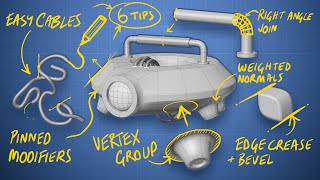
Blender Beginner Tutorial - Part 2 (Modeling Rocket)

HTML-код
- Опубликовано: 20 окт 2024
- Welcome to the Blender Beginner Tutorial series where you will learn how to use the most common features, like modelling, materials, lighting, compositing, animation, rendering... while making a rocket.
In this video we will start to model a rocket.
MACHIN3tools: machin3.gumroa...
Part 3: • Blender Beginner Tutor...
➤GET IN TOUCH:
Instagram: / 3dno2d
Twitter: / 3dnot2d
#blender #blendertutorial #blender3d


This is definitely beginners class!
Slow and great.
Congrats, amazing tutorial. I was able to understand all the concepts easily, I really appreciated how clearly you explained the topics. I look forward to seeing more content like this. Thanks!.
Amaxing class! you explain it clearly. Thanks!
very cool stuff ! love following along
Great tutorial, thank you! This is what I needed.
But with all respect, the machine tools is not necessary. To switch between object/edit mode you need to press only Tab one time and that's it, you don't need to click anything else. The same way with switching between vertex selection - to press 1/2/3 works fine.
Yes, exactly. But I love machine tools. It is much faster and more convenient for me. You can do however you feel comfortable 😊
can You give me machine tool
When I set that cube for modelling i don't have a option like dimension....at the transform window?....
Machine tools is paid now 🤯🤯🤯
Thanks for letting me know. It was free for a long time.
its free on github
@@3Dnot2D Have any alternative?
@@3Dnot2D bro do you have any alternatives
This is amazing!! thank you sooo much! Great teacher
This was very VERY helpful, thanks!
Great video and great tool. Thanks
u got urself a loyal subscriber thank u
VERY VERY HELPFUL. THANK YOU SIR
Up to now it seems a good alternative to the donut series... I'll tell you when I finish the series.
I have two question:
1. Why didn't you begin with cylinder since it's a more approximate shape to a rocket, wouldn't it give more precise shape and more control of the final shape before the subdivision takes place? Jump from rectangular to cylindrical shape after subdivision seems like quite a jump, it would be hard if one was given precise dimensions of a rocket model, right?
2. Does Blender have two different subdivision methods, one you showed here that smooths out shapes and the other where only subdivision takes place (adding more faces) without shape changing/smoothing?
Great class! Thanks a lot
hi! first of all, thank you for this tutorials, you are awesome!!!
second of all, i'm kinda stuck in the 13:57 when u press a key in order to do the inset, i try to do it and didnt work, there is other way to do it without pressing that key? thank you again
never mind, i was wrong he, and if i press right click the inset option is there, thank you again for the tutorials
well explain the tools sir..
3:25 Now Machine tools aren't free it's $5 now
Very clearly explained. But what is daunting is...everything is only by keyboard shortcut is it ? DO all of those commands when modelling have menu or button equivalents too....at least for beginners ? Or to start and work on blender itself i need to memorize all these shortcuts else theres no other way to access the tools. Because i have enough shortcuts memorized working on Premiere Pro and After Effects and Photoshop....and at 50 i dare not try a software that relies only on shortcuts.
Great tutorial for beginners! Really appreciate how you repeat some small but useful commands. I have an issue where the lines of the rocket don't seem to completely sharpen after I apply the last subdivision surface and the depth is not continuous through the entire rocket, can you help me please?
Unfortunately I can't help you without seeing your file and what exactly you did.
I recommend you to star all over again and see if you will do something differently this time.
Solved it, currently finishing your tutorial, really has helped a lot. Thank you!@@3Dnot2D
amazing class, very useful! thank you!
any alternate tool for machin3tools
Wood awesome techniques y friend, susbcribed
hi.thnx for awesome tutorial. is the machin3 tool u mentioned not free anymore? the link u shared showing this product is not currently for sale. and the standard one is 333$ or something..how or where i can download it for free?
Unfortunately it's not free anymore.
wow you are a hero showing us machin3. so much better thank you
You're welcome.
hi @@3Dnot2D
Hi Nemanja,
How are you my friend ?
I am following you since a long time on your photoshop’s channel and I love it so much.
Now, as I finally decided to learn Blender, I recently discovered your Blender’s channel and I love it even more.
But, why did I want to learn blender ? As you are, I am a photographer and a designer artist.
By learning blender, I can extend my creativity exponentially… Do you agree ?
So, there is one question I was asking myself about your tutorials, please ?
As I told you, I am a photographer as well. I would really like to integrate my models into an environment, totally created by myself in blender.
I don’t know if you already have a tutorial on that topic or even a paid course on how to achieve that perfectly ?
If yes, could you give me the link to access this tutorial or that course, please ?
Thanks in advance …
Hi there, I still don't have a step by step video on that topic. It's a bit comex for a short youtube video. But maybe I will kame something about that in the future. You can check my robot making video at my Photoshop channel to see how I integrated it smoothly into photography. The video is called: I made .y oven AI assistant...
@@3Dnot2D Hi Nemanja,
thank you so much for your response. So please please please, could you make as soon as possible a video about that topic, because I really need to be taught by you. You are the one who really know photoshop and blender together and as I’m used to follow your way of teaching, it will be really easy for me to follow your instructions.
hope you can understand !
Tyvm
And help 😢 every time i use subdivision modifier , my whole block becomes disappear
Great again. 😁
I cant find the machine tool, to download for free.... Please make it available so that we can practice
What macbook do you use?
When I add sub division modifier for the second time after giving details as mentioned in the video 20:08 the edges goes rounded but in the video it stays sharp. I'm so confused can anyone explain
Same here =/
did you find how to solve it and are able to tell me how to do it?
Use edge loops thats the only way@@russorox654
How to go to the face mode?
How do I go inti face mode?
We making outta jail with this one
at 18:14 is there another way to do the bevel there? i cant do the ctrl command b it does not work on me. thank you
It's not "Control Command B", it is either one of those, depending on which OS you use - he explained it in the first video, that he's going to spell each step in a way that includes Windows and MacOS.
tl;dr :
Windows --> Control B
MacOS --> Command B
exuseme but what is the shortcut to reset
Ctrl z
@twist_of_art1716 thank you
I’m stuck on the bevel part, Control command B to add bevel is not working for me, can someone help ? 🙏🏼
Ctrl+B om Windows or Cmd+B on Mac... You need to be in the edit mode to do it.
Sir that link isn't working
Machine tools is no longer free. is there any alternative free tools ?
Just press Tab and with 1, 2 and 3 keys you are choosing vertex, edges or faces.
its free on github bro
when i do the extrusion i press shift+z and it when i extrude part of the rocket sticks out do you know how to fix? (im struggling with 19:47)
edit: i fixed the issue but now when i extrude it dosent seem to be making any gaps in the rocket it seems to be making gaps inside the rocket but not on the outside
I would love to know the answer to this as well, I'm loving these videos but I have the same issue!
I'm not sure that I understand the problem. When you press E to extrude, and then move a mouse in one or another direction it will change the extrusion direction also.
@@3Dnot2D it dosent seem to be extruding, when i prees e then s to extrude it and moving my mosue inside towards the rocket it dosent seem to extrude at all
nvm i seemed to have fixed it using a different method ty for trying to help tho
No problem. Glad that you manage to do it.
the machine tools addon is not in the description
My mistake, now it os there. Thanks for pointing out.
TOP
And at 15 my edge loop won't go inside
Okay, it's my fault... I thought I should add more subdivision instead of using auto smooth
❤❤💕💕
how do you download machine tools as a zip file
Just go to gumroad and download it. It is zip automatically.
WHY DON'T YOU USE THE MODELLING TAB RATHER THAN USING SHORT-CUTS
I don't know why but for me the machin3tools is not free
That's strange. Just type 0 in the field.
@@3Dnot2D thanks
how hase the addon machine3tool to share with us !
You have a link in the description.