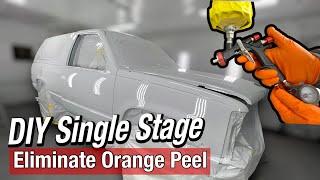
How to use automotive primers, epoxy, etching, and high build basics explained

HTML-код
- Опубликовано: 28 сен 2023
- The basics of using automotive primers, acid etch primer, epoxy primer, and urethane high build primer explained, as well as basic prep work, block sanding and re-priming, sandpaper grits and more
 Авто/Мото


This is an excellent video. What many would consider basic knowledge wasn't for me and this cleared it up in the first few minutes. It's a really cool thing for a professional to take time out of their day to create content like this. Big thumbs up. Really well explained.
Thanks, I super appreciate that 👍🏼
Another reason to use the etch primer is for corrosion resistance from a rock chip or scratch. The zinc chromate in it bonds to the metal then primer bonds to that. I use it on bare metal spots that are 3x3 inches or larger. Then high build but im a production painter for a dealership not a resto guy. We also use UV primer wich is another tool. So if you get a chip the rust wont travel under the paint and bubble or will be less slowing the corrosion down. Great video 100% correct been doing it for 30 years or more.
I bet that UV primer is an awesome time saver, it was just becoming a thing around when I was getting out of production work, so have never had the opportunity to use it
@@Johnnymidnight Its super fast and seems do work very well. I have only been using it for the last 3 years. Glasurit has a great product. It's very expensive so we do use high build on larger jobs. I forgot to say etch primers that I have used are not sanded before high build. There are so many different primers,etch cloth wipes,etch primers it can get confusing. Currently now companies are having issues getting the raw materials for toners,primers,clears even. Application is 1-2 minute first wide coat flash then 4-5 minute second coat within the perimeter of the first. (that is how I prime any primer within the first coat). Then hit with the light 2-4 inches from the surface for 30 sec to 1 minute obviously depending on size of the repair.
Would red oxide primer do the same, with helping the rust not spread with rock chips?
I don’t have much experience with it, but I believe red oxide primer is more commonly used for ferrous metal, like iron
What a superb video. Thanks for taking the time out to shoot it 😎👌
Man this is the info I’ve been looking for please keep these videos coming well presented and down to earth finally a real paint and body man
Thank you, Glad to hear it was helpful 👊🏼
Etch primer contains phosphoric acid, which we use to prepare bare steel but converting the red ferric oxide (rust), which also holds moisture creating more rust, to black ferric (or iron) phosphate, which prevents further oxidation of the steel (well the iron in the steel) and bonds better to the steel, so provides the chemical adhesion you mention.
This is a great explanation thanks
What do you guys do about the white residue left after using the phosphoric acid ? I was using 80% concentrate some areas were black as you mentioned but a majority of it had white stuff all over it
TIA!
Excellent video. Giving me the confidence to start on my first bare metal resto.
So easy to listen to and understand what your saying.
Keep them coming👌🏼
Thanks, good luck on your project 👊🏼
I do care. Great job and explanation. At first i was only concentrated in paintings, now must go back to basics. Learned the hard way. A good paintings is all about the prep.
Always learn alot, thanks, loved the goal tender shot!
This was an excellent video. I have done plenty of my own bodywork over the years. However...I didn't know about primers in this way. 😂 I was like...ahhh!
More videos like this please!
Thanks, I’m glad it was helpful!
that's why i watch videos like this i like to see the process of different people, it turned out good
Great video, giving me more information for me on my wheel arches and how to get that wow paint job. Thank you
Very nice repair, looked great painted
Thank you very much for your in depth explanations. I have a much better understanding of this part of the bodywork process. I will definitely look at your other videos and can’t wait for new ones. ⭐️⭐️⭐️⭐️⭐️
I needed this video
First video that distinguished the different functions between primers
Awesome, glad it was helpful 👍🏼
Thanks for the information on primer types and metal preparation prior to painting. You've got a great communication style which makes your videos a positive learning experience for the viewer!
I appreciate that!
I appreciate that!
Thank you for making the video!
Nice job mate, you answered my questions. G'day
Before I got licensed as a Mechanic, I was doing Bodywork in Surrey, and Port Coq. Thanks for this basic tutorial, refresher. I'm planning on a 70 cab for my f-250 high boy, and Samurai. Good stuff. Detailed
Glad it was helpful, I have an upcoming 77 high boy that I’ll likely be doing videos on, just did a video on starting assembly of a new box for it
Hello 👋 from delta bc 👍🏻
You're a great teacher. Thanks for the video!
Thanks , I appreciate that!!!
Wow! great job, one of the better auto body videos i seen.
Thanks, I appreciate that 👊🏼
This was awesome! As someone who’s just starting to paint it’s really helpful learning from the pros. Thank you for taking the time to share your knowledge 👍✌️
Excellent video and you explained it very well
Thank you for explaining this. I loathe body work, but sadly I need to do some on my vehicles.
Excellent tutorial, just learning the ins and outs of primers. Looking forward to working on my 31 Ford Tudor.
Glad it was helpful 👍🏼
OMG! This is exactly what i needed to know. Thank you so much!
Nice!! Glad it was helpful 👍🏼👍🏼
Thanks for this. Been a dabbler, never serious but now I have a restoration project to do and this is really informative.
Certainly can see why professional body work is expensive.
I’ve been putting high build primer on bare metal for years with no problems
In a drier climate it might be ok for a while, or vehicles that don’t see winter and take the abuse of sanded roads, some surfacers are DTM (direct to metal ) , but still aren’t intended for large areas of bare metal. Epoxy primer is still best practice
Many thanks for this. Am deciding how to tackle the bodywork (etc) on a project vehicle and this is really helpful. Been taking notes throughout.
Awesome, glad you found it helpful. Feel free to hit me up with questions, glad to help if I can 👍🏼
Great video Brother! 👍
Thanks 👍
Learned alot and than you for the tips. I'm been doing alot of metal fabricating on a 55 Chevy wagon and also reading the comments. It looks like I'm going to pick up phosphoric acid and clean the inside of my fender panels. I have been digging out the lead and mig welding parts that I am fabricating. I was wondering about the etching primer now I don't have to worry as much since I have been using it as a base after working the metal.
Awesome job man. Thanks for sharing your experience and knowledge
Glad it was helpful!
@@Johnnymidnight it was and I subscribe to your channel. 🙏🏾
.. An excellent informational vid there, amigo ,..
Thanks, hope it’s helpful 👊🏼
awesome video great shop too
Thanks 👊🏼
@12:30, you are correct it takes less energy to fill the low spot before subtracting. thats becaus the there is more volume to subtract around the low spot than there will ever be if you overfill then subtract.
works for weld repairs and concrete too
Great job and video.
Thank you!
What a fantastic video and perfect timing for me..Thank you so much for the time you spent and explaining so well.
Its starting to make sense to me😂...Ill be the 4th vote for your shop!🤜🤛. Thanks again!
Haha, thanks, glad it was helpful 👊🏼
Hello again! I am FINNALY getting to this point..Sheesh!. Would blue pearl paint cover enough not to show different shades if going over gray primer and original blue? I know some colors cover better than others. Also, how much 2-stage paint would it take to paint a full size short box 4 door Dodge.? Thank you again for the great videos!@@Johnnymidnight
Hi John...this my be a stupid question, but after primer and then sanding sanding high build primer, should all the masking/plastic/paper ect be removed and re-done? I was thinking I could blow it off and clean but now questioning myself on that...what a time consuming task that masking business is...Sheesh!😂.
Thanks!
@Johnnymidnight
@@alanmccormack67lm
Thank you very much for infos, keep up the good work!
You bet!
Good informative video, nice work.
Thank you, I appreciate it !!
great video. thank you.
Glad you liked it!
Great channel. I like your style. I've done my own body work all my life but it is evolving like everything else in this Great World. 👍
Thanks you 👊🏼
Solvents tend to eat into the bondo and "map". Some small dings can be covered with sealer. Best to let it flash and dry a little.
Block with 220 and finish i 320 or 400 grit.
Thanks heaps for this. I like the way you call it primer for a while i wondered what this sealer everyone talked about. The last car i painted was in acrylic lacquer. About to do my first 2 pac job, boy it costs more a lot more than 50 cents. Sorry couldn't resist 😄
Just found your channel...I'm starting a restoration and doing some panel repair on another car...have subscribed! Thx for doing this vid... !,
Thanks, hopefully the videos are helpful 👍🏼
Thank you for making this
Hopefully it was helpful 👍🏼
Great video! Thanks :)
Glad you liked it!
Awesome Video
Thank you 👊🏼
Excellent explanation of all the procedures to use different primers ... greetings from the UK...ps just subscribed..will catch up on all your videos...❤
Awesome, thank you!!
I just use a high solids urethane DTM primer for everything. Never had any issues.
Fine for it’s intended purpose, production spot repairs, but personally I don’t trust it for restoration work, epoxy first is still best practice
Cool, thanks. Glad I watched it before painting my van floor with rustoleum. Epoxy primer it is!
Definitely worth the extra time and money 👊🏼
Just found your channel, Subscribed.
Awesome, thank you 👊🏼
i go by the mfc of the paint that i use which i found each brand of paint is different just like a lot of people use to fine of sand paper for the finish sand but i found that 320 works for most some like 220 for a finish sand
HI great video some very useful tips and techniques in there..
I do a lot of car design and building but very little body work and painting .. I need to repair and repaint the tailgate and wheel arches of my range rover and as you rightly said the rust comes from behind so I had already cut them and reformed some new ones.. but the tailgate really shot and need replacing .. but a job for next year maybe.. but at least it gives me a chance to practice some body work and painting as said it is really shot anyway and anything is an improvement
Ive been looking for video's to give some guidance. Your video is really well done and is much appreciated and you have nice manner very easy to listen to and no unnecessary waffle (just facts) obviously from years of experience) one can learn a lot from you in a short space of time .. and time is the most scarce thing we all have ..I just get really hacked off wasting time looking for content and wasting even more time looking at useless content 🙂keep up the good work cheers Keith ps Ill make time to look at your other videos
Thank you for the kind words, that means a lot 🙏🏼. Glad you found the video helpful
Great video
Thanks!
Great Video. Now to search to see if you recorded cutting out the rust from the left quarter panel. Great Job. Subbed and Thumbed.
I don’t think I did on this job, but do have an older video doing wheel arches 👍🏼👍🏼
If you don't want o buy two or 3 different primers, they make etching wipes. Pre-wet wipes with an etching chemical used like a final clean after final cleaning before priming. Safe for body filler. So you can blow off the area, give it a wax and grease remover wipe down, then wipe with etching wipe, and then put your high build directly on top. Saves time, material and money. Time is money. I don't know what brands or how many brands make it but I know for a fact Sikkens or Akzo Nobel makes it. Plus Sunbelt if they still around makes a sandable highbuild epoxy primer. If that's the route you go, I recommend a respirator not dust mask when sanding. It will eat into the back of your nose almost into your sinuses and make it feel like you constantly have a booger in that hard to get to spot but it's a bad scab that's going to take weeks to go away
I hadn’t heard of those. Being that most of the work I do is restoration/rust repair, I tend to prefer to take the extra step with epoxy, even the likes of self etching surfacer probably ok for production work, but I don’t completely trust it 😉
@@Johnnymidnight I dig it
Hey man good show
Thanks 👊🏼
Boy I'd like to work for you and learn the business😎
Thanx for the post. Every little bit of info helps for us FNGs. Subbed! 🤘 ^v^
Thanks, glad you found it helpful 👊🏼
Thanks John. Great video! Keep them coming. So on that panel where you sanded it and DID NOT apply primer, that was old clear coat? Do you sand that clear right down to the old base coat? Or just say 320 dry sand. Thanks, JR in Ontario 😊
Thanks 👍🏼, the existing finish just needs to be sanded smooth, finish with 400 and you can repaint. If you sand through the existing clear, that’s when it will require primer
You are correct on good prep guy. If u have so so bodyman and so so prep guy the paint job will never turn out great. It’s nice to have all three. That way everyone gets along and no finger pointing!!😂
But we all know that will never happen 😂😂
Color’s with heavy pearls typically don’t cover well, if you’re able, I’d recommend a coat of sealer first so that you have one uniform coating to put paint on. I would suggest 3 quarts of basecoat, 2 might do it, but it’s better to have too much than to run out midway through
Thank you very much John! I appreciate your expert advice...I'm probably a couple weeks away from that but trying to get prepared.
Keep the videos coming, they've giving me a tiny bit of confidence 🤛
Thanks. Great video and very helpful. You don't know what you don't know until you find out.
Indeed, I still know that I don’t know an awful lot of stuff 😁😁
Guy, I now know, unfortunately, & on many level’s as to why I’ve failed upon exploits with body work & Paint application.
Thankyou for such a detailed tuition which provides years of experience in minutes.
How are you at Fishing..? I fail at that also…!
I’m afraid that I am never able to relax long enough to succeed at fishing, if you have some free time, I’d be willing to get together and give it a shot, if you bring the bourbon 😁😁
Thank you
👊🏼😎👊🏼
My question is for old metal trim. I have a 1971 Ford Country Squire and there is metal trim (tin?) around the grill. The primer I chose wrinkled and, upon sanding, it was very apparent it had not really adhered even though I scotch brighted it. What kind of primer would I use for that?
Stainless requires etching primer, epoxy is more for mild steel. Are you using aerosol can primer? I’ve never found it to be particularly effective. Any quality 2 part etching primer should adhere to the tin grille.
Great info... im fixing some rust spots on my car roof... i have a dime size hole that ill hit with some fiberglass... my question is... once the few rust spots are grinded out or sandblasted out to metal, the steps forvrepair are
self etch prime, then prime seal, then fiberglass , then bondo or putty if needed ?..
sanding where applicable,
Then base coat , then clear coat?
Do i need to prime seal again over the bondo, putty before base coat?
Bear in mind this is a 2009 corolla... my summer project is keeping it going for another 5 years or so.. this is not a show car
You will need to prime and sand the filler spots for sure 👍🏼👍🏼
Great summery of the paint prep process.
Your last point should be stressed more to be understood.
Youd love my truck , just beat the dents out and make it all one color , its a truck , i'll have it dinged up more in a couple years 😂😂 ..but nowadays they did stop building good trucks for resonable prices , so i collected a dozen or so chevy's to build and for parts & diagnosis purposes ...its about the handiest thing i have done ..florida trucks ..
Nothing beats a good parts truck…..or ten😁
Self ech primer has the bad battery smell, I've have used it but couldn't wait to cover it up with some high build to stop the smell ! What kind of spot puddy do you like, myself I'm kind of an Icing guy ?
I just use the Dominion sure seal stuff, I have always liked their products 👍🏼
I know the epoxy primer is a 2k primer. What is the high build primer you used in the paint gun just before you sprayed your guide coat? Is that a 1k primer.? I know the can of primer you used toward the end is a 1k.
The urethane high build is also a 2K primer 👍🏼👍🏼
Ok, so just removed my tow hooks on my , truck. They are black and rusted
I mechanically removed lose rust , soaked in a rust remover, brush with metal brush , cleaned then used ospho,
I'll scuff up the pieces with 3m
Clean , and prime with .... Etching?
Then sealing primer?
Then seal primer , then paint it then clear coat?
Lol, so many steps
Am I over doing this ?
Feels like over kill
Thoughts?
Spray cans for now
Thanks !
Prime and paint, shouldn’t need any more than that 😉
What finishing putty was that for leveling the dent? Man I’ve been using bondo and wasting time!
I use evercoat metal glaze
I can se dust in the clearcoat. Just sanden 2000 and 3m green polish
Yep, homemade paint booth, I typically need to do a bit of nib & polish
Say i need to cover a welded seam and use kitty hair. Would the right procudure be scratch 36 or 80 then apply and level kitty hair,Epoxy car, then poly filler skim coat,high build primer? This is for the sail panel welds on a novas qtr panel. Thanks man.
Yep, that’s a good way to go, or you can do all of your filler then epoxy and prime. It’s an age old argument, some guys say to only put filler on epoxy, not on bare metal, but most fillers are DTM (direct to metal). Best to always check manufacturers recommendations on whichever brand you are using.
Used metal based filler on my quarter weld seam thinking it will have more similar thermal expansion rate to the base metal compared to other fillers
Our Pinewood Derby car is about to be NEXT LEVEL now!🤣
😂
I believe a light coat of paint intended to show low spots is considered a "guide coat". ...not sure if spatter counts as a coat but... I guess I don't hate it.
All the 2K/ urethane primers I've used are self etching and body fillers can be applied over them.
Good video mate. Quick question, the epoxy primer, is it a 2 pak? Cheers Graham
It requires the primer, a catalyst, and usually a reducer as well
Can I spray etching primer over body filler sometimes I sand and it becomes exposed metal, so can I spray etching primer over the Bondo, a.k.a. body filler?
Yes, not a problem to have a self etching primer on body filler 👍🏼
Shouldn’t you feather out all the edges so when you put the primer/ paint later on you wont see rings?
Yes,the finer it’s feathered out the less likely it is that the repair area could halo
did you put color on the whole bedside or just the primer spots
I believe I painted the whole bed on this one
Hi! I'm a BC guy too. What brand of high build primer are you using and who do you buy it from? I have been using Nason and it seems to really clog up when blocking. Thanks for the video.
I use the PPG shopline brand from Lordco, the 355 primer, and I also use the UPOL high build when I need more build.
@Johnnymidnight thanks. I'll have to give it a shot! It look like it sanded nice!
I have a 71 challenger here in Kelowna that I did the body work on in 1990 but could use some TLC. Where are you located ?
I’m in Quesnel 🇨🇦
How long do you let the epoxy sit before topcoating it with high build primer?
Depends on temperature, and specific product recommendations, but with the PPG stuff I use it’s 15-20 minutes
Prior to epoxy priming what grit paper did you use over the filler and metal area? Also what did you use grit wise to feather the oem paint edges?
I like to finish filler in 120, and feather everything back with 240
I had to open up a pretty decent section on my daughters car that was done way wrong by the previous owner. I normally finish sand my filler to 180 and feather to 320. Didn’t originally think I’d need epoxy, but to do it right I think I should. Do you think the epoxy will have enough tooth at 180? I plan to 2k epoxy the metal surfaces, and then 2k urethane build prime over the top. The unfortunate part is I had the bodywork smooth and kept finding more and more rust spots where they never properly treated the metal.
I think 180 will be great for the epoxy, will definitely be a nice tooth for mechanical adhesion
Thanks Johnny! Normally I don’t open repairs beyond the need for urethane and small etch spots 😂. As I was feathering I was shocked to see little rust spots. I went back to where I found factory primer. Of course this was after I did the body work 😂 🤦♂️. Thanks so much for the awesome videos man! They really are great for the communities!
I was mostly upset that my blend location was getting smaller and smaller 😂 I think at one point I was like, “cool guess I get to blend into the door too!” 😞
So im hearing if i striped the car down to metal then epoxy primer i can skip the high build primer?
High build over your epoxy 👍🏼
1 question how come no sealer to make it all uniform before top coat? Wether it be epoxy as a sealer or primer as a sealer?
Really depends on the color being sprayed, sealer isn’t always necessary. If it was a light pearl color for instance, I likely would have used a coat of sealer
Obviously the job came out beautiful but I was a taught when you have multiple colors no matter what they are on a panel to at least be uniform
I'm an absolute novice at paint work so forgive me if this question is silly. How do you know when to stop sanding with a given grit?
When you’re blocking out the primer, you’ll be able to see the low areas, usually the coarser grit until it’s flattened out, then once switching to a finer grit,say 220 to 320, you can see when the coarser scratches are gone, although it does take a bit of a judgement call there
So on metal I need expoxy primer then a sandable primer then paint ?
You betcha 👍🏼👍🏼
I would have sprayed a sealer coat before painting it. Personal preference.
Looks like midnight purple, the iconic R34 Nissan Skyline GTR color :)
So, if your clearcoat is shot but your base coat is ok, you can just block everything out and base coat over that, as long as you don’t expose bare metal when prepping the car?
In that case you’ll need to prime. If no bare metal it then it will only require a urethane primer. Usually once clear is broken down to the point of peeling and chipping away, you’ll find once you start sanding that the remaining substrate will have to come off as well
@@Johnnymidnight so once it’s past clear coat, it’s best to sand to metal and prime?
That’s usually the way it ends up, you’ll find the paint an primer will be broken down once you start sanding, as it no longer has the UV protection of the clear
That makes sense, the base coat is cracked and looks like it will wind up needing a full sand.
Hi John...where are you in BC and what's the name of your shop? Thanks in advance.
I’m in Quesnel, shop is Midnight Paint and Body 😉
What kind of epoxy primer are you using?
I’ve been using PPG DP40
For a noob, whats the breathing protection you are using?
Just a 3M respirator, just be sure to have the correct cartridges for chemicals
Just a 3M respirator, just be sure to have the correct cartridges for chemicals
Can you just go straight bondo over the bare metal
Yes, just be sure the filler you’re using is DTM (direct to metal) Most are,that’s what they’re formulated for
Those low spots tend to be bigger then the dent you can see.
Really loved this video. Good job explaining the primers. Did some rust repair on my car a few years ago and thought I had a decent understanding of which primers and the correct processes to use but apparently not. Wish I had known this when i started, but I’ll know for next time at least. Cheers from Wpg!
Love body work . Looks like ya got some dirt in it but?? Every job is different. I never paint anything that someone else has prepared. If they do a bad jo your job looks bad . And people will say ol bob painted it . And they assume that you did it start to finish.
Exactly, I learned my lesson long ago about painting other peoples stuff, never ends well. Pretty common to have to nib & polish painting in a home made booth
Brilliant video. I'm currently respraying the roof and quarters on my rx7, first time attempting something on what id call a large scale. From a beginners perspective the things I did not realise was what grade to sand the surrounding areas. I had to take the roof to metal because of a few rust spots that needed addressing.
I ended up sanding the rest of the joining panels in 320 when alternatively I could have gotten away with just a mechanical sand for some basecoat to stick to. Now I have to prime and block everything Lol
I also was not aware of (apparently) you are suppose to do your filler work on to the epoxy before you high build everything. Luckily a friend who's a great painter mentioned this before I went and laid it on.
Thanks for all your advice.
For most body filler, epoxy first is unnecessary. Typically, they are all DTM (direct to metal). Personally, the only time I feel it’s a necessary step, is on a large job that would be in bare metal for extended periods. Definitely nothing wrong with it, but not always necessary, in my opinion anyway 🙃