How to Crochet a Double Thick Potholder

HTML-код
- Опубликовано: 21 авг 2024
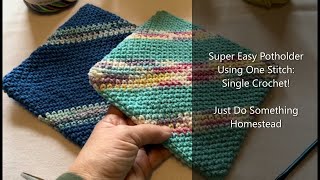
- Today's tutorial is on the Double Thick Potholder. This project is worked in the round as one piece and folded then sewn closed. It's a great beginner project. It also is great for touch to add to house warming gift basket or wedding gift basket or pots and pan set.
Click here for a tutorial on how to make a scrubby sponge and washcloth: • How to Crochet Wash Cl...
Click here for more great crochet kitchen items: • Kitchen Items
Please support my channel by making a purchase in my Etsy store:
www.etsy.com/s...
Email me at ninjabunnycrochet@gmail.com
Thanks for watching and Happy Crocheting,
Dawn


I like that you comment to count your stitches after each round my first one came out wonky but I will use for our camping trips
Love your video 😊
I was gifted this and they are my favorite pot holders! Going to make and gift some this year!❤❤❤
Thanks for teaching me to make the perfect potholder, it's easy and fun and my son and my daughter in law love their beautiful new working potholder!!
I would like to say thank you for sharing this tutorial on how to make pot holders. I've never worked with cotton yarn much, over the many years of crocheting. I usually keep my tension tight, so it's been a lil bit challenging, yet I love this pattern!! For the longest time, I had been 'stuck' with making endless beanies, lol. Now, I am making endless pot holders! Lol 🤣
What an awesome little project! I'm going to make some and give as gifts. 😊
What can one say - this is just perfect!
Love it. I made as a gift for my friend. She will love it!!! Thank you.
such a wonderful tutorial! i’ve made three of these now and always refer back to this video when i run into difficulties. thank you for making it.
So glad to know the mystery. I found a set at a thrift store and grabbed them but couldn’t understand how they were made. This is truly the best way to make pot holders extremely durable.
Thank you so much for the clear instructions! I'm a complete beginner at crocheting and I'm going to make these as gifts!
This was so easy to make. I made it in a day and am now on my 2nd one. Thank you! Wish I could attach a picture lol
Awesome. If you would like to share a picture look us up on Facebook at Ninja Bunny Crochet Chat. I would love to see your project. 🥷🐰🧶❤️
@@NinjaBunnyCrochet love this pattern. Ty.
Thank you for sharing this video with
Me, I really love the way this is made.
I make the pot holders and give them for christmas gifts they are nice Barb wengert
This tutorial is great, thank you!
I have made these for so many years. I have some my sister gave me Prob ably 50 years ago and they are still usable. Only thing do not burn...wash and dries beautiful.
Thank you for the information. That’s good know.
Love this pattern. Thank you so much for sharing. Great tutorial; made it so easy to follow.
Thank you. I've made a lot of these for gifts as well as for craft shows.
Thank you for sharing this tutorial ❤️.
I whipped up 8 sets of 2 & gave them as 🎁 's. They loved them & I enjoyed working them. Very easy & relaxing
Glad you enjoyed the pattern. If you would like to share a picture of your work (this project or any other projects) Look us up on Facebook, Ninja Bunny Crochet Chat. I would love to see what you are working on. Happy Crocheting 🧶❤️
@@NinjaBunnyCrochet that sound nice. Thank you 😊
It was a very helpful tutorial and now I'm going to rip my stitches and start all over again and follow your tutorial. 😊
I enjoyed this pattern. The first 2 rows were difficult, but it was totally smooth sailing after that. I'm making my 2nd now!! Thank you. Great tutorial!!
I've never seen anyone crochet like you do. Not saying it to be critical, just stating a fact. You still get the job done. Very nice.
I have been crocheting for 55 years . I amazed at all the different ways people hold crochet hooks , knitting needles and the yarn especially!! I love how we all crochet a little differently and have the same results!! I love so many young people have taken an interest in this art!!!❤️❤️
I was so excited to find this video. For one, the tutorial is great. Two--you and I crochet the same way! I, too, had never seen anyone do it this way and always thought I was doing something wrong, even though my projects always come out fine. YAY!!! It was so nice to find another crocheter who uses the same technique. Thanks for the great video!! ❤
Awesome! 🥰
Lovely tutorial!! Thank you! A work of art!
The best potholder pattern, works, doesn't take up a lot of space
Thanks I have made quite a few of these over the years.
Thank you for the video I just finished making a pot holder for my sister which I know she is going to love ❤️ especially since I made it in her favorite color green I used a dark green and a light one. If only we could add pictures to RUclips comments I would have liked to show it to you. Thanks again for the detail video.
Awesome. I would love to see it your work. You can post pictures on our Facebook group at Ninja Bunny Crochet Chat.
Love this pot holder, thanks for the video! Great instructions!
This is so cool, I love how it's one piece! Thanks 😊💜
Thanks. If you would like share pictures of your crochet projects or chat about crochet and yarn look us up on Facebook, Ninja Bunny Crochet Chat 🥷 🐰 🧶 💬
Thank you for sharing your beautiful work 😮❤
I love this and have gone a little crazy making them. I get bored with single crochet so I usually start and end with sc but do majority of it with hdc. Also, I have found that if you need to tug and pull to get it to line up toto sew it together, you probably need another 1-2 rounds. Thank you for sharing this!
Cool. If you would like to share pictures of your projects look us up Facebook at Ninja Bunny Crochet Chat. I would love to see what your working on. Happy Crocheting 🥷🐰🧶
@@NinjaBunnyCrochet I’ve sent my request. 🥰
Hi, I followed your tutorial a while back and tried to find it again and couldn't. I am so glad I found you again cause my daughter loves the one I made and wants more. I'm subscribed this time so I will be able to find it again. Thank you so much. A yarny friend.
Sweet. I’m glad you found my channel again. Thanks for subscribing.
I think I'm doing something wrong it's looking for round like a hat..
The first couple of rounds are similar to hat but the more rounds you add it should flatten out.
Thank you sooo much! I can finally make one thanks to you. Love your videos 💜
I love this pattern!! Thank you so much for sharing. I just ordered a cone of red cotton to start making some of these for Christmas gifts!! 🐰🐰
Awesome. They make great gifts. I plan to make some more for Christmas too.
@@NinjaBunnyCrochet have you tried this pattern in hdc? I really like it better than sc.
No I have not tried hdc. I will have try that. Thanks for the tip 😊
Thanks for this vintage pattern. It’s taking me a while to get my first one done but I’m excited to see how it comes out! :)
Awesome! This is one of first projects I learned how to make. I still make them today. I put them in house warming gift baskets. My husband likes to use them has hot pads too.
❤oh my goodness! My hot pad is a peach masterpiece! Even if I say so myself. :) Too big to be a potholder….
It took me a few tries had nothing to do with the video just me being and eager person!! Super helpful and easy for beginners and my first project ❤️
I’m glad you enjoyed it. If you would like to share a picture of your project look us up on Facebook at Ninja Bunny Crochet Chat. I would love to see what you are working on. 🧶❤️😍
This is a very good gift idea.
Thank you so much for posting this tutorial on the double thick potholder. The instructions are very easy to follow and I really like the thickness of it. Pam D
Loved this. I just made one out of plain and plan to make more!
Awesome. If you would like to share a picture of your project look us up on Facebook Ninja Bunny Crochet Chat. I would love to see what your working on 🧶❤️ Happy Crocheting!
This set is amazing . Thanks for sharing.
Thank you. I appreciate your support 😊🧶❤️
Thanks for the tutorial! I leave for study abroad on Wednesday and wanted to find a quick project to make for my host family! They live in a warmer climate so my go-to wearable items wouldn't make sense, so this is perfect!
Wow! How exciting for you to study abroad!! My daughter studied in Russia for semester years ago. Good luck!! Have fun and safe travels 😍❤️🧶
@@NinjaBunnyCrochet How cool! Thank you so much!!
Thank you for the instructions on the Hot pad. Just found you and liked and subscribed. 😊🐇
What a nice potholder pattern. Easy to make. Thank you, I’m making them for Christmas gifts this year!
Awesome!
I made several of these years ago and they are still in good shape. Back then I didn't know they had cotton yard so I made them with acrylic. Now everyone says not to use that because it melts but no one I made them for has had an issue with that.
Cotton yarn is recommended, because acrylic yarn can melt when it comes in contact with heat.
Valerie, my grandmother made some in red and green acrylic yarn. I was in my 20's. I am 61 yrs old now and still have it. It looks really great today. It never has melted and there are no stains. I've been confused on using cotton and acrylic. Both grandmothers used acrylic crochet. I've used the cotton and really prefer acrylic yarn. Maybe I'm not using a good cotton product. Thank you for posting. I think I'll try both and see which one I like best.
I’ve also not had problems with the acrylic yarn.
I’ve been making them with acrylic yarn also for pot holders and using them for years. Personal preference for the type of yarn
The new acrylic yarn melts. My mom found out when she pulled something out of the oven and it melted the potholder to her glass dish and it also burnt her.
Very pretty
I use thrifted wool for these. Wool has excellent insulation properties
This is a great Netflix or road trip project.
Yes! Agreed!
Thanks!! My next project 😊
My mother used to make this and made smaller ones that fit nicely when taking things out of the microwave.
I made a rectangle lol 😂 thanks for your help!
You’re the first person I’ve seen who holds their yarn tension similar to me! I weave between all four digits, but under middle & over index seems rare in the crochet world! 😅
Cool. Yeah it just feels more natural to me than wrapping the yarn around my fingers and what not.
awesome! Thank you! I'm adding to my try-it list!
Cool. This is my go to project for house warming gift baskets.
Very easy to follow. Thank you very much
Great thzat does make it look very nice! Thank you! 💕💕💕
Thank you I will try this.
Excellent video you explain the pattern so well
Thank you.
I just made this but wish you had showed your last stitch. I assume it's like how you finished off the hanging loop. This is my first ever project so maybe I took on something that is for someone with more experience. I'll search for a video on how to finish it. I'll be making your scrubby next. Thank you.
Pretty
This cool chica. Thanks!
Very cool!
Thank you so much for this video!
I have been making those for 3 yrs now
Cool. They make great gifts too.
Great tutorial
I like this tutorial for pot holder❤
Awesome! If you would like to share pictures of your crochet projects, yarn hauls or just chat about crochet look us up on Facebook at Ninja Bunny Crochet Chat. I would love to see what you are working on. 🧶❤️
Love it.
very awesome video keep up the great work
Very nice!
I use size G/6/ 3.5mm hook.
I have made different size of potholder I did more or less number of chains.
I also put my hanging loop right after is close the center, I chain 10 to 15 make the loop.
Great tips. Thanks! Tighter stitches would make a thicker potholder.
Thank you so much for this amazing video! This was the very first thing I've ever crocheted and it turned out awesome! You're a great teacher! You made the process easy to follow! I can't wait to make more and gift them to people! Thanks again!
Awesome!
New sub tytyty fir this. Trying to find a few things to be able to flip. I do crochet so you'd I think is wonderful.
Did it! Thanks!
Thanks 😊
Every time I watch one of these videos for this potholder they are different. It's hard to know which is the easiest.!!!
I made a chain loop on both ends…so my family could pull it across the table instead of passing hot things back and forth…lazy yes! LOL
It would be super helpful if you demonstrated at least thru the second row corner. But great video. For some reason all my rows have 79, and I went back a few times.
Did it still work? My stitch count is off to and I’ve already started over several times…
Are you using a stitch marker to mark the first stitch? Be careful not to count the ch 1 at the beginning of the round as a stitch.
This is such a wonderful tutorial! Thank you for taking the time and making it! Can you make this pot holder bigger?
Yes, start with a longer beginning chain. You will need add more rounds to the project. My suggestion is to stop every so often and fold up the potholder and see if you have enough rounds for them to come together in the middle to form the center seam.
Love the pattern. Thank you!!!
Thank you for the pattern and tutorial.. Nice and simple instructions.. My question, the finished design is the outside, now can you turn it so the right side is showing, or it does not matter, plus can you put a piece of Insul-bright batting for extra protection.. my 1st crochet potholder.
Which ever side you prefer can face out. As far as Insul-bright batting I am unfamiliar with the product so I can not say whether or not it can be used for that purpose.
I'd say poly batting will melt. Use cotton batting. Glad I read this. I'm doing 1 for each of my friends. I'm def going to make it with the batting!
I have also seen these done in a larger trivet and I'm assuming you would just add to your stitches to make it the right amount of inches. Also I've seen some that are half double crochet and I would just think you just wouldn't makes is many rows to fill up. The same amount of area. If you have anything to say on this subject I would sure love to hear it😊
Nice easy pattern. I made 24 rows instead of 20 though, I didn't see a reason to have to force it together and stretch or iron it down but instead filled it all the way and sew it together. Is there a reason to not do rows until they meet? Nice tutorial anyway.👍
20 rows worked well for my gauge. Additional rows can be added to match your gauge.
I can't wait to start making some potholders. I need some badly. All my others are MIA.
I hear ya. My husband takes one of these potholders to work so he can use it when he heats up his lunch.
@@NinjaBunnyCrochet My son is always asking me "Where are the pot holders." So, hopefully I can make some and then I will teach him how.
Awesome!
How do I count the number of rounds I have done? I have been focusing so much on counting stitches and completely forgot to keep track of my rounds! I absolutely LOVE this tutorial, by the way. So easy to follow along!
It’s easier to see the rows with a solid color yarn but there will be rows of little “v’s”. You might want to Google it so you can get a picture of what it should look like.
If you want to make it bigger do you just double it?
You can add more chain to the foundation chain to increase the size of the potholder. You will also need to add more rows to overall project so the two sides meet when folded to form a square.
I'm fairly new to crochet but I think I missed where you first start with the stitch marker to end of that row. All I saw was starting of the stitch to the 80 stitches. If this makes sense.
I placed the stitch marker in the first stitch of the round.
Not many people use the back bump,I do as much as I can.
True. I try to use it as much as I can too. I think I can give a much nice edge.
Silly question if the rounds are the same number why isn’t the stic marker at the corner of the piece when done?
It’s just the nature of crochet. The way the rounds are worked the beginning stitch moves 1 stitch over each round however the stitch count doesn’t change.
If you join each round with slip stitch and ch 1, then start the first stitch in same stitch you just slipped stitched into there will be a clearly visible diagonal seam on the project.
Love it!
Thanks. I’m planning on making up some for Christmas gifts.
Can someone tell me how large this is when finished? I would like to crochet a 6 x 6 because that is the size I prefer for my small hands.
The potholder can be adjusted to any size by adjusting the length of the starting chain and the number of rows completed. Just keep in mind the starting chain length is the diagonal (corner to corner) of the potholder not the length of the side.
I tried this and it won’t fold it’s like it’s to long I can’t get a square? Any suggestions would be great! I was pretty sure I got the numbers correct we did the first two then did in the round and marked the last one then just went around as you said 20 times? I can’t get it to meet up! I hate to have to pull it all out but I don’t have any other ideas?? Help!
Your tension may be tighter than mine, try adding a few extra rounds so it meets in the center.
If I'm not mistaken you are showing a double crochet and calling it a single ??????
Double crochet UK terms is Single Crochet in US terms ☺️
Correct. I’m using US terms. Thank you
If I want to make a bigger square can I just add more stitches to the first chain?
Correct
This is great for a newbie like me but mine is coming out way bigger I feel like lol how many inches is this by how many inches when it done ?
Approximately 7 inch square. Everyone’s tension is different. You may need to add a row or two (or decrease a row or two) so that your potholder folds into a square.
@@NinjaBunnyCrochet thanks being a newbie I’m trying to make sure I’m getting on the right track :)
Is it suppose to end up somewhat rectangle? Mine is not square.
Yes. Due to differences in tension you may need to add a few rows or possibly subtract a few rows to form a square.
Can I ask why your stitch marker was not at the corner when you finished? I am a bit confused as to why it was about ten stitches off the end when the rounds were done.
When working in the round without turning the work the seam kind moves diagonally. When you turn the work after each round the seam remains fairly even.
@@NinjaBunnyCrochet Thank you so much. I plan to make a few of these for family & friends. :)
I wonder if we could achieve the same thickness by using 2 strands of yarn together and just make one thickness. Hmmm.....
Give it a try and see how it comes out. I have made coffee cup coasters with two strands of yarn before.
Hello, may i know why mine curls around like a spiral and what i can do to prevent it? Ty
When you first start it can curl. As you keep adding rows it should straighten out. If it isn’t your tension could a little tight possibly going up a hook size might help.
I make them little bit bigger I owned a business my friends and family always asked little bit bigger for potholders they have big hands
That’s awesome. This one should be about 7 inches. If you add a few extra chains to starting chain and a few more rows so they meet when folded it will increase the size of the potholder.
wish it was clearer with the slipstich and the markers
there's no slip stitch or starting chain, you keep going on the marked first stitch and start the next row. it goes in a spiral, that's why the marker is important -it's the only way to tell where you start a new row for your counts. you've got this! it's super easy once you get the hang of it
Thanks Steph B! You are absolutely correct!
I just have a question I have been trying to make bigger potholders I am wandering on how many chains to do for an oversized potholder
The pattern is made in any multiple of stitches, however, if you are increasing the starting chain you will have to add rows to form a square potholder.
@@NinjaBunnyCrochet I think I did a chain of 50 idk it does look like it is going to fold like the chain 41 in ur video been trying to play with the stitches I’m stumped
You can stop every few rows and fold up the potholder and see if the edges meet up in the middle.
@@NinjaBunnyCrochet thank you for your tips I will keep trying
I thought you had used the Thermal Stitch.
Nope , single crochet, but thermal stitch is great idea. 🤔
Could you tell me what I could possibly have done wrong. I used premiere home cotton yarn in poolside. You said your skein was 105 oz and mine says 96 oz. Whether that matters or not I don’t know.
My potholder came out in a rectangular shape, but I had made 3 before this one in cotton yarn from hobby lobby and they all came out in a square.
I counted when I went around and always made sure I had 80 stitches in each round.
I am making it for my cousin and wanted it to be just right.
Any ideas??? Thanks!
That’s a new one. The only thing I can think of is possibly the manufacture has changed the weight of yarn which messed with your tension/gauge. Do you have enough yarn to add a few extra rows to square the pot holder off?
@@NinjaBunnyCrochetthat would make it too big and look funny I think. Being rectangular already makes it look odd for a potholder. I have already sewn it up too.
I am starting another one with the same brand yarn just a different color. I am anxious to see if that comes out right.
Thank you for getting back to me!
@@connietobey9369 That's understandable. I'm sorry that happened.
@@NinjaBunnyCrochetcould you please tell me the measurements of your finished potholder please?
I redid the whole potholder and it still came out bigger than a square. Mine is 6 1/2 x 8. I think it is the yarn being heavier but not sure. I am frustrated because the first 3 I made with the hobby lobby yarn came out perfect. Thanks again!
Approximately 7 inches
I just watched your video how does your stitchmarker end up so far in on your last round and not at the end or beginning?
The end of the round will move one stitch over after each round just like it does in joined rounds where the seam is formed in a diagonal direction.
Thank you for your response, I am new to crocheting and have never done a joined rounds.
No worries. We were all new crocheters at once. Happy Crocheting 🧶❤️😍
Can we use a size 6 mm hook also??
You should use the hook size that matches the yarn you are using.
3:08