LG Washer Drain Pump Fix in 7 Minutes

HTML-код
- Опубликовано: 4 мар 2023
- Here is a link to Genuine LG Drain pump need for this repair: atlasappliance.partstoday.com...
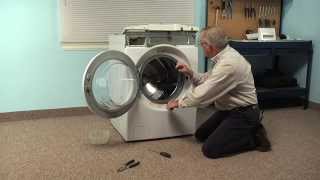
If your LG washer is not draining properly, the drain pump may be the culprit. Fortunately, replacing the drain pump is a relatively simple DIY fix that can be done in just a few minutes with the right tools and knowledge. In this video, we'll walk you through step-by-step on how to replace your LG washer drain pump fixing the no drain issue.
We'll start by showing you how to identify the symptoms of a faulty drain pump. Then, we'll guide you through the process of removing the old drain pump and installing the new one. You'll learn how to disconnect the hoses and wiring, how to remove the pump from the washer, and how to install the new pump and reattach everything.
By the end of this video, you'll have the confidence and knowledge to tackle this common washer repair on your own, without the need for a costly service call. So grab your tools and let's get started!
#appliancetips #diyrepair #appliancerepair #homemaintenance
For Help with home appliance repair in: Stuart, FL visit www.atlasappliancerepair.net/
For appliance repair in Jensen Beach, FL visit: www.atlasappliancerepair.net/
For washing machine repair in Palm City, Fl visit: www.atlasappliancerepair.net/
For LG washing machine repair in Port St Lucie, Fl visit: www.atlasappliancerepair.net/
Disclaimer: The information provided in this video is for informational purposes only. The techniques demonstrated may not be suitable for all individuals or appliances. By watching this video, you agree that you are solely responsible for any repairs or modifications you choose to undertake.
Please exercise caution and ensure your own safety when attempting any repairs. Always follow the manufacturer's instructions and guidelines specific to your appliance. If you are uncertain or uncomfortable with the repair process, it is recommended to seek professional assistance.
I cannot be held responsible for any damages, injuries, or losses that may result from the use or misuse of the information provided in this video. Viewers should proceed at their own risk.
Furthermore, please note that some appliances may have specific repair restrictions or guidelines set by the manufacturer. It is important to familiarize yourself with those policies and comply with them.
By watching this video, you acknowledge and accept these terms and conditions."
Amazon link to drain pump: amzn.to/3utMD3k
For Dryer Repair in Palm City, Fl visit: www.atlasappliancerepair.net/
For Appliance repair in Stuart, Fl : www.atlasappliancerepair.net/
For Washer and Dryer Repair in Jensen Beach, Florida: www.atlasappliancerepair.net/


Thanks!
Thank you so much for the tip
@@appliancerepairamerican i just posted, we did this about 1-2 months ago, replaced drain pump like you did, and now its doing it again,at rinse cycle, tub full of water and sat there grumbling but wouldnt spin or anything,i drained all the water out, BUT THE DRAIN HOUSE IS RIDICULOUS short, i need to figure out a longer one, BUT after i drained all water out, by hand,,,,,,,, i thought i would try to ''drain and spin'' anything left, and i declare it spun and drained with nothing in it,,, what in the world??? and it has some black grease under it too?
Best lg pump replacement guide on youtube. So easy going through the bottom rather than dismantling the top and entire front panel like in every other guide out there.
I really appreciate you taking the time to share this.
Thank you. I appreciate you taking the time to comment
If there is a dryer on top, it's a little difficult. Going to try anyways. Tilt the whole assembly
I’m so relieved after hours of watching videos. Everyone taking the front assembly off. This tech goes through the bottom 😮. Wow. Greatly appreciated.
you are welcome
Absolutely massive time save. Second time replacing this pump and the first time I took the entire washer apart and it took 8 hours total. This way took 30 minutes. Thank you so incredibly much!
YOu are very welcome Chris. Thank you for taking the time to comment
THANK YOU. After I called several local companies and ones suggested by LG.. none seemed think it was worth their time to assist me, so I got fed up at my washer being out of service for two weeks, decided to DYI. Found your video, and even though I have never taken apart a machine like this, you made it seem simple. I ordered the part overnight delivery, had a guy friend assist me with the heavy lifting. We had it running within an hour. 🙏🤘
You are very welcome. Glad to help. Thank you for taking the time to comment
Best pump replacement video. Based on other videos, I was about to pull the whole machine apart. I am so glad that I ran upon your video.
Thank you for the positive vibes. Im glad i could help
Great video! Major difference in water output after replacement.
I managed to tilt the washer and access the drain pump from below. I placed small chairs, against a wall, to hold the back of the washer and braced the feet of the washer to prevent movement while working underneath.
One primary challenge was the misaligned screws on the bottom access plate, making them hard to reach through the small rectangular slot. Initially, I considered enlarging this opening by cutting or drilling the bottom plastic grid. However, I realized that by using another screwdriver, I could shift the metal plate (on which the drain pump rested, equipped with rubber grommets for noise reduction) to align the screws with the existing holes. This allowed me to unscrew the two at the bottom and the one behind the front drain access panel.
While I did disconnect the main tub drain line, it wasn't entirely necessary. Yet, it did afford me more space to maneuver the drain pump housing out of its slot. Notably, I didn't detach the circ pump or the metal plate holding the pumps.
Upon observation, the new and old pumps seemed nearly identical, save for the slightly warped plastic impeller fins on the older one. The distinct difference lay in the feel. The older pump had a consistent resistance when trying to manually rotate the impeller. In contrast, the new one had a magnetic pull on the impeller, resulting in a distinct "thump, thump, thump" sensation as it turned.
Post-replacement, I dissected the old pump to pinpoint the problem, finding no issues on the electrical side.
The culprit? A compromised inner gasket around the rotating magnet was collecting washer drain residues, behaving like abrasive sandpaper. Over time, this residue seemed to be pushed by the brass key against the impeller's inner plastic hub, leading to wear and tear. This resulted in the impeller merely gliding over the brass key, hindering its rotation.
An interesting aspect: The choice of brass against plastic is likely a safety design. This reduces the risk of heat accumulation within the pump's electrical components. If a metal-to-metal design were used, and the pump impeller got jammed due to debris, it might overheat the electrical side. Thus, the use of plastic, which can yield under pressure, is arguably a safer and smarter choice than metal-on-metal within the pump.
Summary: Plan to replace again in 4-8 years depending on how often the washer is being used.
Wow! Impressive analysis. Thank you for sharing
This is the best thing on the internet right now. Holy crap. This is my second time replacing the drain pump and the torturous thought of trying to get the door clamp back on is giving me waking nightmares. I thought about the side and underneath, but seeing someone actually doing it give me such calm peace of mind.
Thank you
Same here... second time found this video. Way easier.
Welp, I’m fixing to do mine….
Any idea why the water pump some just hums but not pump, other times it pumps. Also.us.it normal for it to cycle every 5 seconds or is that program problem. I can only wash light loads. Currently, had to take out 5 towels. So only wash 5 towels at a time.
Yeah me too the pump have giving her last breat and its time to remplace. The pump shake well and dont work
I wish all DIY videos were this straight to the point. I always wondered why people would begin tearing the entire washer apart just to reach the pump that's very easily accessible from the bottom. Great video!
Thank you Joseph. I appreciate you taking the time to comment
It is easier to tear the unit apart if you are good with a hand drill
apparently people are scared of a little water on the floor 😂
Thank you for this video. Simple and straightforward replacement. The original pump lasted 13 years, which I thought was impressive for a family of four.
How did you get off the 3 bolts holding the pump assembly onto the frame doing it this way?
@@nathanflanery2285 Exactly as shown in the video.
What an amazing video.
Solid content. Great explanations. Great lighting and angles. Clear instructions.
Just got this done for only the $40 part I found on Amazon. 20-30 minutes all-in with disconnects, install, some cleaning, and reconnects.
10/10 video. Thank you SO much!!!!!
You are welcome
Other videos have the front panel of the machine removed (some models have a small panel at the bottom, mine has one large panel on the entire front) - so, I greatly appreciate you going at this from the bottom and not having to mess with the huge front panel. Most appreciated. Now, to find a drain pump to install.
I like getting parts from partsdr.com. Or at least use them to put your model number in and get the part number. Once you have the correct part number you can shop various suppliers
This video saved me about 200$! A note to the fellow novices out there. There is a second pump to the right(when facing the machine) do yourself a favor and don't take that one off by mistake. Added an additional headache that nobody needs, lol. Also, if the screw at the bottom that was missing is actually there, just drill an access hole through the plastic base to access the screw.
Excellent all the way… great instruction, lighting, and camera. The best DIY I’ve ever used! I’m not super handy and because of your video it only took about 40 mins and works perfect…. Many thanks, keep it up!!
Wow Greg! Thank you so much for the great comment and inspiration. I plan on publishing alot more. Thank you
Thanks! You make it look easier than it was for me but I couldn't have done it without you!
Glad I could help!
Many thanks for this video! Very clever way of replacing the pump without unmounting the entire washer. I was able to replace my pump easily thanks to you man!
Thank you for the compliment and taking the time to comment
For the record I am NOT considered handy. My drain pump stopped working Monday. Found your video and ordered replacement pump for 20 on amazon. Put it in and it worked!!!!! Thank you so much!!!!! 🙏
Glad I could help
Thank you so much for this video! It saved me so much time. Not having to take everything apart and going in from the bottom, Amazing!! Great video, thank you for taking the time to share.
I am happy I could help. Many machines leave the bottom open for accessing these parts.
This only took 10 minutes. My ancient washer lives again, thank you!
You're welcome!
Thank you for this!! I take care of 2 mentally and physically challenged adults that live here full time and it’s hard to get time to fix stuff. This video vs the others was by far the best!! I got the washer working in 45 minutes!! Thank you again!!
Thank you so much. That means a lot to me. God bless you and thank you for caring for others
@@appliancerepairamerican can i access model 41372 like that?
@@MA-vm6jl You will have to look at the schemes for that model and determine the location of the pump and the most efficient way to access it. Some LG washer you can access buy removing the back panel. Some, like the one in this video, can be accessed from the bottom. They intentionally leave an access hole in the bottom of the machine. If you have to remove the front of the machine it is not difficult, it just takes a bit more time.
Thank you Atlas Appliance Repair, by far the best video for LG front load Drain pump replacement 💯
Thank you
Thank you, thank you, thank you for saving us a few hundred dollars to have our machine serviced. Your video was spot on, quick, and easy to follow.
You are very welcome. Thank you for the compliments
Thank you! I had the exact same scenario with the screws missing. The video was informative, save me hundreds of dollars and blew my wife’s mind that I can fix her beloved washer. Thanks again!!
You are welcome
By far the best video I came across. It was way faster and easier. Thank you so much!
Thank you Fernando
What do you brace the machine with when you tilt it back?
@@candycameron6434 I am sorry but i can not advise on that. You should put the machine completely on its back side to remain safe
Finally an easy method! Other videos have you take half the machine apart! This is great.. can't wait to do this way! Thank you!
Your video was perfect for us to understand. We got the pump switched around and I can happily wash all my laundry now!!!! Thank you for your instructions!!!
you are welcome
I just did this and it works. Very simple, quick and did it in less than half an hour. Thank you
You are welcome
Thanks so much for this video, saved me $300.00 plus. I just ordered the part from LG around $100 and followed your video and it was awesome.
You are very welcome. I am glad I could help
Thank you so much. Watching the other videos I was definitely going to hire someone but thankfully saw this. Fixed my washer this morning quick and easy!
You are welcome Eddie. thank you for taking the time to comment
Excellent video, good camera angles, good narrative and sumple and easy to follow. I just pulled my pump and it is sitting on its back waiting for the new part.
Thank you for the compliments and taking the time to comment. God bless 😊
Great video, thank you! My new pump arrives from Amazon tonight, I feel very confident in installing it having watched this. Great work!
you are welcome
This approach saved me a ton of time! All other methods have you taking the whole front off! Super easy approach. Great video!
Thank you
Best video I found on lg drain pump replacement thank you
You're welcome!
This technique worked perfectly. I only spent 30 mins getting it done. Thank you for the video!
You are very welcome Edward. You can leave a tip if you like by pressing the “Thanks” button. Thank you for taking the time to comment 👍
Best procedure on RUclips. Thank you so much. It avoided me to dismantle half of the washer. A quick tip: Since the procedure requires to tilt the washer, I used the "LG Shipping Bolt Assembly" to secure the tub. These bolts were installed when I received the brand new washer.
Thank you so much for the tip. You stand out. I am happy to have helped
Thank you for this. I’m not very handy so this was still a bit of a project. But I was able to finish in about an hour. Saved a ton of money on a repairman. Thanks!
You are welcome
Today, I purchased the needed pump, installed and then did the diagnostic. Fantastic video. It is like i have a new washing machine. Thank you. You helped my household budget.
You are welcome. If you have not yet subscribed please do.
@@appliancerepairamerican thank you for the reminder. I meant to earlier.
You saved me at least a $100!! It took me about an hour to replace the pump. Thank you very much!
You are welcome. Glad I could help
Our washer was about seven years old when the pump went bad. I was pretty surprised when shopping on Amazon for a new pump there were thousands of reviews across the different sellers. When I got into removing the old pump screws were also missing. Video was great, it guided me well through the process.
Thank you
This is, by far, the best video available for this repair. Appreciate it very much!
Thank you
@@appliancerepairamerican Thank YOU! 🙂. Got it done Thursday night. It's a lot easier to take it apart than put it back together. But, we have a washer again! Happy Holidays to you...
@@hmbpnz Happy Holidays to you too 😊
Great video. Perfect description for an easy fix. Just remember the angle the pump gets screwed on (at an angle, not straight up and down).
Thank you
Thank you so much. We put new pump in with few problems Great video!
Thanks! Just ordered a new drain pump for my machine and will definitely use this video for the install!
Thank you Josh i Am glad i could help
Thank you
I wish you would have done every DIY video I’ve suffered through. You have a knack for sharing the right amount of information and you’re as smooth as Barry White. The first pump video I watched wants you to hold the pump while replacing its washing machine. DIY types are taking advantage of the info, including myself, but are not service repair technicians. One and done. Unfortunately you need a Tool Time’s Heidi to launch on YT these days. I’m subscribing to support continued videos. Everyone on here knows it’s not if Shiz will hit the fan; it’s just a matter of when. Great Job!
thank you for the awesome comment and subscribe.
Terrific video!! Maybe not 7 min for me, but an easy 30min job. Thank you!!
the video is 7 min long
Great video!! This really is the best repair video I have ever seen on RUclips. Thanks man!!
Wow! DMac, thank you for the outstanding comment. Comments like this give me great confidence to start the day. God bless you and your family
Tnx man. Literally took me less than 10 min. I spent more time pulling dryer from top and putting machine on jacks to go from bottom. Front 3 screws are easy to take, some models have bottom bolt or like mine a plastic push in tab. If you are confident washer is secured ( jacks or leaning it like in video) its piece of cake.
I saw a tech come and do this in 10 minutes. this will be this pumps third replacement and a hell of a lot easier than that full disassembly nonsense.
Thank you very much
You are welcome
It worked!!! I highly recommend this method of replacing the drain pump. I have an LG WM2050C washing machine. It wasn’t draining, it was making that growling noise. I checked the filter, it was clean. Watched a few videos and then ordered the part, cost me under $30. I was NOT looking forward to taking the top off, then the door, etc. I had to do all that when the dryer rollers needed to be replaced - not fun. Then I found this video and WOW. My washer and dryer were stacked, so we had to remove the dryer, put it aside, then tilted the washer back. We didn’t have enough room to lay it on it’s back so we let it rest on a bucket that we propped against the wall behind the washer. It then took less than 15 minutes to change the pump! It’s working great, no leaks, we’ve already done four loads of laundry since yesterday 😊. THANK YOU FOR POSTING THIS VIDEO!!
I am glad the video helped. Thank you for taking the time to Comment Mike. God bless
This was the best video I found to replace the pump! Thanks so much, saved me a lot of suffering
You are welcome
Thank you for making this video. I am in South Africa and gosh did this video save me so much money.
You are welcome
Such a great tutorial. I was planning to dismantle the whole front but found your tutorial. Mine had only front screws holding the assembly so it was even more simpler and took only 15min. Thanks, saved my Sunday!
You are very welcome. Thank you for the great comment
I've had to take the front off of mine several times. The door seal retainer is a real pain to put back on.
Tilting like thay saved so much time vs all these other videos thay take the whole thing apart. Just installed my new oump and everything is working smoothly! Thank you!
you are welcome.
Unbelievable!!!
Well done!
You Save me money 💰
Excellent video.👍
Thank you for the compliment. I am happy I was able to help . Enjoy today
Thanks so much. Recommend looking at other videos as well. Mine did not have bottom screw access but rather a plastic tab that held the assembly in place.
Thank you very much for this video. I needed to combine the bottom and the front approach to replace my drain pump. Had to remove screws from the bottom and the front go release the assembly. One of the front screw was quite difficult to get to. But, got it done, and laundry is again being done! Thanks again me
You are welcome
Yes it looks like a great way...ty ty ty. This video is so unique and underrated. I'm glad I have this as a guide!❤
Glad it was helpful!
You deserve a gold medal for this shit. Some guy quoted $500. LG wanted to charge $114 for the part if I use an authorized $500 guy. All other videos tell you take the whole bloody thing apart. I bought the part for $30. It took 1.5 hours cause there were more screws in there than your video. A few which had no clear line for a screwdriver. A little creativity and done.
Tip if you come across that issue. Cut a little plastic off the bottom to get one of those inaccessible screws. There's a screw not showing in the video on the front at the bottom of the housing. its jammed behind the metal on the front. I jammed a screwdriver beneath the housing from the front and pushed it up to unscrew it.
Again. You saved my ass. If you're in vancouver, holla at me. Beers on a patio somewhere, on me!
You are welcome. I hope you subscribed 😊
Thanks so much for such a great video! Saved me a service call and repair! Only tough spot I hit was the second screw on bottom of pump couldn't line up and I had to pop out a small piece of plastic on bottom protector grid, no harm no foul, and all good and done!! Cost me $25 and I learned something new! Great instruction! ✌️
You are welcome
Thank you for the video. I had same issue and your post helped a lot. Saved me time.
You are welcome. Thank you for taking the time to comment
Thank you so much for your easy to follow instructions. I ran into one problem. When securing the pump back on I somehow pinched the O ring. You guessed it water everywhere on the first test run. Second time around I lubricated the O ring with silicone put it back together and it ran perfectly. Whew! Thanks for including how to run the diagnostic cycle very helpful!
wow, that sounds like an adventure. I am glad I was able to help you. God bless
Thank you so much for this very helpful video that saved us from taking the top and door off of the washing machine. My model is from 2015 and one of the screws to remove the pump was awkwardly behind the metal plate of the drain clean out assembly. To access this screw I used a drill with a metal bit to enlarge a hole in the metal plate. After that it was easy to remove the old pump and install the new one.
You are welcome
So glad I found this video. Success!!
Just ordered a pump from amazon overnight, 19 bucks. Hope it works. Thank you. 👊🏽
You are welcome
@@appliancerepairamerican - PS, it worked great! 👍🏽
Thank you so much! I did it! And thank you for going underneath the washer to make the repair. It seemed way easier. There were a couple of times where you went really fast or I couldn’t see what you were doing, but I am a total novice at repairs. That’s on me. But thank you. You saved me $386 in repair costs! 👏🏼
Congratulations! Thank you for the comment and support. Yes, when you can fix it from underneath it goas a lot faster. Thank you for the feedback on going too fast. I am glad I was able to help you. My name is Mark. Enjoy the new LG Pump
Underneath! Genius. Pure genius. Thanks
This was so easy the only thing I had a problem with is the bottom screw holding the pump in place was hidden behind the metal plate. I drilled a hole where it was and made access. Thank you for making this super simple. It literally took me 7 minutes to do.
Thanks! This saved me so much time and so much headache.
you are welcome , thank you for the tip 🙏
Thanks, I was able to get it fixed in 30 minutes. Nice guide
You R WELCOME
It worked!!! Thank you!!!! God bless you and your family! ❤
you are welcome. God bless you and yours
Time and huge money saver. Great DIY tutorial - many thanks to Atlas Appliance Repair.
You are welcome
Thank you for sharing this content
Thank you for the informative video. Our LG Tromm has 2 of these. Did not discover until I removed the assembly. Randomly picked 1 side to replace since I ordered only 1 pump. With my luck, I probably replaced the wrong one but with your instructions, learned it is a quick repair if I need to order again to replace the 2nd pump. Thanks again.
Replace the pump that is behind the coin trap door
Thanks. That's the 1 I luckily replaced. Seems to work quietly now. Do you know what the other pump is for? Thanks.
Thank you, Thank you, Thank you!! I just replaced mine with your direction and it works great now!!
You are very welcome
Excellent video. Your description of "growling and won't pump out the water" is perfect. One observation, which probably doesn't matter since you have to buy the pump to get the impeller..... on mine the motor was fine but the little "nub" at the bottom of the impeller had broken off. Probably hit a small pebble from washing the dog's bed or car's floor mats. Therefore, the motor shaft couldn't drive the impeller and the motor shaft was just spinning around inside the impeller!
Thank you for the compliment. I am glad the video helped. It is possible to fix a pump, but as professionals we always replace with new OEM parts
Thank you so much! Mine was also missing the same screws and they were never there. Last time I replaced the pump I tried to add the front screws but it put things in a bind so I left it as is. My LG was slightly different as far as screw placement. I removed the screws shown and it was still tight but by sticking my head up through the bottom I could see the hidden screws. 4 total, two thru the bottom and others on front and back that video does not show. Still doable without tearing the whole thing apart like I did previously. I don't think my pump is bad but a small Phillips bit fell out when I turned the pump over. Not one of mine so I have no idea where it came from but I think it was stuck in the impeller. New part arrives tomorrow so I'll install anyway.
Good job. Thank you from Sydney, Australia
you are welcome
Hello, I have an OE error message even after replacing the water pump. I can hear the pump running but its not pushing the water out. Any suggestion on to what it may be?
yeah pls help
Did you replace the drain pump? There could be a clog in the drain hose, or in the hose from the tub to the drain pump, or your drain hose may be too deep inside inside the stand pipe
Thanks, saved me a few hundred for an hours worth of work, most of which was moving things out of the laundry room to give me access to the bottom of the machine!
Glad it helped!
TY for this instructional video. Going through the bottom or opening the front: any preference?
I usually go through the front, but on some models it is faster to go through he bottom
Great video! Very easy repair! Thanks for posting!
You are welcome. thank you for the compliments
Great video thanks! I got me sum yesterday! $20 part and some elbow grease vs $400 service call. Thanks for the details and video worked perfect. I did the service diagnostic mode so that was great. Only thing was had to figure out how to manually shift through each phase of diagnostic test by hitting play button for each test to reach last one/finish with draining the water instead of running whole Load to figure if new installed drain pump worked. Thanks again
Glad I could help
Thanks for a very informative video. Did you simply lean the washer backwards against a wall at about a 45 degree angle to work from underneath? It would be helpful to get more information on that.
thanks!
Thank you for subscribing and commenting. Good luck with your washer repair. I am happy that the video was helpful. If you are to lean the machine back make sure to put a support underneath to prevent the machine from falling on you while working on it.
On my model, I had the two screws holding the pump on the bottom, but there was also a screw in the front on the pump housing behind the frame at 6 o’clock position where you unscrew the filter basket.
Fast clean simple easy you are awesome 👏🏻
Thank you 😊
YOU ARE THE MAN! THANK YOU!!!
You're welcome!
Found this by looking on how to get a lost drain hose to come back through the opening in the front after it slipped in. Since this is all I need, what is the best way to tilt the heavy washer to get under it? Do I still need to disconnect more than the power as a precaution?
YOU ARE A ROCK STAR!!! BLESS YOU!!!
Thank you.
I really like this fast easy approach 😊👍
You are welcome. Thank you for watching and commenting
Scott, thank you. I learn alot for watching your videos
Thanks so much😊😊
Best video ever. $40.00 bucks and 40 minutes.
Thank you Timothy for the awesome comment. Makes me so happy to know I my work helped you. 😀
Amazing video! My machine was only slightly different, but this saved me so much time and money. Took me longer than 7 minutes, more like and hour total, but I’m including draining a full tub, unstacking my dryer, and cleanup time.
Only snag I ran into happened when I didn’t pay attention to which direction the pump went and which wires went where. But I slowed down your video and found the orientation.
Something worth mentioning is that there is a little “N” and “L” on the casing right under the connectors. N for neutral where the black wire connects and L for live for the red/brown. Additionally, there may be different sizes of screws and it’s good to pay attention where each goes.
you are welcome. thank you for contributing
You are welcome. thank you for contributing
This is an excellent video - thank you so much. Is it okay to rest the washer on it’s back while doing the repair versus leaning it back on something. It seems safer to lie it right down on its back and that way it won’t fall forward or backward?
seems logical
Would I be able yo go from the bottom for a LG WM2501HVA washer too?
Took me about an hour which is good for me because I have no skills. Well done.
Thank you
oh my gosh, every video i seen for this , takes the whole washer apart, this is amazing, but how did you have the washer to lean back to work underneath it? i have to order the pump and this is amazing video
Mine model wasn't exactly the same as this one as there were no front screws, and I had to remove the shock absorption platform with 3 10mm bolts. That said, the idea of going at this from the bottom is way better than the other tutorials. It took me about 20 minutes
Thank you for commenting
Thanks for a great video. Going to tackle the job this weekend and going through the bottom looks like a much easier approach. Any thoughts on whether tipping the washer backwards or placing on its back could damage the washer? Should it have the shipping bolts installed to tip it safely? Is laying the washer on its back only an issue when transporting?
Peter, you should use common sense when it comes to safety. Unfortunately i am not in the habit of giving this type of advise. I wish you the best
Replacing the $25 pump was way easier by going through the bottom of the washer. I had to cut a notch in the metal circle (at the 6 o'clock location just below the face of the coin filter) to access the one screw attached to the pump at this location.. There were holes for two more screws at the 10 o'clock and 2 o'clock locations of the coin filter, but those screws were missing just as in this video. There were also two screws through the bottom of the machine attached to the pump. I had to cut away a small portion of the white plastic grid below the machine to access one of those two screws. The other bottom screw, located just an inch and a half away, was easily accessible. This seems a whole lot easier than removing the entire front face of the machine. Thank you!
Hallelujah, it works! Thank u so much, grace to you. Only issue I had was getting new pump in housing, hard to see screws. F YI the screws can fit back in the housing at multiple positions but obviously only one way will fit properly in the end...
I also had to the bottom 2 screws off line so I couldn't get to one screw but just drilled a hole in plastic... nobody sees it anyway
You can take that whole base out by unfastening the three stainless bolts, instead of drilling a new hole. Glad the video helped
Great video Sir, thank you.
You are welcome
There is a second slightly smaller pump on the other side of the housing (at least on mine). your hand is there in the video, when you remove what you call the drain pump. My other pump looks like your drain pump. The interface from the brass shaft to the the white nylon impeller has failed. The motor is fine, but i see no way to replace just the impeller/shaft, so i ordered what i hope is the right pump. What is the deal with the second pump on that housing? Why is it not mentioned? what does it do? is it less likely to fail?