@@claudiogavinho Fantastic! Have you ever thought about updating it or is the older model pretty good? For anyone reading this, getting a used one sounds like a great idea 🙂
@@MattShannonPhoto Oh, my mistake. Sorry, Matt. I gave the wrong idea. The first Wacom tablet I bought was an Intuos 2, and now I use an Intuos 4. But even the older models are certainly pretty good.
Thanks for explaining each step and then going quickly so the repetitive steps are not consuming a lot of time … we can pause at any point so there is no need to go slow. Great job.
Matt, this is impressive , never seen this color dodging before , simple method - just pick a solid color there you go , easy to use and total in control of the area and the color you want , less mucking around on the curve . luminosity.. , really love it . Thanks Matt , see you next tutorial .
Hi Matt, congratulations on the tutorial! We’re a video production company based on the beach in Brazil, so 100% of our work includes beach scenes. We’ve seen significant improvement in the color grading of landscapes, and we’d love to see more of how you would handle beach scenes, like the color of the sea, the sand, the rocks, etc. Congratulations again, and we’re subscribed to your channel!
Happy to hear it! Thank you for the feedback. I’d like to roll out a few more editing videos in the future and it’s nice to know what works for viewers. Don’t want to go too fast or too slow. Huge help thank you! Cheers
Thanks for the video. You explained the process more slowly for the first couple and then showed it in practice more quickly with multiple image types. You obviously have a very refined and speedy workflow, but anyone could apply the thinking if they have a basic familiarity with editing software. I like the fact that this is still quite simple but a lot more nuanced than the built in tools. I look forward to trying it out.
Amazing tutorial!!!! Fast and simple. I don't have time to sit around for long periods of time editing. This will be more than sufficient for 99% of the time. Thank you and new subscriber here.
You've given me some excellent ideas for many of my photographs and how to solve some problems I've been having. Photoshop is definitely the way to go for the edits you've shown.
Good morning, I just tried the photoshop version, and it's just so good! My only doubt was how to apply more whites to a snowy mountain scene? The rocks really were enhanced with the bluish layer! Thank you very much, and regards from Uruguay.
WOW…THANK YOU, Matt..I have never done this type of editing…I do have the tablet and love it over a mouse…can’t wait to try these tips out Thanks again!
Thanks for walking through these steps. I tried the technique on a few of my photos, and now the photos really pop. It took awhile to get used to the steps and adjusting the colors but in the end, it worked!
Great video, thank you. I do basically the same thing color dodging and burning with a luminosity mask but I like this method. I use ACR so used your color grading method in ACR and then tried it on a second image when I took the image into PS to finish. Very similar results using both methods but do like PS better. Quicker than using luminosity masks.
Give it a try and let me know how you made out. I added a bunch of examples so that these two steps did indeed work well on most images. But the "proof is in the pudding" as they say so I'm curious how viewers will make out trying this themselves 😊
@@devo5566 Oh no, perhaps I made it look too easy in the video when really it takes a lot of time and practice. Make sure your brush's opacity and flow isn't set to 100% or else your going to add too much Dodge and Soft Light to the image all at once. You can change the flow and opacity at the top of the PS page when you have the paint brush selected. Hope that helps 🙂
These techniques have blown my mind and hopefully some of my rather flat photographs. Any plans to do a session on use the 'Magic Wand' and inverting it to remove shadow, shining etc? I am really struggling to get it right. I have now subscribed.👍
Thank you and so glad this popped up in my feed. I immediately put it to work and I'm loving it. I had just learned (stumbled on) the Lightroom way but like the Photoshop process better. I don't really use PS....need to utilize it more.
Thanks for the tutorial. In Lightroom, you can also use the masking tool with a coloured brush. This gives more control over the process, than only the colour wheels which affect the whole image at once.
Interesting, I use a similar technique to edit real estate photography. The flambiant method bending a flash image and an ambient light image using a layer mask. Beautiful images sir! Excellent work on the tutorial!
Great video as always, Matt. I usually do the global adjustments in LR (or Camera Raw) and the specific adjustments in PS. It's the way I work faster. In LR, to enhance color, I first use the blue channel in the Calibration panel. I noticed something that might be important, especially for those who are not used to editing with masks: controlling the opacity, flow, and smoothing of the brush.
Thank you! My work flow is basically the same as yours, global adjustments in LR and then throw it into PS for the detail work. I've used Capture One and I liked it, but most of my work is done in Adobe software including Premier Pro for video, Bridge for organization, After Affects when needed and a few more. So... LR will have to do considering the all-in-one package I pay for. I do like how adobe works well with other adobe software, Bridge to LR to PS and back to LR, and their printing adjustments are easy to use when printing at home both in LR and PS. I'm sure Capture One is good too but I never got to that state when I used it.
@@MattShannonPhoto I completely understand and agree that the workflow in LR is much more fluid. However, not all adjustments are available when using masks, which is a little bothersome.
Thank you for making this informative tutorial. I see a tremendous amount of potential after I learn some of these basic skills to enhance my photography. Some of the photos I know are decent compositions, however, a bit lackluster due to over/under exposed and being in my infancy. Cheers to your style of photography, in making this video, and everything else you may be doing on the community which I am unaware of.
Absolutley incredible! I can’t wait to try this. I’ve not seen this method before and is super effective. One question… is there a specific blue or yellow you start with?
Great tutorial. Never thought of this. I'm a Capture One user, primarily due to way Lightroom handles Fuji Raw files. Will try to replicate and see how things go. Thinking colour grading and wheels, similar to Lr is the best place to start experimenting!
Damn, that was excellent. I've been struggling with my edits to get them to look like what you see all over the internet from the Pros. I'm more of a LRC person, but I know just enough PS to be dangerous. This makes me want to try them out in PS! Incredibly helpful, thank you.
I look forward to getting more in depth with editing in photoshop for select shoots and using these technics, and trying out these lightroom technics on more of my Batch work (aka weddings) - have a small drawing table but hopping to get a bigger one soon (small one is awsome for travel with laptop)
Great video. I'll be trying this in photoshop. Would you not use the mask features in lightroom to paint the effects in a similar way that you did in photoshop instead of just using the grading section?
Happy to hear you loved the video! No, I rarely use 100% opacity and flow when applying my brush strokes. I should have been a little more clear with that during the video. My wacom tablet and pen also have their own pressure sensitivities that controls the flow and opacity, depending on how firm I press the pen to the tablet.
@@MattShannonPhoto No, I haven't. So much in Adobe is still a mystery. Photography is my "hobby", and my job requires most of my time. This was one of the most interesting tips I've seen - and in such a quick presentation.
Time is short, if only our weeks were longer. Yeah, I wanted to do a fast video with all the steps that keep people interested and informed. The retention for editing videos is really short on RUclips so to be relevant and informative, it has to be quick :)
Hi Matt really great video, fabulous images as well. I am late to photo editing. I use Luminar Neo. Do you know if I can get the same sort of results as you have in PS/ Lightroom. Or could you do a video using Luminar? Thanks so much and really excited excellent work. Bravo. Take care Phil AKA keepclickingphotography
If youre using both Lightroom and photoshop in your workflow do you use the photoshop technique to replace the color grading step in Lightroom? If so which do you do first? Photoshop technique first? Or Lightroom adjustments (minus color grading) and then photoshop technique? Thanks!


![Coheed and Cambria - Searching for Tomorrow [Official Video]](http://i.ytimg.com/vi/hDsYGLbmadg/mqdefault.jpg)


Here is the editing tablet I was using: geni.us/MQfAC
Link to my Photography Workshops: www.mattshannon.ca/workshops.html
I bought my first Wacom tablet in 2003 and since then I've only used it - not the same one, of course.
@@claudiogavinho Fantastic! Have you ever thought about updating it or is the older model pretty good? For anyone reading this, getting a used one sounds like a great idea 🙂
@@MattShannonPhoto Oh, my mistake. Sorry, Matt. I gave the wrong idea. The first Wacom tablet I bought was an Intuos 2, and now I use an Intuos 4. But even the older models are certainly pretty good.
great to hear and for others to read, thanks for sharing
@@MattShannonPhoto pc and laptop which is best for photo editing
That’s a great way to quickly give images a burst of color!! I have never seen that done before. Thanks so much for sharing your knowledge!!
A very unconventional yet effective way to get more colours !!! loved it
Thank you! Cheers!
I love this technique. Thank you for sharing. I have already improved several of my photos while I was watching this video.
Thanks for explaining each step and then going quickly so the repetitive steps are not consuming a lot of time … we can pause at any point so there is no need to go slow. Great job.
Matt, this is impressive , never seen this color dodging before , simple method - just pick a solid color there you go , easy to use and total in control of the area and the color you want , less mucking around on the curve . luminosity.. , really love it . Thanks Matt , see you next tutorial .
This is a simple technique, producing outstanding results. Thanks for sharing.🔥
You're very welcome! Thank you for watching, cheers!
Hi Matt, congratulations on the tutorial! We’re a video production company based on the beach in Brazil, so 100% of our work includes beach scenes. We’ve seen significant improvement in the color grading of landscapes, and we’d love to see more of how you would handle beach scenes, like the color of the sea, the sand, the rocks, etc. Congratulations again, and we’re subscribed to your channel!
Great tutorial. I love how QUICK and simple this technique is and that you show a good variety in how you use it. Lightroom is also a great bonus.
Happy to hear it! Thank you for the feedback. I’d like to roll out a few more editing videos in the future and it’s nice to know what works for viewers. Don’t want to go too fast or too slow. Huge help thank you! Cheers
I’m always looking for simple ways to give my photos more pop. I’ll definitely have to try this one out. Thanks for the idea!
Thanks for the video. You explained the process more slowly for the first couple and then showed it in practice more quickly with multiple image types. You obviously have a very refined and speedy workflow, but anyone could apply the thinking if they have a basic familiarity with editing software. I like the fact that this is still quite simple but a lot more nuanced than the built in tools. I look forward to trying it out.
I've wondered how this look was done but couldn't quite figure it out on my own, now I know. Thanks, this is going to be really helpful to me.
That's an excellent method to instantly enhance images with vibrant colors! Fantastic advice. Simple yet effective. Thank you very much.
Jaw-dropping results in literally two steps! Thanks for sharing!
You're so welcome!
Absolutely fantastic way of "boosting" up your images. Thanks a lot. Great video.
Finally a use for colour grading in light room. Thanks for tips on a feature I have been completely ignoring.
Thanks for teaching a new method to pop the images, expecting more like this episode
Awesome, great to hear!
Amazing tutorial!!!! Fast and simple. I don't have time to sit around for long periods of time editing. This will be more than sufficient for 99% of the time. Thank you and new subscriber here.
You've given me some excellent ideas for many of my photographs and how to solve some problems I've been having. Photoshop is definitely the way to go for the edits you've shown.
The fox photo should be hanging in a museum ❤
Good morning, I just tried the photoshop version, and it's just so good! My only doubt was how to apply more whites to a snowy mountain scene? The rocks really were enhanced with the bluish layer! Thank you very much, and regards from Uruguay.
because the love of photography and see that sick tele on your background, after 10 sec. of the played video, i subscribed.
Long time light room user who has just started dipping my toes into photoshop using layered masks. This was great!
Awesome! Glad you liked it and I hope it helps.
😊❤@@MattShannonPhoto
WOW…THANK YOU, Matt..I have never done this type of editing…I do have the tablet and love it over a mouse…can’t wait to try these tips out Thanks again!
Great video Matt! Thank you so much for sharing your knowledge. Cheers from New England
Great instructional video. Easy to follow and easy to employ procedures. Well done and thanks
Thanks for walking through these steps. I tried the technique on a few of my photos, and now the photos really pop. It took awhile to get used to the steps and adjusting the colors but in the end, it worked!
Amazing, you have helped my editing enormously (even in LIghtroom). Can you specify the settings for the clarity, flow and softness please?
This is something!!! Easy to use in my workflow. Thank you for sharing this. And I hope you getting better 🙂
I hope so too! Thanks for the positive feedback! Cheers.
This was very helpful and I enjoyed that you included a LR module. Very informative.
Great video, thank you. I do basically the same thing color dodging and burning with a luminosity mask but I like this method. I use ACR so used your color grading method in ACR and then tried it on a second image when I took the image into PS to finish. Very similar results using both methods but do like PS better. Quicker than using luminosity masks.
Lets get started! That looked too easy until I try this. Great results as always Matt.
Give it a try and let me know how you made out. I added a bunch of examples so that these two steps did indeed work well on most images. But the "proof is in the pudding" as they say so I'm curious how viewers will make out trying this themselves 😊
@@MattShannonPhoto I have tried this 20 times and i keep ending up making a mess lol
@@devo5566 Oh no, perhaps I made it look too easy in the video when really it takes a lot of time and practice. Make sure your brush's opacity and flow isn't set to 100% or else your going to add too much Dodge and Soft Light to the image all at once. You can change the flow and opacity at the top of the PS page when you have the paint brush selected. Hope that helps 🙂
Simple step, amazing result. Thank you for sharing
These techniques have blown my mind and hopefully some of my rather flat photographs. Any plans to do a session on use the 'Magic Wand' and inverting it to remove shadow, shining etc? I am really struggling to get it right. I have now subscribed.👍
Thank you and so glad this popped up in my feed. I immediately put it to work and I'm loving it. I had just learned (stumbled on) the Lightroom way but like the Photoshop process better. I don't really use PS....need to utilize it more.
This was awesome! Thanks for these tips--I plan on using them to add punch and color. Looking forward to further videos and content from your channel!
I really like this technique and like to see more of your editing type videos
Great tips Matt! Thank you for sharing. Will definitely try this out!
Thank you very much! Thanks for watching.
Thanks for the tutorial. In Lightroom, you can also use the masking tool with a coloured brush. This gives more control over the process, than only the colour wheels which affect the whole image at once.
Interesting, I use a similar technique to edit real estate photography. The flambiant method bending a flash image and an ambient light image using a layer mask. Beautiful images sir! Excellent work on the tutorial!
I'd like to see this if you ever record yourself doing it.
These are all so beautiful! Thank you for sharing!!
Glad you like them! You are very welcome, thanks for watching.
Great video as always, Matt. I usually do the global adjustments in LR (or Camera Raw) and the specific adjustments in PS. It's the way I work faster.
In LR, to enhance color, I first use the blue channel in the Calibration panel.
I noticed something that might be important, especially for those who are not used to editing with masks: controlling the opacity, flow, and smoothing of the brush.
Thank you! My work flow is basically the same as yours, global adjustments in LR and then throw it into PS for the detail work. I've used Capture One and I liked it, but most of my work is done in Adobe software including Premier Pro for video, Bridge for organization, After Affects when needed and a few more. So... LR will have to do considering the all-in-one package I pay for. I do like how adobe works well with other adobe software, Bridge to LR to PS and back to LR, and their printing adjustments are easy to use when printing at home both in LR and PS. I'm sure Capture One is good too but I never got to that state when I used it.
@@MattShannonPhoto I completely understand and agree that the workflow in LR is much more fluid. However, not all adjustments are available when using masks, which is a little bothersome.
totally. Adobe could slam it all into one program im sure but that isn't good business for them.
These are definitely techniques i need in my work flow
Going to try them out later
Thanks 🤟
Thank you for making this informative tutorial. I see a tremendous amount of potential after I learn some of these basic skills to enhance my photography. Some of the photos I know are decent compositions, however, a bit lackluster due to over/under exposed and being in my infancy. Cheers to your style of photography, in making this video, and everything else you may be doing on the community which I am unaware of.
That was fantastic! Would love to see you apply this to portraits
This works like a charm..Thanks for sharing this excellent technique.
I usually use the lightroom method, I tried your photoshop trick and wow it looked so much better....thamks!
Beautiful. Thanks for sharing your technique.
Def bookmarking this video. Super helpful!
Absolutley incredible! I can’t wait to try this. I’ve not seen this method before and is super effective. One question… is there a specific blue or yellow you start with?
Really like your techniques and I’m certainly going to try them. Thanks 👍
Amazing video. I'm wondering how the photoshop techniques compares to using Gradient Map?
This really makes images pop
Well this just inspired me to go home and retouch up some photos.
Great to hear!
wow! so excited to try this! thank you for sharing!!!
Thanks for the LR steps. Color correction is always the challenge.
You are welcome and I completely agree.
Excellent info! Thanks for taking me along!
You are very welcome, thanks for watching! Cheers
Great tutorial. Never thought of this. I'm a Capture One user, primarily due to way Lightroom handles Fuji Raw files. Will try to replicate and see how things go. Thinking colour grading and wheels, similar to Lr is the best place to start experimenting!
Damn, that was excellent. I've been struggling with my edits to get them to look like what you see all over the internet from the Pros. I'm more of a LRC person, but I know just enough PS to be dangerous. This makes me want to try them out in PS! Incredibly helpful, thank you.
Awesome tip! Thanks a lot for sharing. I just moved to Lethridge, Alberta from Ontario. No regrets! 👌🏻
Superb method !!! enjoyed learning with this video. TFS
Thanks Matt! Like others, I haven’t seen that technique before! Very cool way to add some pop !
Wow Matt!!! Thank you for sharing this video. It is definitely going to add another tool to my editing workflow. Thanks again!
Great stuff, very helpful. Beautiful shots by the way. Cheers😊
I look forward to getting more in depth with editing in photoshop for select shoots and using these technics, and trying out these lightroom technics on more of my Batch work (aka weddings) - have a small drawing table but hopping to get a bigger one soon (small one is awsome for travel with laptop)
Fantastic technique!! Thank you so much!! Very easy to follow and understand!
Thank you! This is easy to learn and extremely useful!
A great way to fix some lifeless photos really helped me out thanks for teaching me this technique, worth a like and sub.
I rarely use LR and your examples were a good reason to use PS when more that basic adjustments are utilized.
Glad the examples were helpful!
Nice! I was already doing the Lightroom (Camera Raw) variant, but it's nice to see how to do the same thing in Photoshop!
Yes! Amazing tip. You explained it great and you have beautiful image examples! Thank you for sharing. I'm definitely going to try this. :D
Great video, awesome detail thank you. Can I ask on the Brushes... opacity, flow, etc used please? thanks
An advanced edit of white balance 👌
Very clever...thanks a lot, Ima gonna try this yellow/blue colors enhancement on some of my work in PS!
Great video. I'll be trying this in photoshop. Would you not use the mask features in lightroom to paint the effects in a similar way that you did in photoshop instead of just using the grading section?
Learnt about solid colour. Thank you
Mind is blown!
🤯😁
Very unique approach. Good work!
this is so beautiful
Nice! I rescued some of my images with this technique.
Great PS technique, will definitely use this, thanks Matt.
Loved your video. Do you use 100% opacity and flow?
Happy to hear you loved the video! No, I rarely use 100% opacity and flow when applying my brush strokes. I should have been a little more clear with that during the video. My wacom tablet and pen also have their own pressure sensitivities that controls the flow and opacity, depending on how firm I press the pen to the tablet.
thank you! Very helpfull!
You are very welcome, thanks for watching!
Simple and quick. I like it. Thanks for sharing.
Amazing, thanks so much!
The image of the milky way over Venice at 9:33 really cracked me up! Thanks for the entertainment.
Hi Matt, just subscribed now, I love this just what I've been looking for, now time to try it myself. Cheers Tony
Great tips … are you using the medium or the large tablet? I assume the large is better?
Great tip. Easy and powerfull. Thank you. Regards from Brazil.
Wow! A blessing of a lesson!
Thank you, I’m assuming you haven’t tried this technique?
Perhaps I should name it ☺️😎
@@MattShannonPhoto No, I haven't. So much in Adobe is still a mystery. Photography is my "hobby", and my job requires most of my time. This was one of the most interesting tips I've seen - and in such a quick presentation.
Time is short, if only our weeks were longer.
Yeah, I wanted to do a fast video with all the steps that keep people interested and informed. The retention for editing videos is really short on RUclips so to be relevant and informative, it has to be quick :)
Great tutorial. simple with great affects
Thanks!
I only edit in Lightroom, now I need to learn edit in photoshop. Great video!
Thanks for the excellent info. Very helpful!
Thanks for watching!
60% of the time, it works every time. but seriously, it works.
Yes 😄
Very interesting. I will have to give it a try
Hi Matt really great video, fabulous images as well. I am late to photo editing. I use Luminar Neo. Do you know if I can get the same sort of results as you have in PS/ Lightroom. Or could you do a video using Luminar? Thanks so much and really excited excellent work. Bravo. Take care Phil AKA keepclickingphotography
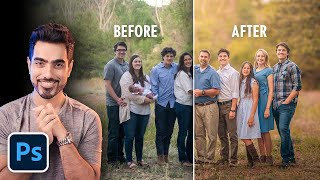
LOOKS GREAT!! (BEFORE & AFTER) 🙂
Followed because of this video.
Hi Matt Enjoyed this - only really use lightroom so will give it a try. As an aside - what monitor do you use?
If youre using both Lightroom and photoshop in your workflow do you use the photoshop technique to replace the color grading step in Lightroom?
If so which do you do first? Photoshop technique first? Or Lightroom adjustments (minus color grading) and then photoshop technique? Thanks!