Adam and Francisco this is a game-changer! Wish I had found your video sooner, would have been a much faster process compared to the other advice on the tube I was following. Made today much more productive, so there’s that. I hope you two bring more to your channel. THANK YOU VERY MUCH
loving the trick with the counter sinking and the hammer. Not seen that before and with 50 sqm of decking around the corner and some planned mitering this is the best tip I've seen yet. Ever...
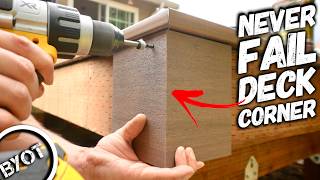
When you're prying things with a flat bar like that, you can stick the short angled part in your crack/gap, and then use the long arm as a lever, which pushes the opposite sides of the bar apart in the groove more easily, and doesn't lift or lower anything - it keeps things flat. Great video and thank you for sharing your work.
There’s a better way to install the fasteners, you have screw down each fastener half way down before attaching the adjoining board and then finish screwing down
dude.. you install your starter board, then, you install hidden fasteners to the joists .. You DO NOT screw them down AFTER the boards are in place together/


Adam and Francisco this is a game-changer! Wish I had found your video sooner, would have been a much faster process compared to the other advice on the tube I was following. Made today much more productive, so there’s that. I hope you two bring more to your channel. THANK YOU VERY MUCH
loving the trick with the counter sinking and the hammer. Not seen that before and with 50 sqm of decking around the corner and some planned mitering this is the best tip I've seen yet. Ever...
When you're prying things with a flat bar like that, you can stick the short angled part in your crack/gap, and then use the long arm as a lever, which pushes the opposite sides of the bar apart in the groove more easily, and doesn't lift or lower anything - it keeps things flat. Great video and thank you for sharing your work.
There’s a better way to install the fasteners, you have screw down each fastener half way down before attaching the adjoining board and then finish screwing down
I cut the tongue off on one side to mount starter deck strip. Makes for same spacing in the beginnings between deck boards
Very good! Thumbs up and Greetings from Ireland! :)
On 7:07 min of the video. The first composite board which is not the same size, did you have to cut it in order to fit ?
What brand of composite did you use ?
When you screw in the boards are supposed to start in the middle so that way you don't have a gap problem
How has this held up over time?
No idea haven't heard from the client since. The producers of the decking provide a lifetime guarantee though if that helps.
You guys are making harder than it actually is
What can I say it was a nice day.
dude.. you install your starter board, then, you install hidden fasteners to the joists .. You DO NOT screw them down AFTER the boards are in place together/
Umm. Wavy joists...
🙈
Instead of ripping boards on the end why not plan ahead and built your supports to not have to?
yeah, yeah. What I want to know is how you fastened down the FIRST board, and secondly how you fastened down the board you ripped!!
Cut half of the fastener off for the first board, cut a groove down the ripped edge of the last board and secure with half cut fastener
Should probably try being gamers on RUclips instead of builders
Games are for losers
u guys dont know what to do...shoemakers...
Nope I've never made a shoe.
i hope you dont do this for a living. Learn how to do it...before you do it.
Macguyver ain't got nothing on me though...
You should just take this video down. This is all completely wrong and teaches the world nothing