Installing a flake garage floor coating like a pro

HTML-код
- Опубликовано: 3 июн 2024
- Installing an epoxy, polyurea and/or polyasphartic floor coating in your garage is great way to not only protect your concrete against wear and tear and staining but also give you an easy to clean surface that makes your garage look like a showroom. In this video, we show you how Concrete Hero, a local concrete coating company in IL does it. Looks easy but keep in mind these guys have have installed hundreds of floors and have the right tools and equipment to get the job done faster and better than the average homeowner.
Steps to installing a concrete coating in your garage
1) Grind existing floor to open-up pores in order to allow primer to soak deep into the slab. This is the most critical step and if not done correctly will lead to the coating peeling off. Having the right equipment is key to this step
2) Repair all cracks and holes in the concrete. A fast setting materiel is used fill all the damaged areas. This requires you to work fast before it starts to harden.
3) Primer/base coat installation. An epoxy or polyurea primer gets installed with a squeegee and roller. Both materials will work just fine as long as they are high solids (98% solids min).
4) Throw flakes into wet base coat. This is the fun part but makes sure not to miss a spot. Use more than you need.
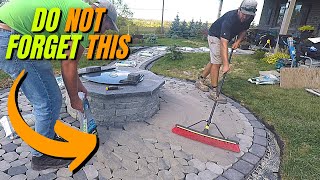
5) Once dry, collect loose flakes and scrape floor to makes sure your floor is smooth.
6) Install a polyaspartic top coat to protect the floor and lock in the flakes. Never use epoxy as a top coat as it will yellow over time and is not as durable as a good polyaspartic.
To learn more about garage floor coatings checkout
www.theconcretehero.com/garag...
To learn more about Concrete Hero
www.theconcretehero.com/
www.theconcretehero.com/garag...
www.theconcretehero.com/garag...  Хобби
Хобби