Normally when I see icord edge I roll my eyes because I'm so over it. BUT this two-color icord is beautiful!! Thank you for creating this video. I think someone I know is getting an item with two color icord edge.
Thanks and so glad you found it helpful🙏 Best wishes for your project. You can share a pic of your scarf with me when done at knittycatsknits@gmail.com 🤗 Happy Holidays 🎉🎉
I want to start by saying I love this pattern! I bought the same yarn and made 8 rows, put in a lifeline and have not gotten past that successfully. I can't tell you how many times I've taken it out, for one reason or another. I do know how to knit but because of how I "drift" when I knit, I usually take out more stitches than I knit. Eventually, I do finish patterns. With that said, I do know how to take out and fix knits, purls and now P1B. The last one I need to know to successfully finish this scarf is how to take out a K1B on a two color scarf, when I mess it up. I think I could fix a regular K1B but because you end up with 3 loops, when doing the 2 color scarf, I just can't figure it out and can't find any videos that can help. Can you recommend a video or do you have one that would explain it? Any help would be greatly appreciated. If I could just learning that one fix, I wouldn't need lifelines anymore!😊
Since I'm a novice, it took me a LOT of trial and error.. but I finally got this stitch.. and I love it! Do you have a tutorial on doing the kind of lifeline you need for this?
Thanks and glad you found it helpful 🤗 To bind off, check out my one-color Fisherman's rib video at ruclips.net/video/xiNZMcTCKgM/видео.htmlsi=4PkrVdZGAFKu1zMh. The bind off starts just after the 11 min mark. For a 2-color pattern, can bind off with just one of the 2 colors but suggest using the same color as the cast on edge, if you want both ends of scarf to match. Hope this helps ☺️ Thanks again for watching and best wishes!
Thank you for this! How do you cast off when you're done? Is it as simple as casting off normally with Color A and then weaving in the strand of Color B, or is there more to it?
Just the simple regular cast off like you mentioned in comment. Would suggest casting off in the same color as the one you cast on with and then weave in the other color strand😊 Thanks for watching my video! Best wishes and a very Happy New Year!
Lovely scarf ...thank you for the instructions One question though.. so after completing 4 rows ..we start again with row one of pattern, that makes it two rows of K1 b together followed by 2 rows of K1 P1b .. for the rest of the scarf ...right?
Thanks @indujaggi☺️ For your question, yes you keep repeating Rows 1-4 of the pattern (disregard Set up row as that is only done once). Please see detailed pattern in video description (can see it if you click on "more" in the text below the video). Thanks so much for watching and best wishes 🤗
How do you put a lifeline into Fisherman's rib? If you do, then in the next row, you can't dip down into the row below. I love this stitch and have used it for many projects, but I haven't found a good, reliable way to do one. Your scarf is just beautiful! I can't get over how lush and gorgeous it looks, and that I was working on something like this myself when I found this video!
Thanks so much, Evie! I am glad you found the video and are knitting a similar project. Regarding lifelines, I agree with you that it would be hard to insert reactive lifelines into the Fisherman's rib stitch. I would recommend inserting "proactive" lifelines (if not familiar with this, please see my video: Adding proactive lifelines: ruclips.net/video/hLdNBLuC1sY/видео.html). Perhaps insert these after say every 6-8 inches of knitting (eg, if knitting a scarf). Hope this helps. Thanks again for watching and best wishes on your project (:
When I do Knit or Purl one below I end up with a bit of extra yarn after slipping the stitch off the left needle.. creating a little bump or loop.. making the stitching uneven. Any suggestions?
Hi Reid, the extra bit of yarn gives the stitch a wonky look at first but after knitting a few rows (or a couple inches), it should look just right. You could try this to tighten up the yarn a bit: after you do a purl one below, when you take the yarn back to do the knit 1, tug on the yarn a bit and that may remove some slack. Can do the same when you bring yarn forward after doing a knit 1 below to do a purl 1 below. Let me know if that works. Thanks for watching the video and trying this stitch! Best wishes 😊
I know it might sound silly but when you do knit/purl 1 below and slide off the stich on the needle, won't that create a bump? Especially if you're using a chunky yarn? Thanks in advance!
Good question, Nimisha! I don't think it will. The thickest yarn I have knit this stitch is with a worsted weight yarn. The stitch causes ridges to form on either side, like in a K1, P1 rib stitch, but the ridges are deeper and fabric formed is more flexible (similar look to the brioche stitch). If you were to you chunky yarn, my guess is that the ridges will be proportionately thicker/deeper but look of the stitch should be the same. Will have to look in my stash to see if I have any chunky yarn to test this out😊 Thanks so much for watching my video and hope you subscribe! Best wishes!
the right side of the i cord when the light side is facing me is all wrong. can it be that at the second row of the repeat the dark thread should not be in the front because the whole cord seems to get twisted maybe you could show how you go from the fourth row to the first one again?
I'm getting a little frustrated. I got the pattern down, but my i-cord edges are not pretty. I don't understand why. I'm knitting very slowly and actually write down the pattern for each row, and still it's looks wooky on both side. I don't know what I'm doing wrong, I wish I can show you what it looks like. 😩☹
@@barbarashepard6801 Hi Barbara, I am not sure how you are doing the cable cast-on. I tried it just now and it works exactly like the video. For the cable cast on, I do it like doing a knitted cast on, except I insert the needle each time between the 2 stitches on left needle. If you are following the same technique, then your working yarn will end up at the top of the needle (ie, next to the last stitch you cast on). Then, slide stitches to other end, join the other yarn and do the setup row. Once you complete this, now both your yarns will be on the same end (just like in the video). Hope this helps (just realized I don't have a cable cast on video, so hoping to make one and will post it this week).
Hi Brenda, I have copy/pasted below the pattern from the video description. Hope this helps. Video tutorial on how to knit a 2-color Fisherman's rib scarf with i-cord edges. The finished measurements for the scarf shown in video is 60 inches (length) x 7 inches (width). Pattern for this scarf is provided below. The scarf feels very soft and wears really comfortably around the neck (long enough for one wrap around). Hope you give this a try and let me know in comments how it turned out or if you have questions. Materials: 1 skein (5 oz, 141 g) each of Caron(R) Simply Soft 100% acrylic yarn (Colors: Blue Mint [lighter color], Pagoda [darker color]); US size 8 (5.00 mm) 16 inch or larger circular needle (or double-pointed needle, long enough to hold the stitches); tape measure or ruler, tapestry needle to weave yarn ends, scissors. Gauge: 13 sts with US size 8 needles knit in 1-color Fisherman's rib pattern = 3.5 in (unstretched) [Link to 1-color Fisherman's rib video tutorial, which includes pattern in video description] Abbreviations: K1b=knit into the stitch below; P1b=purl into the stitch below; Sl=slip 1 stitch purlwise; st=stitch; YB=take the yarn to the back; YF=bring the yarn to the front. Designate the 2 colors as Color A and Color B. For the pattern below and scarf shown in video, the darker color is Color A and lighter color is Color B. With Color B, cast on 36 sts (I used long-tail cast on, but can use cast on method or your choice). Do not turn work. Slide sts to the other end of needle and do set-up row. Set-up row (Color A): [K1, YF, Sl1 with the yarn in front, YB, K1], then K1, PI to last 3 sts, then [K1, YF, Sl1 with the yarn in front, YB, K1]. Turn work. [Note: this set-up row is only done once] Row 1 (Color B): [With yarn in front, Sl1, YB, K1, YF, Sl1], then take yarn back and do *K1b, P1. Repeat from * until last 3 sts, then [With yarn in front, Sl1, YB, K1, YF, Sl1]. Do not turn work. Slide sts to the other end of needle and do Row 2. Row 2 (Color A): [With yarn in front, Sl1, YB, K1, YF, Sl1], then take yarn back and do *K1, P1b. Repeat from * until last 3 sts, then [with yarn in front, Sl1, YB, K1, YF, Sl1]. Turn work. Row 3 (Color B): [K1, YF, Sl1 with the yarn in front, YB, K1], and do *K1, P1b. Repeat from * until last 3 sts, then [K1, YF, Sl1 with the yarn in front, YB, K1]. Do not turn work. Slide sts to the other end of needle and do Row 4. Row 4 (Color A): [K1, YF, Sl1 with the yarn in front, YB, K1], then *K1b, P1. Repeat from * until last 3 sts, then [K1, YF, Sl1 with the yarn in front, YB, K1]. Turn work. Repeat these 4 rows until work measures approximately 60 inches (5 feet or desired length). Then do regular cast off using Color B. Weave in yarn ends. Blocking is not needed for this scarf. Optional: can add pompoms (as shown for scarf in video) or tassles at the end. Your scarf is finished. Wear it proudly! Additional links: Long-tail cast on: ruclips.net/video/EiSK1gqqNz4/видео.html Adding proactive lifelines: ruclips.net/video/hLdNBLuC1sY/видео.html 1-color Fisherman's rib scarf: ruclips.net/video/xiNZMcTCKgM/видео.html 2-color Fisherman's rib scarf (no i-cord edges): ruclips.net/video/MBVT0i6d5xA/видео.html 2-color Honeycomb brioche scarf: ruclips.net/video/kY0JqccP5IY/видео.html
Also, check out link below to a video I found that shows how to access video description in a video (on phone or on a computer)☺️ ruclips.net/video/-aVqWSv7NEI/видео.htmlsi=tFgdWAfg6ZbL-UYx
Hi! Thank you so much for this video I was so excited to get started and my scarf is looking great! I have knitted the scarf to be about 5feet in length and am thinking about finishing it but wanted to know when binding off which row I should bind off after? I've seen videos where people bind off after row 2 or row 3 and am just confused on which row is should finish on so I don't mess up my scarf. Thank you again!
That's awesome, Darcy! So glad you knitted the scarf. If you followed pattern (as described in video description), then you would bind off at the start of Row 1 (which should be the same color with which you cast on). Even if you changed things up a bit from pattern, essentially just bind off after you have turned work and bind off in same color as the cast on. Hope this helps and hope you get to enjoy the scarf soon. Best wishes😊
Thanks! Good question about how to add this to brioche. I would think a similar way should work but have not tried this out. I am curious though now (since I too prefer brioche) and would be great to see this in brioche. I will try it out and will get back to you again (and even make a video) in the near future. Thanks for watching and best wishes!
It would have been helpful to know that i-cord doesn't work with wool. Had to undo hours of work. It also makes sense only with an odd number of stitches, not even. The two sides will look different with even stitches and that's not what we want, right?
Hi Marcy, check out my video on adding proactive lifelines (it is very easy) ruclips.net/video/hLdNBLuC1sY/видео.html. Hope this helps. Thanks for watching and best wishes 🤗
Hi Cathy, yes, it is slip, k, slip on Rows 1 & 2 and is k, slip, k on Rows 3 & 4. Note that before these rows, in the set-up row, which you only do once, it is k, slip, k. Hopefully the details in the video description will help but let me know if you have questions. Thanks for watching and hope you enjoy knitting this scarf!😊
Good question, Llymar. The way the i-cord edge forms, it rolls inward on one side; I consider that to be the wrong side and the side where it rolls outward would be right side. If you follow color scheme as shown in video, then the side facing you when you do Rows 1 & 2 (after doing set-up row) will end up being right side (i-cord rolling outward). Also, the little v-ridges will be in Color A (darker color in my scarf) on the right side and in Color B (lighter color in my scarf) on wrong side. Once you knit Rows 1 & 2, you can attach a clippy marker/safety pin to that side (right side). That can help you keep track of rows. Another trick is to remember that you turn the work only when both yarns at same end; so say you turn work and you are on side where v-ridges are in lighter color, then you know you need to do Rows 3 & 4 next (and if facing right side, then you need to do Rows 1 & 2 next). Hope this helps. I know it can seem complicated but once you knit a few rows, it will get easier to know which row you are on. Also, I edited the pattern to fix the i-cord edge instructions on a couple rows, so please re-check it (video demo is correct). Thanks for watching my videos and best wishes!😊
I was working in a scarf just like this when I saw this video, so I included a link to this video when I posted my project on Ravelry.com. I posted a lot of helpful tips, which might help (and a link to this video). Here’s the link to my project (and I hope it works): www.ravelry.com/projects/truefeather77/ocean-fishermans-scarf
Hi Nancy, actually the stitch itself can be knit on an even number of stitches. But if you wish to add the i-cord edge on either side as shown in the video, then add 3 stitches at either end. Hope this helps. Thanks for watching and best wishes for your project!😊
@@nancyma1332 Yes, you can omit the i-cord edge and just cast on an even number of stitches and follow the pattern, omitting the part about the i-cord stitches. I think you can get away without adding any selvedge stitches (may want to try a small swatch first). If the edges don't look smooth, can add a single stitch on either end and knit it in each row. Hope this helps. Let me know how it turns out. Best wishes and happy knitting!
I think there is a mistake in the instructions. I finally figure out how to make it look like yours, but it is opposite to the pattern description. You say to K, S, K on one pass, then S, K, S on the next, then TURN. Wouldn't that come out like seed stitch? (It certainly did with mine.) I think you mean to do one or the other on both passes, then TURN, then do the other on both passes of the other side. That's what makes it look like your sample. Will this be put up on ravelry?
Hi Evie, thanks so much for bringing this to my attention. I now had a chance to look at it and have fixed the instructions in the description (thankfully, my video demo was correct). So the i-cord edging is identical in Rows 1 & 2 and is identical for Rows 3 & 4. I have not posted this on Ravelry yet. I am considering a few patterns to post there and hope to do so in the upcoming months. Thanks for watching and best wishes during the holiday season!😊
@@melissacano8805 Hi Melissa, sorry you are having a problem with Row 4. Actually there isn't any mistake anymore in the pattern shown in the description field and it matches the video demonstration, which is also correct. Please recheck the video demo and let me know if you are still have a problem with Row 4. Thanks and best wishes!
I should have been more clear. When I put a lifeline in and do the next row, the lifeline gets moved into the slip stitch at the beginning and end.. when I unravel to the lifeline I don't know what stitch to pick up. Apologies for the confusion.
Here's what I mean. It uses terminology and language similar to other patterns. See how simple it is and how much easier to read and work from? Abbreviations: K1b = Knit into the stitch below P1b = purl into the stitch below Sl1wyif = slip 1 stitch purlwise wyif For this pattern, all slipped stitches are slipped purlwise wIth yarn in front Stitches in brackets [ ] = 3-stitch icord border maintained throughout st = stitch YB = yarn in back YF = yarn forward. Designate the 2 colors as Color A and Color B. For the pattern below and scarf shown in video, the darker color is Color A and lighter color is Color B. With Color B, cast on 36 sts (I used long-tail cast on, but can use cast on method or your choice). DO NOT TURN work. Slide sts back to the beginning. Set-up row (Color A): [K1, Sl1wyif, K1], *K1, P1* to last 3 sts, [K1, Sl1wyif, K1]. TURN WORK. [Note: this set-up row is only done once] Row 1 (Color B): [Sl1wyif, K1, Sl1wyif], *K1b, P1*. Repeat between ** until last 3 sts [Sl1wyif, K1, Sl1wyif]. DO NOT TURN. Slide sts back to the beginning. Row 2 (Color A): [K1, Sl1, K1], then *K1, P1b*. Repeat between ** until last 3 sts, [K1, Sl1, K1]. TURN. Row 3 (Color B): [Sl1wyif, K1, Sl1wyif], *K1, P1b*. Repeat between ** until last 3 sts, [Sl1wyif, K1, Sl1wyif]. DO NOT TURN. Slide back to the beginning. Row 4 (Color A): [K1, Sl1, K1], then *K1b, P1. Repeat between ** until last 3 sts, then [K1, Sl1, K1]. TURN.
Evie Hammond Thank you for taking the time to correct and clarify the instructions. Her work is lovely, and yet her instructions had me in a muddle. I thought it was just me doing something wrong. You’d be an excellent instructor. ☺️
ok, i' ve seen in the video about brioche with this edge that indeed the two sides don 't look the same. I' ve been trying to find out all week what i did wrong because in this video that fact is hidden
Great question! I have seen some videos on RUclips use these terms interchangeably but they are different. Although they provide a similar look, they are knit up differently. In Fisherman's rib, we knit 'below' the stitch whereas in brioche, we do a "slip stitch with yarn in front" to create a "brioche" stitch (sort of a double stitch), which is knit together as one stitch. If you are interested in trying out brioche, check out my one-color brioche pattern at ruclips.net/video/4E0rLm3_jXU/видео.html. I really enjoy knitting brioche (may look a bit more complicated than Fisherman's rib, but with practice, I actually find brioche easier). Hope you give it a try. Thanks for watching and best wishes!
Thanks for the question. Actually, the way the pattern works in this scarf demo, not counting the i-cord stitches, the rib pattern is the same for Rows 2 and 3 and the same for Rows 1 and 4. This works correctly to provide the ridges in one color on one side and another color on the other side (as shown in the video). I hope that helps. Thanks for watching and best wishes!
Your work is beautiful, and so is this pattern. Two suggestions: 1) Organize what you're going to say in advance, because you take several minutes at the beginning just to state things that we can already see. You say, several times, "As you can see..." Yes. We can. So there's no need to go overboard verbally about things that are already obvious. That would have saved 4 minutes off the beginning of this video, and would trim the rest. Thank you for the pattern! It looks lovely, and is exactly the scarf I was making for myself, but I hadn't done it with two colors yet. So Now I can see what it will look like with the icord edging in 2 colors. Suggestion: 2) Learn standard knitting pattern notations. They're like a language, and will make it much more likely that someone will use this pattern and sing your praises. When you write it all out in different terms, it's harder for people to figure out, and harder to follow as we knit along. I'm going to edit the text of the pattern a bit in a text file, and when I get a chance, post it later to show you what I mean.
Thanks for the comments and suggestions, Evie! Always looking to improve my videos, so will take your points into consideration. Thanks also for posting the alternative version of the pattern (:
Evie Hammond is it really necessary to criticize her way of explaining things, who cares if she says you see i know people who say "you know what i mean" after every few words, you need to be more tolerant of people and not so critical. I do agree with knitting terminology it is rather lengthy but she is teaching and each teacher is different and some of us may need to know yarn in front slip stitch, however all my patterns say sl1pw or sl1kw
Hi and thank you. I have one request of you..would you please slow down?? I am learning from you but I get frustrated, slow the video down, but that is too slow. I assume your heritage is the same as one of my physicians. But he was SO laid back, very well spoken, like you, and he was always laughing, at appropriate times of course, so at ease was I with him. I did ask him why the rush with people of this heritage, he said because to them there is always more and forget that what they have is more than enough. Again thank you for your video's, I am learning from you which I will always do, never too old..
Thanks for the comments! Actually, most people think I talk too slowly in videos, so interesting to hear your experience. The 0.75 x playback speed in the RUclips options may work. But suggestion noted for the future 😊 Thanks for watching my videos and keep on learning (I am a life-long learner too!). Best wishes!


You made this easy to understand, and you have a nice voice for instruction. Thanks!
Thanks, Guy!😊 Best wishes for the holiday season!!
Normally when I see icord edge I roll my eyes because I'm so over it. BUT this two-color icord is beautiful!! Thank you for creating this video. I think someone I know is getting an item with two color icord edge.
Thank you so much for watching and glad you liked it! Best wishes for your project🤗
So much easier than brioche and just as nice looking. Thank you so much.
Thanks, Sandra! Best wishes 😀
You said it.
Thank you for this excellent video, Sue
@@sueroderick6236 My pleasure 🤗Thanks for watching and best wishes!
Many thanks for a fabulous tutorial!!
@@Jane_Ricciardi My pleasure! Thanks so much for watching and best wishes 🤗
Thank you for this really helpful tutorial ❤ I will definitely give this a try 😊🧶
Thanks and so glad you found it helpful🙏 Best wishes for your project. You can share a pic of your scarf with me when done at knittycatsknits@gmail.com 🤗 Happy Holidays 🎉🎉
Your color combinations are delicious!
Thanks😊
I love your teaching this scarf. Thanks!
My pleasure, Jessica! Thanks for watching my videos and best wishes!😊
Thanks for sharing, very helpful info 🌹🌹🌹
My pleasure 😊 Thanks for watching and best wishes!
I want to start by saying I love this pattern! I bought the same yarn and made 8 rows, put in a lifeline and have not gotten past that successfully. I can't tell you how many times I've taken it out, for one reason or another. I do know how to knit but because of how I "drift" when I knit, I usually take out more stitches than I knit. Eventually, I do finish patterns. With that said, I do know how to take out and fix knits, purls and now P1B. The last one I need to know to successfully finish this scarf is how to take out a K1B on a two color scarf, when I mess it up. I think I could fix a regular K1B but because you end up with 3 loops, when doing the 2 color scarf, I just can't figure it out and can't find any videos that can help. Can you recommend a video or do you have one that would explain it? Any help would be greatly appreciated. If I could just learning that one fix, I wouldn't need lifelines anymore!😊
Since I'm a novice, it took me a LOT of trial and error.. but I finally got this stitch.. and I love it! Do you have a tutorial on doing the kind of lifeline you need for this?
Thank you for sharing, very helpful info. 🌼🌺🌸
My pleasure😊
Very helpful video but could you tell me how to bind off on a fisherman’s rib pattern? I’m confused. 😅
Thanks and glad you found it helpful 🤗 To bind off, check out my one-color Fisherman's rib video at ruclips.net/video/xiNZMcTCKgM/видео.htmlsi=4PkrVdZGAFKu1zMh. The bind off starts just after the 11 min mark. For a 2-color pattern, can bind off with just one of the 2 colors but suggest using the same color as the cast on edge, if you want both ends of scarf to match. Hope this helps ☺️ Thanks again for watching and best wishes!
Very nice edging.
Thanks, Mala!😊
Thank you for this! How do you cast off when you're done? Is it as simple as casting off normally with Color A and then weaving in the strand of Color B, or is there more to it?
Just the simple regular cast off like you mentioned in comment. Would suggest casting off in the same color as the one you cast on with and then weave in the other color strand😊 Thanks for watching my video! Best wishes and a very Happy New Year!
Lovely scarf ...thank you for the instructions
One question though.. so after completing 4 rows ..we start again with row one of pattern, that makes it two rows of K1 b together followed by 2 rows of K1 P1b .. for the rest of the scarf ...right?
Thanks @indujaggi☺️ For your question, yes you keep repeating Rows 1-4 of the pattern (disregard Set up row as that is only done once). Please see detailed pattern in video description (can see it if you click on "more" in the text below the video). Thanks so much for watching and best wishes 🤗
How do you put a lifeline into Fisherman's rib? If you do, then in the next row, you can't dip down into the row below. I love this stitch and have used it for many projects, but I haven't found a good, reliable way to do one.
Your scarf is just beautiful! I can't get over how lush and gorgeous it looks, and that I was working on something like this myself when I found this video!
Thanks so much, Evie! I am glad you found the video and are knitting a similar project. Regarding lifelines, I agree with you that it would be hard to insert reactive lifelines into the Fisherman's rib stitch. I would recommend inserting "proactive" lifelines (if not familiar with this, please see my video: Adding proactive lifelines: ruclips.net/video/hLdNBLuC1sY/видео.html). Perhaps insert these after say every 6-8 inches of knitting (eg, if knitting a scarf). Hope this helps. Thanks again for watching and best wishes on your project (:
ruclips.net/video/1efRoBnPayM/видео.htmlfeature=shared
ruclips.net/video/1efRoBnPayM/видео.htmlfeature=shared
If I don’t want to do the I-cord edging, is the pattern still the same, minus the first & last 3 stitches of each row?
Really beautiful 👌👌
Thanks, Hardeep! Best wishes 😃
When I do Knit or Purl one below I end up with a bit of extra yarn after slipping the stitch off the left needle.. creating a little bump or loop.. making the stitching uneven. Any suggestions?
Hi Reid, the extra bit of yarn gives the stitch a wonky look at first but after knitting a few rows (or a couple inches), it should look just right. You could try this to tighten up the yarn a bit: after you do a purl one below, when you take the yarn back to do the knit 1, tug on the yarn a bit and that may remove some slack. Can do the same when you bring yarn forward after doing a knit 1 below to do a purl 1 below. Let me know if that works. Thanks for watching the video and trying this stitch! Best wishes 😊
I know it might sound silly but when you do knit/purl 1 below and slide off the stich on the needle, won't that create a bump? Especially if you're using a chunky yarn? Thanks in advance!
Good question, Nimisha! I don't think it will. The thickest yarn I have knit this stitch is with a worsted weight yarn. The stitch causes ridges to form on either side, like in a K1, P1 rib stitch, but the ridges are deeper and fabric formed is more flexible (similar look to the brioche stitch). If you were to you chunky yarn, my guess is that the ridges will be proportionately thicker/deeper but look of the stitch should be the same. Will have to look in my stash to see if I have any chunky yarn to test this out😊 Thanks so much for watching my video and hope you subscribe! Best wishes!
what do you do with the tread you're not using when both are on one side when you start the row?
the right side of the i cord when the light side is facing me is all wrong. can it be that at the second row of the repeat the dark thread should not be in the front because the whole cord seems to get twisted
maybe you could show how you go from the fourth row to the first one again?
Is it normal that i have a dark line on the rightside of the i cord when the light side is facing me?
I'm getting a little frustrated. I got the pattern down, but my i-cord edges are not pretty. I don't understand why. I'm knitting very slowly and actually write down the pattern for each row, and still it's looks wooky on both side. I don't know what I'm doing wrong, I wish I can show you what it looks like. 😩☹
Can i use the cable cast on? If not why? I don't like the long tail cast on because it's not as pretty as the cable cast on
Hi Barbara, yes, you can definitely use the cable cast on (and I am sure will look very pretty) 😊
@@KnittycatsKnits but when i slide the cast on row then both colors are on the same side. Do i turn the after the cast on?
@@barbarashepard6801 Hi Barbara, I am not sure how you are doing the cable cast-on. I tried it just now and it works exactly like the video. For the cable cast on, I do it like doing a knitted cast on, except I insert the needle each time between the 2 stitches on left needle. If you are following the same technique, then your working yarn will end up at the top of the needle (ie, next to the last stitch you cast on). Then, slide stitches to other end, join the other yarn and do the setup row. Once you complete this, now both your yarns will be on the same end (just like in the video). Hope this helps (just realized I don't have a cable cast on video, so hoping to make one and will post it this week).
Hi, I can’t find the description, thus the pattern. Would you direct me to how to get to that area or reply with the pattern?
Hi Brenda, I have copy/pasted below the pattern from the video description. Hope this helps.
Video tutorial on how to knit a 2-color Fisherman's rib scarf with i-cord edges. The finished measurements for the scarf shown in video is 60 inches (length) x 7 inches (width). Pattern for this scarf is provided below. The scarf feels very soft and wears really comfortably around the neck (long enough for one wrap around). Hope you give this a try and let me know in comments how it turned out or if you have questions.
Materials: 1 skein (5 oz, 141 g) each of Caron(R) Simply Soft 100% acrylic yarn (Colors: Blue Mint [lighter color], Pagoda [darker color]); US size 8 (5.00 mm) 16 inch or larger circular needle (or double-pointed needle, long enough to hold the stitches); tape measure or ruler, tapestry needle to weave yarn ends, scissors.
Gauge: 13 sts with US size 8 needles knit in 1-color Fisherman's rib pattern = 3.5 in (unstretched) [Link to 1-color Fisherman's rib video tutorial, which includes pattern in video description]
Abbreviations: K1b=knit into the stitch below; P1b=purl into the stitch below; Sl=slip 1 stitch purlwise; st=stitch; YB=take the yarn to the back; YF=bring the yarn to the front.
Designate the 2 colors as Color A and Color B. For the pattern below and scarf shown in video, the darker color is Color A and lighter color is Color B.
With Color B, cast on 36 sts (I used long-tail cast on, but can use cast on method or your choice). Do not turn work. Slide sts to the other end of needle and do set-up row.
Set-up row (Color A): [K1, YF, Sl1 with the yarn in front, YB, K1], then K1, PI to last 3 sts, then [K1, YF, Sl1 with the yarn in front, YB, K1]. Turn work. [Note: this set-up row is only done once]
Row 1 (Color B): [With yarn in front, Sl1, YB, K1, YF, Sl1], then take yarn back and do *K1b, P1. Repeat from * until last 3 sts, then [With yarn in front, Sl1, YB, K1, YF, Sl1]. Do not turn work. Slide sts to the other end of needle and do Row 2.
Row 2 (Color A): [With yarn in front, Sl1, YB, K1, YF, Sl1], then take yarn back and do *K1, P1b. Repeat from * until last 3 sts, then [with yarn in front, Sl1, YB, K1, YF, Sl1]. Turn work.
Row 3 (Color B): [K1, YF, Sl1 with the yarn in front, YB, K1], and do *K1, P1b. Repeat from * until last 3 sts, then [K1, YF, Sl1 with the yarn in front, YB, K1]. Do not turn work. Slide sts to the other end of needle and do Row 4.
Row 4 (Color A): [K1, YF, Sl1 with the yarn in front, YB, K1], then *K1b, P1. Repeat from * until last 3 sts, then [K1, YF, Sl1 with the yarn in front, YB, K1]. Turn work.
Repeat these 4 rows until work measures approximately 60 inches (5 feet or desired length).
Then do regular cast off using Color B. Weave in yarn ends. Blocking is not needed for this scarf. Optional: can add pompoms (as shown for scarf in video) or tassles at the end. Your scarf is finished. Wear it proudly!
Additional links:
Long-tail cast on: ruclips.net/video/EiSK1gqqNz4/видео.html
Adding proactive lifelines: ruclips.net/video/hLdNBLuC1sY/видео.html
1-color Fisherman's rib scarf: ruclips.net/video/xiNZMcTCKgM/видео.html
2-color Fisherman's rib scarf (no i-cord edges): ruclips.net/video/MBVT0i6d5xA/видео.html
2-color Honeycomb brioche scarf: ruclips.net/video/kY0JqccP5IY/видео.html
Also, check out link below to a video I found that shows how to access video description in a video (on phone or on a computer)☺️ ruclips.net/video/-aVqWSv7NEI/видео.htmlsi=tFgdWAfg6ZbL-UYx
Thank you so much!
Hi! Thank you so much for this video I was so excited to get started and my scarf is looking great! I have knitted the scarf to be about 5feet in length and am thinking about finishing it but wanted to know when binding off which row I should bind off after? I've seen videos where people bind off after row 2 or row 3 and am just confused on which row is should finish on so I don't mess up my scarf. Thank you again!
That's awesome, Darcy! So glad you knitted the scarf. If you followed pattern (as described in video description), then you would bind off at the start of Row 1 (which should be the same color with which you cast on). Even if you changed things up a bit from pattern, essentially just bind off after you have turned work and bind off in same color as the cast on. Hope this helps and hope you get to enjoy the scarf soon. Best wishes😊
@@KnittycatsKnits thank you so much that helps a lot!
I love this. How do I print out the pattern? I am making this with a rose pink and a sparkling black to match my coat. I am so excited
Thanks, Tanya! I have provided the pattern in the video description; sorry but have not posted it elsewhere.
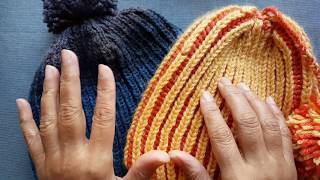
This scarf is gorgeous. Do you have a pattern or video for a matching hat? Thank you.
Such a lovely scarf! I prefer brioche, so how would it work to add the icord on a brioche scarf?
Thanks! Good question about how to add this to brioche. I would think a similar way should work but have not tried this out. I am curious though now (since I too prefer brioche) and would be great to see this in brioche. I will try it out and will get back to you again (and even make a video) in the near future. Thanks for watching and best wishes!
@@KnittycatsKnits Oh, that would be so nice of you, thank you!
It would have been helpful to know that i-cord doesn't work with wool. Had to undo hours of work. It also makes sense only with an odd number of stitches, not even. The two sides will look different with even stitches and that's not what we want, right?
What is a life line and show me how to do it. Thank you so much!
Hi Marcy, check out my video on adding proactive lifelines (it is very easy) ruclips.net/video/hLdNBLuC1sY/видео.html. Hope this helps. Thanks for watching and best wishes 🤗
I am confused: is it on rows 1 and two the I cord edge pattern is slip, k, slip and on rows 3 and 4, it's k, slip, k? Nice fabric.
Hi Cathy, yes, it is slip, k, slip on Rows 1 & 2 and is k, slip, k on Rows 3 & 4. Note that before these rows, in the set-up row, which you only do once, it is k, slip, k. Hopefully the details in the video description will help but let me know if you have questions. Thanks for watching and hope you enjoy knitting this scarf!😊
How do you end it off?
Hope do you keep track of what row your on?
Good question, Llymar. The way the i-cord edge forms, it rolls inward on one side; I consider that to be the wrong side and the side where it rolls outward would be right side. If you follow color scheme as shown in video, then the side facing you when you do Rows 1 & 2 (after doing set-up row) will end up being right side (i-cord rolling outward). Also, the little v-ridges will be in Color A (darker color in my scarf) on the right side and in Color B (lighter color in my scarf) on wrong side. Once you knit Rows 1 & 2, you can attach a clippy marker/safety pin to that side (right side). That can help you keep track of rows. Another trick is to remember that you turn the work only when both yarns at same end; so say you turn work and you are on side where v-ridges are in lighter color, then you know you need to do Rows 3 & 4 next (and if facing right side, then you need to do Rows 1 & 2 next). Hope this helps. I know it can seem complicated but once you knit a few rows, it will get easier to know which row you are on. Also, I edited the pattern to fix the i-cord edge instructions on a couple rows, so please re-check it (video demo is correct). Thanks for watching my videos and best wishes!😊
I was working in a scarf just like this when I saw this video, so I included a link to this video when I posted my project on Ravelry.com. I posted a lot of helpful tips, which might help (and a link to this video). Here’s the link to my project (and I hope it works): www.ravelry.com/projects/truefeather77/ocean-fishermans-scarf
Great! Thanks so much for sharing link on Revelry. Cheers!😊
cast on is multiples of 4? I want to make it slightly wider
Hi Nancy, actually the stitch itself can be knit on an even number of stitches. But if you wish to add the i-cord edge on either side as shown in the video, then add 3 stitches at either end. Hope this helps. Thanks for watching and best wishes for your project!😊
@@KnittycatsKnits yes that totally makes sense. Would i be able to do selvedge edge for the two color fishermen rib instead of the i cord?
@@nancyma1332 Yes, you can omit the i-cord edge and just cast on an even number of stitches and follow the pattern, omitting the part about the i-cord stitches. I think you can get away without adding any selvedge stitches (may want to try a small swatch first). If the edges don't look smooth, can add a single stitch on either end and knit it in each row. Hope this helps. Let me know how it turns out. Best wishes and happy knitting!
I think there is a mistake in the instructions. I finally figure out how to make it look like yours, but it is opposite to the pattern description.
You say to K, S, K on one pass, then S, K, S on the next, then TURN. Wouldn't that come out like seed stitch? (It certainly did with mine.) I think you mean to do one or the other on both passes, then TURN, then do the other on both passes of the other side. That's what makes it look like your sample.
Will this be put up on ravelry?
If you do decide to put it up on ravelry, I'll link it to my project listing, where I have some very helpful hints that will clear up confusion.
Hi Evie, thanks so much for bringing this to my attention. I now had a chance to look at it and have fixed the instructions in the description (thankfully, my video demo was correct). So the i-cord edging is identical in Rows 1 & 2 and is identical for Rows 3 & 4. I have not posted this on Ravelry yet. I am considering a few patterns to post there and hope to do so in the upcoming months. Thanks for watching and best wishes during the holiday season!😊
Hi is the mistake on Row 3 or 4 can someone put correct instruction for this? On my fourth row something is wrong.
@@melissacano8805 Hi Melissa, sorry you are having a problem with Row 4. Actually there isn't any mistake anymore in the pattern shown in the description field and it matches the video demonstration, which is also correct. Please recheck the video demo and let me know if you are still have a problem with Row 4. Thanks and best wishes!
I should have been more clear. When I put a lifeline in and do the next row, the lifeline gets moved into the slip stitch at the beginning and end.. when I unravel to the lifeline I don't know what stitch to pick up. Apologies for the confusion.
Here's what I mean. It uses terminology and language similar to other patterns. See how simple it is and how much easier to read and work from?
Abbreviations:
K1b = Knit into the stitch below
P1b = purl into the stitch below
Sl1wyif = slip 1 stitch purlwise wyif
For this pattern, all slipped stitches are slipped purlwise wIth yarn in front
Stitches in brackets [ ] = 3-stitch icord border maintained throughout
st = stitch
YB = yarn in back
YF = yarn forward.
Designate the 2 colors as Color A and Color B. For the pattern below and scarf shown in video, the darker color is Color A and lighter color is Color B.
With Color B, cast on 36 sts (I used long-tail cast on, but can use cast on method or your choice). DO NOT TURN work. Slide sts back to the beginning.
Set-up row (Color A): [K1, Sl1wyif, K1], *K1, P1* to last 3 sts, [K1, Sl1wyif, K1]. TURN WORK.
[Note: this set-up row is only done once]
Row 1 (Color B): [Sl1wyif, K1, Sl1wyif], *K1b, P1*. Repeat between ** until last 3 sts [Sl1wyif, K1, Sl1wyif]. DO NOT TURN. Slide sts back to the beginning.
Row 2 (Color A): [K1, Sl1, K1], then *K1, P1b*. Repeat between ** until last 3 sts, [K1, Sl1, K1]. TURN.
Row 3 (Color B): [Sl1wyif, K1, Sl1wyif], *K1, P1b*. Repeat between ** until last 3 sts, [Sl1wyif, K1, Sl1wyif]. DO NOT TURN. Slide back to the beginning.
Row 4 (Color A): [K1, Sl1, K1], then *K1b, P1. Repeat between ** until last 3 sts, then [K1, Sl1, K1]. TURN.
Evie Hammond
Thank you for taking the time to correct and clarify the instructions. Her work is lovely, and yet her instructions had me in a muddle. I thought it was just me doing something wrong. You’d be an excellent instructor. ☺️
Thank you.
ok, i' ve seen in the video about brioche with this edge that indeed the two sides don 't look the same. I' ve been trying to find out all week what i did wrong because in this video that fact is hidden
Are Brioche and Fisherman’s Rib the same pattern?
Great question! I have seen some videos on RUclips use these terms interchangeably but they are different. Although they provide a similar look, they are knit up differently. In Fisherman's rib, we knit 'below' the stitch whereas in brioche, we do a "slip stitch with yarn in front" to create a "brioche" stitch (sort of a double stitch), which is knit together as one stitch. If you are interested in trying out brioche, check out my one-color brioche pattern at ruclips.net/video/4E0rLm3_jXU/видео.html. I really enjoy knitting brioche (may look a bit more complicated than Fisherman's rib, but with practice, I actually find brioche easier). Hope you give it a try. Thanks for watching and best wishes!
rows 2 and 3 have the same pattern stitch - they should be alternating every other row
Thanks for the question. Actually, the way the pattern works in this scarf demo, not counting the i-cord stitches, the rib pattern is the same for Rows 2 and 3 and the same for Rows 1 and 4. This works correctly to provide the ridges in one color on one side and another color on the other side (as shown in the video). I hope that helps. Thanks for watching and best wishes!
Your pattern below is blanked out, not displayed
LOL I didn't realize the asterisks would turn some lines *BOLD*. But perhaps that helps? LOLOL
I found your hat video. Never mind.
Thanks, Mary, and glad you found it. Best wishes!🤗
Your work is beautiful, and so is this pattern. Two suggestions: 1) Organize what you're going to say in advance, because you take several minutes at the beginning just to state things that we can already see. You say, several times, "As you can see..." Yes. We can. So there's no need to go overboard verbally about things that are already obvious. That would have saved 4 minutes off the beginning of this video, and would trim the rest.
Thank you for the pattern! It looks lovely, and is exactly the scarf I was making for myself, but I hadn't done it with two colors yet. So Now I can see what it will look like with the icord edging in 2 colors.
Suggestion: 2) Learn standard knitting pattern notations. They're like a language, and will make it much more likely that someone will use this pattern and sing your praises. When you write it all out in different terms, it's harder for people to figure out, and harder to follow as we knit along. I'm going to edit the text of the pattern a bit in a text file, and when I get a chance, post it later to show you what I mean.
Thanks for the comments and suggestions, Evie! Always looking to improve my videos, so will take your points into consideration. Thanks also for posting the alternative version of the pattern (:
Evie Hammond is it really necessary to criticize her way of explaining things, who cares if she says you see i know people who say "you know what i mean" after every few words, you need to be more tolerant of people and not so critical. I do agree with knitting terminology it is rather lengthy but she is teaching and each teacher is different and some of us may need to know yarn in front slip stitch, however all my patterns say sl1pw or sl1kw
Hi and thank you. I have one request of you..would you please slow down?? I am learning from you but I get frustrated, slow the video down, but that is too slow. I assume your heritage is the same as one of my physicians. But he was SO laid back, very well spoken, like you, and he was always laughing, at appropriate times of course, so at ease was I with him. I did ask him why the rush with people of this heritage, he said because to them there is always more and forget that what they have is more than enough. Again thank you for your video's, I am learning from you which I will always do, never too old..
Thanks for the comments! Actually, most people think I talk too slowly in videos, so interesting to hear your experience. The 0.75 x playback speed in the RUclips options may work. But suggestion noted for the future 😊 Thanks for watching my videos and keep on learning (I am a life-long learner too!). Best wishes!
I find slowing to .75 worked perfectly.
Hindi mai
Jaspalji, main plan banaa rahi hoon. Jald hi main videos dono English aur Hindi mein upload karoongi 🤗
**BOLD**