Hi yall, if you're struggling to follow this tut- here is a longer/in detail one: ruclips.net/video/s9RQ83BKcyI/видео.html I've made the Shader available on Blender market for those who want to skip making it- it's $2 (I like pizza) : blendermarket.com/products/lite-water--fake-caustics---shader-an-material-breakdown but- I DO HIGHLY recommend that you at least try and make your own shader, get comfortable with Cycles's nodes. practice makes perfect ^-^
for everyone including me that couldnt do the full cube at 4:11, you just go into edit mode then select all subdivisions by pressing a and hold e while moving your mouse upwards
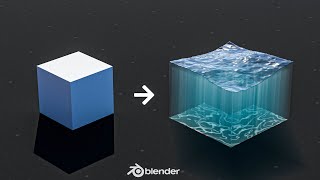
Edit mode for the plane, select all vertices, extrude z up, recalculate outside (normals) is all they did @@gani2546 9 (Tab > a > e > z > click > space > recalculate outside)
you keep track of your time in blender? like its a video game? 1,500 isn't really that much for a thing like blender... that's like what, a year of 4 to 6 hours a day?
THANK YOU!!! Finally!!! I’ve been struggling with fluid sims all week and dealing with massive amounts of unwieldy fluid data + water + particle settings just to get an effect like this. Who knew it was so simple?? This was absolutely all I needed. Wonderful tutorial, nice and thorough with no time wasted - seriously, thank you
Yo! Can people pls tell me how they found this tutorial? Was it via a link or share? Or did ye just search for it? Wanna find out how to make the next tutorial discoverable :)
It was recommended to me as well, because I've been watching every interesting looking Blender tutorial I've seen in the last 3-4 months. It was on my home page, one row down from the top of my recommendations, all the way to the right. The thumbnail looked great and caught my eye. It was definitely the god rays, I'm a sucker for that effect on anything. Hope that helps, feel free to ask any questions, I can give you any specifics you're looking for. :) Oh, and thank you very much for the awesome tutorial, this effect is exactly what I needed for my current project! (subbed!)
The impressive tutorial showed step by step how to set up lighting. However, I believe you should not have skipped over the part you start playing with a solidifying modifier on the ocean to get that "Full" volume of the water presented at the end of the video. I have no idea how you set it up and running video at 0,25 speed does not help a lot. I'm interested to see how you managed to hide sticking our parts of the solidified ocean beyond your tank mesh. In my renders, I can see sticking out parts through my ocean sandbed. That part is extremely important for water to look believable.
@@henkiepenkie3372 I haven't found anything. Honestly, I do a Principled volume with a color ramp and gradient. I think blender might've had an update since this video came out and its a new thing.
@@Tweaks I found out that your plane won't solidify (and therefore can't extrude) when you've got your ocean set to "Generate" instead of "Displace". at least that was my problem, so i hope that helps you ;)
Thanks man. Great tutorial and good pace too. Would love to see how you set up your scene, particularly lighting, because as soon as I try extrude my water plane and use boolean to neaten it up, I completely lose the caustics and rays. Update: After going nuts for ages, I tried a different light source. I removed the sun and added a point light above the water and got beautiful rays through the water. No idea why the sun didn't work.
Also where the shadows fall is where your caustics should land. So make sure you have a surface for them to land on. Slow the tut down so you can atleast see some snippets of the scene setup
You are such blessing. You saved me, I have some scene, I spent good time in it but it wouldn't work without your lovely amazing tutorial. Love you man
Booleans. Extrude the water plane to make a solid cuboid sorta shape, add a cube of the required size, select your water cuboid and add a boolean modifier
for those wondering it is possible to do this without using displacement, for example i am using noise texture, but instead of plugging in the normal from the geometry node you have to plug it in from whatever you are using for the normal socket of the principled bsdf (in my case the nose texture plugged into bump node). you also won't be able to do the volume stuff with the godrays but you can still get the caustic effects
Thank you so much, i was working on an underwater scene and this just took it from "ooh that looks underwater" to "goddamn it so pretttyyyyy" Thank you.
I did it step by step but it doesn't work for me, i have a black water, even if i change all of the parameters, i don't know if its me or a blender update. But great tutorial ! 💙
Nice! Literally found your channel 2 days before Pewds posted your duck video by looking for water tutorials on blender. Glad to see your channel has grown since then! [ just started blender! ]
if you want to do an underwater scene without worrying too much about the water using up too much gpu memory, render a water tank as shown here that covers the entire screen as well as having an alpha background. After finishing the underwater ray animation, render the actual scene (ocean floor, fish, submarines) and composite the alpha water tank animation on top of the main scene in your video editor.
Thank you man for this tutorial & for taking time to even make an extended version with some additional candies! Yay, how beautiful your shader magic looks! \o/
Love it. I think the RUclips algorithm uses witchcraft. I'm making a video about a waterworld exoplanet, and this video pops up in my suggested videos. I'm definitely using this idea, thanks very much!
Hi, This is a great tutorial. I was following it because I need a scene in my current project that takes place underwater, and I need those light rays that come down from the surface. In your product, they look amazing, but I wasn't able to create it. Could you let me know which values need to be adjusted in order to improve that effect? thanks again for the tutorial. :)
I just followed the longer version, and I think my issue was that I didn't use a sky texture in the world material before, but they're still not very strong, so some advice would be welcome. :)
Looks real to me, nothing's real in 3D though. So much possibilities that could be created using ocean modifier, can't wait to explore it. Great job 👏🏼
can you do a tutorial on how you did the last parts? im so bummed halfway into the turorial i cant make what you made. i only made the water part and the node stuff.
Thank you for making this tutorial! I tried this project. But, I have no idea of this scene 4:17. I used Boolean and create water cube. but, the surface includes white noise like drawing a lot of line. If you have the solution, please tell me how to solve.
@@scrub-x2649 yo boss im also having the same issue whenever I apply an apply scale to my water it turns into a like chizzled block, completely breaks the wave sim, by any chance do u know what would be causing it
YOU KNOCKED IT OUT OF THE PARK BRUH!!!!! AMAZING!!!! ONE OF THE BEST HACKS EVER!!!!! Could you please explain me how did you manage to do a clean cube with the Ocean modifier? I tried to use Solidify but it creates a mess
DUDE! where were you a few months ago when i was trying to do this and ended up using like... pre-rendered caustics from some software and like... Gobos? lol. nice tut! thanks!
Im always intimidated by Shaders. It always make me wonder how u guys play with them so easily. Could I get a tip on mastering shaders like you? Thanks for the video though. Subbed:)
As-salāmu‘alaikum, I thank you for the knowledge. May I imitate and modify this method for commercial purposes?? without including your name / youtube name??
Confusing shader, but it's a good one. Also if you willing to, please make a tutorial about eevee lighting trick for bright interior, with less use of hdri? Cause I wondering why is eevee rendering tutorial almost producing dark mode lighting than bright lighting?
Also just a super quick question for you - how did you get the foam on top to show exclusively on the top of the water? I'm trying to use a mix shader with the foam data + diffuse material, and it's extruding the foam along the sides of the cube....
I'd avoid the foam data and just use a normal+color ramp setup to layer a bubbly diffuse. It saves a lot of headaches If you insist on foam data Use an attribute node for foam data, but extrude the plane downwards and make sure your normals are correct. Also best to have foam baked to disk cache and use image sequences instead of data.
@@oby1 Thanks for super fast response! I didn't realize you could do that without foam data, that's sick! Where should I plug the normal + color ramp into in that case?
@@jacquelineF8C8DC after your glass/water shader. Mix node- normal ramp setup as factor, and a diffuse with a bubbly noise feel to it as the shader overlayed. Make sure that normal node is plugged into a normal output from a geometry node
I feel something is off in blender 4.1 when I use volumetric scatter, I need to use numbers of 0.00001 and it still shows very dark water. Not sure what's happening. I did set the top shader surface to shader caustic and a receiver to the a pool wall. Perhaps the combination is causing the issue


Hi yall, if you're struggling to follow this tut- here is a longer/in detail one:
ruclips.net/video/s9RQ83BKcyI/видео.html
I've made the Shader available on Blender market for those who want to skip making it- it's $2 (I like pizza) : blendermarket.com/products/lite-water--fake-caustics---shader-an-material-breakdown
but- I DO HIGHLY recommend that you at least try and make your own shader, get comfortable with Cycles's nodes. practice makes perfect ^-^
how did u learn blender
@@IsekaiAMV999 probably tutorials also or read about blender
@@bwaaah6086 damn u replied mi after 3month😅🙄🙄
@@IsekaiAMV999 ah ikr he goes so fast he’s like a pro
this aint a tutorial. its just you gawking at the screen XD
for everyone including me that couldnt do the full cube at 4:11, you just go into edit mode then select all subdivisions by pressing a and hold e while moving your mouse upwards
thanks mate 🙌
Looks completely different when I do that
Edit mode for the plane, select all vertices, extrude z up, recalculate outside (normals) is all they did @@gani2546 9 (Tab > a > e > z > click > space > recalculate outside)
It doesn't have to be accurate it just has to look cool, best advice ever given
0:15 So that's what the final resting place of all the deleted cubes looks like huh? man, look at all those cube corpses! 😹
Yeah and this place is nuked every 3 minutes. It's called Hell.
This guy is on another level, I literally have 1500 hours on blender and this guy is doing things that I barely can keep up with
you keep track of your time in blender? like its a video game? 1,500 isn't really that much for a thing like blender... that's like what, a year of 4 to 6 hours a day?
Are you kidding? This is the best Blender tutorial ever! I love the spectacular delete!
THANK YOU!!! Finally!!! I’ve been struggling with fluid sims all week and dealing with massive amounts of unwieldy fluid data + water + particle settings just to get an effect like this. Who knew it was so simple?? This was absolutely all I needed. Wonderful tutorial, nice and thorough with no time wasted - seriously, thank you
I love he cube entering the rest of the lost cubes in the start XD
omg, this was amazing, i was finding this for last year project, and I got it now... still the best idea and tutorial, thx Oby !
Ah yes the deleted cube has joined the other deleted cubes and is living happily with them
dude!! making water in blender drives me crazy!!! you saved me bro!! GREAT WORK!!!!!!
The default cube scene was funny. They just get sent to a new dimension.
But great tutorial btw
Yo! Can people pls tell me how they found this tutorial? Was it via a link or share? Or did ye just search for it?
Wanna find out how to make the next tutorial discoverable :)
Well it was recommended for me
It was recommended to me as well, because I've been watching every interesting looking Blender tutorial I've seen in the last 3-4 months. It was on my home page, one row down from the top of my recommendations, all the way to the right. The thumbnail looked great and caught my eye. It was definitely the god rays, I'm a sucker for that effect on anything. Hope that helps, feel free to ask any questions, I can give you any specifics you're looking for. :)
Oh, and thank you very much for the awesome tutorial, this effect is exactly what I needed for my current project! (subbed!)
It was recommended for me..
and also It's very Cool dude
I simply typed "caustics blender" in the search bar on youtube :)
@@davinsaputraartandgamedev9453 sadly eevee will only do volume rendering in box forms- so it wont adhere to your actual geometry
0:20 i love this little skit here, mostly because it is where every single deleted started cube goes when starting a new project.
The impressive tutorial showed step by step how to set up lighting.
However, I believe you should not have skipped over the part you start playing with a solidifying modifier on the ocean to get that "Full" volume of the water presented at the end of the video.
I have no idea how you set it up and running video at 0,25 speed does not help a lot. I'm interested to see how you managed to hide sticking our parts of the solidified ocean beyond your tank mesh. In my renders, I can see sticking out parts through my ocean sandbed. That part is extremely important for water to look believable.
Yeah I also had this problem and did the exact same thing where I slow down the video.
i've got the same problem
Have you found a solution?
@@henkiepenkie3372 I haven't found anything. Honestly, I do a Principled volume with a color ramp and gradient. I think blender might've had an update since this video came out and its a new thing.
@@Tweaks I found out that your plane won't solidify (and therefore can't extrude) when you've got your ocean set to "Generate" instead of "Displace". at least that was my problem, so i hope that helps you ;)
Thanks man. Great tutorial and good pace too. Would love to see how you set up your scene, particularly lighting, because as soon as I try extrude my water plane and use boolean to neaten it up, I completely lose the caustics and rays.
Update: After going nuts for ages, I tried a different light source. I removed the sun and added a point light above the water and got beautiful rays through the water. No idea why the sun didn't work.
Up your sun!
Also where the shadows fall is where your caustics should land. So make sure you have a surface for them to land on. Slow the tut down so you can atleast see some snippets of the scene setup
@@oby1 Tried that. Did nothing. As soon as I swap the sun out for a spot, point or area light, I get great rays. Very strange.
That pile of discarded cubes!! So great
Recommended, but I’ve been searching for Blender tutorials and I’m glad your one came up
For those who have problem with Boolean causing no god ray at sides, add a modifier called Smooth by Angle to Ocean object.
Genius! Thanks for letting folk know
You are such blessing. You saved me, I have some scene, I spent good time in it but it wouldn't work without your lovely amazing tutorial. Love you man
That was the funniest delete cube ever
I love the cube dump animation in the beginning, that's hilarious! :-D
Thank you so much, probably the best Blender tutorial I've watched
Aaww. Glad I could help!
There is a 20min version of this, if you're struggling at some bits
Google brought me. Brilliant video! This was just what I was looking for. Thank you.
I very enjoy the noise rock track you uploaded!
(ah, about the rest - I am too noob to understand it yet)
i just want to know how to make the waterbody in a box shape
Booleans. Extrude the water plane to make a solid cuboid sorta shape, add a cube of the required size, select your water cuboid and add a boolean modifier
@@defferos1801 mans got a lot of knowledge
@@drawing3510 and it is to be shared with all
Same
I wish I can have this material of the Water with Light Ray like yours. Because it's so realistic as I never imagined.
Nice bro, short and simple which helps with retention. Definitely going to use this
Fantastic! 10/10. Thank you for sharing!
for those wondering it is possible to do this without using displacement, for example i am using noise texture, but instead of plugging in the normal from the geometry node you have to plug it in from whatever you are using for the normal socket of the principled bsdf (in my case the nose texture plugged into bump node). you also won't be able to do the volume stuff with the godrays but you can still get the caustic effects
I don’t use blender I just like watching the water. It’s so beautiful
Thank you so much, i was working on an underwater scene and this just took it from "ooh that looks underwater" to "goddamn it so pretttyyyyy" Thank you.
It was great up until the very end where I had extreme trouble following anything you were doing.
hahahaha everyone should use this deleted cube animation in their tutorials! awesome!
This is an insanely useful tutorial, thank you!
I did it step by step but it doesn't work for me, i have a black water, even if i change all of the parameters, i don't know if its me or a blender update. But great tutorial ! 💙
Wow, this is phenomenal, thank you! This video was a suggestion on my RUclips Feed.
Nice! Literally found your channel 2 days before Pewds posted your duck video by looking for water tutorials on blender. Glad to see your channel has grown since then! [ just started blender! ]
if you want to do an underwater scene without worrying too much about the water using up too much gpu memory, render a water tank as shown here that covers the entire screen as well as having an alpha background. After finishing the underwater ray animation, render the actual scene (ocean floor, fish, submarines) and composite the alpha water tank animation on top of the main scene in your video editor.
excellent, now i can render my shark model underwater
Thank you man for this tutorial & for taking time to even make an extended version with some additional candies! Yay, how beautiful your shader magic looks! \o/
amazing ty, i would be lost without these tuts
Thanks for showing this very helpful tutorial and happy blending with Blender 3D
Nice workaround! Cycles is such ass when it comes to caustics! This is a really clever solve!
RUclips Recommended: Because I have a lot of subs for tutorials with Blender.
That's exactly what I was looking for ! Thanks.
...fine
Hey I really love your work! Great Tutorial and delivered at a great pace! Please make more. Great to see a fellow SA You-tuber out here 👍🏾
the best blender tutorial ever
great idea about "deleting the default cube", lol!!!!!
Okay note to self: start with the basics of blender instead of going straight to this
lmao I remember trying to make a fully fledged 3d animation with a complex rig..
While not even knowing what pose mode is.
@@Cyanidedan how did it work out in the end? because I have a tendency to do those things
Thanks man, I really needed this tutorial
YT recommend. Best blender tutorial ever
1:37 how did you add that extra dot? what keys did you press?
Am new to Blender can you please do a remake explaining step by step showing what keys you are using.
wow. This is what I was actually looking for
Love it. I think the RUclips algorithm uses witchcraft. I'm making a video about a waterworld exoplanet, and this video pops up in my suggested videos. I'm definitely using this idea, thanks very much!
Hi, This is a great tutorial. I was following it because I need a scene in my current project that takes place underwater, and I need those light rays that come down from the surface. In your product, they look amazing, but I wasn't able to create it. Could you let me know which values need to be adjusted in order to improve that effect? thanks again for the tutorial. :)
I just followed the longer version, and I think my issue was that I didn't use a sky texture in the world material before, but they're still not very strong, so some advice would be welcome. :)
Man that music is like fingernails down a blackboard.
this is awesome dude!
Looks real to me, nothing's real in 3D though. So much possibilities that could be created using ocean modifier, can't wait to explore it. Great job 👏🏼
Hello, nice vid!
Do this work with Eevee?
This tutorial is absolutely amazing !
Love the tutorial! Thank you so much! One thing though, is it possible to start showing the final result of the nodes?
You really are talented
Godrays? Ha! This guy's doing Godswork! Thanks for the tutorial
This is beautiful man.. 👍🏻
Very good and clear tutorial. Thanks a lot!
I'm a newbie but still gonna give this a try
how would it look with lightning under water?
Cool trick! The node system is insanely powerful if you know how to use (abuse?) it. Thanks for sharing!
can you do a tutorial on how you did the last parts? im so bummed halfway into the turorial i cant make what you made. i only made the water part and the node stuff.
You got pizza. It a great tutorial!
that's an amazing tutorial ! ty a lot !
thank you so much
So that's where all the default cubes go 😂
Thank you for making this tutorial! I tried this project. But, I have no idea of this scene 4:17.
I used Boolean and create water cube. but, the surface includes white noise like drawing a lot of line.
If you have the solution, please tell me how to solve.
Thanks m8, you solved a great mystery. Cheers
How do you resize water at the end? I've been trying to do that for a while but i can't seem to be able to!
U can use boolean
Haven’t tried yet but maybe control a apply scale?
Add solidify modifier than do a Boolean modifier
@@scrub-x2649 yo boss im also having the same issue whenever I apply an apply scale to my water it turns into a like chizzled block, completely breaks the wave sim, by any chance do u know what would be causing it
this is a realy nice tutorial ...thx
your video is good... but please slow down the video speed, so we can see the commands follow the steps... =((
I wish there were a good way to do caustics in Eevee
YOU KNOCKED IT OUT OF THE PARK BRUH!!!!! AMAZING!!!! ONE OF THE BEST HACKS EVER!!!!! Could you please explain me how did you manage to do a clean cube with the Ocean modifier? I tried to use Solidify but it creates a mess
Just extrude it and use an inverted boleen cube to cut it it into a neat cube
ong the most helpfull tutorial!!!
Amazing, thank you!
I love this tutorial.. greath job.. quick and simple
DUDE! where were you a few months ago when i was trying to do this and ended up using like... pre-rendered caustics from some software and like... Gobos? lol. nice tut! thanks!
Really useful trick thanks for sharing
This is using the Ocean modifier right? Which means it won't interact with the duck as a simulation would?
This is literally the worst choice of bg music I ever seen, lol
This is awesome! Thank you.
Im always intimidated by Shaders. It always make me wonder how u guys play with them so easily. Could I get a tip on mastering shaders like you?
Thanks for the video though. Subbed:)
Waitwaiteaitwait, how did you cut the line at 1:37?
Hold shift, and right click (just like the slice thing to cut nodes) across the nodes you want to link
As-salāmu‘alaikum,
I thank you for the knowledge.
May I imitate and modify this method for commercial purposes?? without including your name / youtube name??
Exellent , but please how did you animate the moving waves after applying the modifier ? (i am stuck ,help please)
Hi thank u very very much u solved my biggest problem
How do you do the box at the end? I really like the concept
Yeah i still don't know how he die it 😂
Confusing shader, but it's a good one. Also if you willing to, please make a tutorial about eevee lighting trick for bright interior, with less use of hdri?
Cause I wondering why is eevee rendering tutorial almost producing dark mode lighting than bright lighting?
For all interiors, cycles or eevee. Best to light it directly with lamps. Not hdris
the next time use de add on for the keys ;0
Also just a super quick question for you - how did you get the foam on top to show exclusively on the top of the water? I'm trying to use a mix shader with the foam data + diffuse material, and it's extruding the foam along the sides of the cube....
I'd avoid the foam data and just use a normal+color ramp setup to layer a bubbly diffuse. It saves a lot of headaches
If you insist on foam data
Use an attribute node for foam data, but extrude the plane downwards and make sure your normals are correct. Also best to have foam baked to disk cache and use image sequences instead of data.
@@oby1 Thanks for super fast response! I didn't realize you could do that without foam data, that's sick! Where should I plug the normal + color ramp into in that case?
@@jacquelineF8C8DC after your glass/water shader. Mix node- normal ramp setup as factor, and a diffuse with a bubbly noise feel to it as the shader overlayed.
Make sure that normal node is plugged into a normal output from a geometry node
@@oby1 Siiiiick! I got it!! Thanks again for this awesome tutorial and for the advice. Definitely subscribing!!
@@jacquelineF8C8DC awee. Send a screenshot on imgur! Curious on your result ^-^
Love the music 🎶 😉
I feel something is off in blender 4.1 when I use volumetric scatter, I need to use numbers of 0.00001 and it still shows very dark water. Not sure what's happening. I did set the top shader surface to shader caustic and a receiver to the a pool wall. Perhaps the combination is causing the issue