Filling Objects is Easy Now (Blender Tutorial)
US
Войти
A Powerful Motion Graphics Concept in Blender!
18:23
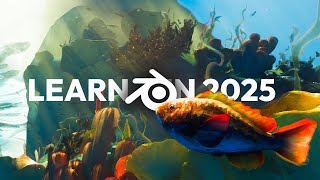
The BEST Way to Learn Blender in 2025
9:47
Inflated Objects using Geometry Nodes
10:25
SIDEMEN AMONG US MAGE ROLE: CAST A LIGHTNING STRIKE TO WIN
45:06
This Month Was Tough on Us..
25:39
The Most Illegal Baseball Bat Ever Created
20:02
Filling Objects is Easy Now (Blender Tutorial)
Ducky 3D
Подписаться
593 тыс.
Скачать
Готовим ссылку...
Просмотров 87 тыс.
0
0
Добавить в
Мой плейлист
Посмотреть позже
Поделиться
Поделиться
HTML-код
Размер видео:
1280 X 720
853 X 480
640 X 360
Показать панель управления
Автовоспроизведение
Автоповтор
Опубликовано: 4 фев 2025
Комментарии • 172
Следующие
Автовоспроизведение
18:23
A Powerful Motion Graphics Concept in Blender!
Ducky 3D
Просмотров 42 тыс.
9:47
The BEST Way to Learn Blender in 2025
Ducky 3D
Просмотров 116 тыс.
10:25
Inflated Objects using Geometry Nodes
Robbie Tilton
Просмотров 64 тыс.
45:06
SIDEMEN AMONG US MAGE ROLE: CAST A LIGHTNING STRIKE TO WIN
MoreSidemen
Просмотров 3,9 млн
25:39
This Month Was Tough on Us..
PewDiePie
Просмотров 1,8 млн
20:02
The Most Illegal Baseball Bat Ever Created
Baseball Doesn't Exist
Просмотров 293 тыс.
02:18
Death Of A Unicorn | Official Trailer HD | A24
A24
Просмотров 1,2 млн
8:41
Creating a beautiful ships art blender Cycles / Photoshop [Concept art] Returning Home
Alex Pi
Просмотров 26 тыс.
10:09
Lego anything with this NEW Blender geometry nodes feature
Joey Carlino
Просмотров 2,6 млн
7:14
text particles in blender /How to convert text into particles / blender tutorial
tutblender
Просмотров 2,3 тыс.
12:41
How YOU Should Learn Blender In 2024!
Ducky 3D
Просмотров 799 тыс.
10:25
10 Minute Tutorial - Abstract Sci-Fi Animation in Blender 3D
Ducky 3D
Просмотров 91 тыс.
22:39
You Should be Using Proximity in Your Animations (Blender)
Ducky 3D
Просмотров 94 тыс.
15:51
How to Avoid Object Intersection | Blender Geometry Nodes Tutorial
Kenan Proffitt
Просмотров 41 тыс.
19:29
10 Minutes vs. 10 Years of Animation
Isto Inc.
Просмотров 1,6 млн
9:38
Blender - Filling Up A Candy Jar | Rigid Body Simulation | Cycles | CG Professor
CG Professor
Просмотров 18 тыс.
01:02
Живу 24 Часа Как Дональд Трамп #трамп #челлендж #серый #24часа
Sergio Nee
Просмотров 484 тыс.
00:30
New Colour Match Puzzle Challenge With Squid Game 2 - Incredibox Sprunki
Music Playground
Просмотров 2,8 млн
00:53
спидран по ютуб шортс 107 | Амёба поедающая мозг
i11ushenka
Просмотров 2,8 млн
9:29:21
Day 2 | IEM Katowice 2025 Group Stage | 🎙КРИВОЙ ЭФИР
SL4M & Counter-Strike
Просмотров 290 тыс.
01:03
У Этого ПАУКА Есть Собственный ПИТОМЕЦ! #shorts
Bubble™
Просмотров 487 тыс.
27:51
В Москве взорвали главу батальона «Арбат». Набиуллину вызовут на допрос. Сбой сайта Мос.ру
Телеканал Дождь
Просмотров 509 тыс.
01:00
На ТАКОЙ ПОСТУПОК способен только человек с по-настоящему ДОБРЫМ СЕРДЦЕМ #shorts
BalcevMMA_BOXING
Просмотров 1,8 млн
00:38
Виселица Hangman #boardgames #настольныеигры #games #игры #настолки #настольные_игры
Двое играют | Наташа и Вова
Просмотров 850 тыс.


![Creating a beautiful ships art blender Cycles / Photoshop [Concept art] Returning Home](/img/1.gif)