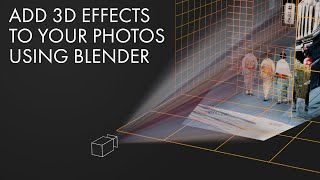
How to turn any 2D image into 3D! - Fspy/Blender Camera Projection Beginner Tutorial

HTML-код
- Опубликовано: 21 авг 2024
- Fspy - fspy.io/
Fspy Blender Plugin - github.com/stu...
Blender - www.blender.or...
Connect with me!
Website: massimo.produc...
IG: / mv.nyc
TikTok: / mv.nyc


the amount of high quality, mind blowing information in this tiny 8min video is simply INSANE
You my good sir have gained yourself a new follower. This has been earned by: production value, how clear it is to follow and last you are a 3D brother. Keep up the good work.
woooow another level tutorial
This type of Blender tutorial is fantastic! MORE PLEASE
Will do ;)
Insanely cool that you can basically move around now and actually see what the graffiti looks like straight on too. Like I get why that works but seeing it is mindblowing
thanks for your tutorials bro, you are really creative. keep up the good work!
Bro this is mind blowing I thought Camera projection is like an super fast way to make 3D models to fill the scene (Ian Hubert's lazy tutorials tells me this) but idea that you can use it like this is super cool thanks for the tutorial!!
Your welcome! Im sure you’re referring to photogrammetry and modeling from image textures to create assets, that’s how Ian does most of his work. Similar idea but different processes! But I’ve seen Ian use camera projection here and there…
@@mv_nyc yeah I was talking about modeling from image texture not photogrammetry coz photogrammetry can take much longer time if you go out and photoscan objects and than process them to make 3D models!
This is really time saving thanks for sharing the wisdom. I saw it from other channels too but your detailed instructions are on my list to try! I create environments and I have jumped in 3D space new nowadays absolutely will try this technique!
That's my neighborhood train station! Nice!
Great video. I 've seen fspy tutorials before but the last part about distorting the shape is really cool!
EXACTLY what I was looking for! Thank you! This used to be so easy in a Projection plugin for FCP but went broken by system update years ago. Now of course when I actually have a reason to use it, had to find another way. Perfect!!!
Excellent job explaining, and really good examples for the distortions. The power of these tools really stands out. Thank you!
the best tutorial for fspy camera projection, you made easy, thank you
Why is the view of this video so low? This video is mind blowing...!!
Thanks for making and sharing this video. Content-wise it was what I needed for an introduction to FSpy. But beyond that, I found the pace the ideas and procedures were presented, and your audio very clear -- you're a good speaker. Finally, your enthusiasm is infectious. All together I feel confident exploring FSpy after watching your tutorial. Cheers!
Maybe I am dumb but I have watched 4 tutorials on how to plot the axis and they were only confusing me and i know perspective from art. But i had no idea what the purpose was of doing it within this program so i kept second guessing everything.
You explained it with context to what the objective and outcome of the placements mean.
I will sub to your channel but thank you sincerely for this.
Good demonstration
BRO I LOVE YOUR CONTENT TYSM
Seeing 191st tunnel in a blender tutorial caught me so off guard.
siempre vuelvo, que pedazo de video..!!!
thank you some much!!! U R THE BEST!!!
GREAT TUTORIAL!!! NICE NICE
wonderful presentation and awesome details ; really exploratory keep it going
its like magic
Dude, you explained so well
Beautiful tutorial!
You have a new fan.
I’m going to try this right away.
Unbelievable 😳
this is a really good tutorial
Magic!. Beutifull!.Thanks, from Argentine.
Mind blowing 😮🤯🧠. Would be so amazing if you could do s tutorial for noobs slowing down all you did.
Super cool effects! Great video!
Cool! The texture part in the back is exactly what I needed! Thank you master!👍
Thanks man
Straight to the point, need more tutorials like this. Subscribed!
thanks im gonna try this
what a great tutorial man,! earned a subscriber immidiately!
Thank you, really inspiring, not knowing so much about 3d, would love to have your knowledge:) thanks for sharing
BRO IF COULD LIKE 100 TIMES I WOULD BRUH SAVE ME A LOT OF TIME
ohh yeahh! thanks for the magic !
cool effect, good job on being so clear on the explanations
Ok that was absolutely cool!!!!! Thank you
Cool! Thanks
straightforward explanation, thank you!
Every tutorial I’ve seen is always interior. How do you do an exterior like a house. How do you project it on the outside and not the inside? Thanks.
yo!!!
fire
fantastic the best tutorial on this subject
Ypu are very helpful you now have one extra follower keep the good work really appriciate the effort and the way you educate us
Excellent tutorial. Many thanks.
Very complete tutorial !! I was looking for something like this :)
Tutorial perfetto per il mio apprendimento...
Thank youuu 👏🏻👏🏻👏🏻👏🏻👏🏻
Great tutorial thank you
this is really cool. thank you!!
Great tutorial - Amazing!!
Glad you got something out from it!
Such a great tutorial!
Awesome! Thank you for this tutorial! This gives me so many ideas!
damn, found your video in a very good time. well done tutorial, gotta try it.
Brilliant! Thank you
Thank You :)
thx :)
Why is the sphere you added not casting shadows? I really like your simple and easy to follow tutorial but I also wanted add something in the scene but any object I add does not casts any shadows. Would you mind if you could tell me, why is not the model we created for the hallway having casting shadow issues? Thank you so much for this tutorial btw.
Jeeeez this is cool
Fantastic!
I don't know why, but when I followed this exactly, Fspy wouldn't place Z up unless I used the Y axis for horizontal. Other than that, it kind of worked. Thanks. This is awesome stuff to know.
Great video!
Thanks man!
Amazing !
Hey bro thanks for tutorial but fspy addon is not working in blender 3.20 is it work in any specific blender version please reply
When in doubt I go back to 2.93.1 to import. Then I save and open in the latest version. Hope this helps.
@@mv_nyc Thanks brother 😊
Thanks
Works well with no furniture
This is very nice and simple. You earn my like and sub
thanks!! new follower
❤❤❤❤
coool !
w tutorial
what about adding shadow to the ball on the surface
Amazing video !! but my referenced image disappear when i move. could you help me pls !!
You can reactivate the camera perspective view by pressing 0 on the numeric keypad
Ace!
I'm trying to understand how the end result would have been any different if you skipped Fspy and just started right out with that Blender modelling and mapping.
Nice Tutorial, but how do we make the ground catch shadows?
Still figuring that one out myself. A workaround would be to duplicate the geometry, make it a shadow catcher and recreate the lighting in the scene as a separate render pass.
I cannot achieve this result, my photo is also a plunging photo but representing a railway track with an embankment around it and a bridge at the bottom, if you look from the side the photo is very stretched
how do we add shadows if we import in an object like a car?
I have flickering on my screen blender after I imported the FSpy file.
W video
I completed the animation but it's not rendering to video.
Although its rendering as pngs.
Can anyone help?
In the output properties, change your file format to the desired file type
This is awesome! Great tut! How do you add shadows back in with a 3d model? I have shadow catcher on the plane, but I don't see a shadow. Thanks
When I make a sphere with a metallic surface and no roughness it does not reflect the image, advice? Awesome vid btw.
amazing tutorial - when I add the uv sphere and attempt to do the whole reflection thing, it's reflecting a default hdr scene. How would I tell my uv sphere to base its reflections off of my scene like you did?
If you're using EEVEE make sure to enable Screen Space Reflections under the render settings tab. Also click on the arrow to the right of the rendered view mode button and make sure scene world and scene lights are enabled
Nice one bro, How to you catch a shadow of a CG object in this shader?
Still figuring that one out myself. A workaround would be to duplicate the geometry, make it a shadow catcher and recreate the lighting in the scene as a separate render pass.
Do you guys know if it works with a drawing ? like in an animation movie background in fspy will it work ?
will the reflection only work with a new object? what if you have one alreay made and want it to reflect your 3d environment? i follwed your steps but it still reflects the default environment. please help.
Why not unwrap and project from view?
2:57 if I even dare to move the camera one nanomillisecond, the picture instantly dissappears but you're just fine, how?
My shadows don't show on the material, how do you fix this :)?
Maybe I can just use a shadow catcher plane
Is it possible to push the active camera "down the tunnel" and the image remains on the model or do you have to physically move down the tunnel to take pictures for proper texturing? If that makes sense.
From what I understood you need to add a second camera and make it the main camera, which then you can use to move it around without having the whole texture wiggling around with it.
First of all: Thank you for this great tutorial! You did a really good job on explaining the steps in a way, I could follow them! I have only one question: Is there an issue in newer Blender versions regarding the Transparent BSDF Node? Because the black parts won't go away, even though I've rebuild your shown node setup identically.
Are you using EEVEE? If so you have to set in the shading tab to alpha clip/hashed. I think either works
@mv_nyc thanks! You're right. I accidentally used Eevee. Now that I switched to Cycles, the black parts disappear 🤘
Any idea why your image quality after the projection is done is so crispy clear but my image quality gets a bit blurry and looses that sharpness? I've been searching for months to know what is wrong and I'm still confused. and I made the image 4k and then 8k but no change at all.
When I go to import my fspy into Blender, I see the image but as soon as I move around, the image disappears and I don't know why :(
How did you move the camera around, not getting mine to move around like yours although I click G the X or Z, Y etc