Pokeys57CNC and Mach4 Part 2: Connecting a Stepper Motor and Driver

HTML-код
- Опубликовано: 31 мар 2020
- This is the second video in a series of videos dedicated to connecting the Pokeys57CNC CNC controller to the Mach4 CNC software. In this video, I connect a single stepper motor and stepper motor driver to the Pokeyts57CNC. Since each motor and driver connection is pretty much the same, I show you how I connect the single motor and driver and you should have no problem connecting more.
I upload to Instagram very frequently and add great informative content as well as customer test videos. Make sure to follow me on Instagram at:
/ buildyourcnc_newbiehack
I upload to Instagram very frequently and add great informative content as well as customer test videos. Make sure to follow me on Instagram at:
/ buildyourcnc_newbiehack
The drivers can also be found on both of the following links.
Link to the Mach4 CNC Control Software:
buildyourcnc.com/item/control...
Link to the Pokeys57CNC CNC Controller:
www.buildyourcnc.com/item/ele...
Link to the driver seen in this video:
www.buildyourcnc.com/item/ele...
Link to the 48V 10A Power Supply seen in this video:
www.buildyourcnc.com/item/ele...
Official Buildyourcnc.com website:
www.buildyourcnc.com  Наука
Наука


Hey Boss, I am a hobbyist. Your atmel microcontroller tutorials got me started in digital electronics. Haven't achieved anything except a lot of FUN.
I have been watching you for over two years now, and I have nothing but respect to you. Thank you very much for making me love electronics and CNC in general. I have learned many things from you. God bless you. By the way, I bought my pokeys57CNC after watching your videos :)
Thank you so much for those very kind words. This brings great motivation!!
Thanks, my pokeys57cnc just arrived!!!these videos will help a lot!
Very informative so far. I watched all your MACH3 tutorials and I'm assuming bits can be transferred over (with the exception of in-software settings), but I'm eagerly awaiting the rest of your videos so I can put a parts list together for a large-scale CNC mill for Aluminium and various softwoods.
So, what I'm really saying is: keep up the good work, and thanks for the help!
Thank you for the great videos! When can we expect part 3?
I'm following step by step your tutorials, they're so clear, I haven't seen anything like them before, you are a very good teacher, thank you so much, If I could ask you, can you explain how to make the axes homing in the Mach3 USB controller card, because you have explain the limits switches connections, but not the homing.
nice one.
please make a video for MK3/4 controller board.
Good job ... love your videos
Can you help to to develop “Jalebi Making machie” Jalebi is an indian sweet you can search on internet there is a machine available and most probably they are using mach3 i guess. Please have a look on that video so we discuss more about it
@@mukulmalviyaaa Those machines are single purpose machines and probably not used in conjunction with a CNC controller or CNC sosftware. IF you know of a machine like that which does use CNC control, please let me know.
Hey,
ruclips.net/video/KOlQ-uQ4HjE/видео.html
Here is the link of machine tht we discussed above. I have only one question to ask ... which software is used to design such patterns is it possible in NX or Solidwork or ArtCam?
thanks a lot for your video. Is it possible to run multiple stepper motor drivers with only single power supply ?? Or I should have buy the power supply for every single stepper motor driver ??
thanks a lot for your video. can i use the stepper driven to support 7 stepper motors??
Yes, there are 8 motor outputs on this board.
Hi , in your videos you are using 24V 1 Amp power supply with pokey57cnc. Can you please tell if 24V 2 Amp can be used or not. Will it harm the circuit.
I only see the first 2 videos for the Pokeys57cnc and Mach 4. Are there more videos for this?
Not sure if you can help or not. I have my CNC, home built, with a Pokey57cnc controller. When I select machine coordinate and then click on the ref all home button none of my axis move and the DRO’s go to zero. Would you have any ides why the axis don’t move? Thank you.
What makes mach 4 better than mach3 ? Thanks
Thanks for the video ;-) i have a problem with mach4 and pokeys57cnc. the homing sequence order works only with x=1 y=1 and z=1. when i want to have z=1 x=2 and y=3 only z works. can you help me ? thanks
hello im building a plasma table with pokey 57 ant the thc plasma sense with mach3 the problem that i have is thc is not working it wont readout the voltage when it arc when the arc stop you will see a small jump in the voltage any idea what that can be
thanks
8:37 my motor wont rotate when im pressing left or right button. I have already set the keyboard configuration. What is the problem??
Part 3?
Hi,
I m form India,
I want to build my own cnc machine but I have no idea to where to buy ledscro in India, its near about 3 meters, if you have any idea so please guide me,
3 meters is too long for a lead screw.I would look into belts or rack and pinion options.
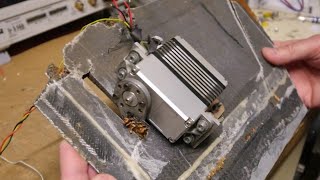
Cool, check my clock i made with scanner parts
Pretty cool!
This is definitely not the correct way to wire the Pokeys57cnc motor outputs to a standard stepper driver.
For each pin on the motor out there is a positive and a ground.
The labeled pins on the motor out are
Enable+
Direction+
Pulse(step)+
Alarm+
and a 5v+ which isn't used in standard stepper drivers.
This means that if you're not planning on using enable, or the 5v positive, the outside wires 1 & 2, 9 & 10 can be capped/cut off.
The rest have a ground beside them, and as per making the unit stable, each should make use of its own ground.
In the end you will wire up
(optional) 1-2 to enable
3-4 to direction
5-6 to pulse
(option) 7-8 to alarm
9-10 are unused (drivers utilize external power source)
The only thing that needs to have attention payed to is ensuing the polarity is correctly wired for each pair.
This is how the Pokeys folks verified to me that they recommend the wiring. (They REALLY need to put it in the manual, and stop pretending that their ecosystem should be the only explained hardware in the manual) *Kinda puts me off from building with anything from them in the future.
Hello, thanks for your comment. So i have to wire both 3 and 4 (gnd) wires to the DIR- pin for exemple?
@@vincentb2490
Um, no!
The reason there are enough gnd wires, is to ensure that all of the positives have a corresponding gnd.
You could "technically" wire any of the gnd wires to any of the negatives on the stepper driver.
They give you more gnd wires, so that you have a gnd for each positive wire.
In the documentation, all of the named pins are positive, and the rest are just labeled gnd. All of the [gnd] pins are the negative pins.
2, 4, 6, 8, 10 are all universal grounds (-)
The rest are labeled and go to the corresponding positive (+)
I just like the cleanliness of pairing the positives to be used with the ground next to them, so you can split the flat cable in the least cluttered way.
axis enable = 1+, 2-
direction = 3+, 4-
step = 5+, 6-
error/alarm = 7+, 8-
+5v = 9+, 10-
I think this division of pairs is the cleanest. You could wire ANY of the [gnd] as negative to ANY of the negative driver pins. You could (though I don't recommend it) use only one of the [gnd] pins and wire all of the negatives to that one pin.
[gnd] is common, meaning that they all go back to the same place.