The Simplest Portable Router Table

HTML-код
- Опубликовано: 5 сен 2024
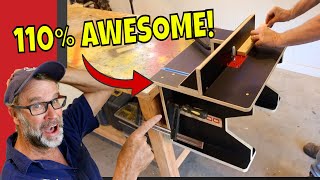
- Today I'm making a quick and easy router table that can be mounted and stored virtually anywhere. This is great for beginners or folks that just don't have a lot of space, or even a second setup if oyu already have a router table.
TOOLS USED IN THIS VIDEO:
Forstner Bits - lddy.no/15xi4
The BEST 0.7 Mechanical Pencil - amzn.to/3vuhnhg
Double Sided Tape - lddy.no/m666
Hardware Kit (Knobs/Inserts) - lddy.no/qe5l
Looking for DISCOUNTED HIGH-QUALITY PEC COMBINATION SQUARES, DOUBLE SIDED TAPE and overall great savings ALL THE TIME? Shop where I shop! lddy.no/go67
YOU CAN SAVE 10% ON STARBOND CA GLUES AND ACCELERATOR!
Use the code “INSPIRE10” at checkout! www.starbond.com
SAVE 10% ON OLIGHT FLASHLIGHTS, TACTICAL LIGHTS AND HEADLAMPS!
Use the code "INSPIRE10" at checkout! www.olightstor...
BANGGOOD WOODWORKING TOOLS: www.banggood.c...
MY HAND TOOLS, POWER TOOLS, CAMERA GEAR AND MORE:
www.amazon.com...
VISIT THE INSPIRE WOODCRAFT SHOP: inspirewoodcra...
Adjustable Box Joint Jig Plan: inspirewoodcra...
Multipurpose Shooting Board Plan: inspirewoodcra...
All Purpose Tapering Jig Plan: inspirewoodcra...
EMAIL: inspirewoodcraft@gmail.com
WEBSITE: www.inspirewoo...
PATREON: / inspirewoodcraft
INSTAGRAM: / inspirewoodcraft
If you appreciate this content and would like to help give back FREE OF CHARGE, simply give this video a “thumbs up”, leave a positive comment, subscribe to Inspire Woodcraft’s RUclips channel and SHARE THIS VIDEO with someone who you think would enjoy it. Some of the links that we’ve provided above are affiliate links. That means that when you make purchases through those links, we earn a small commission of the sale at no additional cost to you. While we do use affiliate links where we can, we only endorse products or services that we believe in. That commission is a big part of our income, which also goes back into making more videos, so by using the links you help support what we do and for that we are very grateful.


This is something doable with my current knowledge of woodworking. Thanks for the video.
I have been debating buying a router table but now I'm going to build this!!! I don't have a full time use for a table but wanted want for ease of routing and the results. This is awesome!! Thanks for what you produce!!!!!
Been thinking how to make a small portable router table and this video checked all the boxes. Simple, easy to build and meets a need. Super nice job.
A router table could be this easy?! Great job as always!
I still use one of those as a secondary router table. Super simple to make and use.
This is a great simple design. I currently don't have a router table, this is a good solution for me.
Perfect, thanks. Years of having a large router table in my shop I realized mostly it's taking up space. I can make this and hinge it to the side of my workbench. Having a small shop,real estate is at a premium and ths helps a lot. Thanks
Hey Vince- do you have4 a photo of thisd finished project- great idea!
I just made this in about an hour and it’s working great routing grooves to accept drawer bottoms. Thanks!
Easy and functional! I have an outfeed table for my table saw with 5/8" plywood top so i did a similar thing with it- I drilled the holes and mounted the router under the top. I drilled another hole through the table and put a T-nut underneath for the pivot end of the fence. I don't have any dust collection which can be a problem but I don't use it for large jobs.
this should have a million views, straight to the point and straight to work, can always be expanded later on. Great job
Nicely done! Would suggest you add a small D-shaped piece of Plexiglass above the bit as a finger guard. Routers are extremely adept at remove material, like skin and bone. Trust me, I used to work in an emergency dept. 🙂
This is as simple as it gets! Thank you.
LOL... I built my router table, several years ago, the same way you built yours, except I clamp my fence on both sides rather than install a pivot. For the really big jobs, I have a Delta shaper, my Dad bought used when he came home from Korea, in 1952. 75+ years old and works as good as new, albeit a VERY Dangerous Tool!! Featherboards are an absolute necessity.
This is awesome, because it's truly perfect for a small router. Plus, you used your Jedi mojo trick of reductionism to perfectly arrive at the essential elements of the table. So much safer than that 'clamp my router in a vise' technique I see people here on YT do (good way to shorten a finger, btw, ask me how I know this). After getting a great little Makita, I almost never use my old, big Porter Cable (690 with the screw-adjust base) anymore... great old router, but it's almost too powerful.
Hey, I resemble that remark! Yes I have clamped the palm router in the woodworking vice. I think I would screw a 2x4 to the bottom of this jig/table so it can be clamped in the vice, just so the vice doesn't get an attitude.
@@MsLorisM No insults intended. I think, though, that the power of the router is the big factor. Not willing to chamfer off a fingertip again here. Very bad way to trim your fingernails.
Just finished min but using clamps to secure. I used MDF for top. A word of caution however. If you clamp the fence it wants to shift slightly. Will be using stronger clamps.
Other than that it works perfect for my use.
Thanks for the video
For those of you who made this out of 3/4" plywood instead of 12mm birch and suddenly realized that the 4 screws that came with your cordless 20V DeWalt DCW600B router aren't long enough, don't worry... The correct screw is a metric M4-0.7 x 25mm screw, and can be found at Home Depot. And you most likely won't find them hanging on the wall with the rest of the screws packages. You'll probably find them in one of the drawers with the rest of the metric and other speciality hardware components.
Short and sweet. Thanks
This is gold. Perfect for the Dewalt compact 20v. I’m still desperately trying to find the plunge base for mine. No one has them anywhere. Ugh.
Thanks for this man, solid gold video as always!
Thank you for posting the great little build, it's exactly what I'm needing as I don't have anything build yet along with limited funds to buy a prefabbed router table. Thank you again and I'm looking forward to viewing your other videos 👍🙂
Quick and easy I like it. I hope all is good to mate your sharing of knowledge is missed plus I miss you too
Wow good project!!! You have a great talent, you are able to explain clearly and show us how to make this. I liked this video!!
I built exactly like you showed it and it works like a charm.
Very cool and simple. Thank you. I wish I saw this a few weeks ago. Oh well.
I like it, gets you your routing table fast, and it's still easily modifiable down the road, I'd likely make 2 L shaped braces that attach to the bottom and snug into the end of my workbench, as I don't woodwork much outside of the garage. 😅
Brilliant! Exactly what I need for my 8x6 shed-shop. My first project with it is to make some finger joint boxes, having tried to perfect my hand tool skills, I think a new level of accuracy is what I need 🙂. I hope we see similar projects from you as this is well communicated and as others have said, you have cut out all the clutter both in the presentation and in the build.
This will be perfect for me, I've got limited space and this will do the trick. Many thanks.
Just gave me a great idea on what to do with my old Black and Decker Workmate 150 folding base.
Thanks for sharing those tips and the make!
Your videos hit all of the pertinent information and are straight forward, direct and honest. That and you're obviously experienced, clever and very innovative. I've been playing around with the shou sugi ban style finishes for months now. IMO you should be the most viewed wood working channel on RUclips.
Keep doing great things man.
Very well said‼️☺️👍🏼👍🏼👍🏼 I love his channel.
Excellent work. Amazing job. Thank you for sharing God bless.
I noticed your TotalBoat shirt and those thin strips you were routing--looks like this might be a good set-up to use for routing coves and beads onto planks for assembling a strip-planked boat.
That plywood cost more than my router! But seriously, this is a clever and quick solution, especially if you have a small shop and don't need a router table setup for daily use.
Definitely one I can do!
3:37 make a small 1/8 by 1/8 45 cut on the underside of the fence for dust accumulation. or the dust will de-rail your work piece making the bevel some-what unconsistant.
agreed, good call
Great little project, super useful..... and that tape snap at 1:45 was the perfect audio accent, lol. Hope you're doing well.... keep up the great videos!!
What a great and simple solution!!
simple, easy and portable, I like it- thanks for sharing
This is perfect for my small shop. I’ve seen shops that have 2 or 3 of these set up with different routers with the most common bits they use in each. As a hobbyist, I don’t have money to invest in multiple routers nor do I have the room to store all those.
Thanks bud, definitely going to try this.
beautifully simple. Bravo
Excellent! Nice and easy to make. Thank you !
Brilliant, dude! Really well done! 😃
Stay safe there with your family! 🖖😊
Perfect! Exactly what I was looking for. Thank you!
Just as good the second time watching
simple and effective = instant like
Great design.
Hey, just wondering where you went. You have helped me tremendously.
Nice job. Thank you for the idea.
Great bit of Kit,
Awesome idea, nice & simple
No nonsense, I love it! You earned yourself a subscriber.
Yes!
This is fantastic! Thank you!
Question:
Would you recommend leaving the surface natural or add an oil/wax?
What’s best for a router table surface?
i would hit it with some paste wax
Personally I would use a water based polyurethane to make the top a bit more slippery but it's not critical to use that. I would just use whatever you have in your shop that you prefer to use. Even leaving it natural is ok, it just won't last as long and won't be quite as slippery.
Fantastic, I love it!
This just amazing what I have been wanting but couldn't find something this portable, I had 1 question is it possible to use this type of fence to cut rabets and dados, like for making drawers using the quarter, quarter & quarter method
Excellent
Where did you find the knob to tighten your fence??
Always genius
Why the middle? Apart from clamping, do you use the space at the back?
Love it!
Well explained
Nice vid!!
Good stuff bro. My only question is how do you account for the depth loss. So the plastic plate on the router is 1/4 thick but the table top is 3/4-1" thick.
For use with the table, the plastic plate is no longer used. As seen in the video, you unscrew it from the router, then use the plastic plate as a template for the screw holes on the table, then screw the router directly to the table from underneath, without the plastic plate attached anymore. You'll only reattach the plastic plate again when not using the router with the table.
What would be maximum size hp for this type of setup? Thanks.
This is exactly what I was looking for. Can I commission you to make one for me?
Nice design but.....what about cup holders and iPhone charging station and.........
Nice. So simple. I might make this but with a cleat underneath to go in a face vise👍
The knob on the fence is unnecessary. Just use 2 clamps.
Here (the formerly FREE AUSTRALIA before leftards took over) and in the UK, there's a brand called Triton.
Not amazing but they do a router table with a few more adjustments - for cheap.
Good for the money is all I'm saying