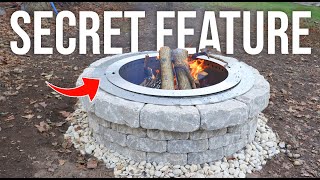
Save Money and DIY a Smokeless Fire Pit. Build a Pavestone Rumblestone Smokeless Firepit for cheap!

HTML-код
- Опубликовано: 29 апр 2024
- Hello! In this video I demonstrate how I made and built a smokeless firepit from a Pavestone Rumble Stone Firepit Number 1! The build was quick and easy and I was able to put this together for about $300 at the time of this video. Although the Rumblestone Trap Stones are not readily available, I was able to complete the build using another Pavestone product! I show how I modified a Pleasant Hearth Firepit insert from Amazon in order to make the upper intake for the secondary burn. I also go over things I would have done differently at the end of the video!
If you have any comments or questions please feel free to put them in the comment section and I will try to answer them the best I can.
Please "Like" and Subscribe!
Product Used:
Home Depot:
Pavestone Rumblestone Round Firepit Number 01 in Cafe: Model # RSK55769
Cafe Trap Block: 166986, Sierra Blend; 397882, GreyStone: 167250
Pavestone 3 in x 10 in x 6 in Sierra Blend Concrete Retaining Wall Block: Model # 80777
Vigaro Bagged Decorative Stone Red Lava Rock: Model # 440897
Quickrete Construction Adhesive: Model # 990210
Milwaukee 7/8" Hole dozer Hole Saw with 3/8" Arbor and Pilot Bit: Model# 49-56-9659
Amazon: (product link)
Pleasant Hearth Solid Steel Fire Ring, Black: OFW419FR; amzn.to/3q2cM4y
Caution: Always wear the proper safety equipment when using tools or power tool which can include but is not limited to: eye protection, gloves, hearing protection
This is a fire pit. Building this in an area which is too close to buildings or vegetation could result in a fire which can result in injury or death. If you choose to build this, you assume all responsibility associated with this or any other project shown on this page.
Thank you for watching!
__________________________________________________________________________________
Disclaimer: Videos made by Just A Dude are for informational, entertainment and educational purposes ONLY. Projects presented on this site and techniques, along with material shown may not be suitable for all skill levels or ages. Matt, Just A Dude, Boo Bear, or any other person or personality mention or shown in these videos or on this channel, or any combination thereof, do not make any claims regarding the safety measures, precautions taken or mentioned, techniques, tools, resources, use, ect, and shall not take responsibility of what is done/completed/attempted with the knowledge or tutorials mentioned or shown in the aforementioned material. Viewers assume to proceed “at their own risk” and should be aware of the knowledge, tools, techniques and dangers associated with Do It Yourself (DIY) Projects and “How To’s”. Viewers should also be aware of any Federal, State, Local or any combination thereof regarding laws and regulations which shall govern the work completed in their region, state, country, ect. It is the sole responsibility of the viewer to be familiar with all laws, codes and regulations and the danger associated with conducting DIY or How To projects completed or attempted. Matt, Just A Dude, Boo Bear or any other entity shown or mentioned in this channel/videos or any combination thereof, cannot and shall not claim any liability for any outcome which has occurred due the knowledge put forth in this channel or any videos shown.
Royalty Free music on this channel or featured in these videos has been provided by ITunes or through a subscription service such as Soundstripe and has been specifically licensed for use in these videos and on this channel.  Хобби
Хобби
![DIY Smokeless Fire Pit [with a sealing strategy others missed!]](http://i.ytimg.com/vi/l15BEL4CjgU/mqdefault.jpg)
![DIY Smokeless Fire Pit [with a sealing strategy others missed!]](/img/tr.png)


![GUILTY GEAR -STRIVE- Season Pass 3 Playable Character #4 [Slayer] Trailer](http://i.ytimg.com/vi/fIrZvjyqf1Q/mqdefault.jpg)

Not only did you help me purchase this kit for under $200 (it's now going for well over $600), but using your advice I was able to keep it at 3 bricks high and feel like it's working very well so I was able to eliminate the need for the ring that comes with the kit! Tip forthcoming! Thank you so much! Maybe the wifey will stop getting chased by the smoke demons now!
BTW, I went 1/2 inch holes spread 2 inches apart
That’s awesome! Yeah, I did vent the top too much haha. Glad you made it work for you! Thanks for the comment.
It may be helpful to plumb a tube to the bottom of the middle to feed primary air in under the fire, because even with lava rocks under the fire, there's no passage way under them for air to reach the fire. I've seen some variations on the DIY smokeless fire pit that use a 4" duct tube to bring air in under the fire from outside the pit, buried in the ground, with the opening covered in hardware cloth and buried under the supporting rocks. That seems to work really well.
Awesome comment! Ive watched a couple vids like that too. For now, the fire pit works great for me but if I ever rebuild, I might add this and compare it. Thanks again for the comment. Please like and subscribe.
Great job! This is the best video I have seen so far on building a smokeless fire pit!
Thank you much! Glad I could help.
Love the video, its unbelievable that as of 2024 the home depot price is now $799!!!
$925.00 when I just logged on. wow!
Awesome video... Great design, cant wait to try this out!
Once you get all the stuff its pretty easy to put together! Thanks for the comment please like and subscribe. Let me know of you need anymore info. I just released a video on a paver patio build too if you’re interested in that. Thank you again.
I'm gonna do holes in the bottom for the main fire to have good cold air. I'm also going to do mine with smaller holes around the top and fewer of them (4" on center) to ensure the air really rushes through the holes to get in to burn the gases in the center of the fire pit.
Sounds like an awesome plan! Let me know how it works out.
Rumblestone! love it!
We do too! Thank you!
Great video tutorial on the fire pit! I had a friend give me a tractor rim, I cut off the tire and used for ring. Just need to drill the holes to make it smokeless.. too bad I cant attach a picture of it...
Thank you for the comment and that sounds like a great use of an old tractor rim!
You can send me a picture of it on my Instagram. The link is in my page description. Thanks again!
Fantastic video, brother🤙. Thanks for posting
Thank you!
Thank you for the super detailed explanation of everything! This is going to be my next project! Liked & subbed.
Awesome! Thank you very much for the comment and sub! If you ever have any questions during the build don’t hesitate to ask here or DM me on my Instagram. @matt_just_a_dude.
Thanks for the detailed tutorial. Unrelated question: Is that a crosscut sled on your table saw? Curious about how you made it, I have the same saw, and have been trying to figure out if it's worth making one for that saw.
Thank you for the comment and yes it is. Its definitely a different build with the ryobi due to the one T guide in it. Im going to have to modify this one a little to make it better because it wobbles a little now. It might be my next video.
Thank you again for the comment. Please like and subscribe.
Thanks for the good information, dude.
No worries. Glad I could help. Please like and subscribe. Thank you!
Thanks for this!
Thank you! Glad I could help. Please like and subscribe. Thank you again for the comment!
I did 1/2 inch holes 2 inches apart and it worked well.
Yeah, I was thinking I over did it a little lol! I might redo it and if I do thats exactly what I would put in it! I dont have any complaints as to how it works right now though. Thanks for the advice!
Hey, if it works it works! I’m about to add my masonry adhesive
It works but with the amount of holes I drilled It doesnt have the air flow to get the flames shooting out of the secondary burn holes. Or, I just havent added enough fuel to the fire yet! Haha
Super cool we are trying it now
Awesome! Let me know how it turns out! Thank you.
Wow! Great video, just dude!!
Thank you!
Watching this in September 2022, literally a year later and that $179 kit you bought is now $926!!! I mean, I knew inflation was bad, but holy smokes (pun intended), that's a crazy price change....
I know. That’s crazy!
I agree. They do have good prices however, if you live in an area where there is not a Menards, the cost to ship it to you will definitely equal out that price compared to a home depot.
Video and project well done.
Thank you very much!
Thanks. Great tips.
Thank you for the comment and glad I could help. Please like and subscribe.
@@JustaDude123 I just subscribed. 👍
Awesome! Thank you very much!
Thank you!
Thank you for the comment!
Brilliant 👏🏽
Thank you!
Hello there great video and super detailed. Getting ready to build one of these but have a couple of (moronic maybe?) questions: When burning all that wood. eventually you are going to have to scoop out all the remaining cinders. With my temporary fire pit, I just pour them out and start anew with a fresh metal pan but this has the lava rocks in it. What is that process and do you have to consistently replace lava rocks? Second question: when it rains, do you cover this or simply let the rain drain through the bottom? Thanks a million!
Great questions! With the lava rocks, I remove the large pieces and then vacuum out the ash with a shop vac. Im going to eventually relocate this fire pit and when I do, Im going to build kind of a maze at the bottom with fire bricks instead of lava rocks. I think the bricks will make it easier to clean.
I also want to build a top for it but just haven’t decided if its going to be made out of steel or wood. Great questions though and hope this helps. Please let me know if theres anything else I can help you with. Please like and subscribe. Thank you again.
I’ve been watching lots of smokeless builds. I like how you used the lower metal ring that was the top of the kit! This size is also a big plus. Great job.
I’ve drilled 8 intake holes in the lower part of the 3 ft ring from tractor supply I’m wondering if you would recommend holes in the bottom of the ring or not. I hope they help since I’m stuck with mine now. I’m assuming they will work as an intake.
They would. You gotta get air to the bottom of the fire as well. Thank you! Please like and subscribe.
Yes exactly. Want air coming in the bottom so the first/bottom burn to burn hot.
Good video, going to do something similar this weekend. Think I'll have to wing it on the stone since the kit is over 400 in my area now (>600 for the taller one)
Wow! Thats crazy how things are skyrocketing! Hope those prices come down soon. If I had to, Id contact a Pavestone dealer and find out what they would charge for 48 traps and 36 of the small rectangle stones. Might be cheaper to order the pavers like that. I posted the product numbers in the description. Please like and subscribe.
The price for the short one is now $775! This inflation is getting out of hand.
The #1 kit in the Café color is still $200 ish. Its just the other colors which have skyrocketed. I would definitely order the kit as pieces if I were to build a different color.
Good looking pit, I seen a build where a guy explained the science and mentioned that it was important to have smaller holes around the perimeter at the top. Just putting that out there.
Edit: look up Bernoulli's principle and apply that to the smaller holes on top putting more pressure out of those top holes enabling that hot air able to reach the fire in the middle (making a more efficient secondary burn)...
Same idea If as if you were to break a sprinkler line all of the pressure would be lost due to the water moving too fast. So essentially you want to slow down the air moving up the inside channel which will push hot air out of those holes with much more pressure. Follow Bernoulli's principle and you will perfect the function of a smokeless fire pit. This is one of the cleanest ones I've seen online! Again I'm sure it works pretty well already, but try plugging every other hole with something if you want to test the theory. Cheers, I'll likely use your build template, it's my favorite final result so far!!!
For sure! If I did it again id drill 1/2 inch hole 2 inches apart. This does get fire fingers but the fires gotta be HOT! Thank you though for the comment. Glad you like my vid the best!
Great fire pit man!
Thank you! Just trying to get my builds like yours!
@@JustaDude123 Hahaha. Your too kind, Bro.
Not at all. Awesome builds!
Thanks for fire pit video
No problem. Glad you liked it.
Thanks so much for this excellent video! Have you burned enough to get a lot of ash in the bottom? I'm curious how difficult it is to clean out the ashes.
Thank you for the comment! I only use the fire pit about once every other week. But to clean it, I just vacuum the ash out of it with a shop vac. I make sure its been a couple of days so there are no embers and put my fingers over the end of the shop vac hose to act as a screen. The ash is vacuumed up and my fingers keep the rocks from being sucked up as well. If there are larger pieces of wood/ash, I just pick them out and throw them away. Hope this answers your question. Please like and subscribe.
@@JustaDude123 just a thought if you end up using it more often, you could easily make a metal mesh cap just smaller than your lava rock to pop on the vac for a less awkward quick vacuum clean up.
That would work out pretty good!
great video, but with the lava rock or any rock for that matter, how do you deal with the ashes?
Great question. I just use my shop vac and vacuum them out. I put my fingers over the end of the vacuum hose so just the ashes get sucked up and the rocks stay. Always make sure the ashes are not burning anymore before doing this. Hope this helps. Please like and subscribe. Thanks again.
Nice video, great fire pit
Thank you very much and thank you for the comment!
Was going on to order the kit and materials to build this today ( 2/20/22) and WOW ! The whole thing is now over $900 ! Supply chain ripoff. Retailers are now gouging everybody using the Covid excuse. There goes my fire pit this year. Going to have to reuse my 30" cheap metal stand one that cost $39 last year ( Now it's $89 )
Wow! Just checked the prices and the price of the kits greystone and sierra blend have really gone up! However, the Rumblestone Cafe Firepit Kit No 1 is still around $200 in my area. Also check with a local landscape supply yard. You might be able to get the blocks by themselves cheaper. Hope this helps.
Thanks!
No problem. Glad I was able to help.
Thanks for the video!
Quick question:
in addition to being just a cool fire pit to sit around - would it work for cooking/grilling purposes too?
Great question. It should be able to be used for cooking. You are going to have to add some kind of cooking surface to the pit though. The fire does get really hot. Hope this helps. Thank you!
@@JustaDude123 thanks for the answer! Well, in this case, I'm more interested in grilling... The thing is - I just bought a house with a relatively small backyard, so I'm looking for some kind of 'all-in-one' fire pit solution, to sit around and enjoy the fire, but also to grill some meat on the remaining charcoal.
If you google Firepit with cooking insert, youll have a lot of options to choose from. Hopefully this helps you. Thanks again!
As of 05/19/2022, a little over a year after you made this video. That RumbleStone Fire pit (#RSK55769) now cost 775 dollars! And in your video the price shown was $179. That's approx. 600 dollars difference, in a year. In ONE year! What the hell happened #homedepot ?!?!
Great video by the way. thx for making this.
It is pretty astonishing! The last time I looked, the greystone and sierra blend colors were that price but the café colored kit is still around $200.
Yeah all of the colors are $775 and above. Ridiculous. I understand inflation and supply chain constraints but this is a price raise of 450% in a year's time. Unreal man.
Completely! The best bet would probably to buy the pieces individually from a Rumblestone dealer. Might have to wait a little but you could probably save a ton of money.
2 THUMBS UP!!! for Johnny Cash......good job dude! .......................BUZZ
Thank you very much! Glad I could help and you enjoyed the vid. Thanks again
Great Video, "Dude"! One small question...How big are the holes you cut in the ring? Doesn't look very big? Thanks!
Great question. I drilled 7/8 inch holes
Spaced 1-1/4 of an inch away from each other. I felt these hole were placed too close to each other once the pit was complete. Another person on this thread stated they drilled 1/2 inch hole two inches away from each other. That would probably work better. Hope this helps. Thank you for the comment.
Thank you Bro
Glad I could help. Thank you!
So this firepit idea.
I like it. I think its a unique idea. I do think you potentially are spending far too much than you need to, since those stones are $2 a pop and you can get away with buying them all outright, and they sell fire rings from ALL OVER cheaper than Home Depot & Lowes; Any solid ring firepit would do for this concept; BUT you would want to make sure you have that "upper ring". More in a moment, at least for my theory.
The way I would propose to make it better would be to add more of those lower induction vents you 'accidently' added.
My theory is that if you were to allow a smaller amount of air from the lower half to enter, it'll still divert 'path of least resistance' to the upper half whilst allowing some air to come in through the bottom. This, in turn, will allow both enough oxygen to immediately start (and inadvertently keep) the fire going, whilst creating a secondary pressure of oxygen to keep the cold air recycling in from the top, creating that 'secondary burn'.
I'm going to probably try this out when it get's warmer here, since I already have these stones; I'll likely just grab another 2 fire rings; One without a cap the other with a cap, and 'repeat' the same idea as what you have here.
I'm using some mildly cheap (but also expensive) one from Tractor Supply. I not only "do not recommend" it, but it's just bulky, warps easily, and burned the fire honestly colder than some $40 amazon fire ring I purchased a couple years back. So I'm likely going to grab 2 rings off Amazon, likely cheaper end simply due to the method I have here.
I'll be trying to figure out the best method of attack for this idea; But cutting about 1" off the fire pit, then tack welding 4 of the spots in place risen up about 1/2". Using that as the "floor". Then setting the other ring inside that one (so any up draft goes back to the upper ring holes).
Then drilling the plethora of holes inside the upper ring cap.
This time, I really want to add a 'stone cap' to the top, so that the there is an extra 'area' of the fire pit, but I'm unsure if I'm going to do that.
What I am doing, however, isn't on a patio. I'm doing this in my backyard and recessing this into the ground a bit to already give a bit of a colder up-draft. Before, I simpy left "gaps" and dug a little dirt trench down to each of the breather holes at the lower part of the fire pit. This time, I think I'll likely span the gap a little wider than the direct with (making it ~36" again) and utilizing some drypack (3:1 sand/portland cement), creating a bit of a 'slope' to the lower part of the fire pit. This way I can ensure that dirt won't just 'make it's way in there after it rains' and make sure that there is some area for air to travel to it.
All in all, unique idea. I was thinking about the two fire-ring idea, but I just wasn't sure how viable it would be. This sort of proves that viability, and would likely make for a more successful fire pit, too.
Great idea
Great vid.
Thank you! Very much appreciated
Thanks for the tutorial! Unfortunately, as of this comment, the HD kit is $569... so looks like I'll have to wait a couple of years to build this firepit.
Prices are rising fast! Ive had the same comment before and was able to find the Cafe colored kits still available for about $200 however, the Greystone and Sierra Blend were priced at $569.
$775 now, WoW! Crazy for $100 worth of bricks.
It is crazy. Especially how each color is selling for a different price. I just checked the home depot website and the Café colored kit is still $209 but the Greystone is $775 and the Sierra Blend is $846! I would just order the blocks individually at a local Rumblestone supplier.
Don't buy the kit, kit it yourself and save hundreds
Liner $100, 60 stones $66, heat resistant caulk/glue. Don't buy the kit lol
great video, 1 question though. The pavers at the bottom of the firepit, are those needed? will the fires mess up on concrete deck (like cause cracking or something)?
Great question. I dont know of they are needed. The smokeless fire might work without them but Im not sure. Having a fire directly on the concrete will mess it up. The heat from the fire will expand air pockets on the concrete and cause it to blow out. Hope this helps. Thank you
@@JustaDude123 1 year later and still happy with it? other then the 2" on center suggestions any others?
Love it. It works very well just gotta keep it fed. It burns hot so make sure you have plenty of wood.
I think if you take out the two bricks inside at the bottom and let more air into the base of the fire you would reduce the smoke even more.
Ill have to try that next time I have a fire. Thank you!
I have a question the flat stones that you have underneath your fire pit what size are they and how many do you have. Because I like that and I was given permission to make one because I stay in the apartment building and I believe that would make it look a lot better The Underneath pic. Thank you
Great question. The bottom which the fire pit sits on is made up of 12 inch by 12 inch concrete stepping stones. They are 1.5 inches thick. There are 16 of them which make up 4 rows of 4. Hope this helps. Please like and Subscribe!
@@JustaDude123 nice video! I am wondering if you have a concrete patio and that’s why you put the flat stones underneath your fire pit to protect your patio ? I have a concrete patio and I don’t want to damage it. Thanks
@@lachika8005 Great question! Yes, I do have a concrete patio and placed the 12 x 12 pavers underneath it to protect it. I recently built a paver circle for a firepit seating area. The video should be up soon. Hope this helps. If you haven't, please like and subscribe. Thank you!
@@JustaDude123 awesome! I will wait for your new video. Thanks 😊
How are the temperatures around this? Does heat radiat outwards much or does it mostly just go up?
Great question. It just goes straight up. Ive only had a fire in it for a couple hours so I dont know if the bricks would ever get hot and radiate heat. I doubt it due to the air always moving between the bricks and the fire ring. Hope this helps. Thank you for the comment.
Thank you for the video.
I think if you had shown the video while talking, it would have heloed me a lot.
No worries. Thank you! Glad I could help.
So, does the fire actually make less smoke or is the smoke vented away in a more efficient way?
Great question! The air flow under the fire and at the top of the fire cause two things, the fire to be well ventilated making it burn hotter and a secondary burn at the top which burns off smoke. This causes the fire to make less smoke. Its not 100% smokeless. There are little puffs of smoke which occasionally escape but it creates way less smoke.
@@JustaDude123 Makes sense! Thanks!
No worries, glad I could help. Thank you!
great video dude
Thank you very much!
Would you put these on a wooden deck, maybe over some pavers?
I wouldn’t advise it. No telling how hot those pavers would get.
Do the lava rocks pop in the fire? Awesome Video!
Great question. The first fire I had there were two pops but after that, there were none. Thank you for the comment. Please like and subscribe.
I want a more natural-looking stone on the sides and a more finished cap stone, so I will probably not go with the kit. It seems like what you need to bring the inner wall of the pit to the bottom is a ring with the flange on top and sides that extend down to cover the vents coming into the cavity between the inner and outer wall. I wonder if they sell those. If not, couldn't an aluminum sheet be inserted to extend the black metal ring downward and cover those vents bring air into the cavity?
Great comment. I would be wary of using aluminum due to the fact the fire could melt it. Id stick with mild steel or stainless. Also, The ring doesn’t have to be “airtight”. You gotta get air to the bottom of the fire as well. Hope this helps. Thank you again for the comment.
@@JustaDude123 I follow you, so let the air come in below the sides of the ring. On the outside I’m torn between natural stone veneer that has to glued to some brick interior wall or a dry stack with concrete trapezoidal wall “stones” that don’t look natural to me. I’m going to continue looking for some dry stack material that will do the job. I need a nice cap material too. Advice welcome.
If you want something custom for a cap/fire ring, you could have something custom built at a welding shop. Also, look up how a solo stove works and secondary burn. It will probably aid in the planning of your build. Hope this helps. Please like and subscribe.
Probably need smaller diameter holes at the top to maintain good pressure. Otherwise looks real cool.
For sure! Or holes spaced farther apart. Thank you!
if you built a 'tunnel' under the bricks to allow fresh air into the center of the fire pit - the fire would burn hotter. you could have an adjustable door on the air tunnel to control flow. it would be similar to store bought smokeless fire pits that allow air in from the bottom
Awesome idea! That would work pretty good but this fire pit burn very hot. It draws air in from the lower vent holes and air reaches the bottom of the fire through the lava rock great idea though and it would work good in a pit that I think, is more closed off. Please like and subscribe. Thanks again
@@JustaDude123 can lower holes be adjusted for air flow? All wood stoves have air flow adjustment
They cannot. You could put a brick in front of them and use it to close them off or open them up.
@@JustaDude123 I think a central air flow from a separate "tunnel" has the advantage of easy to control flow and it does not reduce the flow of air to the top holes. Ie the top holes would be faster without the bottom "leak" holes.
Air flow flowing through lava rock will eventually get clogged by ash. It would be less of a problem with a central hole to keep clear, not the whole bottom of the pit needs to be dug out and rocks cleaned to maintain air flow
So many reference videos already out there explaining why smaller holes, and less of them is beneficial. How did u manage to basically cut out the entire upper portion of the ring
Just lucky I guess. Great comment!
How will you clean it with the rocks?
Its actually not that bad. I put my fingers over the shop vac hose and create kind of a screen. It vacuums up the ash and leave the bigger pieces and rocks.
You can buy this at Menards. The"kit" is 3 level, but really just a list of materials. Could buy extra. Now that I watch this I may do that. 3 level kit is under $200. Of course started raining right when I finished.
Menards does have good prices on the stone kits if you live in their service area. Im on the west coast. I was looking at their paver circle kits because of their price but by the time I paid for shipping it was more expensive than to just get a kit at home depot. Tell me how it works out for you! Thank you for the comment.
Hey Matt, thanks for doing this. Question: you said store bought smokeless have a lot of holes on the bottom. Why not drill holes a couple inches from bottom too in addition to the top rim? Thoughts?
Awesome question! I didn’t drill the holes in the bottom ring because the lower ring is not solid. There are gaps in between the pieces which deliver plenty of air to the fire. I also think the fire is able to get air from the bottom due to the lava rocks having gaps between them as well. If the ring was a solid ring which went from the too all the way to the bottom I would add holes to the lower part of the ring as well. Hope this makes sense and answers your question. Thank you for watching. Please like and subscribe!
@@JustaDude123 I think I get it. Haha. I've watched so many DIY smokeless videos I'm getting confused. So if the ring insert goes from top to bottom then yes drill more holes. But if I add an extra layer of pavers & space them out air will get through & I won't need the holes drilled on bottom of ring. BTW that kit is not available at Home Depot so if I need to replicate the stones can you tell me the sizes I should look for? Thanks!
I would watch the video again and see how I installed the lower ring and added the top ring. It might make more sense with the visual. I listed the amount of bricks needed in the video and in the description there are the item numbers. I believe the no 1 kit contains 36 of the traps and 36 of the small rectangles. To build the fire pit like I did, you will need 48 traps, 12 traps and 12 rectangles on each tier. Hope this helps. Please like and subscribe!
@@JustaDude123 yes I've watched it 3x Haha. I was asking the size/height of the blocks you used (not how many) are the concrete blocks like 4" high. Sorry not trying to bug you. But was thinking if I purchased a fire pit steel insert that was 14" deep rather than 10 then I wouldn't need the insert that came with the kit & then would'nt have to rig up using both. 🤷♀️
Sorry for the late response. I tried to find a taller fire pit ring as well and was not able too. If youre able to locate one, please let me know.
Here is the link for the dimensions of the traps:
www.pavestone.com/edgers/RumbleStone-Trap/923
Here is the link for the dimensions of the mini stones:
www.pavestone.com/edgers/RumbleStone-Mini-45mm/913
If you want to build a fire pit like what I did, you will need 36 mini stones and 48 traps.
Hope this helps, thank you!
Thanks Matt! I am such a visual learner. I appreciate the explanation with inserted video clips. What are your thoughts on people adding a vent pipe to the bottom when they build them in the yard? Thanks again!
I think a pipe would help air get into the bottom of the fire. Theres another video on RUclips where someone put a pipe going to the bottom of a firepit and they added a air pump to it. I forgot who did it. Thank you for the comment. Please like and subscribe.
how do you remove the ashes from the lava stones, or it will just keep building up?
Great question. I use a shop vac. I put my fingers over the end of the hose and spread them apart. This allows the ash to be vacuumed up but my fingers stop the lava rocks from passing through. Hope this helps. Thank you!
Dude sporting a Johnny Cash T PLUS great content.... instant subscribe....
I do what I can lol. Thank you for the comment and sub!
The problem i wonder about is when it rains do the ashes run out on to the patio?
Great question. Not that Ive noticed. We got about 5 inches of rain last weekend too. Might have been enough though to wash it clean but I havent noticed any black ash seeping put of the lower vent holes. Thanks again for the comment. Please like and subscribe
The hardest part was moving the blocks to the floor at Home Depot, arrange/count. Moving them again to my cart, then again to
My truck, and lastly to the back yard. Definitely the hardest part lol.
Wow, you’re right, that is a lot of moving! How’d it come out?
@@JustaDude123 came out great!
That’s awesome to hear! Enjoy it! Thank you for the comments.
Where is the listing for the octagonal bottom? Amazon link only showed the top black ring.
You can go to the Home Depot website and search for Pavestone 31 inch Octagonal Stainless Steel Fire Pit Insert. Should bring it right up. Hope this helps.
Great video! I can't seem to find the basic kit for $179 at Home Depot or anywhere anywhere. Can you verify the details? Thanks
I was able yo find one Cafe colored kit in another zip code but I was able to find the cafe kit in my zip code for $209. There out there, just use the home depot website and search nearby area codes. The Cafe color is the cheapest. Hope this helps. Please like and subscribe! Thank you.
@@JustaDude123 Many thanks I'll dig deeper
Im sorry I couldn’t help more. Its just a guess and check process around your area.
Just out of curiosity when did you buy this kit? I’m looking at the same kit and it’s listed at 569.00.
I bought this kit about two months ago. The cafe colored kit was around $200 but the other colors were more expensive.
I just looked and the cafe kit is still around $200 but the greystone and sierra blend kits are $569. Hope this helps.
@@JustaDude123 oh duh! I didn’t even notice you could switch the colors. That’s crazy to pay 300+ for a different color! Thanks man appreciate the response and the video !
No worries. Yeah, definitely a huge price mark up for a different color. Thank you and glad I could help.
I'm not sure what the bottom ring is doing. It looks like it's blocking the airflow from your openings at the bottom of your fire pit?
Great question! It is not. The air flow at the bottom does make it to the fire a little bit. The bottom ring is supposed to go to the top ring and make an air chamber between the bricks and the fire. This air enters from the outside at the bottom of the pit and is then heated and it rises. It then goes into the fire through the top holes and helps to get rid of smoke from the fire. I hope this answers your question. Thank you for watching!
I think i missed it but I didnt see the chamber for the air that leads to the secondary burn holes
Its the inch of space between the inside of the bricks and the outside of the fire rings. Hope this helps. Thank you.
Do you know possibly the amount of bricks and item number for small bricks so instead of kit just to buy them separately, since the kits are not available? I believe the bricks item number is 80749 or 92334, but the second one is bigger ?!
I listed the amount of bricks needed in the video and in the description there are the item numbers. I believe the no 1 kit contains 36 of the traps and 36 of the small rectangles. To build the fire pit like I did, you will need 48 traps, 12 traps and 12 rectangles on each tier. Hope this helps. Please like and subscribe!
@@JustaDude123 I was slightly distracted when watched it lol. liked and subbed. Thanks a lot
No worries, thank you! Let me know if you need any more info. Thank you again!
So cleaning out the pits ashes has to be a pain with the lava rock laying on the bottom.
Great question! Its not that bad. I use a shop vac and put my fingers over the end of the hose a make kind of a grate. The ashes get vacuumed up and the rocks stay.
Had to subscribe
"If I can't fix it I'll fix it so know one else can" haha
You watched till the end! Haha. Yeah, an old timer told me that once when I was a kid and I haven’t forgot it! Glad you enjoyed. Thanks for the comment and sub!
Subbed for the name of the channel
Awesome! Thank you
dude great video and i know its old, get rid of that torque max system on your garage immediately. Thats a wayne dalton torque max system and they are terrible, convert your system to a torsion system and your garage will run like a dream for years. I am a garage door professional and on the daily im showing up to replace these systems. You'll need to get those big springs that go above the door, watch a video and possibly do it yourself if youre safe and watch a bunch of videos.
Awesome advice! Thank you. Any conversion system you recommend?
Damn... That kit is $926 now. Nope, no inflation.
Completely understand. The cheapest way to go would be to buy the bricks individually. Go to a landscape supply company which is a Pavestone dealer and order the block. You need 12 traps and 12 small rectangles for each row.
Yeah, I already ordered all the stuff I need. Although I went with the smaller ring (28" I.D.) since our patio is pretty narrow. Ends up being 11 per row and no small rectangles. But to think the price of that kit has nearly 4x'd in 2 years is nuts.
How wide is the outside perimeter?
Great question. 46 inches. Hope this helps. Thank you.
I would probably have inverted the stainles panel ring and drilled holes around the bottom of that and set the black ring on top of that ledge and left some gaps in the second tier to. But still this is the best. "DIY" firepit video i have yet seen.
Those are definitely some ideas worth trying out! Thank you!
Can you please comment a link where you’re still finding them for 200 something dollars please? I’m looking all over but not sure if I’m looking at the right kit. Thank you.
Just go to home depot website. Search for Rumblestone firepit. You are looking for the Rumblestone firepit Kit No. 1 in café. I just looked and that kit is $239. The sierra blend kit is $918 and the greystone kit is $841. If you want a sierra blend or greystone colored firepit I would go to a landscape supplier who is a Pavestone dealer and order the blocks separately. You need 12 small rectangles and 12 traps per row. Hope this helps. If you have more questions please let me know. Thank you.
Pavestone RumbleStone 46 in. x 10.5 in. Round Concrete Fire Pit Kit No. 1 in Cafe with Round Steel Insert Is the kit I’m looking at and on my Home Depot it is showing it costs $925. Thank you sir, I believe the one I’m looking at is the same one you’re talking about
I just looked and changed the location of the Home Depot I was looking at. I found one in the LA area which listed the same kit for $925, one in the Sacramento area listed the kit for $239 and one in the San Diego area listed the kit for $179. I don’t know where you’re at but the Home Depot located at Imperial Marketplace #1032 has the kit for $179 and free shipping to your residence. Hope this helps.
Why doesn’t the fire ring come already with holes?
Great question. I really dont know. My best guess is the concept of the smokeless fire is new. Im sure the industry will pick up on it though. Hope this helps. Thank you
I have the same Johnny Cash shirt
Thats awesome! Cant beat the shirt rack a Target, lol
I bought the same ring on clearance at tractor supply = $27 scooooorre
That is a great price. Awesome find!
From the time you posted this video till the time I just saw it (Almost a hear to the day) the cost of that kit is now over $900. I know Bindenflation has got things out of wack but damn that is messed up
I just checked the Home Depot website. The greystone kit it $841, the sierra blend kit is $918 and the café kit is $238. If you really wanted to save some money, I would go to a landscape supply company and order the bricks individually. You need 12 traps and 12 of the small rectangles per row. You might have to wait a bit for the order to come in from Rumblestone but it would he a fraction of the price. Hope this helps. Thank you!
Could have just gone to a local farmer and bought an old rim from the oldest tractor he had. Probs could have gotten one for free. Cut out the hub, and drill holes for air. Then brick around it...
Definitely a way of getting it done! Thank you for your comment. Please like and subscribe!
what sould happen if you skipped the botom insert?
Great question but I don’t know. Air would still get in, and air would still heat up and rise inside of the top ring. I just don’t know if not having a bottom ring would be beneficial or not.
Yes, yes, yes and yes lol
Thank you for the comment!
Damn their prices must have skyrocketed. Because that same firepit is now $400+
I looked at the prices today. I was able to find the café colored kits for around $200 in my area. The kits which are the greystone and sierra blend are at $569. At those prices, I would find a local landscape supply company which sells Pavestone products and order the blocks individually. Hope this helps. Thank you for the comment.
@@JustaDude123 that does help! Thanks!
No worries! Please like and subscribe. Thank you again for the comment
ouch. HD wants $775 for kit as of 6/06/2022
I just looked, the Sierra Blend Kit is $846, the Greystone Kit is $775. Prices have shot up! If you want a Café colored kit, they are still listed at $209.
I have to say it does look very cool but it reduces the heat that radiates to the body that's sitting 5 ft away from the fire pit, this is why I will not build a surround for my smokeless fire pit.
Cool. Thank you!
Should have left the gap, it would cause fire to burn cleaner
Great comment. I thought about it and in actuality placing those bricks down there really dont block off any air coming it. Just gets sucked up through the lava rocks haha. This fire pit burns pretty hot. Thanks again for the comment. Please like and subscribe.
It's $775 at home depo.
The greystone kit is currently priced at that. The sierra blend kit is currently $846 right now and the cafe kit is priced at $209. If you want to save some money Id go order the block individually at a landscape supply company which sells Rumblestone pavers. Might take some time to order them but youd save a lot. Hope this helps.
Nice tutorial. Unfortunately, the kit is $569 now. 😬
Thank you for the comment! Theres been a couple comments like this before. I have been able to recently find the Cafe colored kits for about $200. The Greystone and Sierra Blend kits are at $569 tho.
@@JustaDude123 what does the "kit" consist of?
Great question! The #01 kit from Rumblestone consists of 36 small rectangles, 36 traps and the steel insert.
Thanks! I am having trouble finding the extra blocks you are suggesting from the Home Depot. Are there any other places you suggest trying?
Great question. If possible I would get the same color blocks as your kit. Sometimes Home Depot has them but if they dont go on Pavestone web site and locate a Pavestone dealer. You should be able to order the block you need from them. Hope this helps. Thank you!
This is no longer $179 at Home Depot, it is now $569 😕
Great comment! Ive seen the greystone and sierra blend kits for that price but Ive still been able to locate the cafe colored kits for about $200.
you keep saying secondary burn, but I don't think you actually know what that is. great build though.
Thanks!
One year later... that same kit is priced at $758. A 424% increase in about 1 year. That's not inflation, that is downright grand theft.
Yeah. They got spendy. I have been able to find the Cafe colored kits for around $200 still though. The sierra blend and greystone kits are ridiculously expensive. If you wanted on that color I would go to the Pavestone website and find a local distributor. Then order the blocks individually. Might take a bit to get the blocks in but it would be a cheaper option.
Now it's $925 LOL @@JustaDude123
@richf9608 wow! That has gone up.
2021 $179. 2024 $925.
That is crazy!
Holes are too big too
Too many of them too! Haha. Thank you for the comment
Bummer this kit has gone up to $569
I was able to search around my area and still find the Cafe colored kits for about $200. The Sierra Blend and Greystone kits are at $569 now.
@@JustaDude123 NICE! at homedepot still?
Yes. If you wanted a sierra blend or a greystone, to cut down on the price, I would buy the pieces individually from a landscape supply dealer. Pavestone has a product dealer locator on their website. Find the one closest to you and order 48 traps (12 trap blocks per tier) and 36 small rectangles (12 blocks per tier). They’ll probably have to he ordered but it might save you some money too. Hope this helps. Please subscribe.
Dude is hot 🔥
Just FYI the kit you bought in this video is now... $569.00 in my area... from HD. Yikes.
Great comment! Ive had another person comment the same thing but then discovered the Cafe colored kit are still $200ish while the Sierra Blend and the Greystone kits are priced at $569. I just looked around my area and was able to locate a Cafe Kit for $179. Hope this helps. Thank you for the comment. Please like and subscribe
Hearth is pronounced "harth". FYI
Awesome comment. Thank you. Please like and subscribe!
??? this kit is over $800.00 ???
Yes, the kit prices have gone up. Currently online at HomeDepot, the Sierra Blend kit is $846, the Greystone kit is $775 and the Café kit is $209.
Dude sure can talk…
Haha. Thank you!
@@JustaDude123 NP 😉
Awesome work!! Hey, this is from Family Handyman, we are really interested in your video and want to feature it on our brand. Please share your Email address or any social media handle so we can share the information with you. Thank you.