Ryobi 40v Battery Questions answered

HTML-код
- Опубликовано: 28 июл 2024
- consider sharing this link for my video to help my channel grow! • Ryobi 40v Battery Ques...
here is my second video on the Ryobi 40V battery. I answer a few questions from comments, and give a few more details on these batteries.
amazon.com link to ryobi dock so you dont have to solder to the battery: amzn.to/35PF1bt
amazon.com link for similar power supply: amzn.to/41oVo9m  Наука
Наука


Reset worked!
I left my trimmer out in the rain, causing all four lights to flash and the battery not work. But the.RST reset trick worked! I used a piece of solder wire bent in a U shape to reset it. Hardest part was getting the four screws out. I had to drill out the little center tip sticking up out of the middle of the hex head screws. I used a T15 bit. I just peeled the end label back instead of cutting it, and it stuck back down good as new. Thank you for the video. It saved me about $95 at HD.
Awesome! Thanks for sharing your success story.
I would like to go into further detail on these batteries as well as some others that I have worked on, I have been inside the battery pack for about 7 years now and most all knowledge I have comes from you tube or trial and error, thank you for your time and keep vids coming,
I have another battery video coming soon.
Great explanations. I have red cell packs and many cells pop the CID open which I pop back but better to buy a cheap drill battery from any brand to rip apart and salvage. It seems Makita use good quality cells. If modifying and shorting MOSFETs I recommend to add resettable temp and amp fuses in series.
Not a bad idea. Thanks for watching.
Thank u for the information.
You are welcome. Thanks for watching.
Is there a way to reset this battery after getting a charging error?
you answered my issue; I have 41 volt on but the power shuts down after like 30 seconds, restarts again after the trigger is released and pressed again, faulty electronic board.
It could be shutting down because one set of cells is low when the load is on the battery too. :)
Great info. A+++
Thank you.
Hello! Thank you for the video! I'm trying to run a Razor MX500 off two Ryobi 40v in parallel. I have tried 6Ah Ryobi, 4Ah Ryobi, and two knock off 6Ah (which are really 4ah). The knock off ones run great and allow 35A each (70A with two in parallel), but the real ones all cut out even at low current draw (15A or so). I've seen them blink the two middle lights after they cut out. Once the load is removed they reset and work again till cutting out almost immediately. All of them work fine on Ryobi tools with zero issues but running a 1800 Watt brushless motor with 50A VESC skateboard ESC they cut out. Any ideas? I'm thinking the BMS is wigging out and cutting power but I'm not sure. Liked and subscribed... Cheers!
I know the cells in the 2Ah batteries are capable of 15A max each, so in theory because there are 2 in parallel your maximum would be limited to 30A. All of that current runs through one or two FETs, that have a limited amount of current they can handle, so I wouldn't be surprised that they shut down to prevent permanent damage. Even with multiple batteries they don't seem to share the load. In my testing it appeared that one battery does all the work and when you ease off the throttle and they go back on it, then the other battery would take the full load. The only way around this that I can see is to replace the BMS with a different one. I was looking into just that, but there is not enough room for a different BMS inside the case even if you remove the old BMS. The new BMS would have to be external. I may make a video on just that idea.
Thanks for watching
@@thecityviking Thank you for that insight! Sounds like the BMS is not managed very well if they are not pulling evenly from both sets. I have a shunt power meter on my little bike that has registered up to 75A for a few seconds with the generic fake 6AH ebay packs on a hard pull but those packs may be built differently. I imagine they are still running 18650s but it's possible they are running pouch lipos. Haven't opened one up. It's also possible that the meter is innacurate as it is a cheap Chinese one but the bike sure pulls hard and the packs don't cut out. I'm sure their BMS is just not as limiting as the real Ryobis. I have measured their capacity with the power meter and they are only actually 4Ah which makes it even more impressive if they are able to draw that much current. I have now logged over 130 hours on the knock off packs and while they don't quite have full capacity anymore they still run strong on my little bike that I run just about every day. It would be interesting to see what you think of the knock off ones if you ever get your hands on one! I paid about $60 each but got them to send me $20 each back after I called them out on the false capacity numbers. Cheers!
Great info. A+++. Great info. A+++.
Thank you so much for the compliment. Please share everywhere! :)
I have an odd issue with my battery, I have the single FET versions (my understanding is that this is the older style). Taking the battery apart and measuring V across - and + charging terminals I only get 10V, however when I measure the V between - shunt resistor ie the ground plane and the positive terminal (and the positive plane) I get the full 32.7V, testing each pack also gives me a constant 3.27V across ALL of the cells. So the cells are not bad.. The inbuild battery indicator only lights up 1 green light and obviously, the battery will not charge. I am not an expert in electronics, but I would have thought that the outside negative terminal connects to the internal ground plane. Unless another component (maybe the FET) sits in between the external connector and internal ground plane. Not sure if you have seen this before or not. Thanks in advance.
Your theory regarding the FET is correct. It sits between the internal ground plane and the external ground connector. The BMS programming won't allow the FET's to connect to the external terminals. Supposedly it tries to protect you from attempting to charge an overly discharged pack. They claim it's for safety reasons but let's be honest... it just forces most people to buy another battery.
First, try the reset procedure. (connect RST to ground for 10 to 15 seconds) If the reset procedure isn't fixing your issues, I'd try charging the cells a tiny bit higher manually. 3.27 Volts/cell is generally considered "Empty". It SHOULD charge ok at this voltage, but alas, it's not charging. You may be right at the threshold of what the charger considers "TOO LOW". (Usually it's 30 Volts???) So go ahead and manually charge the cells by attaching a 35 Volt power supply (or typical 19V laptop power supply with a DC to DC boost converter set at 35 Volts... they're fairly cheap). The positive wire can go to the external + connector, but the negative wire must skip the BMS by connecting to the negative point of cell #1.
Once you get all of the cells at 3.50 Volts each, redo the reset procedure (connect RST to ground for 10 to 15 seconds) and then quickly put it onto your Ryobi charger. (Don't waste time reassembling the pack, the long timing delay will re-enable the BMS battery pack shutdown.)
I hope this helps.
Resistor load might fix my no charge. Thank u.
You are welcome and good luck.
not releasing the pressure from the 0V cells?
Looks like there are multiple revisions of this board. I have a Rev Q board, which looks nothing like yours in the vid. I'd like to see how to revive it or check the cells.
Is it a newer battery?
@@thecityviking yes, it's about a year old.
The newer (updated) Ryobi 40v batteries will have the Rev:Q battery management system board. The older Ryobi 40v batteries will not have these bms boards, but still use 2 FETs on the updated Ryobi 40v batteries.
How long do Ryobi batteries last? I have 4 from my tools and no clue what to do with them. Using your videos to see if I can salvage them!
I have disassembled several for the cells and used them for all kinds of things. I have flashlights that require the 18650 cells that are inside. The cells are not the largest capacity, but they are high drain cells, so you can pull a large current from them. The BMS is not very user friendly, so I would not try to salvage it myself, but there are some decent parts you can salvage like the FETs for other projects.
I have a Ryobi LI-ION 40V 93.6Wh OP4026 battery and when taken apart, the computer board is different than the one in your video. In the upper right corner of the board it has 5 holes one right after the other with the following marks: CLK, DAT, GND, 3.3V, RST. Not to far off to the left are 3 more holes with the following marks: GND, SCL1, SDA1. Which holes would I insert a jumper wire to reset the battery?
I'm here to find out how to reset the older Ryobi battery as well. Did you ever find an answer?
Unfortunately not.
I have a weird issue. My BAD 40v is fully charged and when I put it on the charger it says fully charged. I also have another 40v which also charges fine so the charger is fine. The problem is w/ the my BAD 40v that's fully charged and shows no errors when on the charger will NOT power on my tools. I've tried multiple tools. My good 40v powers fine. What do you think is wrong?
Is the questionable battery actually charged? Have you opened and confirmed? If it is, the FET could be FUBAR. I had a battery that flashed all 4 lights but would not run the tool, and when I checked the voltage it was low and some cells very low, so I think the flashing means something.
Please have a video de soldering bms board ?
You require a lot of heat to unsoldee these boards. I used a 100/140W soldering gun and had traces lift on some boards. The problem is that you have to heat several areas at once and lift the board as well. If you are not trying to salvage the board, you can heat the pins and lift a little, then move to the next pin and slowly lift it off as you heat them.
I have a newer board (July 14, 2016) with red cells. Problem started and unit measured 28v total. One bank was low. I tried a variable charger without cutting trace as you had shown for other boards. Now I get 35v across output terminals but little to nothing across each pack or from fuse to each half. Any thoughts? Have I ruined it? Love the videos.
I am not sure I understand your problem, but I doubt that you caused any damage. The BMS may have disabled the output when one bank was too low.
Hi again. Back trying to resolve my battery problem. Prior to trying to get it working, I was getting about 9 V from the fuse to each side. Not enough for the charger to work. A couple of banks were at 3+ volts. After trying to charge it with a DC charger as in other videos, now I have 1 bank at 1.5 V and the others under 1 V. And now from the fuse to each side shows around 1 volt. Is there anything I can do to get it charge? Appreciate any guidance. Thanks
At what contacts did you hook up the boost converter to the battery?
I thought it was includes in this video, but it is in this one for sure.
ruclips.net/video/9chLnW1jX2U/видео.html
This was my first ryobi battery video, but maybe I'll make one more for the newer batteries and to add stuff I missed.
Thanks for watching
I am using these packs to power a 40v "1000w" minibike build. Using just 1 (6Ah) battery, the pack shuts down, I'm assuming the current draw is too high and it's lowering the pack voltage and tripping some protection. I have not been able to test with two packs in parallel yet. Is there a "C" rating on these packs, or do you know how many watts I can pull from them?
I am not sure about the 6Ah packs but the other ones you should be able to pull 15A for a short period. What motor are you trying to run? The 1000W motors I have seen all run on 48V or higher. If you try to run these motors with they ryobi batteries it will shut off because the voltage is not high enough to start out with. At full power the ryobi 40V(36volt nominal) will require almost 30A(27.7A) hope that helps
Opened my 5ah pack and found all cells at4.02v. Except cell1. Cl1. It was at 3.01v charged with adjustable psu at 4.0v 1a limit. Now battery worked on test run.
sweet. thanks for watching
I have a very similar problem - all measure 3.5 except for one that measures 2.5 (measuring from CL2 to CL3). Did you/can you charge the one cell in place? Can I just connect the psu to CL2 and CL3 with 4v 1a limit?
@@carlosfuentes5422 3v battery is a weak used cell. believe it is always used for the electronics 24hrs a day 7 days a week. extreme wear compared to other cells. after charging it and running it in weed eater for an hour it was back to very lower than other cells.
Have you tried charging individual stack at the points where you are measuring the low voltage? I measured similar voltages as you are and I charged individual cells from the tabs on the bms, brought all cells to similar voltages using a single 18650 battery charger. Now the battery works fine so far.
It looks like the balancing part of this bms is not well designed and does not do the job properly.
While I am not a fan of the BMS on these batteries, all BMS's have a limitation to how much they can correct. Limiting how much current is used for charging can help mitigate cell drift. The bottom line is that the more cells are cycled the closser to the end of their limited life they get. I have manually corrected cells to get batteries to work, but you may find you have to do it more and more, but at least you can get more life out of the batteries. Thanks for watching.
I have a 5ah battery that got wet and the two capacitors in the center of the board blew, do you think I can try changing just those or can I replace the whole board? I was able to save my 3ah that also got wet, which just needed a mild cleaning and a reset. I tried looking for a board for the 5ah, but the 5ah seemed to be hard to come by.
I have pulled the BMS off of about 20 Ryobi batteries and I have always had at least 1 pad lift, so take your time, and good luck. You may be able to remove the caps without removing the entire pack.
I have a single FET pack that is showing full voltage internally but only about half voltage across the main terminals. What do you think about the idea of running a thermal switch (rather than a solder bridge) across the FET pins?
A thermal switch would offer a little protection at least, but I would only charge it that way while monitoring it. Did you see the part of my video where I show how the output pins not showing the correct voltage until I put a load on it? Then it showed the correct voltage.
City Viking did I see it? Man, I watched both videos multiple times! Lol. What I am worried about is the case where I forgot and left it on the charger and it got in a thermal runaway scenario. I am hoping that breaking the bridge will stop the charge, but your video didn’t really cover that scenario, unless I missed something.
I added a jumper as you suggested and saw no change. Do you think I am looking at a bad FET?
The jumper should have bypassed the FET and the battery should have the full voltage across the main outputs. Are you not getting that?
City Viking I will post a pic tomorrow showing the jumper placement that I used
I have a dead Ryobi 40V 6Ah (OP40602). I opened it and measured the cells to be at 0V. I have access to 12V and 40V power adapters, any suggestions how should I go. I was able to revive some Ryobi 1.5AH 18V batteries
I do not have any of those batteries, but I would start by getting all the individual cells to the same level, say 3.6V. Thanks for watching.
Can I charge individual cells through soldered connections on the board without disassembling everything?
That's exactly what I would try. Make sure all banks of cells are charged to the same level and try it again.
Instead of salvaging, I would like know how much effort is required to replace these bad 18650 cells. I have many 40v tools and rely on these batteries. However at 100 to 150, I look for used and bad batteries. I have an opportunity to buy 15 assorted amp hour bad batteries. I can use good cells in some to make others work. Just need to know how to swap them.
You would have to start by removing the board that is attached. While this can be done, it is difficult to not damage traces. Once the board is removed, there are 4 long screws in the older pack that breaks it down to 2 separate packs. You would then need to remove the welded tabs on the ends to remove the batteries. I have plans to do something like this with some of my batteries. Stay tuned!
Working on one now. Cells changed and all back to around 4v. Since rst shows 3.3v. Did the reset to GND but still not behaving . Sometimes shows 1 bar sometimes 3 when pressing button. And won't charge in charger. Think the controller parts a bit confused.
Yes, these proprietary BMS's seem to fail, and no matter what you do, they can't be recovered. I have tried fitting a different BMS in the box but have not been successful...yet!
If all ten groups of cells in the series string are at 4.00 Volts, that's good. Now try the reset again (hold reset pin to ground for 10 to 15 seconds) then IMMEDIATELY put it onto your charger. Try to do these two steps in less than 30 seconds... the time wasted putting the enclosure back together screws up the timing of the BMS housekeeping checks... and that delay re-enables the "battery shutdown" sequence.
(You may have noticed that the voltage on the output terminals decreases after about 45 seconds from reset or charge initiation. That's your first clue that there is a timing sequence happening in the BMS programming. The 10 second reset and subsequent charge cycle need to be done in a fast sequence.)
@@test-193 I have never heard that, but I just tried. Short rst to gnd and immediately put on charger and it's showing charging now. Hope that solution sticks. Thanks so much. Where did you discover this method? Have you experience with this particular bms chip. I thought it was a self destruct type . But the reset does seem to get things back if you follow the right procedure. Edit: charged from 38 to 40v(across cells) and some weird things happening. Charge level shows 3 sometimes and 4 sometimes when pressing button on battery. Voltage showing 20v across +- terminals. All batteries near 4.0v except one that is 3.8 ish. Perhaps that cell pair is bad causing issues.. I'll change them over and keep on trying until one of us completely dies.
David Ujcic - glad that it charges now. Does it actually power your Ryobi devices? Or not?
Also, you can charge up the one group of cells that is lower via a simple 18650 charger and some alligator clips. No need to replace them at this point.(maybe it will be necessary if that same pair drops below the others again.)
You'd think they would match the cells, right? As in coming from the same batch at the time of manufacture.
They probably did, but the batteries were pushed to their limits and caused damage to some cells.
I build ebike battery packs. Doesn't matter if from same batch. There will always be Drift. I use a Hobby charger balancer. And run it Naked No bms or safety. Ezpz
I was working on an Oregon 40 volt chainsaw, yesterday. They thought it was the speed controller or motor but I told them is was more likely the battery or a switch. They said the battery has four bars on it but I told them a battery can contain voltage but no current due to excessive internal resistance, E=IR. I put the battery on a new Oregon charger and after about an half hour the battery would run the saw for a second or two. I left it on the charger overnight but I think the pack is shot. I do not know any history on the saw or battery pack. I think the battery was fully discharged and the saw thrown in a tool shed until the next time the owner wanted to use it and the battery was then crapola.this is why I only have two cycle saws.
It is likely the battery. Have you checked the voltage of the battery and the individual cells? Lithium packs shut down the pack if the cells are not balanced.
@@thecityviking no, just the positive and negative terminals and pressed the button on the front of the case, four green bars. Voltage was 40 VDC.
You could still have a few weak cells causing the pack to shut down, but maybe there is a problem with the motor or drive that is causing too much current draw. The easiest way to determine if its the battery pack or the unit would be to try a known good battery.
I have one battery dropping voltage. Reset didn't do anything. The second battery has 1 cell group at 0V. What can I do in these cases?
Sorry, but it sounds like the cells are done. Thanks for watching.
I have a perplexing problem that isn't covered in this video but you seem to have the knowledge to diagnose it.
My older 4a, 40v battery shows 4 green lights and measures 40v across the + and - terminals on the case. My string trimmer will only run for about 2 seconds and then quits. I can immediately start it again and it will run for another 2 seconds... does this about as long as I want. Any thoughts? Liked and Subscribed.
It's possible that one group of cells (of the 10 in series) is lower voltage than the other nine. Even though the overall pack is measuring 40V, the one low group may trigger the BMS to shutdown the FET's.
For example: Nine of the ten groups are at 4.10 Volts, but one group is at 3.20Volts. This equals 40.10 Volts, so everything seems ok... but the BMS would not like the group of cells at 3.20 Volts and take action to disable the output FET's. Try measuring each of the ten groups of cells. It's fairly easy to charge up the one low group with a typical 18650 charger and some alligator clips. Hope this helps.
I agree. If the trimmer works fine with a different battery, the problem is in the battery and could be a bad cell or 2. All of my tools don't communicate with the 3rd connector which is a data line, so the BMS is shutting down for some reason or another. They do monitor temperature through 1 or 2 temperature sensors and that would shut it down too.
@@test-193 Thanks for the suggestion. I'll try it this weekend.
@@thecityviking Thanks for the confirmation (and for making the video in the first place).
In the 4 connectors of the pack,
The outside connectors are pos and neg
What is the function of the 2 middle connectors ?
The middle pins are used to communicate with the charger. Here is a website where a few people are trying to decipher the communications.
www.diyelectriccar.com/threads/ryobi-40v-bms-troubleshooting-and-repair.197409/
@@thecityvikingthanks, Im asking because some battery packs especially for scooter has separate pin for charging
Most standard BMS's have a separate wire for charging. The positive wire from the battery goes to the charger and is used to power your device but the negative usually goes through the BMS (B-) and has separate connections, one for charging (C-) and one to power your device (P-). Quite often you have a separate connectors for charge and one to power your device, but I would bet that inside the battery pack that the positive of both are connected. The Ryobi Battery is different in that it uses the same 2 connectors for charge and discharge. Not sure why they did this, perhaps to make their batteries more proprietary. Hope this helps.
Xin bạn nghiên cứu và làm thêm những video về việc bạn reset lại pin RYOBI , đối với những phiên bản pin 6Ah mới hơn , khi họ sử dụng nhều IC ở đầu ra OUT B- . Khâm phục và cám ơn bạn rất nhiều ! THANKS !!!
What's with all the boats?
Boats?
Thanks for watching.
I have the Ryobi OP4015 Battery. It sat on a charger for a long time (both plugged in and unplugged). Now all the LEDs flash and the charger does not detect it as chargeable. The logic board is a Double Fet type. If I solder a wire from one FET contact to the other as in your video, can I just plug the battery back in the charger?
Flashing lights on the battery are usually a sign of a problem. In my experience the individual cell pairs are very low and it will not charge on the charger. You could try and charge the individual cell pairs up to 4.00 volts and see if the charger will work again.
@@thecityviking After I soldered the wire across the 2 FETs, the charger did recognize the battery as chargeable. But after using the battery once and placing back on the charger for another full charge, the red and green lights flashed again after all the LEDs turn solid green. Is this expected because of the FETs being bypassed?
I have a question. If I test from the battery positive to battery negative I get 20 volts. If I test from the battery positive to the cl- spot on the board I get 40 volts. Does this mean the board is bad?
The voltage will drop across the negative and positive terminals if there is no power draw. This is because the FETs have turned off. If the battery does not charge or discharge, it is because the FETs are not turning on. There could be a number of reasons for this including a bad board, or board determined cells are not balanced.
@@thecityviking I will recheck the cell balance Thanks very much! awesome videos!
Have they finally fixed these batteries yet ?
They could make these batteries less proprietary that is for sure!
I have 2 of the Ryobi OP4026 95 Wh with the "18" stamped on the board next to the Dec 17, 2013 date and the light green batteries. I charged one up to 40.1 V using the same type setup as you describe (connecting the negative to the screw/pole and the positive to the far right blade as in your first video). On the first one it worked perfectly, on the second one it charges correctly and all the batteries check out as holding a charge (between 3.6V and 3-8 V and around 20V on each half), but when you measure the voltage from the far right blade (+) to the far left blade (-) the voltage is 15.1 V. Obviously, when you put it on a Ryobi charger it just flashes green and red--because the voltage is showing as so low. Since the resistor mod doesn't seem to work on this board, I was wondering if anyone had any ideas about why this was happening or how might one fix it. Seems a shame to have to deconstruct the battery for parts when it seems to be working otherwise. Great videos! Thanks in advance.
Thanks for watching. The measured voltage across the 2 blades is not always accurate. If you attach a load across the two blades and then measure the voltage, it usually measures correctly(I think I show this in one video). This is because the FETs turn off after about 30 seconds and you are not actually measuring the battery voltage.
Here is another source for Ryobi battery information.
www.diyelectriccar.com/threads/ryobi-40v-bms-troubleshooting-and-repair.197409/
Hi there from Australia 🇦🇺 I have a question that I have not found the answer to anywhere. I have the double FET board and the charger flashes red/green. I have charged the battery to 35v as you have explained, have reset the board using the “RST” point to ground. Still I have the red/green flash. I have not yet bypassed the FET. What would you suggest next. The cells are all good individually however it was discharged to 4v total when I acquired the battery. Cheers , Jason
Are all the individual cells close in charge state? They need to be something like .020V volts or closer otherwise the BMS thinks the cells are too far apart to correct. Sadly it could be that the internal resistance of the cells are out of range for the BMS, and there is nothing that you can do to fix that. You can harvest the cells for other projects though.
Uggghhh this is torture. Just gonna can these old batteries
If you haven't binned these batteries try and sell them for their parts. You may be able to make a little towards new ones.
How bout you do a ridgid 18 vid in same manner crossing the 18 battery. I had 100% happenstance luck on repairs. And worse luck if you. Even say water the same time you touch one. And I'll be going to ur channel to find more awesome ness thanks
I am always looking for other batteries and as I get them I will make more videos!
I have a newer 4.0 battery that won't charge or run the tool. When I push the fuel gauge button all 4 LEDs blink 4 times. I get 38v at the terminals and here is a link( tinyurl.com/yag6vo45 ) to my testing at the battery test points... Any ideas I was thinking maybe a bad MOSFET...?🤷♂️
While it could be a bad FET it is more likely that the pic has determined that the one of the cells is bad so it won't let the pack charge. Check all the sets of cells to see if they are all close to the same voltage. At 38v each set of cells should be 3.80v. If you have one set that is different that may be the problem. If you get all the cells close to the same voltage, it may satisfy the pic that the battery pack is ok again.
@@thecityviking Each cell is 3.80v. Still have 4 flashing LEDs.
I think I will de-solder the FETs and replace them.
You could check the gate voltage to see if it is trying to turn on the FETs. I think its about 10V. Do you have another battery to make sure your charger is good?
Let me know if you get it going again. Good luck!
I've fixed 4 Rev Q batteries, and here's their little secret: they permanently lock in unsafe mode. Even after you balance all the cells, the lights will still flash. Solution: find the 2 little pads inscribed in a rectangle called RST. Jump those 2 pads together. I used needlenose pliers. So far this has worked 100% for me.
@@real-botspot worked perfectly 👍
Jumper RST and 3.3v for a couple of seconds: @
that didn't work for my batteries, but it is definitely worth a shot.
Chrck cell tabs
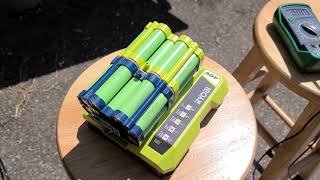
Why did you not identify the cells?
The green cells are LG LGDAHA11865. The other color is Samsung INR18650-13Q. You can look up the datasheets for each of these. They are both 1300mAh LiCo cells with a nominal voltage of 3.6 volts. There are 2 Banks of of 10 cells.
I tried to cover everything but also make a video that was not too long. I never make a script, so things sometimes get forgotten. Thanks for watching and adding the cell specs
Ryobi batteries are just junk I had too many fail some I've revived some with bad circuit board but cells are ok....junk pure junk I now use an adapter so I can use either a bosch or dewalt on my ryobi tools so I've solved all my problems by NOT using crap batteries from ryobi.
I agree with you in that the battery packs fail too often. If I were to make these packs I would not make them so proprietary. I like your thinking with the adaptor though!
Did you make an adapter or did you buy one?
I had a friend 3d print an adaptor and I bought some that look 3d printed that come complete with wires and connectors so they are ready to go. I ordered some connectors for the 3d printed one and they should arrive any day. I will make another video that shows the 2 with the details.
@@thecityviking any chance you might be doing a video for the rev Q boards?
I believe I have one, but it is still in working order. I was considering doing a video showing some of the differences in the boards.