Motorcycle Fork Seal Removal And Replacement

HTML-код
- Опубликовано: 14 сен 2014
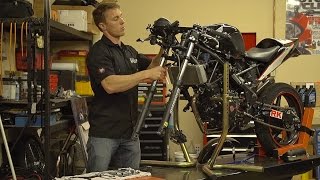
- This video shows how to remove and replace leaky motorycycle fork seals using basic, inexpensive tools. Once you see how it's done, the mystery is removed from the procedure and you'll be able to do it yourself with little effort.


Thank you Tom. I looked everywhere for a video addressing how to service standard damper forks, especially showing which way the seal goes. There's not much on the Internet and this is the only one with clear instructions.
Thank you for the time you took to make a video that is extremely well thought out. Very concise and easy to understand. I didn't understand the procedure to remove the socket head cap screw out of the bottom of the fork until I stumbled onto your video. Again thank you!!!
You're very welcome! It's always great to receive such nice feedback and I'm glad that my video was helpful.Tom
Hi! Your video is so informative, detailed and helpful that you deserve all my respect. Thanks so much. I know how to change the fork seals but your video is going beyond. By the way ¡What a great bike you have at your back! Again: Thanks.
Tom, THANK YOU. !! .
After severe M.V.A. in '99 that confined me to my wheelchair for 3 + years forced me into learning to walk/think/function again..I never lost hope to ride on 2 wheels again.
Im buying my '85- v45 magna tomorrow or next couple days.
Your "front fork seal" replacement video has been extremely helpful for getting $200.00 ( off $2000.00 asking, due to forks work) off purchase price. Not to mention the much needed knowledge of correct procedures for this project.
Thanks Tom.!!
My pleasure, and glad you'll be back on 2 wheels soon. Bet of luck with you new ride, and enjoy!
Thanks for showing us all of the hands on tasks in detail. That is exactly what I needed.
This video is bloody brilliant. I had no problem changing my fork seals and oil on my 2014 Yamaha Bolt following this video. Keep up the good work.
Thank you so much for explaining this procedure like you did. Sure helped me out. The best video out there I found so far.
Thanks a lot for the upload! I almost gave up and then saw this pvc pipe method and it worked perfectly.
Awesome - glad to hear it!
Systematic.... Nicely presented Step wise with stages!! Appreciate dude.
I just completed my first fork rebuild. Your video was very helpful. Thank you for taking the time to help us out.
Awesome! Glad you found it helpful. I'm doing another set of forks as we speak!
Thank you, By far the best how to video for fork seals i have found
Hi Tom! Your video was the best I could find so far. Thank you so much. Now my 2000 VFR has everything new in the forks. It seems that my bike just got a new life. Sadly the season back here in Finland is only 7 months. All the best to you!
Fine video. I had to watch with no sound but found the presenter to be dynamic, interesting, and informative. Good camera work and editing. Real nice. Was a good refresher for rebuilding my ZG1000 forks.
I am getting ready to do this on my Magna VF750. It will be my first time, and thanks to you I know I will have no problem doing it. Thanks.
Excellent video. I needed the specific step-by-step process and you did it very well. Thank you
Great video, very clear and helpful! Would love to see more, and show off some of those bikes!
Wow. This video is just what I needed. Thanks for your time and effort.
This helped explain the fork assembly/seal removal a little more for me as I'm doing my Honda cm450 fork seals with no previous experience. THANK you for making a clean cut video and explaining what you have!
I'm glad it helped - it's my pleasure!
Just about to start my first fork rebuild. Thanks for sharing all the knowledge!
Great video. Helped me figure out how things work inside there. Thanks for posting
This is exactly the video I need to change out the seals in my 84 Nighthawk S. Thanks!
Great video, I'll be rebuilding my 2015 vstrom 650 forks this next week. Least I have an understanding of what to do after watching this
the quality of this video is amaizing!
This Video is really helpful, That fork leg is exactly like a #1986YamahaTT225 I'm glad you showed those Two Teflon bushings and that Washer. Great Great explanation
Excellent video! I had a 1986 VF500F. I am currently riding a 1993 CBR600F2
Great video. I appreciated your teaching method; straight-forward, knowledgeable, clear and concise. Cheers.
Thanks very much - your kind words mean a lot.
I have this job to do shortly and your video has been very informative and very useful for a jo I have never done before. well done that man Cheers ALAN
this was perfectly helpful, thanks so so much, best video out there
You made that upper bush seem so easy. I'm doing it on my vstar and it's a stubborn mule. The seal itself is way easier to install
Now this is how you make a tutorial video!! Great job, thank you so much!
Thanks Mike - I'm glad you found it helpful.
The best and most helpfull video, that I found concderning this work. Thank you very much.
Great job! Straight to the point. Thank you, Sir.
Looks simple. I like it. Nothing like a good instructor
Thanks Tom, my 2000 FX650 is the same, this video is really good and helpful.
Excellent Video Tom, Thank you for Sharing...
Excellent video just watched this as I'm attempting the seals on my Cb500s by far the most informative to give me the confidence to takle doing my seals...
I did my CB500 a while back, quite straight forward. I also did my Virago a week or so ago and did a vid.
Excellent video! Very concise information and presentation. Will be very useful on my leaky forks. '03 ex250f Ninja.
Thanks for the Vid.... I will be working on my 84 Nighthawk 700 soon and this looks almost exactly like mine.
Excelente trabajo y muy profesional gracias por todas las indicaciones, me sirvió bastante
Perfectly done. Thank you
Thanks..very easy to follow and detailed information...much appreciated!!
Thanks for taking the time to make a great video.
I followed your video last year. It is such a perfect video, thanks!
Thanks, Chris - you just made my day! Glad that you found it helpful.
Great job. I have noticed some other's don't use lock tight on the allen bolt at the bottom. Nice to see you didn't miss that part. 10/10
Thanks! Glad you liked my video.
Very helpful video. Thanks!
Thanks Tom, very inciteful
Got to do my 1000F so this video was very useful - Thanks!
Great video.
One question, what should I check when the fork locks up when bottom cap screw is fitted. The damper assembly doesn't seem to want to come through the bottom of the upper fork (stanchion). I have not changed any of these components.
Bike is an XJ600n.
Great video, it's very well structured and I know I learned something.
I seem to have a cracked/corroded dust cap on my 85' Suzuki GS550L, it's my first bike, and she rides fine; including the suspension, I think. How much of a priority would it be to get that replaced, being I have other work to have done, like the carburetor.
Tom, good video, From experience , sometimes it is very difficult to undo the lower allen key bolts, I like to try and crack the loose while still under tension before removing forks from the bike. Also a mention that be very careful to not cross thread the upper screw caps as they have a very fine thread.
Damn, I absolutely love your video ! Nice and calm, and everything seems professional. That is also very helpful for me since my one of my forks is just spilling oil all over the fairings when I ride :/ Thank you :D
Glad to help!
been told and makes sense to just crack the bolt before fork removal makes life easier I'll be doing my fork springs and oil as soon as I get the kit can't wait
Excellent video, thank you for sharing your knowledge!
awesome Tom very helpful thanks.
Excellent Tutorial Mr. Tom. I already subscribed to your channel and I hope to continue watching important videos like this. Thank you.
You're very welcome Wilmer - thanks!
Thanks for making this video.
Thanks! The seal in the freezer trick worked great! There was a very noticeable difference between leg 1 and leg 2!
Jason Ewert seal in the freezer trick? what does that do?
It shrinks the seal so it will slide into the fork leg more easily (with less force/ less potential for damage)
Much obliged. I changed the seals in a set of forks in a '78 KZ650 many years ago, still have the bike, and need to do it again. In fact, I have two sets one on the original bike I'm putting back on the road and another from a parts bike. The seals are cheap enough and will give me some practice. I didn't remember it being all that difficult and the shop wants $150 just for the labor.
This video was so helpful! Thank you!
You're very welcome! Glad you liked it.
Great video, actually about to replace the seals on my 82 V45 sabre. I'm positive the forks are the same so wondering if you had a link to the seal kit you used? Particularly the circlips, none of the kits I've found include them
Thanks!
Nice job Tom!
Thanks
Great video!
Very helpful!
Thank you for this intelligent well done video 👍
Thanks very much for your kind words!
Well done!
Nice video thanks . Couple ask ? . Can you tell me is this video usefull for old bike such as shadow vt500c and where is manual number 21 for oil fork filling ?.
how did you pop the seal out of the outer gold tube my ducati forks am the same but they won't come out!?
You mentioned using the freezer for the ease of dust seal seating. My dust seal won't seal far enough for the ring. The fork seal driver tool is damaging the fork seal. Any suggestions and the Stockton seal driver busted and bent. What size is your pcv pipe?
Think you for helping. The Harley shop where I live said 350 to 400 to do what you have shown me so I am doing and now I can thinkyou
great video. really helped.
A very easy listen of how to do seals. Excellent
Thanks!
My motorcycle has an oil leak on left side. Do I just buy the fork seal to replace it or do I have to buy whole such as dust seal, oil seal stopper, oil seal and oil seal retainer?
Good job, Tom! It's about time someone put tape around the fork tube!
Nice work.
Thank you great video
Great vid!!
very helpfull video
thanks
Did you get to the 70's fork seal video? I have a '75 Suzuki GT550 Triple with a leaky seal.
Thank you!
Hi Tom, do you have a video for 1975 kawasaki z1 900 fork seal replacement? Thank you
Very helpful.
Thanks , very helpful to me :)
You are my new go-to guy. You have a very calming manner in your videos which make them quite soothing to watch. Have you any videos where you lose your shit?
Hahaha, I just saw this comment - you really made me laugh. No, so far I haven't lost it on any of my videos, but I have while doing some of my own work. I'll try to pick a subject that will force me to flip out and throw tools around the shop. Have a good one and thanks for making me laugh.
Very helpful, thanks a lot!
You're very welcome and I'm glad it helped!
I have a drive way full of bikes I bought each family member through the last 50 years; and ended up with each of them back when they could get them running again; a new guy moved in across the street and cannot get that steel spacer tube pressed back inside; after installing the spring and washer. I do not remember ever having the same issue when changing out different length front fork tubes to adjust handling / cornering; but it has been 1 1/2 to over 2 decades since I have done this task.
Any Idea why he is having this problem; I gave him four different shop service manuals for various bikes; but figured the shop service manuals I had for my track bike; a 2009 Buell 1125R to get a general idea. His steel tubes like the one you put in during this video; is a good 8 - 10" long, and no matter how hard or how big of a guy tries; it still sticks out a good 4 - 6", and there is no chance of putting the top cap nut on it; something isn't right; however, I have never owned a 2001 Yamaha V-Star 650cc bike before.
Addendum: It has been since 1986 when I replaced my front tube's with 4" over forks on my 1st new HD 1100cc Sportster Custom while stationed in Germany; and 15 years since I put 2" over front fork tube on my second new 1999 HD Softail Night Train, ( Which I still ride today ), when not toting around ole girl on a 2011 HD Road Glide Ultra.
Any insights would be appreciated; the good new story is; I told him; it is only difficult the first time .. lol, like most every thing.
Thank you sir !
Excellent
Thanks :)
good job
Good video
great , Thanks.
thanks somuch
Hello, please, how much oil do I pour into the front shock absorbers? honda xl600r (pd03) 1983 Thank you very much
Wow ! Your videos are truly the best ! Just curious ,I'm doing the forks on a 1982 cb900f. Do you have and tricks on getting the forks to slide through those rubber turn signal mounts? Keep up the great work, We really appreciate your detail videos !
Yes wipe a little WD-40 or even some windex on the rubber before sliding the tube through and you should have no trouble. Glad you like the videos - thanks!
i had no bottom bushes on my xps 125 ct and the seal is still in lower tube. how do i remove the seal.
good chit, thanks
Great video. My problem is that the inside of the fork is turning while i turn the allen head bolt at the bottom with my ratchet. i m hoping that a friends electric impact wrench will undo it.
Well presented. I have only 1 issue here. You never ever put locktite on that bottom screw. Why you may ask? Because it's like breaking it off in mama's back door. The next guy that comes to do this is gonna curse you to no end. You do not need it or any other form of adhesion assistance. No Teflon tape or ANY foreign substance should ever be used inside the oil compartment. AND it forces you to delay putting it back together, who wants THAT problem? Not me. Just replace the copper washer, torque to spec and you are 100% good to go.
You may be right, but all of the Honda factory service manuals that I have (at least 5) specify using loctite on that bolt. Personally, I don't think it's needed either, if torqued to spec.
@@tomscyclerecycling8242 Point taken. A locking type washer behind the head would do nicely to keep it in place. Think I will try that just in case. I am doing this project tomorrow. I have purple lock tite and may just use it. It is lighter than Blue and I can wait overnight to put it back in. No hurry here. Bike's been sitting for nearly 2 years. Carbs are done and she idles and runs up nicely. But that front end is calling my name, especially after the death wobble hit me at 75 mph. Sure got my attention fast, only had 1 hand on the bars.
Yes. Especially if you don't heat the Allen bolt before removing it next time, and if you try to get the bolt out without first heating it, you'll just tear it up.
You have convinced me to do it myself on my Suzuki 1200 Bandit (GSF).
The right ordre at the end is (it's a question) :
- you tight the bottom bolt
- you add the fork oil by the top
- you pump several times for the oil to get down
- you close the fork by tightening the top big bolt (where you manage the smooth/hard of your fork) ?
Am I right ?
I'm not familiar with your Bandit, but you pretty much have it right. I don't have to do any pumping after I add the oil since it isn't like a brake system with air trapped. Also, some forks have an adjustment that's part of the top nut, but not all of them. The ones with dampening or rebound control do. Best of luck!
You do good work Tom! See you on the forum < ; ^ )
dude your videos are awesome, but your last one is a year old. I'd love to see more!!
I know, I know...I'm very late putting out the next couple of videos. Getting my video guy to come and shoot these has been a challenge lately. He's my son-in-law and is very busy. But I promise that more are coming.Thanks Patrick!Tom
Great to hear, keep it up!!
I know, I know. I have at least new ones all worked out in my head, but I need a new video man to shoot and edit them. It's hard to find out who will do something like these at a low cost. I promise that there will be more!