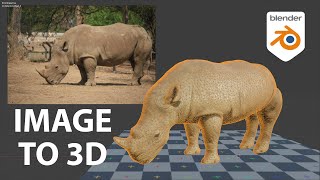
Make Animals In Blender 3 - The Easy Way

HTML-код
- Опубликовано: 16 сен 2024
- In this video i show you how you can make fairly convincing animals in the quickest way possible that are fully rigged and game ready.
Thanks to Nvidia and PC Specialist for sponsoring this channel.
www.pcspeciali...
www.nvidia.com/
Learn How to make characters like this with my Blender courses all only $15 (plus local taxes)
bit.ly/4apCOCy
(Search Blender Courses)
Chapters and links
1:06 - How to insert background images - • Placing Background Ima...
1:20 - Tracing animal - make low poly animals - • Low Poly Animals | Qui...
2:10 - Bulk out
3:20 - Legs
6:02 - Unwrap - Learn more about unwrapping • Unwrapping & Placing 2...
7:01 - Texture Painting - beginners guide • Texture Painting | Ble...
7:20 - Stencils - Guide to using stencils • Easy Texturing with St...
8:26 - Clone brush - quick tip video to come
9:15 - Rigify
9:36 - Hair cards
11:10 - Rigify 2
Say Thanks: paypal.me/grant...
My Website: www.gabbitt.co.uk
Discord: / discord
Get good at blender series: • Get Good @ Blender
Simple game assets playlist: • simple game assets - f...
Learn the basics of Blender 3: • Learn Blender 3 for Co...
Learn texture painting: • Learn Texture Painting...
Learn Sculpting playlist: • Learn Sculpting in Ble...
recommended graphics tablet:
I use a graphics tablet to paint with and my recommendations are written below:
Ultimate Buyers guide - • Graphics Tablets - Ult...
Display Tablet
my choices:_
Display Tablet
XP Pen pro 16 - 22
UK - amzn.to/3Itzrgy
US - amzn.to/2OMIoY4
Graphics Tablet
Wacom one
UK - amzn.to/39drH1C
US - amzn.to/3jrGGd2


For animations you can scale and place a video in the background as a plane in mp4 format and set the frame start and end for the sequence you want to copy. Once that's in place with the example of Grant's Horse you can then key frame the major positions and replicate real world movements for your models.
@Lukas Thompson np there is also a free thirdparty mocap site that will take video from a phone and then make a rig that you can then transfer the animations over as long as the bones are named the same, cant remember the site but the ai is only set up for humanoid.believe you have to mask the first frame of the person for it to know what to capture though.
awesome I get it now
This is a game changer for me! I usually do high-poly sculpts for 3d printing but I've wanted to expand into making game-ready models. I originally thought the only way would be to do the high poly sculpt, then retopologize, bake the normals, etc. I didn't really know the best approach but this is lightning fast!
So you can make high poly but no low poly? lol
@@stormk-1130 it's not that I can't make low poly, I just had the process flipped. I assumed I would have to make a high poly sculpt first then bake the normals, but this video shows me that's not necessary at all for a game ready model. I can't just make a low poly and save myself a ton of time haha
@@stormk-1130 I find this surprisingly common these days. I've seen so many younger artists that have only worked in zbrush / standard pbr workflows and are totally lost when it comes to just building a low poly model and making a texture from scratch.
@@leedotson6323 I've never used Zbrush, but I'm still pretty new to working in 3d modeling in general.
I started using blender at the beginning of COVID and I exclusively use it to make models for 3d printing-In which case low poly models are useless to me (I use my prints in my detailed dioramas). I just didn't know the approach for game models because I hadn't considered making any until recently.
@@Geordiecrafts Sorry, I should have clarified that I wasn't referring to you specifically. It makes sense that you wouldn't be familiar with a more texture heavy workflow if you started modelling for 3d printing.
This was often referred to as "profile modeling" and it was one of the first O.G. modeling techniques I learned way back in 2001 from a modeling book I bought teaching you how to model dinosaurs. Still think it's a pretty useful strategy today for beginners as I'm rounding the corner of about 20 years in the professional industry. Only thing I would encourage for new people is to not lean too heavily on image plane tracing, as you'll want to hone your 3d spatial shape interpretation abilities.
Do you mean modelling straight from a reference to 3d as opposed to importing an image and tracing?
Yes, I found that I only got better at organic modeling in particular by having reference images on one screen(assuming you have 2 monitors), your 3d software on the other and mentally breaking down and extrapolating 3d shapes from direct observation of 2d images. In the beginning I was leaning too heavily on accurate 4-point turn ortho character sheets, but sometimes, you don't always get those and have to figure out shapes and proportions on your own from a single perspective image.
@@rodneyabrett really good p.o.v i learned modeling with clay and i'm learning to sculpt in 3d now and knowing how to interpret 2d models is a freaking good skill to have
I can recommend a software called PureRef instead of Blenders background images.
@@makulVR PureRef is awesome. I love it!
A tip i can give for hair cards, is to use curves.
You can position it the way you want and use the extrude to make a plane. Convert it to a mesh and the uvs will be fairly easy to adjust. Saw this on a tutorial a while back. You can even use hair particle system to generate de curves.
Also, You can try making the hair cards in blender itself, using the particle system and the principled hair shader.
Hope these tips can help :)
Other than that, the model looks pretty good, nice video
I used to use hair curves with alpha on so only the hair strands would show, it definitely isn't the most realistic approach if you're looking up close but I'd highly recommend it for anyone who cannot stand the hair particle system like me! For more volume you can just make a smaller version of the hair and make it opaque too
Very interesting 👍 I would never have thought to use the actual reference image as a texturing stencil. Good idea to get great details on a very low-poly animal (the eyes, for example).
Thank you for making these tutorials 🙂
You could call it «a horse brush»
@@novmikvis Yes, you could
When moving vertices around, my tip is to use the Tweak tool (press W untill you see the pointer with the cross in the tools selection), then set Preferences->Input->Mouse/Tablet drag threshold to something low, I use 3 px. Of course sculpting tools are also extremely useful on lowpoly models, as demonstrated in the video here!
Also when smoothing in sculpt mode, also try Brush settings and change Deformation from Laplacian to Surface smooth, the latter will preserve volume. Good for cleaning up topology.
this really saved me! I was just destroying the form lol thank u so much man
Amazing tutorial! I had never before done organic modelling or made any complex animal meshes ever and was always scared of it but i was able to make this in less than a day! This is certainly a step ahead in my modelling skill level
Thank you so much for detailing this process!
I saw Ian Hubert do similar for ducks, buildings and even a whole frickin waterfall lol.
I love Ian’s concise videos but I also love that you broke this technique down! It’s VERY versatile :)
Thank you as always for your thorough tutorials! I really wanted to learn how to effectively do this!
Seconded for Ian Hubert videos, though, his Lazy Tutorial videos have been vital in quite a few of my projects for both class and professional work!
I’d also heavily recommend Royal Skies, who also does quick videos that teach you extremely important techniques extremely quickly! I feel lucky to live in a day and age where so many content creators make such amazing videos to teach others for free!
@@projectalpha22_va I know Royal skies! He’s the reason why I understand black and white texture maps fully now :)
But good recommendation!
hi! late reply, but where can I find these videos from Ian Hubert?, greetings!
I Couldn't recognise that it a low poly model.🔥🔥🔥 Even though you used hair cards.. Excellent job man!!
This way its really easy, it's so useful and understandable for beginners like me congratulations bro.well done.🎉
For the hair cards, on the tail you could have try making a tri-plane. Cut a loopcut in the middle, then select the middle edge, and extrude the edge only. The texture mapping should follow, and would create a new plane intersecting right where the "information" is on the transparent plane. That's the same technique that's used with WoW's trees.
holy crap im so glad i finally searched this up! with the technique i was trying to use ( with even less steps because i forgot some, i mean i did 1 tutorial) you could tell it was a horse, at least.. huge improvement when i figure this out
Thanks. This is a really helpful tutorial for this point in my Blender journey. Your vids are awesome!
As a life-long fine artist of wildlife sculptures your tutorial is inspiring in my journey into the 3D world of Blender, ZBrush and Photogammetry. Thanks
These tutorials are great Grant, thank you. I always learn something new.
For hair I really like the Hair Tool addon. Basically you give it a simple mesh and the addon will generate hair cards over it
Used this video to make a frog, very helpful, thank you grant!
every video is amazing and this doesn’t disappoint! keep up the amazing work!
Fantastic! I can’t wait to do this for my own projects! You are the blender wizard
3:65 Thanks for slowing this bit down, it really helped me to see exactly what you're doing with this leg.
3:65 ?
You mean 4:05
@@SkyXEquinewhoop. Meant 3:56.
One thing that works better with the hair card issue is to model a leaner volumetric cylindrical representation of the tail first, then lay down the hair cards on top of that instead of trying to build the entire tail with 100% cards.
👍
I was gonna be lazy and skip this tutorial. Then he pulled this new stencil thing I've never seen before and I'm so glad that I didn't skip.
Những ca sĩ khác cho mình cảm giác thư giãn khi nghe! Còn ĐP luôn cho mình bị cuốn theo tinh thần bài hát.
This is top tier tutorial material! I will be sure to share with my friends who want to get into 3D
Thank you for being honest in your videos and showing that you are also still struggling with some things, like that hair.
This is the perfect dream base mesh for every sculptor
Thank you so much.
Its best to avoid triangles go full quads if you can, triangles makes games run slow becouse the computer has to DOUBLE processing to process it, triangles are ok but still tricky, ive had triangles fuck up whole animations because it just didnt work -_- so if you can manipulate quads to be what you want USE QUADS it becomes all triangles during proccessing meaning you dont need triangles
Blender has a thing in the settings I always have to go looking for it "tri's to quad's" use it! Its a life saver
OMG THANK YOU! I was so hoping you would do something like this! I love it!
It's interesting to see in the comments that many people seem to skip those old school techniques and only know the more time consuming sculpt/retopo methods. Box modelling and faking details using photo textures is still one of the easiest and fastest way to get things done when you can get away with it.
Very nice to see. Also looks simpler then it is i imagine. Love the quickies though
Im bad at painting soo i always use stencil for quick details. Its amazing.
Keep up the good work mate.
I'm not sure if you have done this already or not; could or have you created a PDF listing, in order, the perfect beginner to intermediate video course. Free then purchased. It appears you have a wise grasp of what's needed and how we , as newcomers, should progress in our 3D journey. All your videos I've watched so far are all extraordinary. Keep up the good work.
My website has something similar
yep - got the software, got the horse - so that's good for THE HORSE AND HIS BOY... just gotta work out the wings for THE MAGICIANS NEPHEW!
Hello pls may I explain or do a vid on how to equip the plane thing because I can’t get it
cool, thx for the tutorial, add animal to my game will let it get into next level
The 3090 (and even 3080) are both insanely powerful for live ray tracing, the 3080 alone (which I've tested) being able to render the BMW render in, like 8 seconds, where my CPUs normally take around 10 minutes. However, for live Cycles previews, especially low-poly ones, you can actually get away with a lot, LOT lower than that. I pretty routinely check the look of fur, which is extremely high-poly, and of materials... on my dual Xeon X5690 CPUs, from 2011, and before that I did so on my lower-end X5560s from 2009. It can be pretty grainy, yes, especially on higher-poly scenes, but it is real-time enough to make adjustments without issue, and when I don't want grain it only takes a few seconds waiting for it to finish. My subdivision surface models with simple lighting even feel basically real-time... just like this video, just slightly slower.
Testing right now, though, it is pretty slow with one of my more complex scenes of 147,830 tris and particles of fur at a WAAYYY higher level than that with all the children turned up to render level, lots of caustics, several different light sources, lots of luminescent materials, and a very dark scene. THAT would be a scene I would want to see on a 3080 or 3090... and actually I believe I did IIRC, and running this crazy complex scene was basically as fast as I would usually run one of my simpler scenes, which is awesome, or alternatively, as fast as that scene, but with only the character and fur in it without all the crazy lighting and such.... zoomed out a bit.
But, despite having used it with my own scenes on another computer, and 3D modelling being basically my main thing with crazy lighting and lots of particles, I don't feel like I particularly _need_ a 3080 just yet. In fact, I still haven't sorted out the GPU drivers to make Blender work properly on my RX 480 again... I just ignore the issue and use CPU. Once Blender updates CyclesX to support Mesa again that will probably tide my over even longer, because although the RX 480 isn't _that_ fast, it's still waaayyyy faster than CPU ray tracing, lol.
...Which again, with simple lighting and a 96656 tri scene is still nearly as real-time as the "crazy" ray tracing shown here, and the scene shown in the video appears to be lower poly.
Today my siblings asked me to go out for skiing, I refused saying I'd like to do some blender tutorials instead. Didn't regret it, now I have my own horse rig.
Oh my God, you are an amazing artist
You make it so easy!
Anybody know what key was pressed to create that new line at 1:41?
im ages late but pissed nobody answered this
thanks so much :) i need to try it but first i will check the tutorial on stencils ^^ :) yay
That’s extremely awesome!
a great help ty!
amazing tutorial, thank you so much
I really don't request videos but I can't find the answer anywhere on the internet! Can you do a quick tutorial on how to make a horse and rider? I would really appreciate some tips on where to start!
Great video. I sure could use more tutorials on hair in general.
I was not ready... lol saw that the video was 12 minutes long I asked myself how could he possibly explain all that in 12 minutes..LMFAO you showed me!
Heck yeah man. I had trouble with hair cards too. I’m curious. What makes you decide to plug the alpha in from the image texture on the normal shader vs using a transparent shader? I always get torn on the multiple ways to do the same thing. I’ve also played with adding translucence to leaf and hair cards so light goes through a tad. I didn’t know about the clone tool, or the select overlap. Already excited to add those to my tool belt.
Still playing with it but couldn't get much joy from the transparent
@@grabbitt gotcha. and it’s basically the same thing anyway right? Thanks for your thoughts grant.
Thankyou man ♥️ love every video ♥️
Thanks for the tutorial Grant, I would greatly appreciate if you could do a fighter jet rigging tutorial (engine nozzles and landing gear mainly )
Great video🐴
this is challenging
Really love your box modelling sir!
(But must you cut off his Jacobs just to save a few polygons??) Poor Horse XD
This is a very helpful video! But I do have one question. Do you have any videos on making eyes for low poly and or high poly animals? I've been really, really struggling with making eyes for a dog. Thank you for reading! I love your videos.
Not yet no
Back to the future movie says : The easy way...
this is awesome!
Excellent!
I enjoyed the video! I have to add that sculpting the general form would be a lot faster than modeling it. I guess, also with meatballs would be quicker.
I would say it's about the same in terms of sculpting. But you still need to have low face count for animation
@@grabbitt Yes, you can not avoid the retopology. Maybe I am too much used to employing Quadremesher to retopology automatically, or Retopoflow which allows you to build the mesh very quick.
Great vid btw
Hey Grant! Thanks for the neat tutorial, infact thats the exact method I use to make basemodels.😄
However Id have liked a disclaimer that this is infact low-poly and not comparable to a full on sculpt.
People who dont know 3D that see this video could get the wrong idea on how complex proper modeling/sculpting is. As someone who sells his art customers sometimes complain about the prices when "aLl iT tAkEs iS tHiS" *sends video*
I know it came of a place kf kindness, just saying maybe a diaclaimer wouldve been good.😉
I'm gonna sculpt it in the next video. People can see how long it takes them
How would you do this if you sculpt it? And when do you use extruding vs sculpting? Is there an advantage?
Looks awesome. Would be amazing for animals in the background for vfx.
That 3090 is pretty incredible
hey grant have you thought of trying to extrude from the the side of the model instead of the under and why do you extrude from the under instead if side
See back leg extrusion. I extrude from the side
Getting through the first three minutes took me 5 hours and two rage quits. Things can only get better from here lol
Thank you so much!
damn that is a nice horsie
When I left click y under rotation a whole different menu pops up, with not a choice for rotation. Please help.
Press r then y instead
Very inspiring.
Hello sir please tell me how to make animals tomorrow is my blender compitetion
very cool
Thought with the Nvidia sponsor we'd get some hairworks stuff (I assume it's still supported, was last year when I struggled with it) that might be a little too far into engine stuff for this channel tho
Trying to stay low poly for game engines
@@grabbitt Hairworks is specifically for game engines. Witcher 3 is the most famous example, don't think there's unity support but unreal has had it for ages ( takes some effort to set up)
@@callmeray7705 I see. thanks
You make it look easy! My horse looks like a... not horse.
1:48 whats the shortkey of increasing those verticals?
Gender neutral horse!
You mentioned in the video RTX 3090 card, can this also be done with RTX 3050 Ti or would it be to much for the machine to handle?
Should be ok
@@grabbitt Great, Thanks!
I'm having a bit of trouble at 2:11 in the vid. How do I apply rotation and scale? And the mirror wont connect up too the vertices to form what you have got in the video.
Apply rotation and scale by pressing ctrl a in object mode
See my mirror modifier video
I am the Bigest Fan of you
Can you make tutorial for how to get outlines with solidify in sketchfap? You have best tutorials!💪
Great!
Step 1 : model it
Step 2 : done!
Surprisingly easy🙂
So to sum it up:
1. Make a simple low poly horse
2. Become a master at painting and make it so realistic that it looks high poly and that it has fur.
or use the image as a stencil so you dont have to become a master of painting
WOOOOOOOOOOOW
(Me too lazy to make another donut) time to gogle how to make a line!
Can you do a tutorial on modeling with different axis? Gimbal, normal etc. I always get dents in my mesh.
so, i havent really followed step by step, but i have an outline of the horse, but when i extrude it, theres nothing in between, i just end up with 2 outlines instead of 3d model, any advice?
Bridge edge loops
@@grabbitt Thanks for the advice, I tried both "bridge edge loops" & "extrude individual faces", unfortunately neither worked. I managed to figure out that some of the vertices were the problem, I'm not sure what was wrong with them, but it was like they were stuck to the place they were at and wouldn't budge. I had to delete those stuck vertices and make them anew.
Nice Video ..!
Thanks. You said it was obvious to do the hair first before rigging. I would think just the opposite. Can you say why?
So you can attach the hair to the rig
May I ask what PC set up you are using?
Cheers
Hey, I'm having some problems with applying like at 11:50. I don't know how to explain it but ye. if i click rotation and scale like you did, the rig deforms into way too big and no matter what i do, it it doesn't want to connect to the model or anything
apply scale and rotation to rig and model with ctrl a
@@grabbitt thats what im doing and thats when the rig defforms.
what button was to make the legs come out?
please help me.
E to extrude
Hello, May i ask the legal side of using textures to paint if i want to sell my models? Or are the models considered new art Apart of original texture?
Very difficult to say. I used a CC0 texture for this
Aw I just wanna pet him.
Sucha beauty.
Please where can I get the image to do the course. Thank you
I thought I posted the link
can someone help me what thing he uses to fill it in 2:29 pls
did you find it?
nope@@DiaaAlhalabi376
You should try hairtool for blender, perfect for this sort of thing, I made a border collie covered in floof, it was glorious, it'd be so easy to make horse hair with it
Using this technique I've done a horse, a dog and a pig, after, give or take, 4 years of using Blender its rare for me to actually finish a project, I should've bitten the bullet and work on low poly a long time ago, no more complicated meshes that are a PAIN to work with on term.
Hi Grant, I created a Cat thru your another video and i wanted to texture paint hence used this video as reference. but i after unwrapped when I clicked on one vertex on island , this vertex is also getting selected on another island as well. Its not overlap but 2 island holding same vertex. I dont see the same in your video here. is it mistake?
Turn of link selection top left
@@grabbitt Wow, Thank you so much for reply