Don't Use Softboxes | Do This Instead

HTML-код
- Опубликовано: 13 июн 2024
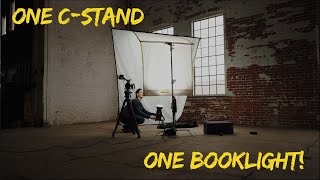
- Softboxes come in all shapes and sizes, allowing for different convenience. However, a book light is the way to go if you want to enhance your cinematography.
------------------------------------------------------------------------------------------------------------------------
Chapters:
0:00 Before & After
0:27 Softbox vs Book Light
2:08 Set Up
10:41 Final Result
------------------------------------------------------------------------------------------------------------------------
Music from Uppbeat (free for Creators!):
uppbeat.io/t/yokonap/airplane...
License code: 1FYUDHIH5JLGDHGSH
------------------------------------------------------------------------------------------------------------------------
Main Camera: Sony FX30
Photo Camera: Sony A7III
Main Lens: Sigma 24-70 f/2.8
Main Prime Lens: Samyang 35mm f/1.8 FF
Lighting: Aputure 120d @SmallRigGlobal Bowens Mount Softbox
Audio: DJI Mic + Deity D3 Pro
------------------------------------------------------------------------------------------------------------------------
#cinematic #cinematography #storytelling #filmmaking #sony #sonyfx30 #sonyfx3 #videoediting #canon #colorgrading #filmmaker #lego  Кино
Кино


Awesome tutorial but I got confused at the end. How did adding the shower curtain increase exposure? I figured adding a layer of diffusion would soften highlights but reduce overall exposure.
Sorry! I noticed that made it sound confusing. Yes, the shower curtain only reduces and softens the light.
What I meant to say was increasing the intensity of the 120d.
Sorry for the confusion!
Thanks for catching that!
Literally the best advice that I feel like I just started hearing recently is to start with all your lights off, expose for the environment, and then adjust your lights accordingly. Maybe I just missed it in my early research but man did that change things for me.
Exactly! Light the space, not the face.
when using the silver side, you are actually not softening the light a lot, it becomes a little bigger light source with more direct light like a panel with hard diffusion. also make sure the walls get some flags to cut the light from effecting the wall. the wall has become hotter then the character. but the results still works great
Yes! The silver was to reflect much light, which would've been defused through the curtain. Yes! If I had a flag, I would've had better control to block the spill.
Fun fact a budget option for the 3 and 1 kit. Because sometimes they can be expensive or if you just don't have one on hand most people have A. Reflector for their car that you put in your window, you can use that.
Thanks for the tip! That's a great idea!
The whole point of your video (at least from what you said in the beginning) was to achieve proper exposure on the face while protecting the highlights coming from the window light, yet at the very end you ended up cranking up your base ISO/E, thus clipping the hell out of the outside highlights anyway lol
I did mention in the captions that you would need a strong light source to combat the daylight.
Anyone who knows cinematography would bump up the iso if the keylight isn't strong enough. Of course, that means highlights, and the overall exposure would increase.
Thanks for watching!
This example would've been way easier if the window wasn't there.
You could also place a small flag over the light / bounce to give the light a more direct feel with less fill everywhere in the room.
For sure!
Dude I’ve had those stands for a green screen that I bought, now I have good use for them finally. Thank you!
No worries! I'm glad to help!
That backdrop pole is super clutch on set also
It packs away super small
Great for goal posts or t bones
I use it in 99% of my setups for large key sources
@@Supercon57 I’m excited to get mines out
@@Supercon57 underrated tool!
Don't forget the classic shoot through umbrella.
They're soo cheap and soon easy and quick it would be crazy not to have at least 2 permanently in your kit
Good tip! Thank you!
@@Matthew_Chung no problem, they really do fill the room with bounced light, and work really well outside if you use the sun as your point light source 😎
@@SystemParanoia Wonderful!
Do you think shooting through a soft box into the curtain would achieve the same double-diffused look?
Yes! You can definitely do that. In fact, that might give you a more accurate 45-degree angle you need for the Rembrandt lighting.
i just came across your video bro and i learnt a lot from this alone, pls post more of lighting tutorials like this😊
Thank you so much for the feedback! Yes I will indeed!
Well done, thank you for the information. Great tutorial! I liked and subscribed, thank you.
Thank you!
Hey, great work! I learned a lot.
Thank you! Glad to hear!
this vid was so chill yet so informative thanks man (:
Thank you! Glad to help!
I enjoyed watching :) Super laid back!
Thank you! I appreciate it!
Great job Matt, sometimes a simple budget setup is all that is needed 🤙
Especially doing it with super light weight aluminium stands makes light weight and very transportable as well for a solo shooter.
Thank you!
Loved the video and your explanation! I never fully understood the process of (and why you would need to) setting up a book light. Now I do! and I'm definitely going to try this setup in future jobs.
I do have a lingering questrion:
You mentioned that to get a get more details out of the highlights we would need to use a more powerful light, but I noticed the reflector you used for this example was pretty small, do you think that the amount of light you got from this example would have been greater if you used a bigger reflector paired with the 120D?
Having a bigger diffusion cloth would indeed wrap around the subjects face more. But you would need more powerful lights to get more details in the highlights.
You would have to watch out for spills tho. You would use a flag to block out unwanted spills to the background
Bro, you just saved 990€ on a scrim jim. Looks good.
Your welcome!
Hey Matthew, awesome video as per usual! What phone app/false color app are you using on your phone to gauge the IRE levels?
I'm using the monitor + app designed for sony cameras. False color shows you the ire level of highlights being 100, shadows being 0
@@Matthew_Chung Awesome thank you so much!
Great video man! For tutorials like this in the future it may be a good idea to record yourself setting the lighting up and after record yourself narrating that footage or have a talking head bit of you watching and narrating it
Thank you!
Very interesting. Thanks for sharing!
No worries!
Muy buen contenido, esperemos mas crack , saludos desde Buenos Aires
Muchas Gracias!
This is so informing! subbed and liked!
ㅋㅋ
Sub number 200
Let’s go
Also great tips. Definitely something learned today
Thank you so much! You're so kind!
Hi Matt, it seems to me that jumping to the second Native ISO is against the original purpose of preserving the highlight details in the windows. (False colour shows that it's nearly clipping in that area).
With a bit more output, don't you think the apurture would be able to handle the exposure for the indoor part of the scene?
Yes, you are correct! My aputure 120d isn't strong enough. Using strong light source would definitely allow you to retain the highlights more!
Good stuff man! Subscribed!
Thank you! Appreciate your support!
it looks better at the start. call me a sucker for shadows
I defo dig the darker look too! The fx30 does wonders in dynamic range!
Hope this video helped! My apologies for not uploading in a while. Please like, share, and subscribe if this video was helpful!
hey can you tell me where you got the film burn overlay used for transition?
It was from Instagram. I forgot his name but I'll tag his Instagram once I find it.
That was very helpful thank you
Thank you!
This helped so much 🙏🙏
Thank you. 🔥
This is great thank you. What app is that for your phone?
Thank you!
It's called the Monitor Plus
What app did you use
It's called Monitor + Designed for sony cameras
very nice video thanks
Thank you!
excellent
Thanks for watching!
Would have been nice to actually see a comparison to using a Softbox…
Will keep that in mind! There's tones of videos covering that topic!
ruclips.net/video/D7LCYIlEXqI/видео.htmlsi=4Pk46_5IMdtb0Wjb
dope video broddy
Appreciate it!
thanks!
ㅋㅋㅋㅋ
I usually can't spend this much time on a shoot.
Totally understandable! Depends on the shoot. Not suitable for run and gun
What monitor are you using?
It's called the monitor + for android and ios. Designed for sony!
This 12 minute video (uncut) might have been bearable if it showed the essence n 3 minutes: I’m sure everyone can figure out how to hang up a shower curtain.
Sorry if I have wasted your time. That's why I have included chapters below.
you need to use nagtive fill because right now its completely flat
Love some negative fill! Depends on the shoot!
I have a 120d also! So it can’t change temperature?
Yes, it's a fixed fixture, meaning you can't change Kelvin temp unless if you use gels
This video is really great and it seems to be doing way better on RUclips relative to your other videos. Why do you think that is?
@@Jiujitswho I think it's the low-key clickbaity title with a more laid-back and respect for the audience's time?
@@Matthew_Chung definitely click bait title worked for me, then I stayed because it seemed laid back and full of information
@@Jiujitswho great to hear! Thank you
"Don't Use Softboxes" ,,,,,Proceeds to use a scrim to soften the light with a setup completely unnecessary for the result obtained, leaving more than clear that it was better to use a softbox
Fair point! I do mention earlier in the video stating that softboxes come in different sizes and needs for the shoot.
As I'm not the best at cinematography, the result can only vary from the person's skill and fair judgment. I do believe I tried my best to motivate the window light shining through however its subjective.
I was simply showing a different type of lighting. Not to say you can't use a softbox.
Hope that clears up! Thanks for your time!
Strongly disagree. Its a book light, extremely common setup for professional sets, and a far better choice for this particular application than a softbox would have been
Also a softbox will look very sourcy, his book light setup fills a lot more the ambient looking very natural. if he wanted to over power the windows he would need at least 2400w, but nice setup for 1 light.
@jjbmxer thank you! Yes I tried my best with 120watts ahah
book light is only for small spaces. Otherwise there are better options.
Of course. If you have the budget, go for a 4 x 4 butterfly or even 6 x 6 🤪
@@Matthew_Chung t bone a 12 by muslin.
Like it👍
Thank you!
Good video
Thank you!
Done subscribing.
Thank you for the support!
sorry, but this is not “quick and simple”. Good tip though!
Depends on your skill level for sure! There's one stand setup for the book light.
I mean, the overall "setting up" process - 4 light stands, curtains, reflector, lights... that's a bit much, innit?
@dicesales yes. I do mention earlier in the video that book light is only possible and understandable if you have the time and space for it. Otherwise, a softbox would be better.
There's always better and smaller ways to get through bigger picture.
I really like what u did . But believe me u can make this video 5 minutes
Thanks! I'll keep it in mind. Chapters below.
No :(
?
Telling you right now, 9 times out of 10 on a corporatre shoot you dont have time to bring in all the gear and then set up a for a booklight. Or even the space. So yes still use softboxes. Every project is different, I hate clickbaited video titles like this lol
For sure! I do agree the title is misleading in a way, but I did mention earlier that it totally depends on the space and budget as well as the purpose of the video.
@@Matthew_ChungFair dawgy, keep on rockin'
@divad435 thank you for your time! I appreciate it 👍
Bro I’m so sick of these click bait titles 😂. “Don’t do this” “stop doing that”. The content isn’t bad but stop making it seem like your method is the definitive answer to achieving something.
@imDonDiestro i agree. I also do mention in the beginning, including the chapters, going over the differences.
This video wasn't to say softboxes aren't the way to go. Sorry the video was long, so you might've missed it
Please (!) stopp using these flashing white effects for your video cuts in your RUclips videos - this can trigger seizures in people who are perceptible to this…
I'll keep it in mind! I sincerely apologies if it has impacted you.
@@Matthew_Chung Thank you a lot ;-) It is distracting from your great content, most people would have a dark RUclips UI anyway, so in this rather dark environment, it is even more getting onto your nerves ;-)
Apart from that, great video! Thank you for this ”Light for the _space_ , not the face“… Most people do not even know what ND filters are good for. Very nice explanation in your video, having this underexposed scene you only then start putting light in - for the face ;-)