How-To: Leaky Rocker Box Gasket Fix on Harley-Davidson Sportster

HTML-код
- Опубликовано: 11 окт 2024
- This video is brought to you by: www.lowbrowcust...
Have you ever been riding down the road and felt some hot oil on your leg or arm, or noticed an excessive amount of oil around your cases? It's probably a rocker box gasket leak causing you all that trouble. 1986-2003 Harley-Davidson Sportsters are notorious for having rocker box gasket leaks. The old gaskets from the factory were poorly made in two separate pieces, over time the gaskets become brittle and useless. With one of the guys bikes here at the shop having this exact problem, Todd thought it would be a good idea to share his expertise on the matter and show everyone its not that scary to dig into your motor and fix that pesky rocker box gasket leak on your own.
00:01 - Intro.
00:35 - Remove the Gas Tank.
01:31 - Talk about the different tools you can use.
02:14 - Remove the 4 top bolts and the rocker box lid.
03:40 - Remove two rubber gaskets, the one sealing the lid and the square gasket in the middle.
03:59 - Remove the middle ring of the rocker box, carefully use a dead blow do not pry.
04:10 - Remove breather umbrella from the middle ring.
04:22 - The bolts inside the rocker box. 4 fasteners that take a 1/2" socket. 3 fasteners that take a 7/16" socket. 2 easterners that takes a 3/16" socket head.
04:41 - Remove the last rubber gasket.
04:57 - Going over the next steps in the process, spark plug removal, jack bike up, put in gear, and make sure both rocker arms are down.
05:37 - Remove both spark plugs.
06:13 - Jack the bike up so the rear tire is off the ground and put the bike into second gear.
06:38 - Rotate the tire forward from the right side of the bike so you can watch the rocker arms go up and down.
07:03 - What it looks like when both rockers are down and even, you are now ready to remove the fasteners.
07:18 - Remove the fasteners on the rocker box, start with the smaller ones first, then the large ones.
10:40 - Remove the rocker box.
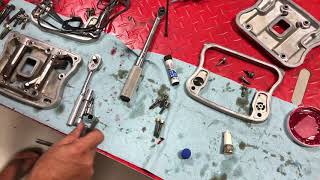
10:56 - Roasted, toasted and burnt to a crisp. That gasket is junk and was the problem!
11:33 - Scrape off the remaining junky gasket material with a razor blade and thoroughly clean the rocker box off.
14:17 - Make sure your rocker shafts are correctly aligned with the notch on the shaft and the hole for the long bolt to go in.
16:18 - A little push rod knowledge.
16:55 - James Gaskets!
17:36 - OOOOO AHHH! The new gasket is far more superior then that old stock gasket!
17:59 - Place gasket on the motor and align the holes.
18:20 - Introduce your rocker box back onto the engine, make sure the holes on the gasket below are still aligned.
19:15 - Get all of your fasteners started to ensure the gasket is aligned evenly.
20:05 - Snug down all of the fasteners evenly, but don't fully tighten. Start with the small ones first.
23:02 - torque specs.
23:50 - Bust out that Torque wrench!
26:09 - Install the first rubber gasket and center square rubber gasket.
26:41 - Make sure the center ring is clean of any gasket material.
27:19 - Umbrella valves info and install on center ring.
27:48 - Install center ring onto the engine.
27:54 - Install second rubber gasket onto rocker box, make sure it is in the grooves.
28:17 - Replace the paper gaskets on the 4 rocker box lid screws.
29:27 - Install the rocker box lid, make sure the center ring and lid align with the engine.
31:24 - Bust out the torque wrench again!
32:15 - Rocker box leak fixed!
32:22 - Put bike back in neutral and lower bike back down.
32:34 - Spark plugs back in and get your gas tank back on!
33:01 - Fire it up and go for a ride! Ride it like you stole it!
Music by:
"The Dweller on The Threshold"
Composed by: Nihilore
"Out Da City"
Composed by: Fles Lit


I have a 1999 Sportster that has had a minor but annoying oil leak for YEARS. I knew it was rocker box gasket related somewhere low. I was too scared to attempt the repair myself and wasn't trying to spend shop money, so I rode on and cleaned up (as it got worse). I've been watching this video for years and today I replaced my front base gasket following this video verbatim. THANK YOU! You have given me the courage to address ANY issue on my bike.
Awesome now I know Thanks
When he says “you do have a workshop manual don’t you” gets me all the time xD
I could watch this dude bake a cake and still be entertained. Awesome videos brother, keep up the good work.
Bravo to Todd and whoever edited this video. Literally perfect amount of information and no filler and wasted time. I pretty much relied on this video
Not just the step-by-step, but also the why behind each step. Phenomenal!
Totally love watching Todd doing the “How To” vid’s. Great teacher and definitely full of outstanding knowledge and he even ads some comedy too 🤙🏻
If you own a sporty... or any Harley really. This guy is a necessity to subscribe to.
These how-to series are awesome!
What a great tutorial , I just discovered a gasket leak and WAS apprehensive about doing it but not anymore , thank you ...
i just changed out my rocker cover gaskets i got from Harley on my 1997 FXLR and they still leaked??? got thicker JAMES GASKETS.. and torqued them down 34 pounds and no leaking so happy... your video was a great video and really helped me... Thx ...
That was great, man! You're a good teacher.
Thanks for the pragmatic video - my youngest son bought a 2009 Sportster 883 and it had the leak on the nearside front lower corner and was starting on the the nearside rear lower corner. [we are in UK so that is the kick-stand side on the left]. Your video helped. Ordered all the parts and set to. The front had clearly been bodged with gasket sealer. We needed to apply some heat with a heat gun to soften the gunk and used an old credit card with a rubber mallet to ease it off gently. A person had used a screwdriver gouging the machined face. So a bit of water and 800 wet n dry wet sorted than on a mirror as a flat surface. WE chose to buy two new brethers as one looked a bit sketchy. Assembly was quick. She started first time after filling with fresh fuel. Awesome.
Many thanks !
Ride safe . . .
Used a seperate lowbrow video for my 883 conversion and near end of breakin found I had a leaky gasket. Between replacement gaskets and the bolt kit for rocker boxes from their site I no longer have that pesky leak. UV-Light and dye always confirms 😂 Was a 2013, grabbed the torque specs from manual but the video was super helpful!
This is hands down the best how too video of these gasket changes. It’s going to help me out a bunch.
6 years later and my son and I are about to dive into this project. Why is it ALWAYS the front one? I don't know, just happy it's not the rear, that looks like a nightmare. I've bookmarked this video and will be following it (probably at 1.25 speed) with him and making a day of it. Thanks for lending your expertise to the world! Can't wait for the day when I no longer have to clean oil up from everywhere...
Awesome video! This gave me the confidence to finally fix my leaky Harley. Thank you.
Thank you, I used this video to do my 2011 Iron. Only difference was to have it in top gear to roll the wheel forward, and there's only 2 parts in the top of the header instead of 3.
Very easy to understand and saved me a couple hundred dollars.
thank you from Colorado, I'm not a motorcycle mechanic, but I enjoy doing small things like this, so, much appreciated.
Thank you LowBrowCustoms for an excellent walk-through. I had a nasty leak on the front cylinder of my '92 XLH. After watching this I fixed it for the cost of the gaskets *and* I got to see what the problem was: it was missing the little rectangle gasket.
Brilliant mate. You give us the balls to do this ourselves. I left my chops engine into a certain HD dealer to have a new set of 1200 Wiseco barrels and pistons installed, rode it 100 miles and it's weeping from the exact place.
I'll do it myself now. Has anyone ever had this happen I wonder?
Victor Lonsdale I had a 2008 1200 Custom, beautiful bike and I had a leaky rear cylinder/rocker box at 12,000 miles, got it fixed, cost me $250, six months later it was leaking again, took it to a different mechanic, another $200. I was told that it was a common issue with Sportsers but I was pissed so I sold the bike. Currently I'm riding a 1995 1200 Sportser & love it. The pre 2003 Sportys are better than the current ones, just my opinion!
Cheers Dude; just did my 1200s and thanx to your walkthrough, it was a piece of pi$$. I was pretty apprehensive about attempting this, but, without a doubt the most difficult part was removing the old crappy OEM gasket residue from the alloy covers.
I just wanted to say first I SUBSCRIBED second I definitely couldn't have done this job without your help. Thanks for being so in depth appreciate it very much my harley gaskets are happy.
TY. TY, TY -- I am a 69 year old man (70 next month) with a 2008 Sportster. You saved me over $600 in shop fees for a simple project. I've purchased Low Brow parts and will continue to purchase as needs arise.
Just bought a 2000 883 with leaking rocker boxes. Followed your video to put on the new James gaskets. Easy. Thanks.
Thanks Todd! You made replacing my front rocker gaskets a pleasure.🌞
Pulling that rear cover off is a bit of a blacksmith's puzzle but it will come out with patience. Don't gouge anything. Thanks for the awesome video, got me riding again
Thank you for the full tutorial. i changed my back top rocker for the first time and it is a success. Thank you
I'm glad you mentioned it's possible so I know I'll be able to get it, but man, the one that's leaking is the back one haha. I still appreciate the info.
Just blew this gasket yesterday. This video is top knotch on how showing replacement. Subscribed I liked it so much!
Fantastic video, as always! Really thoroughly explained the solution to the leak.
This is exactly where my 1999 road king twin cam 88 is leaking, but on the rear box. Thank you for the info!
Let lifters bleed down 30 minutes before removing or installing 4 big bolts on rockers! Removing last! Installing them first! I would also install rocker lockers to stop shaft noise when doing this job. Also use blue stuff on all bolt. Great video 👍👍
Thank you guys and thank you Todd, as always with these videos, very useful and very therapeutic!
Hi lowbrow customs. i'm bought some part from you (Speedometer Gauge Mount 1") and i'm happy for that :) greetings from Poland
Great instructional video! Now I see how everything fits together but seeing how much room it took to remove everything I'm even more concerned about replacing my rear gaskets - it is very tight back there.
this channel is so well done these videos are a life saver thank you guys
Stoked you dig it! and glad we can help!
Hey. .... Thanks for this great video... My wife s bike developed a leak and the Harley dealer wanted a lot of money to replace the gaskets... this video was spot on.... everything you mentioned happened and it took me a Saturday afternoon to do it
Really surprised he didn't tighten the four main rocker box bolts in star pattern and with 1/8th turns at a time - something the H-D manual says is critical, as does every other video covering this topic. Not doing so can result in real damage to the rocker box. Lowbrowcustoms has definitely raised my eyebrows ! Moral of the story: always get your info from several sources ! . . . and especially the H-D Manual when wrenching on your H-D.
You're a stud man I appreciate you so much. Need more bikers like you out there!
Just got my Genuine James gasket kit. Look to do this job very soon. You make it look easy...
Thanks Todd for your videos...always a pleasure to watch:)
🇺🇸Hey guys! Howdy < N.central PA. Recently stumbled onto y’all and grateful I did. My rides an ‘05 XL1200c I found in the fall of ‘16 in cherry condition. Wifey of 44 years talked me into buying it in order to ease my ‘end-of-life crisis’ AND it’s working😎 I do most of my own mechanics Sooo you’ll be hearing from me in the future. Since we’re neighbors I may even ride out to visit this summer. Great job on your channel & hope to see y’all soon! Uncle Fudd
I'm right in the middle of it. Not to bad so far. Good video, lots of help, big thanks !!!
Very impressed. My dream is a shop like yours. Even more an old school mechanic that can teach me for years to come.
Well done, really enjoy your narrative while doing the work. Keep them coming.
So good! I have to do this for the 93 883. Going to have to get that gasget kit. I've never done this before, but I think I can now. Thanks for the video. I liked and subscribed!
Gotta love Todd's videos 😆
Good luck installing the rear rocker box with the shafts installed 🤞
If you push a 16 inch .060 dia. length of wire down through the push rods, you can open the check valve in the hyd lifter. 👍
Foot lbs of Tq are 12 in lbs - hence 120 in lbs equals 10 ft lbs 🤔
Nice Sporty and another great video to keep in the files. Excellent reference.
I really enjoy watching you work, it's both informative and entertaining.
thanks for the help just picked up my first harley and it needs the same gaskets going to the site now to order a set
Was thinking of getting someone to do mine, because I've never done them. Thanks! I can do that job myself now!
Excellent video bro! On my 01 883 Sportster i had a hell of a time getting the rear cover off, SHITTY welds! It seems as if I machine down the four rocker bolts and take the crowns off it should go back in no problem though! Thanks for the great video!
God I'm so glad the motor can stay in the frame. My Sporty has plumes of smoke coming from the oil burning, guess it's time to tackle it. Thanks for the tutorial.
I've got a leaky rocker box gasket on my 92 sporty 883 that I'd just bought. (It's sat since 2013 I believe and both rocker box covers are aluminum and oxidized so I'll be doing and cleaning both of them. this video took the fear out of attempting it myself, thanx!
You are the man I’m learning by the minute and you’re easy to understand. I got a 49 Panhead matter fact it is an easy Rider 1991 issue. And I have a 2016 fat bob. Learned a lot by watching you
Best teaching video I ever watched keep up the good work
Thanks for the video ad tips I just finished 92 rocker box gas on my Sporty 883 yesterday, leak is fixed.
Your the best did the gaskets on my softail to day thanks for the help
Love it. Luckily mine is only leaking out the front, looks like quite the chore to do the rear one. Thanks for this!
I like these videos and dig his style. Gonna do this job very soon. Thanks
Thanks mate. Great video. Do you have any video about replacement of valve seals. My 1997 Evo Dyna Wide Glide is smoking blue on start up when hot and I think is valve seals. Thanks in advance.
Excellent video and instruction. I'm about to do this job on my 2013 XL1200C and I could have done it using just my shop manual but this video is very helpful. Got a fancy digital torque wrench that my family bought me for christmas one year and it does both inch and foot lbs! (my torque elbow is out of calibration)
Rebuilding a 1990 flhs and going with a 94-96 road king looks. Got it wired up with all new harness I made. New wiring and male/female plugs. My first Harley but second bike build. Found I had a front rocker leak. I knew I can change it, but dyslexia can be a challenge for me. So now I know what some people was saying about flat siding the cam. Pfft wish they wouldn't talk like it a top secret shop talk and not explain what they mean. If they even know what they're talking about in the first place. If they knew me they would understand, I know my way with tools, I've built a handful of auto engines, a few race motors, and boat motor as well. It's all the same principle. 4 or 2 stroke. Fuel, air, comp, fire. It's just how the different companies decided how to achieve and direct it. I'll be subscribing, I'm not afraid to learn from someone else's mistakes, saves me from making it myself lol. Also, from someone that's a veteran in the field, I'm sure you know more about this motor then I do and I'm definitely going to be watching for any little tips that you learned the hard way.
Age is starting to creep up on me and I'm getting to lazy to learn the hard way now days. Thanks, even if this video is a few years old. New to me.
I like that simple straight to the point and informative there's a lot of these videos where they're hey look at this and you know I got this in my shop and you know I painted this yesterday and I did this last week and I got these plants outside your simple you're straight to the point and you get s*** done I like that part
I wish all Harley guys were like this. Versus the overly wanna be tough frown bs guy. Good vid! Cause when I’m riding mine I’m grinning like a champ!!!
Great how to. I have the confidence to tackle them again if need be. I had a follow that's a good wrench help me around 2006 we had to take them apart for a noise, but the dealership left the front sprocket loose in the primary as soon as that bike started making noise I said damn that sounds like it's in the primary. But another Harley mechanic said top end of front cylinder so we pulled the rocker boxes, but took a chance and reused the old gaskets and one leaked so we redid it. I have a question, on my cam cover the Chrome is flaking on it I got a pretty good price on a nice used one I have linked to a video below where a gal I think she's in the UK or somewhere she's pretty cool by the way anyways she pulled hers off without touching her rocker boxes at all. But I think hers is a rubber mount mine is a 2002 1200 custom. I guess wishful thinking but there is no way to sneak that can cover on and off without taking my
rocker boxes off is there?
ruclips.net/video/0R-_HM2MN0Y/видео.html
This is the best tutorial for this!!! Friggin awesome dude, and thank you guys!!! 🤙
Thank you now I have the confidence to do this on mine and, myself, also purchased the gasket kit. Now if I only had a lift, lol
Thanks bro, just finished doing my ‘09 1200 with your instructions.
Seems to have worked.!
Woohoo.
Thank you, I will try to do them on my 08 Xl 12 C Im tempted to put some gasket maker in the corner of the rear. It has leaked before. The bike has 50,000km they were done at about 25k km.
Lots of in city riding, nature of the beast.
Thanks for the video.
"My tools don't make me money they save me money"
I just did this job on an early 1984 FXST. Basically the same process I believe. I followed the video step by step & referred to my service manual as well. I did not remove the pushrods. I allowed plenty of time for them to bleed down before tightening any bolts. Please answer this 1 question I have? After all 9 bolts were torqued down there is pressure on the rockers of both cylinders. I have cycled the motor several times by pushing on the kickstarter with my hand. I is easy to do and everything seems to be working smoothly but I am reluctant to hook up the battery and start the bike with electric start. Is it safe to try or have I missed something. Great video by the way!!
Thanx
...Well did ya start her up?! As long as she turns over Smoothly by hand AND you don’t have any parts left over I’d go right ahead and kick it. What’s the worst thing that could happen?... a leak is about it.
Great video easy to follow and to the point thanks
Very nice and detailed video. Thanks for the attention to detail. On my 2013 HD sportster 1200, I'm seeing some dampness ( no oil spill on floor). Most of my friends said it's normal for an HD, should I be concerned?
not right away but if it progresses to get worse then yes you'll most likely have to change out that gasket.
Thank you so much, I was able to change mine out thanks to you!
Thanks for a very clear informative video.I noticed you mentioned the V Twin evo engine near the end regarding the alignment.I have a 1998 Road King classic 1340 Evo and looks like my rear rocker box gasket is leaking at one corner.Is it basically the same job on this engine. Obviously a lack of space on the rear cylinder as you also mentioned but are there other points I need to be aware of? Thanking you. Regards Dave .Scotland. UK.
I have an 88 sportster, same problem. You think those same gaskets will take on my bike? looked at your site it says COMPLETE ROCKER COVER GASKET KIT - SPORTSTER 1991 - 2003. Excellent video by the way!
Awesome video...thank you for great instructions!
Great vid Todd. You do an awesome job. Doing full top end gasket replacement on my 05 sportster xl1200r now. Rear Base was leaking a bit. All pulled apart and cleaning up the parts. Question....Problem getting the thin black gasket off the cyl bases. It is really baked on good. Want to be careful of the surface and reluctant to use a razor blade for fear of scoring the aluminum surface. Any suggestions on getting that loosened up?
Very nicely explained. Thank you.
WoW; nicely done, in keeping the lesser known, in a captive state of awe, Mr Teacher if any one don't know now there aint nothing they will ever know...Thanks for the #101 class... I was looking to know and you sure did teach me something... I just got an 06' 883 sportster from a now friend, and this is just what it needs done to it.. So for $2000 i got me a real nice looking and working bike, as soon as i do this job to it. THanks for the video, you now have my attention from here on...So keep it coming... And i hope if i have some questions we can talk on them...Accurate knowledge is life saving....And we all need that.... I see you have done that...Your friend....JRC
PS. Where do i find that calibrated elbow torque wrench thin-gee thing....JRC
Give us a call anytime. Todd is an expert technician and can help with (almost) anything and everything. We'll be here!
@@lowbrowcustoms Am making my list now thanks lol..i just got a bike a small 883' you see am 6' 260lbs my son might want to ride so i got it, i had stopped back in 95'' and i want to see if i can still preform like i once did, am 65' now.. this should be fun if you know what i mean... am going to change the handle bar... might be calling soon...see you soon....JRC
Thank you so much..I appreciate the breakdown.. it is actually what i needed
This is great, I'm going to use this video to guide me. My leak is higher up between the first and second plate, but do you think it's worth it to go all the way down and replace all the gaskets since I'm in there anyway?
Best gasket made on the market
Thank you for your intelligence, you made the jobs easy
Age & experience - I get away with is line being 65++. Man you are good!
Great video. About to do this repair in a few days. Also, can someone help me figure out what seat is on this bike?!
I have those same bars on my ride. I also have a chrome set. But no dimples so had to go with the black bars.
I’ll be doing something similar but on my rear rocker box of my 98 softail this winter thank you for the information
Awesome video, looks like I’ll be buying your type of gaskets , keep up the good work.👍
Great video!!! At this point could I replace the valve seals?
Nice informative video mate!! I happen to own one of these, have done 20000 kms(12500miles) on it, how much life does this gas kit has generally?
Thanks in advance!!
25,000 km I did mine as well paid a shop. Now at 48km leaking again. Rear started late summer, front showing signs as well.
Thanks to this video. I will do myself
@@Liquormans That sucks!!
Thankyou.
It was a big help and I got the job done easy and right.
Thanks for your help...
Great tutorial.
Showed everything. Some videos start with the engine on a bench, or cut from a fully assembled bike, then say something like: "Then remove the tank, seat and rocker boxes", then cut to the disassembled engine. Literally useless.
Bad ass! Saved. Gotta tackle this project soon. Great video! Thanks!
I should of listened to you. My shop manual for the big bolts said 18-22 I snapped a bolt, luckily was able to get out easy. To the Harley dealer to get bolts. Going to get all new, not sure if I comprised the rest by going to 22
Having this exact problem on my 07 nightster. Rear rocker box though. It'll be interesting to see how much more difficult it is.
Its just a tighter fit. Watch our Hooligan install series episode1 and 3 i believe has the rear rocker box disassembly and install, you will see how tight it is.
@@lowbrowcustoms Thank you Sir, will do.
This video is great, Thanks so much! I will be doing this soon to my '71 Ironhead, I know its a little different but the same, I have a manual I will be using. Thanks agian, I will be using your knowledge
Kept tryin' to place that windin' down tune.
Then it dawn on me that it's much like the tune i hear
when it's too late to mix another drink, & the lights are goin' out.
Dug the tech tips. Delicate medicinal measures, indeed! 51018
Great video.
Thanks for this. Is the procedure similar on an Ultra Classic?
Torque specs and stuff will be different make sure to get a workshop manual