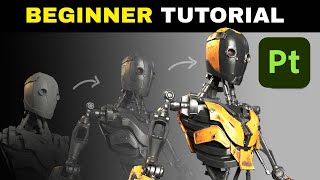
Texturing Different Parts of The Same Model in Substance Painter

HTML-код
- Опубликовано: 3 окт 2024
- In this substance painter tutorial I show you how to mask different parts of your model, so you can apply different materials to a single piece. For example, your model might be in one giant piece but you want to add different textures. I will show you how!
🎁 Get OVER 160+ Scripts, Projects and premium content on my PATREON HERE:
➡️bit.ly/SpeedTut...
·························································································
🔥 INSANE UNITY SAVINGS: bit.ly/UnitySa...
🕹️Synty Publisher Mega Sale: bit.ly/SyntyPu...
🕹️SpeedTutor Unity Store: bit.ly/STUnity...
🕹️Unity New Release Discount Sale: prf.hn/l/BdvEmg3
🕹️Unity WELCOME2022 Offer: bit.ly/UnityWe...
🔥 INSANE HUMBLE SAVINGS: bit.ly/HumbleB...
🕹️Humble Tutorial Bundle: bit.ly/Mammoth...
🕹️Unity ART Bundle: bit.ly/UnityHu...
🕹️Unity TOOLS Bundle: bit.ly/UnityIn...
🕹️SFX for Games Bundle: bit.ly/SFX-Mus...
🕹️Learn Programming Games Bundle: bit.ly/LearnPr...
🔥Unity Materials / Files & More:
🕹️CGAxis 400 PBR Material Bundle: bit.ly/CGAxisP...
🕹️Synty Assets: bit.ly/SyntyLo...
🕹️Filebase Assets: filebase.gamed... (Code: SPEEDTUTOR2022 - Sign up for a FREE MONTH)
🔥 UNITY SUBSCRIPTIONS:
🕹️Unity Plus: bit.ly/UnityPl...
🕹️Unity Pro: bit.ly/UnityPr...
·························································································
💰BIG DISCOUNTS on my website, for my UNITY ASSETS:
➡️www.speed-tuto...
💬Join the Community Discord:
➡️ / discord
💝 Make a donation to the channel:
➡️www.paypal.me/s...
·························································································
⬇️ SpeedTutor Puzzle Assets:
➡️Unity Store: bit.ly/STUnity...
➡️My Website Discounts: www.speed-tuto...
⬇️ SpeedTutor Best Selling Assets:
🧩Adventure Puzzle Kit: bit.ly/STAdven...
🗒️ Note & Letter System: bit.ly/STNoteL...
🔍Examine System: bit.ly/STExami...
🔢Keypad System: bit.ly/STKeypa...
⬇️SpeedTutor Model Packs:
➡️Unity Store: bit.ly/STUnity...
➡️My Website Discounts: www.speed-tuto...
My Assets include: Gas Mask, Flashlight, Generator, Themed Key , Padlock, Phone, Chess Puzzle, Lever, Valve Puzzle, Fuse Box & Safe Systems. Cardboard, Debris, Massive Models and more!
························································································
⭐ Connect with me:
💬| Discord: / discord
🐦| Twitter: / speedtutor
📱 | Facebook: / speedtutoruk
🖥 | Website: www.speed-tutor...
·······················································································
#SubstancePainter #PaintingObjects #MultipleMaterials


Lets me save you the heart ache of trying to break up your model for texturing! Share the love! :D
🔥UNITY SAVINGS: bit.ly/UnitySalesHub
🔥SpeedTutor Unity Store: bit.ly/STUnityStorePuzzlePacks
🔥HUMBLE SAVINGS: bit.ly/HumbleBundleDeals
Still works great as a substance painter method for masking different textures off. Thanks for making a short video on this really important technique.
No worries at all, I still think it's single-handedly one of the most useful techniques.
Phenomenal, this honestly saves me so much space. I've been running myself into the ground with UE4 just trying to keep up with the sheer amount of space that multiple texture and materials sets take up, especially for my own high res models. Thank you very much.
Haha, glad I could help you out my friend! It bugged me for a while and just needs something super easy and here it is! :) Best of luck with all your work!
This just solved a HUGE issue on my end, thank you!
No problem at all, thanks for watching! :)
Bless you this is by far the easiest and most useful tutorial I've bumped into. Been trying to figure this out for a while now and this instantly solved my issue
Haha, I'm glad you think so! Great to see you here. Best of luck with your work in Substance! :D
This kind of quick tutorials are quite useful because It gives an idea and a proper concept for the first time to see how things works!
Great to hear it! :)
Working on texturing for the first time for a project class! Thanks so much for this! This is really helpful and good to know all around! Cheers!
Haha, I'm glad you think so! :) It really helped me when I learned how to do it! Best of luck.
saved me from having to redo my uv islands in 3ds max! I just stumbled upon this trying to find something else, but this was perfect! thank you!
Haha, you're very welcome! It's one of the best things I think you can learn for Substance Painter. It truly sped up my creation time :)
I think this video fact will feel very comfortable for the substance beginners who jump from other softwares..
thz dude.
I'm very glad you think so, thanks for checking this out! :)
Man you're a lifesaver. Thank you!
It's my pleasure to save you, my friend! Good luck with your new FOUND KNOWLEDGE! :D
I was so confused with ID maps and color selection stuff, thanks so much for this ! Subbed :)
Haha, tell me about it! I'm glad I could help! :D
You are a literal god, This helped me so dam much
You're very welcome, Steven. Glad I could help you out, my man! :D
Thanks a lot this saved me from my id Maps that sometimes do not seem to work properly.
Haha, no worries! Much quicker than ID maps. :D
You're a life saver man, thanks a bunch!!
No problem!
that saved my life too !
@@jr_pilot9960 I'm glad I could help you too! :)
good tutorial,and very easy to understanding
Glad to hear that!
Thank you! I was having a hard time figuring this out. It makes more sense now.
No problem at all, Emily. Glad I could be of service to you! :)
This is a must procedure, specially if you are painting architecture, Thanks.
You could also use the UV chunk fill option when using the polygon fill tool for painting.
Cheers, exactly what i was looking for.
Very Nice! Please do more substance things!
Will do, what would you like to see?
I've been working this way for years, it's by far the most simple
I'm exactly the same as you! I've been doing it since I started with painter many years ago. It feels like the iterative way without causing yourself too many issues down the line! :)
This has flattened the learning curve of SP by a substantial amount (pun intended) ! Thank you so much.
I'm glad I could make it easier for you because the day I started doing this was truly a day of joy! :D
You are a GENIUS! Seriously I’ve been looking for this technique all bloody day. Cheers
No worries at all! I'm glad I could finally save you! :P
Useful tutorial! Many thx!
You're very welcome, Andreas! :D
just used this method for one of my college projects, thank you so much it was really helpful!
You're very welcome! Haha, thanks for taking a look at the tutorial. Out of curiosity, how did you find it?
@@SpeedTutor i googled how to apply smart materials to specific parts of a model on SP and your video was the first one to show up! :)
Amazing tips, this will help so much with my more advanced texturing. Awesome job.
Awesome! Thank you! :)
Very helpful. Thank you
No worries at all! :)
Yay thank you so much for such a concise tutorial! Showed me exactly what I needed!
Fantastic, I'm really glad I could help! :)
Totaly life saver. Thank you
You're very welcome! :)
Very helpful video. Thanks a lot.
Thanks very much! :)
Awesome! Thank you!
No worries!
This is a really great tip. Thanks for the video!
No problem at all, thanks for watching.
You Sir, truly are Mr Incredible. I'll have you know that I was actually referred to Substance Painter by someone who has a clue, and was attempting to help me out, as I was still painting my UV textures the archaic way by using Photoshop. Never again, and it's all because of you, and this tutorial is EXACTLY what I needed to know how to do.
I feel exactly the same way, when I discovered how to do this. I used to do texturing in Photoshop too and Substance Painter really changed my life! I never texture in photoshop anymore! :)
Great video and straight to the point! I love this, you saved me from my uni project I was about to throw away! TY :D
Haha, I'm glad I could save you! :D I'm always here.
I come here to salute you, thanks for this tutorial, I'm searching for this for days and finally found!
Thanks a lot! Nice content!
You are very welcome! I'm glad you found it useful! :)
Really really useful tutorial ! It solved my pattern issue. Thank you ! 😊
I'm glad I could be of service to you! :D
Dude very useful and to the point thank god.
Great to hear it, thanks for watching! :)
This saved me so much time, thanks
Glad it helped! You're very welcome! :)
Dude ure a substance painter god to me :D thank you very much!
You definitely got a new sub :)
Haha, thanks for watching! :)
Hey Bro This is exactly what I needed to learn.. really nice man, thanks a lot :)
Great to hear it! :)
ty so much for this!!
That's no problem at all, thanks for coming to watch! :D
Please do more about texturing! finally someone with usefull content on this topic :'D
What would you like to know? :)
Thanks for this helped heaps
Glad to hear!
oh Thank you! Thats very usefull!
Glad it was helpful! How did you find my video? :)
Thank you so much
That's no problem at all, thanks for watching! :)
Thanks!
You're very welcome!
Never heard about this software looks interesting. Great tutorial. Keep it up !
Thanks very much! :)
damn still useful years later. ty for this, got my uni assignment due in a couple hours lmao
Haha, I'm glad I could be your saviour! :D I hope you managed to submit, or I'll be disappointed in you.
yessir, ty!
This is exactly the kind of thing I wanted. Nice one man! Thanks a lot :)
No worries at all, my man! :)
It's very helpful, thanks a lot comrade!
I'm glad you think so, Captain! :)
thanks!
You're very welcome! :)
Cool! Thanks.
Glad you liked it!
Cheers m8 you've saved me x
No worries at all, my friend! :)
TE AMO!
Haha, thanks very much! :D
Wow, thanks a lot!)
That is no problem at all! :) I hope it helped! :D
thank you so much
You're very welcome! I'm glad you found it helpful! :D
this is amazing, but unfortunately, my model's UV map is different, the chunks have been used multiple times, so even in polygon fill it adds the material to unwanted parts of the model, do you have any wisdom to share on how I can change that, please?
Hey there, no problem at all! :) If some of the UV map overlaps on other elements, it will add the texture to other areas. The only solution would be to edit the model UV map and don't overlap any UV elements. I hope that makes sense :)
Thank you buddy ;) it helped me a lot
I'm very glad to hear it! :)
Thank you so much! You are a god sent ahaha. This is exactly what I was having trouble with! :D
I'm very glad I could help you out! :)
Super helpful!
Great to hear it! :)
THANK YOU SOOOOOOOOOOOOOOOOOOOOO MUCH dude
Thx
No problem at all! :)
thank you!
No problem at all, I hope it helped! :)
Thank you so much!!
No problem at all! :)
i realy like your video
I'm glad you found it helpful! :D
Nicely explained Thanks brother. Subbed!
No worries at all, thanks for watching! :)
Great tut, good on ya dude
I hope it helped, thanks for watching! :)
thank you
No problem at all! :)
thank u ^_^
No problem at all, I'm glad I could help! :)
Thank you very much (=
You're most welcome! :D
thank you
No problem at all, thanks for watching! :)
ABSOLUTE FUCKIN LEGEND!!!!!
Thank u sooooo much
Haha, glad I could help you out. It was incredible when I learned this myself. :)
It is showing fill layers are not paintable
Fill layers aren't paint able, only with masks. You will want to use a standard paint layer for general painting! :)
ho.my.god. SO MUCH KNOWLEDGE IN 5MIN
I'm glad it was something that could help you out! :)
SpeedTutor Thank You so much for sharing this quality content 😌
That is no problem at all! :)
So this means I can have multiple textures in one UV map which then can be used for multiple objects?
Exactly, I'll often combine several models onto one UV and then texture them together by doing this method! :)
Thanks for the video! I am trying this with a one uı and one material but now there are a lot masks and folders in my project. Is it bad?
I don't think that should matter! :)
is there a way that you can add like edge wear effects to specific parts or is that only if you color ID specific parts for you to be able to do that?
Very Nice Saludos¡
L-I-F-E S-A-V-E-R!
I'm glad you could be saved! :D
Do you know that you are a hero?😀😊
I wear a cape on the weekends, does that count? :P
@@SpeedTutor Please wear it all the time😊💜
is it possible to all those materials sets are exported as just one texture set?
That's what I do, because it will all be one texture set based on the UV Mapping from my 3D Program. I'll make several models share the same UV space and thus atlased to one place! :)
is this how assets for games are done? i feel like having only a few texture sets for a large objects would be beneficial for game engines ( so it doesnt haveto load a bunch of texture layers). Maybe this isnt how its done, just wondering if it is or isnt.
Most of the time, for optimisation sake you will want to have the minimum amount of materials per asset and/or textures per material as possible. As most PBR related texturing these days require, atleast 4 high quality textures which are normally the biggest overhead in a game. Yes they can be compressed by various solutions within the engine but it's about you being smart about your workflow really. I hope that helps! :)
Wow why can't I just paint a chunk I want to mask off? Still kind of rigid. So basically no real control of the area or pixel by pixel? Hmmmm....that kind of sucks.
Can I make a piece of the map transparent?
Yes, if you use an opacity map or have that as part of your texture which supports transparent in-engine :)
when i paint one side any object, lets say box, paint goes on every side. how do i fix this
Do your UV's overlap?
Hi! I just had a quick question, how do i set up a file in wich i can get different texture sets? I have tried different ID's, smoothing groups and materials but nothing seems to work. :c
Different texture sets are (in my experience) just different or multiple materials on a single model. Whereas in the case of what I wanted to showcase in this video, you can have just one single material for your entire model and texture different parts as if it were made of multiple texture sets or materials! :)
@@SpeedTutor i struggled with it for quite a bit unitl i saw that the udim box was checked......thanks anyway for the quick response!
how did you get your objects to have different materials? i imported from blender but i only have one material type for all the parts, so i cant select them individually
They are different materials on the object, from your 3D program but this technique is to help you only use one material per asset. For optimisation sake! :)
@@SpeedTutor i just tried in painter, i have over 30, 2k res materials,m the program is starting to crash haha. What can i do?
How was this model prepared e.g., uvs done in what program, were the individual pieces done separately(uvd).
This model isn't mine but provided by Allgorithmic for their competition a while back. The object is in seperate parts with various materials, but the purpose of the tutorial was to show how to apply multiple materials to an object that might only have one material and UV map. I hope that helps :)
i hate the fact that the program has make somane changes, i cant found half of the things that u are using in the video :(
Those features should still be there, what version are you using?
how to open this built-in model in sp?
It's not built in, I think I got it from the Substance website! :) It's called their "Mat Challenge".
im having an issue. when i drag some materials onto the head. there is a jet black shadow inside the crease in the head and around the neck area. it shows up on the UV map there and in a couple other spots. i tried moving the light source around and that didnt fix it. would you have any idea whats causing this? i notice its not there at all in your demo. thank you:D
That's really hard to say, as I don't know what your setup is. Did you bake out any maps, like Ambient occlusion? Is your model just imported directly in from a 3D program? If not, it might be polygons that are flipped or you need to reset the mesh data in your 3D program. I used 3DS Max and sometimes you need to do something called "Reset XForm" - This will reset the mesh data, as the polygons can get messed up. Sorry I can't be of more help.
@@SpeedTutor all i did was drag the exact same smart material onto the exact same model you did. do you have a discord or anything? maybe i can show you:D
when i apply the material to the head, the colours wont show up like in your tutorial. it just stays grey. been at it for two days now. help please
That's strange, does it apply to the mask? If you hover over the mask?
@@SpeedTutor no it does nothing, i downloaded the trial thinking this can help me with texturing but i cant seem to get any material on the model. i unwraped it in 3ds max, a simple box and exported out a fbx. everything opens in substance paint, my cursor dont even have paint on it to paint. i think its the pc, it cant hadle it. im using an intel 4000 graphic card. thanks for the reply
That's a tough question, I'm not sure if on-board graphics are supported. You could turn the resolution down in painter, to 1024 or less. See if that improves it? Sorry I can't be of more help!
@@SpeedTutor thanks for your help. i will give it a go
But how to do this same thing if the texture is not originally by default in Substance ? How to apply such an imported texture and normal and AO maps to only specific parts of a 3d object ?
So how do you apply these textures within Substance?
That's what I am asking you.
You can apply certain textures to the channels themselves, if you import your maps and then add them to either a paint or fill layer, and to the particular channels. I'm sure this will work, don't quote me 100% because I don't even do it.
@@SpeedTutor What a person you are. No I won't "quote " you but thanks anyways.
I assume you mean that in a good way? Haha. If so, no worries at all! :)
How do you do different colors on the same material?
You would have to change the parameters within the material settings once you have added it to the your model!
Hey yall, does anyone know how i can do a polygon fill with just an edge wear generator to that specific polygon selection but without have to add any actual fill/color (like the default being a red fill for example). I just want the edge wear effect for that polygon selection without having to touch the material underneath it in anyway. I dont want to color id every single part that i just want a generator for.
my default workspace does not look the same, do you know where I might find the polygon fill tool?
What version are you using? It's either on the top panel or along the side.
@@SpeedTutor found it there is just a graphic now to indicate what it is
I dont have any tools on the upper shelf that you selected after applying the black mask :(((
Do you have the newer interface?
SpeedTutor I think so yeah
For some reason it doesn't work for me. I click and click, but it doesn't apply anything. I have my UVs neatly layout etc, but nada. Any fix?
I'm not sure, do you have the correct alpha colour on the selection?
No idea, yours it's the first tutorial I'm following about SP, I'm on a monkey see monkey do basis right now, trying to learn what you do lol.
Polygon fill is unclickable it is all grey out
Do you have a model imported?
@@SpeedTutor it works. But now my problem is in Maya. For a project I can't use Arnold. So I try Stingray PBS to get the metallic effect for example.
In the shader editor I see my material but once it is assigned to my model it doesn't show. I know Stingray works better with DirectX 11. But still nothing.
Sadly, I'm not a user of the software you're speaking of. I use 3DS Max myself and don't do anything in it, outside of general modelling. I'm sorry I can't be of more help to you.
Great job. Second.
Thanks man! :)
how do i make my model into many parts in texture set list?
As in? How do you get different texture sets on your model? (If so) Usually by putting different materials on each part of your model in your 3D program! :) I hope that helps.
@@SpeedTutor does it have to be a specific material in the 3d program?