Lograste un video muy profesional, felicitaciones y gracias por compartirlo. Veo que hubo algunos problemas de transferencia del toner. Pero en las areas donde se transfirió correctamente, el resultado es asombroso. Personalmente me quedo con el metodo del toner mejorando, eso si, la tecnica de transferencia, para que se transfiera 100%. A parte de eso es más económico, con lo cual ya no queda discusion posible sobre cual de los dos, toner vs film es el mejor.
Finally got my yellow transfer paper from China seller. Waited 10 weeks+ in these Covid times. I followed the instructions here, almost perfect result and the only one that has worked for me (glossy magazine paper, etc etc). After etching (muriatic acid and 3%hydrogen peroxide in 2 HP to 1 MA mix ratio solution), result was excellent. One or two hair line shorts which I could have avoided in the Eagle layout. I'll just adjust the layout rules and DRC check. Many thanks for this video. A project that has been stalled for months now can resume!
Yo he probado con todos los metodos imaginables. Para producir los circuitos impresos de la mejorcalidad , siempre usé el metodo fotografico y la serigrafía. Pero es caro y solo se justifica si se van a producir muchas placas. Si se desea producir una sola placa, no vale la pena. Luego usé el metodo el marcador indeleble. Sirve pero solo para circuitos sencillos ya que el trazo es a mano y a menos que usemos una buena regla o tengamos buen pulso, los trazos salen algo feos... Tambien usé el "bishop" que consiste en pistas autoadhesivas, EL trabajo queda prolijo pero ocurre que es necesario calcar primero un bosquejo sobre la capa de cobre que sirva como guía para pegar luego las pistas autoadhesivas. Y para calcar , yo utilizaba el obsoleto papel carbonico. Ahora uso un proyector que me he fabricado con un equipo viejo en desuso. Coloco el dibujo en la base del equipo y con una luz fuerte me proyecta el dibujo cobre el cobre. Primero debo asegurarme de que la escala de proyecdcion derá la correcta para que las patas de los chips coincidan todas en su sitio corecto. Luego, donde se proyecta una linea voy dibujando con la ayuda de una regla, compas, pistolete, etcetera el impreso ayudado con una pluma rotring cargada con laca al agua. Lleva tiempo dibujar todo, princiopalmente si se trata de un gran proyecto, pero es barato, prolijo, e infalible pues una vez seca la laca, al introducir la placa en el ácido, las pistas de cobre quedan hermosamente lisas , derechas y profesionales. Además... nunca tengo apuro. He dedicaro a veces una tarde entera a la produccion de una placa pero los resultados fueron espectaculares. Finalmente adopté este metodo.
Muy buen video Luis, pero desde mi punto de vista hubo un pequeño detalle cuando usaste la plancha de calor el circuito no paso lo bien que se hubiese deseado, yo uso una enmicadora, como la que usaste en el metodo de la pelicula de fotoresist cuando pegaste la pelicula al cobre, y los resultados son sorprendentes x que la presion que se ejerce es similar en toda la placa de cobre, intentalo y veras q buenos resultados, de cualquier manera, mis respetos y felicitaciones a tu excelente trabajo, y compartir tus conocimientos, saludos
SI es cierto que no se transfirió todo correctamente: A mi con la laminadora no me funciona bien, es muy sencilla y no puedo regular la temperatura ni la presión, y para transferir el toner necesita bastante calor. De todas maneras despues de haberlo practicado varias veces el resultado mejoró considerablemente, y he llegado a realizar este mismo circuito sin cortes. Un saludo
Some viewers of this video asked, where the transfer paper, used in this video, comes from. It surely comes from China, ordered at eBay, even though I am not sure completely. But it defenitely looks the same as the one, which I ordered in 2013 from a chinese seller (fifty sheets), named Sense&Core. My paper has a shiny side and a mat side as the one in this video and the image has to be printed onto the shiny side of my paper as well. To find a list of offers for this paper do the following on eBay. Got to eBay advanced search (wriiten in tiny letters on the right side, next to the blue big [Search]-button) In the advanced search topmost field type in -toner transfer paper- (WITHOUT the dashes) and choose - "Exact words, exact order" ... from the drop down list. DO NOT press the blue [Search]-Button yet! Scroll down instead, until you'll find - Location and choose (*) From preferred locations PLUS "Worldwide"... from the belonging drop down list Scroll down further, until you'll find the last three items: - Sort by and choose "Time: ending soonest" - View results (leave this one untouched) - Results per page and choose "200" ... from the respective drop down lists. NOW you can press the blue [Search]-button. This way eBay will display more than seventy results of toner transfer paper. MOST of them come from China or Hong Kong and cost about fifteen to twenty Dollars for hundred sheets. Amounts of fifty or ten sheets are available as well, but then the price per sheet will be more of course. Nearly all of the chinese papers are yellow, like the one, used in this video. As all of them are marked as "Unbranded/Generic", it is most possible that they are ALL THE SAME and come from ONE single maker. You will find a few chinese offers of "New White A4 Heat Toner Transfer Paper For DIY PCB Electronic Prototype" among the papers listed from this search. I DON'T KNOW ANYTHING ABOUT THESE PAPERS! They may be the same, OR they may work similar to the the Pulsar - "Press 'n Peel" paper (FAB-IN A-BOX). I ordered mine (fifty sheets) in 2013 from the chinese seller Sense&Core (which is not listed in that list - maybe they don't sell it any more). Using Brother HL-2030 Laser Printer and Iron for transfer MY(!) results vary stronly. Sometimes I get very good results and sometimes it simply seem to "not want" to transfer. Furthermore it seems to depend on practice (so you surely will NOT get a good result at the beginning). I do many things on perfboard, because the drilling is a pain in the ass (I don't have a drill press, and no place where i could put it to). Etching a PCB only(!) comes into consideration for me, if the circuit solely/mostly consists of SMD-parts. One VERY IMPORTANT THING - NEVER EVER touch NEITHER the cleaned board NOR the printed image to transfer, with your naked fingers! The skin-oils "effectively" prevent the toner from sticking to the copper.
how long after printing could you go b4 it could no longer b transferred mainly would it still work if you printed the design and then did the transfer 30 minutes to an hour later?
Hola espero te encuentres bien. Tengo una problema cuando trato de imprimir la impresión no es uniforme tengo una impresora láser de tóner marca brother, tienes alguna recomendación que pueda solucionar mi problema, gracias de antemano.
i don't have a laser printer... can i print this on an inkjet printer and use a photocopy machine and use the copy? since photocopy machines uses toner... thanks..
Good video of process steps but you didn’t show the labels on your bottle more than a split second; not able to read. Also the text narration were not displayed long enough.
your purpose of lifting the bottle to show the chemical did not work , before I could read the bottle was gone also the bottle wa rotated, you are trying to show but failed
Its hydrochloric acid and sodium perborate not a mix i've heard of being used before. I use hydrochloric acid and some peroxide which becomes a reversible reaction, just bubble some oxygen through it and its ready to use again. As always be careful handling acids and especially mixing them with anything.
This method is promoted in many videos, but it sucks and produces bad results. Find the method using photo-resist film. It's easy and produces much better results.
ох как не экономно, ох мама дарагая.... я хоть А4 разрезаю на двое и получаю А5, и на этом куске печатаю несколько экземпляров запасных и в том числе шелкографию на сторону компонентов
Don't you have brains to realize we don't know spanish?? How should we guess what a sh%%t in bottles you used? What concentration? Second, hardly we're enjoying watching 5 mins of board bath. And instead of flying around the broken roads better you show HOW to fix it! And don't say about ink pen, on 0.2mm roads??? Esp. when you spot it AFTER etching.


Lograste un video muy profesional, felicitaciones y gracias por compartirlo. Veo que hubo algunos problemas de transferencia del toner. Pero en las areas donde se transfirió correctamente, el resultado es asombroso. Personalmente me quedo con el metodo del toner mejorando, eso si, la tecnica de transferencia, para que se transfiera 100%. A parte de eso es más económico, con lo cual ya no queda discusion posible sobre cual de los dos, toner vs film es el mejor.
Menos mal, GRACIAS. El primer vídeo en el que veo que explican en qué lado del papel se debe imprimir.
Finally got my yellow transfer paper from China seller. Waited 10 weeks+ in these Covid times. I followed the instructions here, almost perfect result and the only one that has worked for me (glossy magazine paper, etc etc).
After etching (muriatic acid and 3%hydrogen peroxide in 2 HP to 1 MA mix ratio solution), result was excellent. One or two hair line shorts which I could have avoided in the Eagle layout. I'll just adjust the layout rules and DRC check. Many thanks for this video. A project that has been stalled for months now can resume!
Yo he probado con todos los metodos imaginables. Para producir los circuitos impresos de la mejorcalidad , siempre usé el metodo fotografico y la serigrafía. Pero es caro y solo se justifica si se van a producir muchas placas. Si se desea producir una sola placa, no vale la pena.
Luego usé el metodo el marcador indeleble. Sirve pero solo para circuitos sencillos ya que el trazo es a mano y a menos que usemos una buena regla o tengamos buen pulso, los trazos salen algo feos...
Tambien usé el "bishop" que consiste en pistas autoadhesivas, EL trabajo queda prolijo pero ocurre que es necesario calcar primero un bosquejo sobre la capa de cobre que sirva como guía para pegar luego las pistas autoadhesivas. Y para calcar , yo utilizaba el obsoleto papel carbonico.
Ahora uso un proyector que me he fabricado con un equipo viejo en desuso. Coloco el dibujo en la base del equipo y con una luz fuerte me proyecta el dibujo cobre el cobre. Primero debo asegurarme de que la escala de proyecdcion derá la correcta para que las patas de los chips coincidan todas en su sitio corecto.
Luego, donde se proyecta una linea voy dibujando con la ayuda de una regla, compas, pistolete, etcetera el impreso ayudado con una pluma rotring cargada con laca al agua. Lleva tiempo dibujar todo, princiopalmente si se trata de un gran proyecto, pero es barato, prolijo, e infalible pues una vez seca la laca, al introducir la placa en el ácido, las pistas de cobre quedan hermosamente lisas , derechas y profesionales.
Además... nunca tengo apuro. He dedicaro a veces una tarde entera a la produccion de una placa pero los resultados fueron espectaculares. Finalmente adopté este metodo.
Very nice work. Well done.
excellent tutorial, muchos gracias!
Can it be any laser printer? Or does it have to be with a specific requirement?
Welcome to the next show....repairing Bum Traces on PCBs
Very good
Muy buen video Luis, pero desde mi punto de vista hubo un pequeño detalle cuando usaste la plancha de calor el circuito no paso lo bien que se hubiese deseado, yo uso una enmicadora, como la que usaste en el metodo de la pelicula de fotoresist cuando pegaste la pelicula al cobre, y los resultados son sorprendentes x que la presion que se ejerce es similar en toda la placa de cobre, intentalo y veras q buenos resultados, de cualquier manera, mis respetos y felicitaciones a tu excelente trabajo, y compartir tus conocimientos, saludos
SI es cierto que no se transfirió todo correctamente: A mi con la laminadora no me funciona bien, es muy sencilla y no puedo regular la temperatura ni la presión, y para transferir el toner necesita bastante calor. De todas maneras despues de haberlo practicado varias veces el resultado mejoró considerablemente, y he llegado a realizar este mismo circuito sin cortes. Un saludo
Which side should I print the rough one or the smooth side
Smooth (the glossy, laminated side).
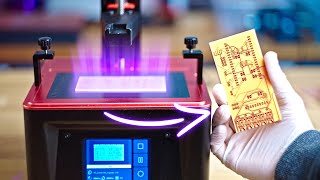
Some viewers of this video asked, where the transfer paper, used in this video, comes from.
It surely comes from China, ordered at eBay, even though I am not sure completely. But it defenitely looks the same as the one, which I ordered in 2013 from a chinese seller (fifty sheets), named Sense&Core. My paper has a shiny side and a mat side as the one in this video and the image has to be printed onto the shiny side of my paper as well.
To find a list of offers for this paper do the following on eBay.
Got to eBay advanced search (wriiten in tiny letters on the right side, next to the blue big [Search]-button)
In the advanced search topmost field type in -toner transfer paper- (WITHOUT the dashes)
and choose
- "Exact words, exact order" ... from the drop down list.
DO NOT press the blue [Search]-Button yet!
Scroll down instead, until you'll find
- Location
and choose
(*) From preferred locations PLUS "Worldwide"... from the belonging drop down list
Scroll down further, until you'll find the last three items:
- Sort by
and choose
"Time: ending soonest"
- View results
(leave this one untouched)
- Results per page
and choose
"200"
... from the respective drop down lists.
NOW you can press the blue [Search]-button.
This way eBay will display more than seventy results of toner transfer paper. MOST of them come from China or Hong Kong and cost about fifteen to twenty Dollars for hundred sheets. Amounts of fifty or ten sheets are available as well, but then the price per sheet will be more of course.
Nearly all of the chinese papers are yellow, like the one, used in this video.
As all of them are marked as "Unbranded/Generic", it is most possible that they are ALL THE SAME and come from ONE single maker.
You will find a few chinese offers of "New White A4 Heat Toner Transfer Paper For DIY PCB Electronic Prototype" among the papers listed from this search.
I DON'T KNOW ANYTHING ABOUT THESE PAPERS! They may be the same, OR they may work similar to the the Pulsar - "Press 'n Peel" paper (FAB-IN A-BOX).
I ordered mine (fifty sheets) in 2013 from the chinese seller Sense&Core (which is not listed in that list - maybe they don't sell it any more).
Using Brother HL-2030 Laser Printer and Iron for transfer MY(!) results vary stronly. Sometimes I get very good results and sometimes it simply seem to "not want" to transfer. Furthermore it seems to depend on practice (so you surely will NOT get a good result at the beginning). I do many things on perfboard, because the drilling is a pain in the ass (I don't have a drill press, and no place where i could put it to). Etching a PCB only(!) comes into consideration for me, if the circuit solely/mostly consists of SMD-parts.
One VERY IMPORTANT THING - NEVER EVER touch NEITHER the cleaned board NOR the printed image to transfer, with your naked fingers! The skin-oils "effectively" prevent the toner from sticking to the copper.
Thank you for this!!!
@Amari Danny Thanks but, what does that have to do with making PCBs?
how long after printing could you go b4 it could no longer b transferred mainly would it still work if you printed the design and then did the transfer 30 minutes to an hour later?
eddy apple doesn't seem to be interested in an answer 🙈
i really dont think it makes a difference
Can I use iron perchloride to corrode copper on the board?
Hola espero te encuentres bien. Tengo una problema cuando trato de imprimir la impresión no es uniforme tengo una impresora láser de tóner marca brother, tienes alguna recomendación que pueda solucionar mi problema, gracias de antemano.
i don't have a laser printer... can i print this on an inkjet printer and use a photocopy machine and use the copy? since photocopy machines uses toner... thanks..
ufff. tòo many steps. you will lose quality. but you can test it
Hello Friend.
What printer and what resolution did you use on your printer?
Thanks for your attention
Good video of process steps but you didn’t show the labels on your bottle more than a split second; not able to read. Also the text narration were not displayed long enough.
The unsatisfactory result might have to do with the use of paper between the iron and the paper, this should be tested
Hola ¿cuanto tiempo aplicas calor con la plancha?. Muy buen video :)
20 a 30 min
Por cuánto tiempo planchas la placa?
May i know copper boards is not 100% copper? only the top layer is copper??
Buen video. Donde puedo encontrar el fotolito usado?
where to buy that paper. and what is name of that paper. that process suitable for iron plate image tra
Sonu Verma it's called transfer paper, or you can buy stiker paper and use the yellow thing like in the video
amazon sells it
your purpose of lifting the bottle to show the chemical did not work , before I could read the bottle was gone also the bottle wa rotated, you are trying to show but failed
this paper purchase link please...
dont work with inkjet? can use on brass sheet?
Which chemicals are you using? Can you give some details as the infos on the bottle isn´t my native language ;-)
Its hydrochloric acid and sodium perborate not a mix i've heard of being used before. I use hydrochloric acid and some peroxide which becomes a reversible reaction, just bubble some oxygen through it and its ready to use again. As always be careful handling acids and especially mixing them with anything.
how many minutes should ironing?
Thats a bad result
A very bad result actually, the breaks in the copper are visible to the naked eye even on camera
You don't say
Which type of yellow colour paper??
This method is promoted in many videos, but it sucks and produces bad results. Find the method using photo-resist film. It's easy and produces much better results.
what is the printer setting for this type of paper? thanks
How minute iron
can we use inkjet printer for this process
No
Hi, palese the proportions of cloridric acid and sodium perborate. Thanks
Hi, where to download the test circuit?
dpi?
anyone know if this would work using a laminator instead of an iron?
I have tried it with my domestic laminator and it does not work well,
It needs enough heat and pressure.
Whats that for a paper?
I got mine on aliexpress if you search for "Toner Heat Transfer Paper For DIY PCB Electronic Prototype Mark" or similar
the music is terrible....
Paper name
ох как не экономно, ох мама дарагая.... я хоть А4 разрезаю на двое и получаю А5, и на этом куске печатаю несколько экземпляров запасных и в том числе шелкографию на сторону компонентов
Amigo, ¿me podrías pasar ese diseño de la placa para probarlo?
An improved method
ruclips.net/video/PB7N9uIYW4A/видео.html
Pleas send me
Don't you have brains to realize we don't know spanish?? How should we guess what a sh%%t in bottles you used? What concentration? Second, hardly we're enjoying watching 5 mins of board bath. And instead of flying around the broken roads better you show HOW to fix it! And don't say about ink pen, on 0.2mm roads??? Esp. when you spot it AFTER etching.
Stop being poor and do it on a pro!
Dejen de ser pobres, y hagan en un profesional.
Deixem de ser pobres e façam num profissional!
for simple tests is the best option
para pruebas sencillas es la mejor opción