Это видео недоступно.
Сожалеем об этом.
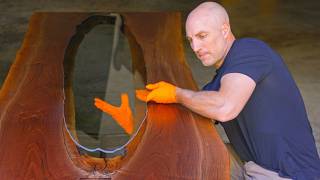
CLETUS MCFARLAND, PIE CUTS, BROKEN PARTS AND A NEW PERSONAL BEST IN WIFEY'S WHIP!

HTML-код
- Опубликовано: 27 авг 2022
- There's something for everyone in Episode 205 of Mike Finnegan's Garage! The legend, Cletus McFarland dropped in to go for a ride in my wife's 21ft Eliminator Daytona jet boat and of course, we had issues. A boat that has ran great all summer long suddenly had an intermittent issue with the crank sensor in the twin-turbo Texas Speed 427 LSX engine. We got that handled and also enlarged our charge tube, which made a massive reduction in the temperature of the air coming from the turbos. This meant the engine made way more power! In this video we show you how to pie-cut tubing and test our new parts while adding six mph to the top speed of the jet boat!
Want to help support this channel and stay fully clothed and out of jail? visit www.fsmgarage.com for all of your clothing needs. thanks!
-Finnegan


Told ya that elbow was hurting ya! I wanna go for another ride :)
Maybe teach folk about maintaining the cross-sectional area of the tube, regardless of the tubes shape? ;)
@@PiDsPagePrototypes in general the hot rod community is way behind the curve in really learning about true airflow characteristics as far as turbulence restrictions how to design a system with the least amount of potential restrictions and or turbulence both of which are major factors in turbo efficiency.
That and they really need get past how pretty the welds looks on the badass titanium, steel and or aluminum piping and insulted everything from both sides.
Down to insulting the tubing from ice water tanks to isolation for the intercooler where it connects to the frame supporting it.
Because everything that is used to pipe the hot and cold sides into the turbos and the throttle bodies is the best heat conductors for the most part out there.
But if you insulted the hot side you generate more power to drive the turbine that drives the wheel that sucks the air to stuff the air into the combination chambers.
Yet they super heat the space underneath the hood which in turn super heats the charge pipes, and the manifolds next to them.
Cold air is horsepower and forced induction cold air is bigger horsepower.
Simple basic common sense tells you that the heat is killing the best part of your efforts in creating more power by the most efficient way to get forced induction except ram air, which most cases this could be improved by ducting the inlet side of turbos in especially when they're trapped inside the hood with out a open path straight to outside ambient air
Dam trolls
Nudge nudge
@@timothymilam732 Spot on!
Also, there's a bit of a giggle to be had, with auto correct swapping Insulated for Insulted - I can imagine a frozen guy shouting at an engine,... :D ;)
As someone who works with low voltage signals around high voltage/current noise, you have to be super careful with the routing of the shielded low voltage wires. Do not concern yourself with neatness, keep the low voltage signal wires far away from high voltage things like spark plug wires or high current wiring like are feeding the coils and injectors. I wouldn't even have the crank and cam sensor wiring bundled in the same harness. Also they can only cross at close to 90 degrees if they must cross each other. Anytime wires run parallel near each other, you will get some signal cross talk, even if the wires are shielded.
I deal with this problem building the tube HIFI amplifiers I make, and "lead dress" as we call it is key to not introducing noise into the low level input signal. The other key is ensuring the wire shield is actually grounded at the ECU end so it's functioning as a shield. A digital device like these engine ECU's can ignore noise up to a point, and then after that, the signal turns into garbage. I highly doubt it's a "bad connection" given the super low current we are talking about.
I am curious what the output of that crank sensor looks like on a scope, and if I was having this issue, I would put some sort of a data logging scope at the ECU end of the sensor wire to see what exactly is happening to the signal when it fails. Is there a ton of extraneous noise or does the sine wave flatten out? Even just looking at the scope pattern at the ECU in real time with the engine running at different RPM's might point to the problem. My guess is the wiring is picking up noise that overwhelms the signal due to the routing of the signal wiring.
how about shield everything
like only run shielded wires? or wrap everything up?
19:34 cleetus arrives just fyi
this ^^^^^^^
Skunkie knows of what he speaks. I've been in aviation avionics and controls for years, and shielding isn't just wrapping wires. Bonding one or both ends of the shielding to the connectors or device is critical as well. Low voltage signals are always kept separate as much as possible. I'd be willing to bet it's why some folks have issues after they've done an LS swap in their garage. There's a reason GM fabricated and routed their wiring harnesses the way they did.
I’ve had more success draining shields at one end ONLY (usually the source) due to ground differential voltage.
@@jkK-lw9lu You're right. A lot of times it's done that way.
Your wife is going to be so happy with these improvements you are making to her boat!
@Max Power guess you need to go back a few videos when they went on vacation
cleetus helicoptering around is some really baller shit.
Time is money.
Meanwhile poor James stuck in garage being a shop manager
(Unless that's where he wants to be which maybe a strong possibility)
@@jdias51 And you can be pretty certain that he gets a pay which is above average pay.
Unless it's farther away than it looks on video, you have a plug wire right against the purple signal out wire from the crank sensor at the end of the harness where it isn't shielded.
Beautiful boat, your wife is so lucky to have you build a magnificent water craft 😎👍. Best of luck getting everything ready for drag week.
Wow you actually listened to us internet commentors who know nothing about fab. I hope the bigger y cut is working. Love the videos keep them coming.
There are some smarter than Finn MFers making comments, I’m listening HARD!!
Mike, i love that ur the kind of boss who hold the workpiece while the other guy throws the hammer.
I saw ya make a test hit last week and it was glorious! Made my day! I tried to holler at ya'll after ya pulled her out. Those turbos echoing off that glassy water was eargasmic!
I'm jealous as all get out!!!!
@@brianmiller1098 It was just dumb luck. I went for a ride on my pedal Harley down to d landing and was chilling for bit. Then bam across the water I saw the red rocket coming out of the woods backing into the water!
That pup just plain rips now! Sounded great, too! Have fun! ✌️❤️🙂🇨🇦
Air intake temperature is key, air density = hp. Sweet ass boat love your builds.
My quarter mile times were always better on a cool night
Yupp nitrous makes it super cold in your combustion chamber allowing for extreme amounts of fuel to be combusted thus more power even tho I’ma turbo guy I love nitrous one time me and my friends for fun did a 150 shot on a stock 4.0 Cherokee we were running with the built stuff all we had was paddles and a dry shot
@@prod.yayo5715 the main part about nitrous is the oxygen in it
Not only air density but also knock reduction
@@Hamring thats all to do with your timing and afr tho obviously locking is bad for your motor but it could b prevented are you saying that nitrous and turbos reduce your chance of knock because the temps are down?
The pop off on the jet drive needs a safety switch that pops it if the ignition cuts.... maybe a .25 delay. Fast enough to prevent a submarine but not so fast that it pops on a momentary glitch.
I agree 100%.
if the ECU has an extra output you could use engine RPM. if it drops below X rpm then it runs the pop off
@@Woodie-xq1ew Too many variables.
I used to live in Cleetus' neck of the woods. Good to see him in GA visiting Finnegans Garage!
Yeah, it’s amazing how much restriction just a slightly too small tube can have on airflow. When remodeling my old kitchen, I tried to move the exhaust vent ducting into the floor joists above, but had to cut the diameter by 2” to get it to fit. That caused too much back pressure to run the fan on anything but the lowest setting.
I have been a mechanic for over 30 years and one thing that has been in my tool box all that time is Silly Putty. I the case of your crank sensor would put a small piece on the trigger wheel, install the sensor, pull it back out, pick the putty out carefully to see your gap. You can cut the putty with a razer blade and get a pretty good measurement. If there is some room sand some paint off the block. If it is like the crank sensors I have been around it doesn't hurt the sensor if it rubs a little plastic off the end. I have mostly worked on larger diesel engines.
Awesome I love the way how you explain everything can't never stop learning and that boat is a bad boy !!!
That bird at 23:06 sounds like an old Powerstroke attempting to start 😆
Nice to see you having a good time with the water machine. (Minus the trouble). Way to skim the water surface.
Didn't even get the chance to scare Cletus with the boat, but watching your face turn as the magic happened was priceless.
I wanna see more building...isn't it amazing how much you can learn about fabricating when trying to make your own stuff in your garage, even in that short time from the 1st time you built it look at the welding and the fit how much better you improved everything about it getting to take the time to redo it again 😀
It’s those little things ya learn that make a big difference.
Isn't this the truth! I've been welding/fabricating as a career for 15+ years. Lately I've been mentoring a friend who has been getting into fabrication as a hobby. He'll ask questions and look for tips and tricks, stuff thats second nature to me at this point. So the more you do it the more you learn!
Newburn looked like the village blacksmith with that set up lol I love it!!!
Mike is my spirit animal. I live vicariously through him. 😀🤘
Watching that first part with Cleet and the IAS I realized I realy like your neighbors house.
Fantastic to see the science behind a performance engine!
it's ugly, but it works great. I'm glad I was one of the ones who said something. You're welcome, internet!
The thickness of the red paint is keeping the sensor out of the block just enough to cause an issue. My thought only
Great episode! Love watching the fabrication stuff and testing new things!
Mike I love your show and all the goodies you get to play with im a 28+ experienced automotive technician small details can be so important even as small as the thickness of the red engine paint between the crank sensor mating surface and having that paint cleaned off! In my experience just that slight change in air gap between the sensor and crank ring gear can mess up the whole day of having fun
Might be a silly observation, but when you were looking at the crank sensors, they were facing each other ( mirror image). They were not orientated the same way, so of course the mounting plates looked off. Only the centre lines of the plates would be the same. Cool boat and nice fabbing btw. 👍
Heck of a Turbo Setup, "Blows the Fire Right Out". Good Job!
Two of the best on YT on a jet boat? Win!!
Your wife is going to be thrilled with these results. She’ll be able to be first to all of her favourite fishing spots. Nice going guys.👍👍🇨🇦😳
So glad you were open to ideas. So cool to see the Holley data back up the physics/design change. Rad boat. Hope you are getting bigger and bigger smiles. Good luck with Blasphemy.
I love that pie cut trick
Commenting for support
Random pro-tip for 26:20: if you don't want your phone sliding out of your boardshort pocket, fold the entire pocket towards the back of your leg after putting it in there.
You do this by holding your phone in your pocket, turning the back of your hand towards your leg and pushing the whole pocket back. Saves you from tucking it under your pant leg and risking dropping it after you forget it is there when you stand up. I've been there too many times.
Instructions unclear. Phone stuck in prison pocket. Send help.
@@Keifsanderson Hahaha! You're going to need some BBQ tongs and a whole lotta grease!
Even the thickness of the paint on your block can be just enough to throw off the cps !!! clean off the paint to the mating surface !!! i used a little play-do on the end of my cps, measured it, cleaned it off, to set my shim height, worked for me !!!
I also used a little play-do on the end of the cps sensor to measure the gap & set my shim height accordingly, Worked for me !!!
Thank You. La Pine Oregon. Like you we moved out of California in 17 from San Diego old old hot rod guy and his lady here
The ball bearing welded on the bar as a hammering tool is a nice idea. Great for removing dents from tubing to if you can reach them.
55 in the back of the intro should be a must on every episode all time dream car man keep up the awesome vids
Boats? No. Dag Week?!! FTW!! But seriously, 42min Finnegan video? I was here for that.
The Basphemi is a bad ass car. I rewind and watch you pulling that wheelie. Keep up the good work
😀
That cold cut saw is awesome. I really should get one.
The mullet giraffe 🦒 😳 has HIS OWN HELECOPTOR! 3 time I seen it in video..shure would like to see the video of his getting it .CLEETUS!!! No holding out on your peeps.
hellyeahcopter
The cross sectional area of two 2.5" pipes are about 9.8 in2, which is about equal to a single 3.5" pipe at 9.6 in2. Great work as always! Things change of course as the shape changes to more oblong.
Mike, I would bet that the lake water temp also went up somewhat between your 111 and your 117 mph runs, making your changes even more significant. Spinning the pump almost 300 more rpm and climbing faster in rpm would probably indicate a couple hundred more hp, and the cooler inlet temp would be safer for detonation. Awesome before/after investigative work and results!
The cross-sectional area of a tube increases a lot more with increases in diameter than most people realize. The cross-sectional area of a 4" tube is 2.56 times the area of a 2.5" tube. So you actually have more area in the elbow now than the 2 tubes coming from the turbo, so absolutely no restriction.
Exactly. The cross sectional area increases 3.1415 square inches for every 1 inch the diameter increases. This is because Area=diameter*Pi
Always a good day when you drop a new video
Put a wider washer on the crank sensor retention bolt to make the holding tab more rigid...the factory tab is weak and will flex because it’s not made for high crankcase pressure which can push out the sensor and increase the gap... a thick fender washer will cure the “bends” and keep the sensor to wheel clearance tight.
I'm so glad you finally fixed that elbow, its been making me twitch since you made it and first commented on it lol
Pie cuts? Hell yea. Also yea, the cooler you get intake temps, the more dense the air is, allowing you to achieve more air in the same volume of space. Something fun that i would like to mess around with in the future is using Bernoulli’s theorem to make turbo routing that doesn’t restrict but changes pipe diameters to increase the pressure, in turn increasing the density.
Any increase in pressure will result in an increase in temperature?
@@jkK-lw9lu technically yes, but in this sense I would be attempting to keep the amount of fluid (in this sense for physics I am looking at air as a fluid, not a gas), and the temperature of the fluid constant. Using the ideal gas law, I would be attempting to keep the “n” & “T” constant by messing around with the volume of the tubing used. My thoughts were that if temperature becomes an issue, I could cool the air post-pressurization, but then I don’t know if that would negate the pressurization (basically making all the pressurization pointless) or if it would decrease the pressure a negligible amount. Basically trying to get as dense of air as possible while also having that air flow between Mach 0.4-0.5 (137.2mps - 171.5mps), since that is the velocity at which air flows most efficiently (no restricting or over flowing).
Basic thermodynamic theory is when you compress a gas it gets hot, expand it and it cools. Temp at the restriction would be warmer, but immediately after it would drop again. If anything the restriction might have a very very slight inter-cooling effect, but the restriction will reduce flow, and hence performance.
No advice. What you do is awesome.
Keep it up, love the videos they give me something to look forward too.
Thanks champ.
I was driving through Oregon and there was a beautiful 70 series Ford hauling a jet boat going the opposite direction. I instantly thought of you and your jet boats.
Crazy how one small change can make that much difference. Very cool!
Love the fab and test video's. Learn something with every one of them.
FYI, remember to leave the radius outside of your Y intact, because if you remove it that will cause extreme turbulence inside the radius bend going to your throttle body.
You want the air to have a smooth radius curve to direct the air flow coming from opposite directions to be guided around the corner, and not dead heading into the opposite flow head on.
Imagine that you're looking at it as if it were water, are smoke, and that you just ran them full force into each other head on.
Even though you do have a pipe to contain them both, you're still doing a major directional change.
If these two forces come together after the Y in a controlled radius curve, and it always them to just blend in the slipstream, there's very little rolling and boiling of the two invisible forces.
If allowed to smash in anything less than a than a smooth long radius 90 degree radius.
Then you will have a unstable air stream, and you will lose both volume, and velocity, because of the lack of controlled smooth directional change which creates excessive static pressure. Which means you lost a bunch of clean air, and reduced the amount of horsepower you could of generated for less effort from your turbos, and the more efficient they are the longer your engine and other components last.
Simply make a long radius 90 degree elbow of the same size as the entering pipes from each turbo outlet, then cut it in half on the middle of the 90 across side to side.
Then cut them in half along the center of the radius retaining the outside piece of the two halves.
Trim them up to fit inside of the Y connector where you maintain as much of the original pipe size.
Tac them back to back where they'll match the Y size at exactly the same point on each hakd as if you're completing a true 90 degree radius coming from opposite directions, and all them to continue the full distance possible to control your air flow inside your transitional 90
It will not hurt if you have to split the transition to match the heels of the incoming 90's, because it allows you to keep controlled direction of the opposed forces, and allowing them to blend smoothly.
Yes it's a PIA, but this is the correct method for merging to different directions smoothly, and you're gains in clean air will be far superior to what you'll get if you allow the smash headfirst into each other.
Over 40 years in commercial and industrial hvac and every type of air flow scenario you can imagine, I've dealt with it, and had to figure out how to fix the crap others have installed that was poorly constructed, and or engineered, because would deliver the proper airflow required to meet the designed CFM'S.
So I giving you the best information that you can possibly hope for in the position that y'all are in trying to improve the preformance of your intake system.
In those famous words that we all tell out girlfriends and wife's, trust me.
If you really think you improved it as much as you did by using the pieces that you used.
Make another one using the information that I gave you, and do a comparison of those two fittings.
And if you really want to learn how to make your hot and cold side piping as efficient and productive as possible, get yourselves a manometer, and study where, and how to set it up to measure your airflow through your systems
That was a good read. Learn something new every day. Thanks!
It's much better than before indeed, but i'd still say it's a restriction of the cross section still.
Like you're proposing they would optimally go around the bend and then combine.
Cleetus should have brought that 2 into 1 thing that fits with the Motion raceworks throttle body, i'm sure they've done their homework in regards to airflow. (and at least looking at it, it looks like good flow ... not that my intuition counts much)
If you could fit all of that in the space allotted, would be good information, not enough room=compromise, Finn made a good choice in my opinion
@@jkK-lw9lu you can very easily if you know how to layout your fittings.
Just look at it as if it was made of glass, and your minds eye can show you how if you look at it in that way.
Just extend the outside radius of the Y, are as you look down on it in plan view.
Its the middle of the fitting, and by extending the heels of the opposing fittings, you clean up the turbulence by allowing the air to flow naturally into one another.
Versus the way it is now, the air slams onto the opposite air flow causing it to boil, and roll around against the inside of the transitional 90, and itself, instead of blending smoothly.
Here's an example of how to in vision air flow..
I'm sure you have seen rocks and boulders in a river, and how as the water flows around a Boulder, it's nice and smooth.
Until it slams into the water flowing from the opposite direction, and then it rolls and boils every which way.
Air does exactly the same thing if you make it slam head first into air flow coming from around the corner meeting it head on.
Yet it meets the other at the same angle, are close to it.
It blends smoothly together, doesn't cause them both to fight each other, because that's resistance and causes increase in static pressure and that slows the air flow to slow down dramatically.
Yeah I know I tend to get carried away with my explanation of how airflow works, or doesn't work if the wrong things are done.
When you increase the overall diameter of the pipe, the CFM quickly increases. At 10psi on your 2.5" ID, you can flow ish 5000 CFM, at 4" ID, you can flow 16400 ish CFM at the same 10 psi, I used 1 foot of length for those numbers, but just a general show of the difference that little increases in diameter quickly gives exponential increases in overall CFM.
Watch Rob Dahm's Ultimate Guide to Wire Harness' (Lol) But he does give some good explanation about shielding, splitting certain high and low voltage wires from each other when building the harness. I tend to agree with Skunkie Designs
Also, your ending temps of 173 F vs 136 F intake temps, the 136 F intake temp has ish 94% MORE air in the same cubic inch as your 173 F temps from before. Tempurature drops also start to parabolicly increase the physical amount of air in the same given cube.
JFYI guys, you can set Holley Data logging to "System Log" and it will record the actual crank and cam signals (including when/where it looses sync).
As busy as you are you'll probably need help with what your looking at (and or what to look for) but Data is the King when it comes to trouble shooting (vs WAG-ing) 🤔
Thank you for posting all the great videos on your channel
I would look at the crank case pressure and see if there is a correlation between that and the loss of crank signal. Being that it is a boosted application, you could be making so much case pressure that it is actually pushing the sensor away from the crank and creating too much gap. In that event, if that is the issue, maybe a belt driven vacuum pump could keep the case under vacuum and hold the sensor in the correct location. Maybe I'm an idiot but it's worth a look. I love what your doing and wish you and yours the best!
Was badass to see the process and work put in to make a custom turbo piping
When you placed the sensors side by side, you can notice that the mounting tab metal it a small bit thicker. Perhaps, there is an issue with the securing tab changing temp, moving the sensor and causing additional gap. One way I would test this is to add a washer or small metal tab on top of the securing tab to help stabilize it during heat cycles. The difference in 1mm can cause the system to fault.
Or the paint that I was seeing under the mounting tab!
@@jkK-lw9lu And the paint around the sensor port as well. That was my first thought. Scrape that area so the sensor is fully engaged.
always good to see a finnegan video
I would put some shielding on the wires running to the crank sensor to prevent EMI.
Looks like they have shielded cable with the drain connected at the ecu ( see the heat shrink on the sensor end covering the shield?)
That boat sounds like it’s making another 300-400hp.A suggestion-try to get the spark plug wire away from the sensor wire . There might be some kind of emf interference going in .
another option is to run the sensor wire thru some grounded copper braid, to shield the signal from the spark wire.
@@2000freefuel Not sure about automotive stuff, but in Industrial Controls we wouldn't dream of running a sensor wire that wasn't internally screened and earthed for just this reason. Especially if it went anywhere near an HT spark source. When we fit Industrial burners, any HT cable must be at least 300mm from either a Flame Scanner cable or an Analogue sensor.
Unrelated, but sitting here watching this on laptop while simultaneously watching FwF "S-15 Truck Redemption" on TV, both are very entertaining.
Giọng Đức Phúc đỉnh quá đi mất. Nó kiểu mộc mạc, ko màu mè và nghe rất chân thành ấy ❤️❤️❤️❤️❤️ Mong 1 ngày sẽ được ngồi ở trời Đà Lạt và nghe Phúc hát 🎵
I love this man I remember the early days of seing finnegans garage on roadkill and hot rod before he got his own show I just watch these as I relax in my room after a long day of work hope to turn my side room and carport into a shop aswell I got my compressor my welder I got all the jacks and tools I need to get jobs done but I want to learn how to do more custom jobs we are currently in the process of swaping a 5.3 vortec into a 2001grand Cherokee doing everything ourselves ported 706 heads and stage 2 tsp cam with bee hive springs and ls6 lifters gonna be my first ls swap but I’m familar with camming them
So I will start by saying nothing I do is at this level of power, however, I know delicate sensors enough to recommend this:
1) As another said before me, make sure the wires are shielded to the ECU
2) With boats being solid mounted and having very minute vibrations of which thousands at speed are rarely registered via the ass meter, the internals of electronics usually can and do fracture at solder joints or, especially so, any flex in a solidly soldered connection without isolation.
That said I would try to make it so that your crank sensor isn't tightened with the possibility of flex and is isolated solely to vibration.
That said the improvement is astonishing, wasn't expecting an elbow change to make as much difference as it did. Good luck with Blasphemy, I know she likes to test you lol
I always keep a set of sensor pins around to perform pin drag tests. These terminals have a way of losing connection when they've been tampered with. Also, solder the terminal to the wire just after the seal, cheap insurance.
Sometimes the thickness of the paint or rust build up where the sensor mounts to makes a clearance issue.
Congrats, u now have trolls, ads, and scammers in your comment section- you’ve officially made it
Another cool trick I picked up for cps while working on top fuel cars, is to wrap the sensor clearance with 8 gauge copper wire to make a spring and use dielectric grease
Find a fine thread bolt that will slide in properly to the crank sensor hole. Machine the end flat on the bolt. You can turn the nut to set the depth measurement. Use two jam nuts. You might modify a jumbo nut into the jam nut. Then you can machine a bore to put an indicator on the end to check the difference of inserted depth from the bolt to the sensor.
I really like the boat stuff.
I Love your channel,Huge fan of roadkill but Finnegan's Garage rocks😁
super content for folks that pay attention and tune.. well done and fire me up.. good job guys
It appears that the reluctor wheel is damaged. In industry I believe it is common to space the sensor away from the wheel at 1/2 the diameter of the sensor. Does it not come with instructions?
Regardless I love your channel. The chemistry between Finnegan, Newburn and Cotton is awesome.
More Michael Wayne!
Mikey, in the video where you are showing the reluctor bore with the sender removed, it showed what looks like a piece of metal on one of the reluctor tabs.
Awesome video! You guys really are getting it done! Thanks for sharing
, Kevin
The blacked out wheels look killer
Sorry advice, take the old position sensor gut it and run a bolt through it. Screw that bolt in as far as it it will go while buddy turns the engine over by hand. You’ll get a really good idea of what the gap is and be able to adjust the other sensor to suit.
Top log shows real time
I had to add a shim to my crank sensor around the base of it. There is a GM part number 12565102. I actually had witness marks on my sensor. Crank flex can cause it to be too small of a gap and have the same issue.
I have watched you go from a hack to a excellent welder. You are bad ass now 🤗👍🙌✌️
Well done! Knocking on the buck and a quarter mark
I keep a cheap pipe swager handy for opening aluminum merges up. I plan on upgrading to the hydraulic setup that The Fabrication Series has listed on his channel.
Common sence your trying to output two presurised volumes of air into a pipe the size of one turbo outlet it would be extramly turbulent specialy if one turbo is making slightly more boost than the other but love how much it has improved the boat keep the videos coming
Those aluminum TIG welds looking 🔥🔥
Fishermen the lake is yours …… for now lol. That’s an impressive machine Mike
Nice work guys...👍
Science the heck out of it...✨
Keyboards for the win...🏁
I like the code "wife's boat" to keep you out of the dog house and on her goodside !! 👍👍😂😂
A jet boat basically follows the ideal pump laws. To increase the mass flow rate by a factor of N then pump has to spin N^2 faster and needs N^3 more power. So for example to double the mass flow rate of the jet the RPM must increase by a factor of 4 and you need 8 times the horsepower. From there if you know all the data from testing then you can calculate your efficiency at different speeds and see how your efficiency curve matches the impellers efficiency curve to see if your optimized.
You need a better/bigger a2w / more effience cooler on that engine. How i make all those ic/a2w cooler system is when boost hit system should work so good that IAT should be same as ambient or less. If you get that close to that there is extra at least 20-30% more power to coming on that engine. Keep up the good work, That is mean clean machine 👍
Great job boys! from Mivhigan!
Great content thanks for sharing
Damn you fast lad
I love that Miller welding helmet. I've never seen one with such a large viewing area. Assuming it is the Relic 280051, that's starting to get up there pricewise at $387, but if it works as well as the claimed spec, it would be totally worth it. I need all the help I can get with my 73 year old eyes. 😎
Lmao! Dude you and Garrett colabs are theeeeee best. Too fuvkin funny!!!
Thanks for watching!
You need to recalibrate the flux capacitor since replacing the crank position sensor then it won't shut off anymore. 😄