THANK YOU for watching! Let me know what you thought of this video, and if you really loved it, consider supporting my work on Patreon: www.patreon.com/thenextlayer
You are on a good track to becoming a great RUclipsr. Some of the humour, especially the delivery, doesn't really land, and I suggest removing the moving printer in the grey background as I found it very distracting. Same thing about adding your face to clips of the slicer doing its thing: it's distracting from the actual thing I want to look at. Technically the video is impressive.
Thanks for including information for newbies as well. A lot of the existing beginner material is fairly old and/or outdated, applies to Ender-style printers, and so on. I feel like we're having a bit of a shift in the industry with the new more-automatic printers, but content has been focused on reviews, comparisons to older models, or basically just targeting experts rather than people who are just getting into the hobby now that the barriers to entry are starting to come down. I had no idea slicers could do so much vs modeling software!
This came along at a really good time. Now that I have a machine that... just works... I've been spending more time dialing in slicer settings. But I had no idea most of these things existed. So, thanks for that.
This is one of the most useful videos I've seen and now I'm just waiting for my new computer to be ready so I can install Orca and start trying these suggestions through. Thanks Jonathan!
Some more tricks/ tips. Use more a 0.6 nozzle. Print your top surface layer with one shell and set the extrude to 0.42. Now the flat spot of the 0.6 nozzle will go over the previous layer for the second time (partly). The effect is that the nozzle is ironing and printing at the same time, the surface is silky smooth. Try it. Did you ever set your walls/ shells at 3,5 ? This means that after 2 layers the 3 one have one wall less, this one wall will be laid there buy the infill, as a infill wall. this create that the infill is more connected with the walls, making your part stronger.
I started to use the Orca Slicer few days ago... I was using the Ultimaker Cura... Oh my, Orca Slicer seems a whole new level thanks to all this settings you mentioned. I know it's not the only software that has this things, but to me it has the whole package and it's really easy to use! Thanks for the tips!
I think your video style is improving. Less over the top and forced jokes, tons of good info, very professional. I'm assuming you have a lot of prior filming and editing experience?
@@thenextlayer Sorry if that sounded like a bit of an underhanded compliment BTW. I should have started by saying your channel quality is already massive. Your delivery of the info is improving and I just think you are setting into a groove for this niche that will connect well with the audience. Good stuff!
This is the best video for me right now. I will use it as reference. Thanks. You have convinced me to learn more Bambu slicer. What I learned from you today could have saved me a couple hours last weekend...
Great video. I would add one more, with arachne you can heavily modify line widths from function to function. For instance with my 0.4mm Nozzle and 0.2mm Layer height I use 0.8mm infill line width, 0.5mm outline perimeter, 0.6mm inner wall perimeter. This incereases print speed by sometimes 25%, the quality stays the same. This needs a little bit of tuning but works very well generally speaking. I also use a 0.25mm Nozzle to print 0.6 line widths you don´t even have to change nozzles and you can print very fine lines in the same print if needed. Arachne was the best and biggest change for FDM slicers and people didn´t even notice.
Don't forget after customizing the settings for your print in the slicer, save the project out as a .3mf so I you decide you need to tweak something after closing the slicer you can get back to where you left off.
Complete individual objects is also a nice way to print batch of tiny objects with a filament leftover, so when the filament runs out only one print is unfinished.
Awesome video but having difficulty finding these settings in Cura. Would be helpful if you could locate them in a few slicers so that we can follow along with you. Great video though!
Couldn't find most of those in Cura.......so i may have to switch over to this one....... i dont comment much, but that being said, great video as always 👌
A very, very, VERY useful video. Your information provided me with new super-powers for my 3D printing! Thanks for making it easy to understand. Now, can I use Orca Slicer with my new SV06 and SV06 Plus...and my aging Ender 3 Pro?
I noticed a few new features I didn't used before, I didn't know orca slicer is that good, so I will try it. As for printing object one by one and removing them while the printbed is still hot, it will result in crooked pieces, specially if they are thin, like for instance gears or such. Also, might not be that good if you skip a step on the motor while scraping the object. I would at least insert a pause comand in the gcode after each object and make the printer do some type of queue printing.
@thenextlayer Another great video! Thanks. I don't see it mentioned, so I'd thought I'd point out that there is an easier way to set per-object settings in Bambu/Orca. In main panel on left, in the Process section header, there is a selector for Global/Object. Just select Object there, and then select one or more objects and use the same UI (Quality/Strenth/Speed...) to tweak params for the objects. And it highlights what you've tweaked. I'd post a screenshot if I could. Click Global to go back to that view. Cheers.
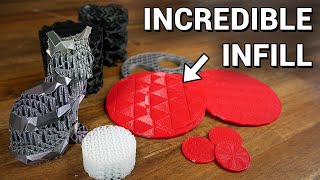
Great and informative as always. I got one big question: the objects in #10 and #11. Are these hotweels tracks connectors?! I (my kids) always have a shortage of them.
When I got to around 9:28, I had to laugh. I recognized that shape pretty easily: Hot Wheels track connectors. I had added support for mounting them on wooden ramps.
prusa slicer has high detail and super detail puts ironing to shame i made a custom plate for my nest thermostat with braided inlay it came out flawless warning it takes a while to print
variable layer height ive found to screw with dimensions. i work with molds and the tolerances need to be very tight within 0.1mm and i recently printed a model with variable layer height only to find out after the 12hr print that it went from 67.5mm width down to 66.95mm, which might as well be the span of the brooklyn bridge. model was useless and could not be used at all
I see that you use Orca Slicer and so am I. just started and some what like it. Question where do I go to be able to see my start gcode and to see the print on my sonic pad.
Hey buddy thanks for the video. I appreciated it. I have a question for you... Have you tried to slice the same object on Simplify 3D and Orca? I really can not find why Simplify is so faster than Orca Slicer. Could you bring us 3 or more points to speed up prints on K1 for example.
I'm writing with Google translator, so sorry for any mistakes. Do you know where there is a table option where you can see several print profiles and see where the others are. There is a window with a profile on the left, then the "=" symbol and on the right another profile. I accidentally discovered this and now I don't know where this option is.
Hi I have been persuaded by your videos to switch to Orca Slicer but afraid to mess up my Ender 5 with Sonic Pad... How should I set it up and configure on Orca Slicer?
Variable layer height has been a mixed bag for me - sometimes it saves time, but often it just increases the time even when I have it set to prefer speed.
Hello, I am relatively new to the 3D printing world. I have a ender printer from Creality. What CAD software would you recommend to use to learn to create 3D object? Also what slicer software? Thank You
1:20 I think my main question then is "can you view and control the printer remotely?" like if you check in on it and see the thing exploded, can you stop the print from ur fone? 🤔
Tried to download and install but it seems that it requires Microsoft Edge? This only appears to run on Win 10 and above. Not about to purchase a new machine just to run 'free' software when Prusa Slicer does the trick.
OrcaSlicer does look interesting - but I'm kinda confused as to why you'd want to monitor your print from the slicer. Sure, it saves a step, but other monitoring software like OctiPrint give you so many features and control, and allow you to monitor the print from any computer or even on a cell phone. It sounds like it just distracts from the primary reason for a slicer, which is to prepare the 3D model for printing.
Am I crazy or is Sli3r most likely pronounced simply as "Slicer"? Back from the leetspeak (1337) days where letters were substituted with similar looking numbers (3 is a backwards E) in order to increase the cool factor or something.
You know not to be a jerk or anything I haven't subscribed to your page yet and it says the first thing I saw you have given so little information for anybody that you can't do what you're telling them to do maybe you ought to think about putting out a video telling people specifically how to download from the software and how to compile it as a software engineer. This was a stupid ridiculous video it gave me no help pointed me in no directions and you gave no links to download any of that stupid software all you gave a link to which I still don't understand is a page that has multitudes of release information but I have yet to find a download link. It would be nice if you would make a video and then give reference links to the ship you're talking about you gave really no information and I can't understand where all of these people are giving you thumbs ups on your comments about how this was such a great video you gave no information you wasted 20 minutes of my time and then trying to find that software couldn't find it wasted another hour so thank you very much I will not be subscribing to your channel and this is a video. Sorry for being so rude but when you put out a video and you tell people this is how you should do it you need to give them all the information about it.


THANK YOU for watching! Let me know what you thought of this video, and if you really loved it, consider supporting my work on Patreon: www.patreon.com/thenextlayer
You are on a good track to becoming a great RUclipsr. Some of the humour, especially the delivery, doesn't really land, and I suggest removing the moving printer in the grey background as I found it very distracting. Same thing about adding your face to clips of the slicer doing its thing: it's distracting from the actual thing I want to look at. Technically the video is impressive.
Thanks for including information for newbies as well. A lot of the existing beginner material is fairly old and/or outdated, applies to Ender-style printers, and so on. I feel like we're having a bit of a shift in the industry with the new more-automatic printers, but content has been focused on reviews, comparisons to older models, or basically just targeting experts rather than people who are just getting into the hobby now that the barriers to entry are starting to come down. I had no idea slicers could do so much vs modeling software!
Agreed! I take requests. Just message me on discord
This is immensely helpful! As a noob, your videos have helped me print better quality models much sooner than I thought I would be able to !
Wow so glad. Thanks for the comment!
Enjoying the outdoor shots and greenscreen, it's a nice change of pace and looks very high quality!
Thanks!!! Great feedback. Soon we will be in the new studio but I’ll do a green screen for you!
The hole filling was one I have not heard of, but Combine Infill is one I definitely want to use!
Nice!
I love how he mentioned how those 3D printing slicers built their software off each other. 👍👍👍
This came along at a really good time. Now that I have a machine that... just works... I've been spending more time dialing in slicer settings. But I had no idea most of these things existed. So, thanks for that.
Amazing! Thanks
This is one of the most useful videos I've seen and now I'm just waiting for my new computer to be ready so I can install Orca and start trying these suggestions through. Thanks Jonathan!
Hole X-Y compensation alone is worth gold. Thank you!!!!
Glad!!
thanks man !!! I learned couple things there :) Keep rocking it. Your content is awesome
Wow! If you learned something that’s amazing! You’re an expert!!
good content :) Orca slicer is great, especially with the auto generated filament tuning tests, multiple build plates for one project, etc !
Sounds like a good combination of most popular/handy features of other slicers in a new skin... Nice! Time to try it out soon ;)
I haven’t even started playing with those!!!
Some more tricks/ tips. Use more a 0.6 nozzle. Print your top surface layer with one shell and set the extrude to 0.42. Now the flat spot of the 0.6 nozzle will go over the previous layer for the second time (partly). The effect is that the nozzle is ironing and printing at the same time, the surface is silky smooth. Try it.
Did you ever set your walls/ shells at 3,5 ? This means that after 2 layers the 3 one have one wall less, this one wall will be laid there buy the infill, as a infill wall. this create that the infill is more connected with the walls, making your part stronger.
"What this can do, is widen your holes..." I died.
Nice. Finally I've found some settings which I used in simplify3D
I started to use the Orca Slicer few days ago... I was using the Ultimaker Cura... Oh my, Orca Slicer seems a whole new level thanks to all this settings you mentioned. I know it's not the only software that has this things, but to me it has the whole package and it's really easy to use! Thanks for the tips!
I think your video style is improving. Less over the top and forced jokes, tons of good info, very professional. I'm assuming you have a lot of prior filming and editing experience?
Yeah almost 10 years. Thanks for the kind words.
@@thenextlayer Sorry if that sounded like a bit of an underhanded compliment BTW. I should have started by saying your channel quality is already massive. Your delivery of the info is improving and I just think you are setting into a groove for this niche that will connect well with the audience. Good stuff!
one of the best 3d print tips and tricks i have seen in a long time. thank you!
This is the best video for me right now. I will use it as reference. Thanks. You have convinced me to learn more Bambu slicer.
What I learned from you today could have saved me a couple hours last weekend...
NICE! Now, try OrcaSlicer, I did a video about it ;)
Great video. I would add one more, with arachne you can heavily modify line widths from function to function. For instance with my 0.4mm Nozzle and 0.2mm Layer height I use 0.8mm infill line width, 0.5mm outline perimeter, 0.6mm inner wall perimeter. This incereases print speed by sometimes 25%, the quality stays the same. This needs a little bit of tuning but works very well generally speaking. I also use a 0.25mm Nozzle to print 0.6 line widths you don´t even have to change nozzles and you can print very fine lines in the same print if needed. Arachne was the best and biggest change for FDM slicers and people didn´t even notice.
Don't forget after customizing the settings for your print in the slicer, save the project out as a .3mf so I you decide you need to tweak something after closing the slicer you can get back to where you left off.
Yup good advice
Complete individual objects is also a nice way to print batch of tiny objects with a filament leftover, so when the filament runs out only one print is unfinished.
I do the same!
I'm a newbie and this was super helpful. Thanks so much.
Awesome video but having difficulty finding these settings in Cura. Would be helpful if you could locate them in a few slicers so that we can follow along with you. Great video though!
Fair feedback. But have you considered trying Prusa or Orca?
Couldn't find most of those in Cura.......so i may have to switch over to this one....... i dont comment much, but that being said, great video as always 👌
Thanx, Maybe next time show us how these features work in orca such as variable layers
I can do that
Great info! Keep it coming! Your videos have come such a long way!
Thank you so much!
A very, very, VERY useful video. Your information provided me with new super-powers for my 3D printing! Thanks for making it easy to understand. Now, can I use Orca Slicer with my new SV06 and SV06 Plus...and my aging Ender 3 Pro?
lots of great tips, tysm
Great stuff. I’m a hack and didn’t know about any of this stuff.
Nice. Enjoy!
I think this was the final nudge I needed to use Orca over vanilla Bambu Studio lol.
I noticed a few new features I didn't used before, I didn't know orca slicer is that good, so I will try it. As for printing object one by one and removing them while the printbed is still hot, it will result in crooked pieces, specially if they are thin, like for instance gears or such. Also, might not be that good if you skip a step on the motor while scraping the object. I would at least insert a pause comand in the gcode after each object and make the printer do some type of queue printing.
thank you these should make life much easier
@thenextlayer Another great video! Thanks. I don't see it mentioned, so I'd thought I'd point out that there is an easier way to set per-object settings in Bambu/Orca. In main panel on left, in the Process section header, there is a selector for Global/Object. Just select Object there, and then select one or more objects and use the same UI (Quality/Strenth/Speed...) to tweak params for the objects. And it highlights what you've tweaked. I'd post a screenshot if I could. Click Global to go back to that view. Cheers.
Great and informative as always.
I got one big question: the objects in #10 and #11. Are these hotweels tracks connectors?! I (my kids) always have a shortage of them.
Yessir!!!
leaving cura... thanks :D
So useful video! I learned tons! Thank you!
Wow I didn’t know about most of these!
👏👏👏 You save me lot of time. Thank You.
Time to make those holes bigger! ;)
:)
Great stuff!!! Thanks for the tips!
I love you man your are the greatest :D So much things I'm learning from you :D
Wow thanks
I really wish Orca had better settings for variable layer height, Cura definitely blows it out of the water there.
When I got to around 9:28, I had to laugh. I recognized that shape pretty easily: Hot Wheels track connectors. I had added support for mounting them on wooden ramps.
Man u sumplify things great video
Thanks! Glad you liked it
@@thenextlayer wat u think of the anycubic kobra max
prusa slicer has high detail and super detail puts ironing to shame i made a custom plate for my nest thermostat with braided inlay it came out flawless warning it takes a while to print
iiiinteresting
variable layer height ive found to screw with dimensions. i work with molds and the tolerances need to be very tight within 0.1mm and i recently printed a model with variable layer height only to find out after the 12hr print that it went from 67.5mm width down to 66.95mm, which might as well be the span of the brooklyn bridge. model was useless and could not be used at all
I see that you use Orca Slicer and so am I. just started and some what like it. Question where do I go to be able to see my start gcode and to see the print on my sonic pad.
Excellent video !
Thanks! Stay subbed more coming soon
nice enunciation
Thanks :)
Great vid man awesome job
Thanks!
Great video. Thanks
Thanks for the comment!
Hey buddy thanks for the video. I appreciated it. I have a question for you... Have you tried to slice the same object on Simplify 3D and Orca? I really can not find why Simplify is so faster than Orca Slicer. Could you bring us 3 or more points to speed up prints on K1 for example.
I don’t have simplify
Can someone show/tell me how to change the support density in Orca slicer please?
Do you know hiwntinmake infill parameters thicker?
I'm writing with Google translator, so sorry for any mistakes.
Do you know where there is a table option where you can see several print profiles and see where the others are.
There is a window with a profile on the left, then the "=" symbol and on the right another profile.
I accidentally discovered this and now I don't know where this option is.
anyone know what the combine infill layers is called in cura? or if they even have anything similar to it?
Infill height
Hi I have been persuaded by your videos to switch to Orca Slicer but afraid to mess up my Ender 5 with Sonic Pad... How should I set it up and configure on Orca Slicer?
Variable layer height has been a mixed bag for me - sometimes it saves time, but often it just increases the time even when I have it set to prefer speed.
Hmmmm which slicer?
@@thenextlayer PrusaSlicer
how much difference between the 3 orca slicers is the web based difference or slicer difference
regards
Are you using that slicer on your Voron. Awesome video.
Yessir!
Hello, I am relatively new to the 3D printing world. I have a ender printer from Creality. What CAD software would you recommend to use to learn to create 3D object? Also what slicer software? Thank You
Stay tuned. Video coming on that topic in a couple weeks….
1:20 I think my main question then is "can you view and control the printer remotely?" like if you check in on it and see the thing exploded, can you stop the print from ur fone? 🤔
Yes but if you want to do it truly remotely you need Octoeverywhere
@@thenextlayer Hmm 🤔
where I ask how you make a Galloway cow
How do you get to the MODIFIER AREAS? Right-click on something?
Yes
@@thenextlayer - Right-click on WHAT, please?
Tried to download and install but it seems that it requires Microsoft Edge? This only appears to run on Win 10 and above. Not about to purchase a new machine just to run 'free' software when Prusa Slicer does the trick.
OrcaSlicer does look interesting - but I'm kinda confused as to why you'd want to monitor your print from the slicer. Sure, it saves a step, but other monitoring software like OctiPrint give you so many features and control, and allow you to monitor the print from any computer or even on a cell phone. It sounds like it just distracts from the primary reason for a slicer, which is to prepare the 3D model for printing.
It works with Octoprint, too. It shows whatever interface you put on the printer
For some reason my printed parts are mirrored how do I fix this?
@@skyrim4713 click on the object again once is chosen, right click and removed the mirror effect
Orca slicer doesn't support that many printer i did find a bit lackluster.
:( sorry to hear
Can you also use OrcaSlicer with a Prusa MK3S+?
No
Yes, you can add any printer with custom profiles.
@@thenextlayer that's always something
prusa slicer has infill setting
Yep
Him: "Filing your holes" "Get your head out of the gutter guys"
Me: What the heck is the gutter version of "Filing your holes"?
CHecked it out, but it doesn't do Sailfish.
Am I crazy or is Sli3r most likely pronounced simply as "Slicer"? Back from the leetspeak (1337) days where letters were substituted with similar looking numbers (3 is a backwards E) in order to increase the cool factor or something.
Yeah it’s kind of a joke poking fun at people who pronounce it that way lol
"hot wheel łącznik" - how come?
there is no "Close Holes" in PrusaSlicer.
There is towards the bottom of slicing or layers tab on newer version anyways. There's also even/odd or something i believe.
You know not to be a jerk or anything I haven't subscribed to your page yet and it says the first thing I saw you have given so little information for anybody that you can't do what you're telling them to do maybe you ought to think about putting out a video telling people specifically how to download from the software and how to compile it as a software engineer. This was a stupid ridiculous video it gave me no help pointed me in no directions and you gave no links to download any of that stupid software all you gave a link to which I still don't understand is a page that has multitudes of release information but I have yet to find a download link. It would be nice if you would make a video and then give reference links to the ship you're talking about you gave really no information and I can't understand where all of these people are giving you thumbs ups on your comments about how this was such a great video you gave no information you wasted 20 minutes of my time and then trying to find that software couldn't find it wasted another hour so thank you very much I will not be subscribing to your channel and this is a video. Sorry for being so rude but when you put out a video and you tell people this is how you should do it you need to give them all the information about it.