How To Make Clamps For Your CNC Router, Easy CNC Router Projects

HTML-код
- Опубликовано: 2 окт 2024
- This easy CNC router projects start to finish tutorial takes you through a good first CNC router project. It is a step-by-step how to make clamps for your router using Vectric Vcarve or Aspire. You will learn about array and rectangle functions. It also discusses how to set up the toolpaths for your CNC router project.
When you're done, you will have a good project to work on with your CNC router. This also shows you how to set up the project on your CNC router. This in general is a CNC router projects tutorial for woodworking. This Vectric Vcarve and Aspire tutorial is for CNC router beginners.
CLAMP FILES MOVED FROM ETSY TO IDC WEBSITE
Get your clamp vector and G-code file here → bit.ly/3qLpGTu
To watch the setup instruction video, click here → • CNC Router Make Your O...
__________________________________
VECTRIC SOFTWARE LINKS
[Please use these links when you order. It gives me credit. Thank you]
→ Vcarve Pro (Recommended): shrsl.com/36xfh
→ Vcarve Desktop (24x24” size limit): shrsl.com/36xfj
→ Vectric Aspire (3D modeling): shrsl.com/36xfk
→ Cut2D (for the budget-minded): shrsl.com/36xfm
__________________________________
VECTOR & G-CODE FILES TO GET
Etsy Store: etsy.me/3oxX79l:
VIDEOS AND PLAYLISTS
→ Why you want grids on your spoil board: • Why You "WANT" To Cut ...
→ CNC FOR BEGINNERS playlist: bit.ly/3rg4WTl
→ CNC ENTREPRENEURS playlist: bit.ly/3mxz6Ok
→ VCARVE FOR BEGINNERS playlist: bit.ly/3pdmFsi
ROUTER BITS FOR CNC ROUTERS
→ 8-pc carbide CNC router bit set (w/ free vector files) bit.ly/3d1iQnF
→ 1” Surfacing bit required for surfacing your spoil board: bit.ly/2QEYLKz
***Use this discount code (SURFACING BIT)
→ Glass engraving drag bit: bit.ly/3tRy98s
OTHER ‘MUST HAVES’
→ Calipers: link.idcwoodcr...
→ Hearing protection (plugs don't work): amzn.to/2Hs1RgW
If you currently own a CNC router, please take a moment to take this survey to share your experience with it: bit.ly/3r5XzNh
Cool vector files for CNC router & CNC laser: etsy.me/3oxX79l Learn how to start an online business from scratch: bit.ly/2ZUEIKK
Words are the top-selling items of all time with CNC products. Get the free WORDS THAT SELL list: idcwoodcraft.c...
NEED A WEBSITE?
An ecom website prebuilt for CNC’ers, built in 3 days, for $200. Mention ‘IDC Woodcraft’ to get 10% off: insightsmarket...
CNC For Beginners Podcast: anchor.fm/cnc-...
CNC Insiders sign up (free files and more): idcwoodcraft.c...
OTHER WAYS TO SUPPORT THIS CHANNEL
→ LIKE the video
→ COMMENT about the video
→ DONATE: www.paypal.me/...
→ PURCHASE through links I provide in these descriptions. I receive affiliate commissions and the cost is the same to you.
Garrett Fromme
Facebook: IDCWoodc...
Website: www.idcwoodcraft.com
Email: support@idcwoodcraft.com
#cnc #cncrouters #cncforbeginners #vcarvetutorials #vectric #clamps #cncrouterprojects


looking forward to trying this
Mike, glad you enjoyed it!
This video encouraged me to switch from my own clamp design to yours. And I definitely need to make a news bacth, as mine is almost at the end of its lifecycle. Motivating! Thanks!
tec4ever72, I'm glad to hear the video was helpful for you! It's great that you're inspired to make a new batch of clamps. Happy woodworking!
Great video. Thanks for all of the information you give on all of your videos. I have learned a lot from them.
briansbobcat1, I'm so glad to hear that you're enjoying the videos and finding them helpful! Thank you for your kind words!
I don't have much hair left and trying to figure this out, well, I would have probably pulled out the rest. But with this walk through I can do it. Not only a big thumbs up on video but thumbs up to you. Thank you, stay healthy and please keep making videos. Your student, Russ
Hi Russ! No more hair loss, my friend. We'll get you there with your CNC!
Thanks learned a few things again kind regards Hans
hanspijpers2100, you are so welcome my friend.
You made the process of not just making clamps but using the program so easy. Thank you.
James, glad it helped brother! You're so welcome!
Thanks Garrett. Stumbled across your site while researching mods to my spoil board. Used your method to scratch a grid into my spoil board and then went down the rabbit hole. LOL. Just finished following this tutorial. Wanted to say that your teaching method is very easy to understand; even for a retired Marine Corps pilot. I have to admit I've been running Vectric VCarve for about 4 years now and have just gotten comfortable with what I know and how to do it. Huge "A-Ha" moments during your videos where you show certain functions that I didn't even know existed. Thanks again!
Sakesan13, I am so glad to hear my teaching style and videos have helped you brother. Welcome to the wonderful world of CNC and I am excited to see what you create.
Thank you very much Garret. I learned a lot, discovered the array function, which I 'need'.
Greetings from Belgium .
Thats great to hear Igorfun. Glad the video helped you out.
Yes! Yes! Yes! Thank You Garrett...
You are welcome Michael.
This is a really great video! I have watched hours of your videos trying to educate myself on how to design in Vcarve and make "stuff"! I just finished making my spoil board and surfacing it. Which was an education all in itself! And so I went back to this video on how to make clamps. Garrett, I am glad you took the time and all your takes to make this video. There is an encyclopedia of information in this video that goes way beyond making clamps! Thank you again for doing all you do to teach people about CNC design and builds!!!! It has sure made my adventure into CNC so much more enjoyable and reduced the learning curve and frustration levels considerably!!!
Jeff, those initial projects are the hardest but it sounds like you have the basics down for sure. The clamps are just the start, I'm excited to see what you make next!
I have been a CNC and Vectric user for a while and have no need for more clamps but after watching many of your videos I realize that even though “clamps” is the main topic inside there will be information that I can use on other projects. And was I correct, as in other videos of yours there were so many other helpful hints.
Thank you
One day I’ll get the courage to set up a one on one
Just one more thought-if you were to use a 3/16EM for the perimeter cutout you could have gotten that one more row of clamps. I use the 3/16EM for cutouts a lot on .75 material.
Be Safe
Hey Lyle. Ya’ know, I think I’m gonna start doing the 3/16” thing. Such perfect sense. From one CNC’er to another…thank you!
Thanks for your time for making this video 😍
Hey Orsa. Thank you for commenting and letting me know I didn't waste my time.
Great tutorial. I was able to set up the project in VCarve Desktop with no issues. It took me a hot minute to realize that Desktop doesn't have the spiral ramping option or the 3-D tabs...but in any event once I set up the project on the machine, zeroed it out and set the Z (to the bed & not the top of the piece..SMH) it cut like buttah. I only made 4 sets just to test it out as it was my first cut other than leveling the spoil board and cutting in my grids. Thanks again. I have much to learn but am psyched at my progress and all thanks to you and your tutorials Garrett.
Yay Martha. I forgot to mention in the email that is was very cool to see the clamps made!
Thanks. I picked up some things I didn't know, about layers and arrays and spirals.. I set mine up in individual rows/files so they can be grouped on any width wood I have laying around. The best thing I learned is to zero off the machine surface, not the work surface, so not to mark your spoil board. I had no idea it worked that way. Note: @ about 25:03 you say "1.8" inch and I'm sure you meant .18 inch as shown in the video.
PaulSchuster-yj4zb, glad to hear that this one helped you out so much my friend. As for the part at 25:03, you are 100% right, I meant to say 0.18"
Yet another amazing video. I am glad that I discovered your videos. I'm learning so much while I'm waiting for my CNC machine to arrive.
Robert, happy to have you here brother! Keep learning everything you can while you wait for your machine. You got this!
excellent videos and teaching style !
Thanks Craig!
Good to follow your development method.
Graham, many thanks brother!
Brilliant. Teaching a variety of new techniques in the same video and all clear and understandable (and I can remember them as well).
Thanks Stewart. I try to throw in several techniques whenever I make a video.
Crystal clear Garrett. Thanks for your dogged determination to make this vid. Your methodology is especially useful; showing the inprocess "fit/function" and clarifying is very helpful. Thanks!
Hi Barry. Thank you. I kinda felt the video was a dud after trying so many times. Seems to not be the case. What kind of projects are you getting into?
@@IDCWoodcraft Primarily projects that will push to expand my knowledge and skills. A simple V carved gift for my wife my 1st project. A really nice 3d carved wedding plaque with curved V carved text for a friend. Other than that getting my new Shapeoko Pro set up with a spoilboard, guide rails, grids, et al; most of these things a deep dive into learning and gaining knowledge.
@@cook6052 love learning new things! keeps the mind active. Let me know when you get this puppy built
I detect a subtle Paul Simon reference there...
I know I say this almost every video but I sure wish you were around when I was learning! Thanks for you time and effort!
Hi Checvy. That gave me a smile. You are welcome, my friend. It may be frustrating sometimes but I love teaching this to you and others.
Nice detailed video. Thank you. Just an FYI, the Z/2 function works if you hit "=" sign instead of 'enter'. So it would be "Z/2=".
Hi Kanran. I like that little short cut. Sometimes it is those simple little things that make life easier.
Great video and tips! I’m a cnc newbie and with a Yora 3018Pro. I designed my clamps in Fusion360 and carved them out with an 1/8” compression bit and the spiral ramp really makes a huge difference with a small router with the small diameter bit. Thanks
Glad this one helped Sean. Happy to hear that your 3018 is up and running!
Very good
Markkiernan, glad to hear this one helped you my friend.
My bobs CNC finally arrived last night.!Excited but nervous.
TOD!>>>>it arrived! so excited! Can't wait til I see a picture of your first project.
Well done. Thank you for the info.
Hi Matt. Thank you!
This is awesome!
Thanks Grant
Your lessons are enormously helpful to me on so many different levels. I'm extremely thankful for all your lessons and skills that you have given. Thanks 😊 James Puckett
Hi James. Thank you for the wonderful compliment. I'm glad that all this stuff in my head is able to help you so much!
I am enjoying your videos so much. I understand what you say so much better than most videos I have watched. I'm a visual learning person. Do you have an instruction for preparing the spoil boards? Thank you again, I am so ready to get started with my CNC
Hi SD. I do have a video about spoilboards. Click here:ruclips.net/video/-NsPZD0az5Y/видео.html
Great video!
Thanks!Thank you, Mr. W!
Correct me if I am wrong. You should be able to resize the clamp on the right in one step if you use the Set the Selected Objected Size Tool uncheck the link XY box select all vectors and change the width size.
Jeff
Hi Jeff. You are correct. The reason I didn't do that was to hold the step distance of 0.5". The other more important reason was to teach people how the rectangle function workls.
good stuff. thankyou!
Hi PS. Glad you're here and you're welcome.
Awesome!
Thanks Daniel
Really like the Spiral technique. Much easier on my router. I need to get some downcut bits . The up-cut I have seemed to work out though I just wasn’t sure wether to use the climb or conventional setting. I just went a little slower. Thanks for the video.
Something else I thought of also is that before a person pulls the parts you could make a rubber mold and then pour in what ever mold material you liked to make a stronger Clamp if you desired to.
Oh Sim, you have given me an idea!!! I might start making clamps. And I can make the mold to make them. I am getting requests for clamps.
@@IDCWoodcraft That’s great.
Can’t have enough clamps, will be cutting these. How about cam clamps next? The ones I’ve found suck. Great video.
Oh, oh...cam clamps! YES, I'll do that one very soon. Thanks for reminding me.
By far, the easiest video to follow. And I’ve watched a lot of videos on making clamps! Thanks for another great video!!
SB,they keep telling me that. I guess I'm doing the right thing
Garrett what setting did you use for the spiral ramp for the clamps or did I miss you setting that up? Jeff
Hey Jeff. The question, although sounds clear enough...isn't. Can you be more specific?
Gwdave1997
I built a couple of clamps first to see if I could then bought your setup. The only item I changed the size to 16 X 16 and cut them from there. Setting the Z axis did cut the wood all the way thru however I now have a bunch of lines on the spoil board. I do have to say that I used the clamps I built using your setup for the original ones then I now have enough clamps for anything I want to built, and love the way they work they are as good as the OPPS clamps that cost $50.00 to buy 4. Would I build them again, you bet thank you for such a great plan....
Hi Dave. You just can't have enough clamps. Isn't it nuts? We buy clamps for that price when we can just make them? Glad it workd for you!
Thank you so much for taking the time for this. I was looking to buy some wooden clamps for my CNC and it makes so much more sense to do this and cut them on my CNC lol
Chupagoat69, you're so welcome brother! Happy cutting!
V good.
I will make my with Plastics
I I will send on pictures When made thanks
markkiernan5806, good call making these in plastic brother! I like that idea.
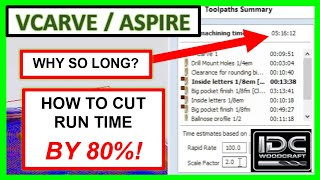
Hi Thank you for your great video i have replicated it and my time is twice that of yours can you offer and guidance on this please ?
jamesevans4919, I'm glad you enjoyed the video! It's common for projects to take longer when you're still learning. Keep practicing and you'll get faster with time! I also have a video that should really help you. Here is a link: ruclips.net/video/qxi7epIGVX4/видео.htmlsi=LXlir_m5iuVB8IIB
Afternoon Garret, what I believe James is referring to above is the actual job time. I've also followed your instructions to the best of my ability and no matter what I do I'm not able to replicate your 35 minute completion time. It's well over an hour. Would you be able to tell us why that would be?
I learn several new things EVERY time I watch one of your videos. Great job!!
Hi David. Funny you say that. I learn every time I make a video. Sometimes, I plan one out and then have no idea how to do the process, so I figure it out and pass it on.
WHERE is the longmill link to buy a machine?
Hey Mark...right here → bit.ly/3olFGvX
Garrett just started the trial v carve you said it took you awhile to do the clamps. Still have a hard time following you i have 5 months until i get my onefinity. So hopefully i can somewhat learn a little something before then. I only have laptop. You be clicking on stuff. That. I cant find things delete without clicking on it then right . the box comes up that delete comes up is a easier way to delete i have to play you 50 times just to get a slot. And anything i haven't made it past the second layer you said click on this but you forget to say what you clicked . so i m lost i going to buy the program from etsy. But I'm going to keep trying and going to watch youtube. To use to the vcarve program. Hate to spend a bunch money i don't really have.
Hi Michael. I apologize for things I miss that you don't get. I tried to cover all the bases as best as I can. I have an entire series of videos that are step by step. You might want to download the PDF that I've created with all the videos on the channel. They will walk you through the correct process to learn this stuff. It is set up for beginner CNC router owners.
You can download the pdf here
bit.ly/3mLHGfI
Very helpful video, I followed you clearly until laying out the tool path for the final outer profile cut. I would have thought that the start cut height for the outer profile of the clamp would have been the material thickness. In the video I believe you showed it as 0, but I thought that 0 was table top not material top. Did I miss something, or just not quite understand?
Brian, apologies on the confusion on that one brother. When you are setting up your toolpaths, the software considers the top of your project surface as its internal coordinate reference plane.
Basically, it doesn't matter if you set up your project to have the Z zero to be the topmost surface of your project or the surface of your spoilboard, you will set up the toolpaths the exact same way for either case.
The grain would be running in the X direction, Right?
Hi HH. The grain would run along the length of the clamps.
I watched the videos when I purchased my machine however, the videos didn't go to the detail which you showed I picked up a quite a few techniques to speed up my work, Thanks.
Stephen, that is great to hear brother! Congrats on your new machine.
I think I would've called the Profile 1 toolpath as Slots or something similar to make it clearer that you need to start at a 0.375" depth.
3d Layers, very good point my friend. Thanks for bringing that up.
If using a 3018 pro cnc and I buy your clamps would I need to change speeds and passes and bit size. Thanks
Ron, your machine is a bit too small to use these clamps with. I would recommend using your machine with the clamps that came included. They will be your best bet brother!
When using 3d tabs the bit will not stop, raise up, cut over, plunge down, and continue the cut. The 3d tabs ramp on the up and down movements and do not stop the movement.
You're right. I keep forgetting to set it for 3D tabs and tell people to use them instead. Thanks for reminding me.
Garret. Thanks for all the great video's and advice. My husband and I downloaded your 18 & 24 clamp files today. We're able to open up with the vectors but no Toolpaths or G codes. We've just got out Shapeoko a few days ago so we are running Carbide Create 7. Is this the reason we didn't receive or can't open tool path with G codes? Thank you in advance.
roxannehulsbrink6467, It sounds like you are trying to open up gCode files in Carbide Create. What you need to use is Carbide Motion to send the gCode to your machine directly instead of using design software. If you are still having troubles, please send me an email at garrett@idcwoodcraft.com. I would be happy to help you in more detail my friend.
just curious, do you have to zero the Z-axis when doing the slots or is it just automated when you first done the zero to the spoilboard?
Hi Warren. You tell the computer to start at that position so you don't have to re-zero
Garrett you rock. Keep up the good work!!! I’d be lost without ya 👍
Matt, thanks brother!
Help I use Vcarve and watched the video as i did the program at the end I when to save I mark visble toolpaths to one file I then get an error the visble toolpaths use different tool all the tool are end mill 1/4 in what am I doing wrong
Hi John, that is a great question. Try double checking your toolpaths and making sure they use the right tool. You could also try and save the gCode files individually to run on your CNC.
Great video. I am from the Bahamas. Just wanted to know the router speed number you used with your settings.
For this use 3
Thanks for the video, enjoyed it
Thanks Ron
Thank you! I watch as many videos of yours I can and I learn a lot from each.
Hi William. Thank you. So glad to have you here!
As always either learn something new or get a useful reminder of functioins.
Hey Deam. Yup, as long as we keep learning, we always pick up something interesting and helpful!
Hey Garrett, when I select a rectangle, then choose the ‘Draw Rectangle’ button, I don’t get the ‘Apply’ option, just ‘Create’.
So instead of editing the existing shape, it drops a new one in.
Ahhh. I’ve worked it out. With V11.5, I need to select the shape and press ‘shift’ while selecting ‘Draw Rectangle’.
grumpyoldwit, so glad to hear you got it all sorted out brother! Happy CNCing.
Would you recommend a hardwood over pine for the clamps?
Hi Dan. You can use any wood you want exceptparticle of course. I use pine because it is most of the scrap that is laying around. As for recommendation, of course hardwood is more rigid. It would be a better option.
How long are the 1/4 20 bolts do you use for the clamps?
Brendon, I would recommend 1" to 1.5" bolts!
Great video very informative for us noobs 👍from Western Australia.
Matthew, glad it was helpful brother!
WHY NOT NEST THE PARTS TO MAXIMIZE THE PRODUCT?
Hi John. I didn't think about that at the time. Good point.
Great video, thanks.
Durand, you're so welcome! Glad you enjoyed it!
Grasshoppa say "Never forget = sign when asking for instream math ;) Otherwise, program does not know you call him
You're too finny! Trivia question...what was Grasshopper's masters name?
@@IDCWoodcraft "Master Po", of course !
Another good video and learned a different way to do layers, arrays, and tool paths. Thanks for the information this will prove to be very helpful.
Hi Joe. thank you for the compliment. I falmost felt this video was almost too much nfo in one shot. what do you think?
@@IDCWoodcraft I knpw I learned a lot from it that I did not know. I had to watch it twice today. It eplain some things that I do not remember from vcarve help file. Thanks I enjoy and find these videos helpful.
Wow! Thanks for sharing
Hey Gustavo, you're welcome.
Being that I've already uploaded your IDC Drill bit data in the tool database, is it good to change the feed and speed rates and/or tool numbers like you are doing on the video? Also are you using an upcut or downcut 1/4" EM? Thanks Garrett
Hey Max, you can change around your feeds and speeds as needed. The feeds and speeds table is a great guide for you to start out with. You'll develop some intuition over time and practice and may choose to change some numbers around. I changed around mine for this project. And I used a 1/4" downcut endmill for these.
Garrett - great lesson but you said the run time was 35 min. For some reason reason mine is double that? What am I missing? Thanks again Jim
I modified it since the video. You're making more clamps, so it takes more time
@@IDCWoodcraft Thx and I thought it was ME!! GRINS
Idc. I have a kl44 bob cnc. It doesn’t come with a spoil board. I’m trying to get the correct inserts and screws to hold the above clamps down. Do you have a recommended inserts, screws, nuts for this purpose?
Also, I enjoyed your bits video. I will order those recommended bits.
Hello Road. Your name makes me smile. I would contact Bobs for recommendations on this. they may have plans. Or look for plans that someone put together on Etsy or something.
@@IDCWoodcraft Haha. I know...I only have two income streams so far. But one day, one can hope right.
@@Vangfamilyjourney my friend, keep working at it. I currently have 4
Thank you for this video. I learned a lot. I created my own project based on your teaching, but when my router cut all the way through, it went into my spoil board about 1/16" What did I miss in my setup? Thanks.
Hi Lyle. You probably did not account for the material being thinner that what was set in the software. If you set .75 and material actual is .7, and set start depth from top, then the bit will cut into board. Happened to me too...many times, until I learned to ALWAYS measure the material first.
@@IDCWoodcraft Thanks for your response. I forgot to mention that I set my Z zero to my spoil board surface, as you did in your video. My first time doing that. My material thickness was actually 0.7515 and I set the material thickness in Aspire to .75. I greatly appreciate your help.
@@lylepollett2234 hmmm. We'll have to talk. Not sure why. I'd have to look at your settings
@@IDCWoodcraft It finally dawned on me what the problem could be. I decided that maybe the thickness of my Z zero fixture was set incorrectly, and sure enough. Not sure how I missed it when I set it up. Lots of learning.
Whrn setting the depth of my cut to not cut into my spoilboard do I set it at the exact width uf my board or .o1 past the exact depth of my board ?
Louis, this one is a bit tricky to answer over comments brother. Reach out during the live sessions Wednesdays at 8PM EST. Kate and I would be happy to help you then.
Watched your video and followed along as I created the file in V Carve Pro. I've watched tons of videos over several years of learning how to use V Carve and my CNC. I have got to say for a Knuckle Dragger like me, You vids are the best i've come across. Keep up the good work and Thank You for your Service. I'm a Veteran and appreciate your contribution. Sappers Lead The Way
Todd, thank you for reaching out brother! I am so happy to hear that my videos have helped you so much over the years. Thank you for your service and support my friend.
Garrett, another great video. I was wondering if the Bobcnc is really worthwhile since it's made from wood. I live about 20 miles from them. Was thinking about a little visit.
Hi Richard. I started off with a Bobs and have since moved to the Longmill. What a difference! You can see why in this review video I did about it: ruclips.net/video/rqKwcqHdSPw/видео.html
No CNC machine yet, but thinking hard about it. Your videos are very helpful, both to help me understand how the machine and programs work as well as info and advice on what machine to go with - thanks, will continue to view your videos.
Rick, glad you like them! I'm happy to be a part of your cnc journey, I know how complicated it can all seem even prior to having your machine in hand! But it can be done I promise and I'll be here for you every step of the way when you're ready to take the leap my friend!
Garrett, Another easy to "understand and do" video. Watching this clamp creation video provided the background needed to understand the what and why of the design layout. Thank-you.
Keith, glad that this video helped you so much brother! I'm happy to hear that it was easy to understand.
Awesome video....and another learning experience.
thank you Garrett
Hi again OKI! We are always learning, my friend.
Clamps !!!! Oh Boy !!! Did my first test cut today. Now gonna try this.....
Dan, let me know how they turn out brother!
Another great video, as I am now watching your whole playlist 😁 I have saved a lot of your videos to back over when I have more time. I have just bought this program from Etsy and intend to run it soon, but I am going to use 19mm Marine ply as I have a ton of it laying around, hey if it works great, if not then I will buy some pine. I will be using metric tools so hope it still works the same or I will edit the tooling in the program to suit.
Hi Warren. Ply works gread for this. You might want this PDF download. It is all the videos I've created and they are sorted. Here's the download link → bit.ly/3mLHGfI
Thanks for another great video! Do you have any other style clamps that you use? I just recently got the t-track add-on for my Shapeoko XXL. The clamps are pretty short that come with it because the tracks are so far apart. I created an L bracket for the lower left corner of my CNC, that way I am always at 0,0 when putting stock on the CNC. Are there other shapes for clamps that you have thought of?
Hi George. I will be doing a cam-lock clamp video soon.
Great instructions. I have been thinking about making some clamps for awhile now. Now I know how. Thanks
Hi Alex. Maybe this video was the hint to get at making them...
I know I was overdue for making mine
Nice to see a machinist doing this you have your clamps parallel to table when clamping (Old machinist pet peeve)👍
Ya' know Jeff, you are so right. That flat contact is so important.
Garret One thing to bring up with this video make sure that when you cut the camps you are going with the grain if you are not using plywood. The clamps will snap if cut across the grain
Hey Larry. I thought I covered that. Thanks for pointing it out. I''ll add it to the comments in the video
Thanks Garrett. Just picked up a used CNC and worked through this practical tutorial in Vcarve. Very helpful in learning the software and process. I expanded the relief pocket 1/4” to remove the curved edges and that seemed to do the trick. Thanks for the strong content.
Shop Dad, I am happy to hear that this video helped you. Keep up the good work learning CNC brother!
Great video, thanks
Gold Ridge, glad you liked this one brother!
I really like your detailed instruction. He helps to know what to do and what not to do and why. Thanks for reaching us. db
Thanks Dennis. Ya' know, it takes a ton of time to do these, but shares like this make it all worth it for sure!!!
Very helpfull again :) i definatly will try and make some clamps myself.
Do it Bruutt. It is very cool to do.
I am still waiting on my CNC router. When do , man you will be my teacher. Thank your for your time and effort.
Hi Maunza! I'm excited for you and wishing that router would arrive now! when is it supposed to get there?
Real nice clamps. You explained the process really good. I just started with my onefinity and VCarve Desktop in the last two weeks. It's time to put you great selection of bits to work. Thanks Paul.
Hey Paul. I'm ready to see what you make!!!
Getting my head into the design side of things and just a simple thing to some is a massive step to others we can all just by designs and load and go the CAD side is another world one i am just stepping into and videos like this help me and many others to have our light bulb moments thank you
Mick, I promise the designing will get easier with time and practice. We all have started out as newbies my friend! You're so welcome, I live for giving people those light bulb moments and making things a little less frustrating while on the learning curve! Keep up the good work!
Looking to buy your clamp setup on Etsy but can’t find it. Do you have a link?
Hi MP! I am working on that now. It'll be available tomorrow. I'll send a message through here with a link when it's up.
Thank you great job
Thanks Robert!
great video as usual. its worth pointing out that the clamp needs to be cut with the grain of the wood running in the long direction on the piece. otherwise they will snap in two. something to consider when laying out your file based on your available material.
Hi Adam. Yeah, sometimes I forget even the basics need to be stated for new people. Thanks for commenting about that.
excellent Garret just mae my first purchase from your etsy :-)
Hey Jig. Awesome. Make them clamps my friend and send me a pictue!
A very useful design and you made it simple to follow - thanks!
Gordon, glad you liked the clamps brother! Happy to hear that the explanation was easy to follow.
Wonderful and very helpful video as always. I watch as many of yours as I can.
Hey KArl! Thank you for sharing the compliment, and for being part of theis channel.
I can’t get enough of these marvelous videos. I’m so glad I found your channel.
Steve, welcome aboard brother!
I really learned more how rectangles can be used in ways I didn’t think of. That and the offset from the spoilboard rather than the material surface. As always, more than worth the time Garrett.
Terry, I'm glad this helped my friend!
learning Cantonese is easier than trying to learn this software :(
Hey Just Another Day! I know this software can be a pain! Keep working hard, you'll be a pro in no time!
I like your design. Instead of using my CNC to make these I used your dimensions and designed them in Fusion 360 and then 3d printed them. Will give them a try once I get my MPCNC completed. Thanks!
Hey Dave, send me pictures. I'd like to see
@@IDCWoodcraft just sent over the pictures to your email address.
Very helpful information. I'm new to the CNC and your videos are very helpful. Thanks so much.
James, glad it was helpful brother! Happy cutting!