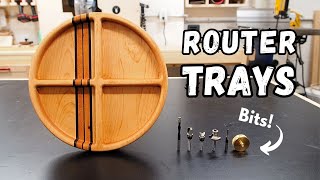
How to Make Router Trays: Templates, Tips & More

HTML-код
- Опубликовано: 7 июн 2024
- How to make wooden trays and bowls with a router and not a CNC or lathe. If you're familiar with making cutting boards, this is definitely right up your alley. Even if you're not, this is definitely a fun project for a hobbyist woodworker, tinker, or maker. In the video, I walk you through all the steps for making wooden trays with router templates.
-⏱Timestamps⏱-
00:00 How to Make a Router Tray
01:11 Router Tray Templates
02:30 Making & Modifying Templates
04:35 Saving Wood
06:20 Glue Ups
06:49 Tracing the Template
07:04 "Hogging" Out Material
08:17 Drill Press Option
09:30 Router Bit & Custom Plate
10:04 Attaching Templates & Routing
12:26 Outside Perimeter
14:58 Sanding Part 1
15:23 Chamfered Option
16:06 Roundover & Edge Profiles
17:03 Sanding Options & Tools
19:28 Raising the Grain
19:59 Finishing Options
21:11 Applying Finish
24:09 Buffing & Burnishing Tips
26:16 Final Product & Last Tips
-📸Instagram🎥-
/ 6_8woodworks
-🔨Tools/Supplies I Use🔨-
Full List: www.amazon.com/shop/6_8woodworks
-As an Amazon Associate, I earn from qualifying purchases.-
Router: amzn.to/3xdgS9W
Drill Press: amzn.to/3fc5hlE
Bandsaw: amzn.to/3PEXkFE
Collet Extender: amzn.to/2TFHZwM
Bowl & Tray Bit: amzn.to/3j09eLg
Plexiglass Sheet: amzn.to/3f9hqI6
Small Flush Trim Bit: amzn.to/3g0RS07
Large Flush Trim Bit: amzn.to/3BmSd8Q
Spiral Upcut Bit: amzn.to/3f7ZBca
2” Forstner Bit: amzn.to/377d4wr
Large Chamfer Bit: amzn.to/3BR20lk
Large Roundover Bit: amzn.to/3idjLni
Small Roundover Bit: amzn.to/3OJ1cUL
Drill Press Sanding Attachment: amzn.to/37cSScs
Arbortech Contour Sander: amzn.to/2VjOV32
Angle Grinder: amzn.to/376P24C
Drill Sanding Attachment: amzn.to/3zOdMLn
Starbond CA Glue Kit: amzn.to/3l9fS4p
Wood Glue: amzn.to/3tYoxb8
Pneumatic Sander: amzn.to/3z8L612
Dividers: amzn.to/3JlIdic
Curve Stencils: amzn.to/3bd3y0D
Buffer Attachment Pack: amzn.to/3Q2z9AJ
1" Sander Attachment Pack: amzn.to/3bd2Bp5
Orbital Buffer: amzn.to/2QfjzbK
Light Scouring Pads: amzn.to/3uGW7Dj
Buffer Bonnets: amzn.to/3w9IRrh
Tried & True Finish: amzn.to/3JctXbe
Cutting Board Oil: amzn.to/3lfEzwl
Board Wax: amzn.to/3u0gmey
MicroJig Matchfit Clamps: amzn.to/3OHOHJd
Bench Vise: amzn.to/3S7GVet
Benchtop Belt Sander: amzn.to/3OGY63O
Table Saw: amzn.to/3sw2A2G
Wood 101 video: • Wood 101 For Woodworke...
Cutting Board 101 video: • Cutting Board 101: How...
Router Bowl video: • How to Make A Bowl wit...
-Router Tray Templates-
I purchased my MDF templates from www.woodline.com/collections/...
-💻Website💻-
www.sixeightwoodworks.com
For more about my DIY router table, check out / careu4ijcli  Хобби
Хобби


Love your content. Always learn something and really enjoy the way you present the topic. Especially the way you always provide options for tools at different levels of woodworking skill/commitment/engagement/investment however one wishes to quantify it, you provide options. A great way to present to a wide audience. And above all, as always, beautiful work. Love the channel.
Appreciate this so much! That really is my intent and goal. Thanks for your support!
I couldn’t agree more. This is my go-to channel. The best on RUclips, in my opinion!
Man. I had no idea juat how much work goes into making a bowl. Really impressive. Great work. Great video. Thank you for taking the time to share.
I'm very impressed with your channel! Found it back in the spring when I was looking for information on trellises for my garden and became a subscriber after watching that video. Your presentation is straight forward. You are an excellent instructor. I began my woodworking journey after retirement and have learn so much from your content. Well done, keep "em"coming!👍. Of course now I see two "MORE" router bits I need to add to the collection after watching this video.🤣
😁 I appreciate that so much! Thanks for your kind words and have some fun with sawdust!
Hey, I have to tell you, you are a great teacher. I watch a lot of diy, and you are astonishingly good. Thanks for these video.
I’ve been doing woodworking and movie construction for about 4 years, and this is hands down one of the best RUclips woodworking videos I’ve ever seen!
Thank you so much! I really appreciate that!
The most simple and precise directions EVER. Thank you
Much appreciated!
You do an excellent job on your videos. Thanks for sharing
Your explanations are phenomenal!!! Everything seems very simple, but it is not so. To do certain things you need talent. Congratulations. I continue to follow you with more and more interest. I always learn something new. Thank you
Thank you so much!
Great video! Loving all the different styles.
Absolutely great video. Thanks for the class. The extensive list of links are greatly appreciated.
Really appreciate it.
Very good video explaining each step.
Thank you.
Finally!!!! Someone who actually explains things in a way that makes it easier to make templates 👍👍👍
Let the games begin! Sure wish I could send you some beers for your time! Will these do?
🍻🍻🍻🍻🍻🍻👍 Cheers, and thanks again👍 😎
From Italy : very nice ! Bravo !
Hi. Thanks for all your truly inspiring videos. Keep up the great work.
I really appreciate it! Thanks!
💯
I’ve watched your whisky barrels to chopping board video a few times since which I bought for 54gallon barrels I’ve broken them down to staves and cut out the central belly bit of each Steve so far. All down to watching the said video
I'm just discovering how powerful routers are and this video was really useful for me - thanks.
Really inspiring. Love your teaching style. Subbed.
Notwithstanding that backwards ball cap (high school is over) your video was very good. Thanks for sharing, Steve.
Another excellent tutorial I always learn new stuff I can try out - really looking forward to the cnc video, bring it on!
💯
Appreciate it!
Great video, well done 👍🏿
Thanks for the tips. They really helped me!!
this is one of the best demo i have seen , thanks mate .
Really appreciated!
GREAT TUTORIAL!! I’m going to give it a whirl soon!!
Thank you so much! Have a blast.
Just discovered your channel. Looking forward to watching a lot more of your content!
Much appreciated!
Love your bible verses and different items around your shop! Brings a smile to my face and you always bring on the knowledge that has been so helpful! God Bless!
Appreciate it! Important reminders for me.
Awesome video - thank you for providing such great information in an easy way to understand manner.
Glad to hear it helped!
Very well explained. Much better than some guys who just hawk tools. Subscribed.
Appreciate it!
1. Impressive channel indeed!
2. Excellent & clear tuition!
3. Touching & inspiring verse on your t-shirt! We wish all of your viewers will adopt & internalize the message...
Appreciate it! That’s my hope too. Channel name and try to incorporate where I can through the channels and content.
Great video! Such honesty!
Thank you
Thank’s 4 sharing !!! 👏👏👏
Beautiful work brother 🏆
really enjoy your videos great learning curve for me
Great stuff .. Thanks for sharing..definitely learnt a lot..cheers
Amazing video. Thanks for the ideas and the links. Great stuff.
Really appreciate it!
💯
Excellent discussion and tutorial. Allowing us to skip steps (if we know what's going on) is "rad" (that's what we used to say back in the day). I'll be perusing more of your vids!
Hey Micah! Just figured it out! Great love it and your excellent work!
Thank you!
Gosh I always learn a lot from you. Much appreciated!
Thank you so much!
I like how many ways you show how to do a process really game changing thanks bro
Appreciate it!
I'd never heard of a pneumatic sander before. Fun tool! :D
Appreciate it! 😁
تبارك الرحمن تسلم ايدك. ربي يحفظك ويرعاك. أحسنت الصنع رائع جدا
I really enjoyed this video. I've been wanting to make some bowls an this would be one way to do without all the bells and whistles for bowl making. Thanks for sharing.
Appreciate it. Sure is fun to do something a little differently.
They look really great.
Really appreciate that!
fantastic thanks for posting true innovator.
Love the T Shirt... Nice work, and great looking product.
Thank you!
Nice work!
you are perfect . by my language , أنت مبدع
Thanks for this! Great tips!
Really appreciate it!
Awsome information. Very well done. Thanks
Thanks!
This was a great video with ton of tips. I visited your website and all pieces are awesome. It looks everything is going well since almost most the pieces are sold out. Great for you. Thanks for sharing your workflow since 100% of what you brought is high value. Keep up the good work and greetings from the Caribbean.
Thank you! Hope it helps.
Nice job of covering a lot of options at every stage!
Really appreciate that! I try and include everything I can.
💯
Hello from utah ,i want to thank you ,im a beginner carver and this router idea will make me some nice products 😊 thanks for opening my mind ,i have a few power carving tools including my awsome ball sphere ,thanks.
Thank you for sharing
Love the shirt.
Thanks!
Nice work man !I wish I could make them.
Great video, that tired and true finish looks fantastic....Go Hawks.
Thanks! Go Hawks!
Those are some really nice trays
Beautiful work.
Much appreciated!
Great video. Thank you.
Thank you!
Soy de costa rica y soy evanista por muchos años todo lo que sea relacionado con el arte de la madera me gusta ver cosas muy interesantes
Thank you, brother! Glory to Him!
Amen!
Thank you so much!!
Wow! That is a seriously good video but I'm going to have to watch it a few times.
Appreciate it!
Coole Projekte Viele Grüße aus Hamburg
Nice job mate
I live your T shirt
God bless
Muito legal seu trabalho parabéns 👍 👍 👍 👍
Parabéns!! Ficou muito lindos!! 👍👏👏👏👏
🙏🙏
💯
Well done sir. Keep up the good work
Thank you!
In your video above, at time stamp 13:14, we can see you utilising a router guide plate made from acrylic/plexiglass. It would be great to see you make a short video showing how you made this, and the advantages of such. I know loads of people who would love to watch it. And I'd be able to link people to your video instead of trying to find a way to describe it. I reckon you'd get loads of views! Love your videos. Well done 🙂
ruclips.net/video/PjWiA2Vgbfs/видео.html
At about 13 min in he goes over making the templates.
That was just fantastic. thank you so much.I will be doing some of that very soon.
Julien Lamarche.
Have fun!
I love your Tshirt!!!
Thanks!
This is brilliant! So informative! Yes I also wish there was a way to save some of the wood - a separate base? Think I’m commenting on the wrong video though😅
Great job I joy watching
Thank you!
EXCELENTE TRABALHO; LINDAS PEÇAS:
GRATO!
And I really like the tried and true good choice
Wow, 1st time. Exceptional idea. I mean creative.
Thanks!
Really, really great video. First time I'm run into one with my 3962t band saw.(well close)
Great little unit!
بسیار زیبا 👏👏👏👏👏👏
I'm manufacturing my CNC Router, I want to produce beautiful pieces like these... congratulations, the pieces are really beautiful.....
Like your videos, great ideas
Really appreciate it!
Great T shirt beautiful work
عمل جيد وممتاز واصل شكرا.
Great information. I've been subscribed before but for some reason I haven't seen any of your videos pop up. Will have to go check things out.
Thanks, another great video. Go Kraken!
Thanks! Go Kraken!
I have a rectangular piece I’ve laminated and would like to hollow it out, thank you so much!
Big like ❤
Peças muito bem feitas e lindas parabéns, 👋👋👋👋Vc ai tem aceso a ferramentas boas mais fácil aqui são muito caras. abraço.
I love that you give options on making products! Do you ever get tear out from the router? If so what do you recommend to prevent this?
For sure. Small “bites” with incremental depth is the best way to avoid it. Some species are more prone to tear out too. But inevitably I have to patch with some CA glue or do extra sanding/shaping.
hi there, i randomly saw this vid on the side of my page there.. and thought mm whats this?.. all i call see was wood and patterns. i was pleasantly surprised. i wish i could do that. but.. my hands.. sigh. but now i want to buy ur products. i am about to check out your link. thanks for sharing. also nice to see some money goes to some charities. lovely. :) by for now, from Australia. :)
Great site .Learned a lot thank you.When you do your glue ups how thick you make your blanks. On YT it looks like 3" think. Is 2" a good thicknell or to thin
You left out one of the best options for sanding and a great finishing wax...Acks Wood Pastes LLC is number one in the USA! Do not have to sand over 320, the abrasive paste on a small drill buffer will sand and seal, then we add the most carnuba wax possible, NO varnishes and have to wait till it cures. We were just featured by the gang at This Old House magazine finishing a table top and using both. 50 years of TV cant be all wrong...beautiful trays and bowls your making!!
Meraviglioso
Hey man I really like your stuff. I was just wondering why you didn't use the original template (that you used for the inside) to route the outside of the tray with the flush trim bit? Was it that you wanted the walls of the trays to be thicker than the template would have given you? Thanks.
I was also wondering, about the plexiglass that you use on your router. did you center or offset the router?
time to try out CNC!
💖💖👏👏👏👏👍👍👍👍 Braavvooo pak kesan kayu yang memukau 👏👏👏💗💗💗💗💗👍👍 salam sukses untuk anda💖
nice
What kind of hardwoods did you use for the square tray other than Purpleheart
You had me at 'its kinda sketch but sometimes we do sketch things'
😁😁😁
you are exceedingly skilled. I have copied you and sell here in Thailand. thank you for your advice... i am an old English guy. I JUST RECEIVED AN ORDER FOR 10 OF YOUR PIECES.,to be delivered to a 5 star hotel in Bangkok.due to the average wage of $16 for 8 hours work i can only sell at a very modest price, but thank you.
That’s great to hear!
Круто! Не все понятно, но почерпнул много нового.
I see you have a ridgid sander. Do you have issues with the drum sanding sleeves slipping on the rubber when you put any pressure against sleeve
To conserve material you could use your band saw to create veneers, then jigsaw out the middle. Then laminate the pieces together and finish with a flush trim bit. This would eliminate the hogging out step with the drill press and save a ton of time and material. Ultimately this is a different process and therefore will yield a slightly different end result.
For sure. So many more options and possibilities.