This is very well done. From a cost perspective, aesthetic perspective and usage perspective. This is one of the best thought out sprinter roof racks I've seen. You should be proud of this and I will be following your lead with my sprinter van. Thank you.
Great design and video explanation. Regarding aluminum, there are specialty aluminum suppliers where you can purchase common shapes that are also anodized, typically clear anodized which is a silver type look. Regarding attaching the redwood to the aluminum- would suggest using a 1/4-20 stainless through bolt. Flat head on top, with washers below, including a spacer washer to keep wood off aluminum. Otherwise, water will puddle there and dry, puddle and dry, over time degrade wood. Also, suggest adding some countersinks to your toolbox, Weldon is a quality brand. Thanks for the video!
The best DYI van roof rack system I have watched on YT, nice layout and execution. I also like your AC system, can you share the information about you roof AC, thank you.
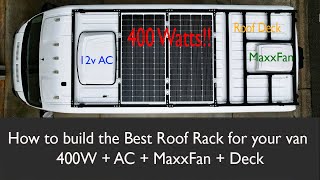
Thanks my friend! The AC is Mercedes Benz factory AC that comes with the passenger van configuration. It’s big so it takes up a lot of roof space. But very beneficial traveling in hot summers
Great job! You explained the build very well. Anything you would have done differently now that it’s a few yrs old? Also what brand is your ladder? Cheers
Thank you!! I also want to make a roof rack of sorts. Only for my converted enclosed cargo carrier not a van. I need to replace the wooden frame I haphazardly built to mount my 4 solar panels on. The total length is 12'. Getting 2 lengths of 8020 thru the mail that length is impossible. However 4' lengths are much easier. I can get a pack of 10 with free shipping cheaper than 1 single long rail. Couldn't figure out how to connect them together though to make a long rail. Your video solved that. Once again thanks now I know what to do.
What a f'in G! Great video, I am looking into vanlife and the costs are just so absolutely astronomical for crap like this. This looks FANTASTIC, even better than a lot of OEMS, and fits my bill for being infinitely customizable and reconfigurable. Great, great design and good job, my friend. This is going to save me some money. You should post a paypal or something, I'd buy you a beer, this video will seriously save me $1500-2000
Pro tip. Ensure you never put aluminum in direct contact with steel. In this case, the roof of the van. When the two metals interact, an electric current is generated, which causes corrosion. Ensure you have an insulating layer in between.
@@Davidh741 There might be better options but inside my van I used 1/8' thick high density closed cell foam whenever I attached aluminum against steal. On your roof I think laying down a strip of butyl putty tape might be one of the better options.
Yes, you must isolate dissimilar metals. Paint is not an isolator. The most practical is using “1/8 thick hi impact styrene sheet” which can be easily fabricated, cut, holes drilled, etc. This can be purchased online (small 12x12 pieces, etc) at places like McMaster Carr.
Thanks Fred - that is a good video exactly what I need - everything. Can you share the cut sheet/quantities you got of each? I am about to install OEM MB T-Track on my roof - MB 144WB 2018 2500 Cargo
I like what you have done which gave us other options and not rely on expensive roof rack that is similar in construction. Question, what aluminum grade is the one you used?
Ok. I made my rack using these components… many things learned: - It seemed on my van that the distance between the factory railing might be slightly different from the measurements here. - The square nuts for the roof rails (20mm) were incorrect for mine. 25mm is much better. - The legs are difficult to attach because of the challenge of trying to tighten bolts in such a small space. One thing I’m not 100% clear on, is the optimal way to get the rack onto the roof… it seems in this video it’s done as one piece… but that’s not possible because of roof fans, a/c etc. So, knowing the actual steps to build and then attach, would be very helpful.
Thanks for sharing. Odd that the roof rails distance should be different. Hope you did measure 1st. The square nuts, I bought from Rhino Rack. They are for the Sprinter rail and fit fine for mine. So your rails might be different after all. For tightening the bolts to the rail, you can drill an access hole thru the 80/20 profile right on top. Then you will have easy access. I learned that later and shared it in one of the comments. I built up the whole thing and have someone help me setting it on top. It wasn’t difficult if you have two people and two A ladders.
@@fredzhang5212yeah, i wonder if whomever outfitted my van put a different rail in. I didn’t measure first, but its working. I’m not following on drilling an access hole… did you do it down through the actual 80/20 rail? I saw a much easier approach from the unaka gear roof racks… where they used an L bracket on the inside as legs…. Vs the gusset. I wasn’t sure if you considered that approach or not. Anyways, it was difficult work for me, but i got it to work and it looks pretty good. Now i need to find just one rhino rail… $260 for a set is not worth it:)
Thanks! I think you might have asked cat# info (I got it in my email but not showing up here). I did my best to added them in the video description. You can find them there. Make sure to double check in case 80/20 made changes. You may need to visit your local hardware store for some other nuts and bolts. There are different profiles so you don't have to pick the kind I use. If you don't need black color, bare aluminum profiles are something like 25-30% cheaper than the black anodized ones. You can save a couple hundred dollars that way. You can add up the lengths from my drawing in the video if you want to built exact. As DIY goes, I would encourage you to make changes as you see fit. Make sure triple measure to make sure your van is not different from mine. I buy custom length pre-cut. I cost extra $2 for the cut but well worth in my opinion. You just need to be sure of your measurement and design : ). Hope this helps!
You did an amazing, creative job thinking out your rack in detail - wonderful job on your RUclips video explaining how you did it. Can I ask where you buy the awning brackets?
Very nice job on the build, and the thorough video was excellent and helpful! You mentioned in one of your replies to a comment that you had to install your roof track as your Sprinter did not come with one. I have the same issue. Did you use Riv-nuts to attach the track? Any difficulties in drilling or attaching the track?
@@fredzhang5212 we bought the van (on a 2010 Sprinter chassis) used. It was already completely built out commercially as a camper van, so the interior is completely finished out with headliners and cabinetry. No inside access to the roof
I researched quite a bit and couldn’t find a solution I can do without inside access. So I went thru the big trouble to remove the headliner just to install the track. My understanding is rivnut requires access from both sides too. But a bodyshop mechanic probably can find you a good solution. In that case don’t buy MB OEM factory track. Bolts were pre-welded to the OEM track for you to easily attach from the inside with nuts. You will get the Vantech tracks where bolts were not pre-attached. Hope you find a solution! Cheers!
Wait, sorry I was thinking about this wrong. I think you can use rivnut without inside access (as long as you weather seal it properly and don’t over-torque the bolts). bolts head will need to be countersinked in the track otherwise it will prevent T-nut’s sliding back and forth freely. My understanding is Sprinters already have predrilled holes for the tracks (mine does and so as many video out there). When not used, they are covered by round plastic caps and painted over. You should be able to see them easily. You can remove them easily with a heat gun. The problem to you is again no inside access. When the caps are removed, the piece inside holding the cap will break loose freely and there will be no way to remove them without inside access. So you might hear things rattling inside and won’t be able to do anything about it. If drill new holes, the plastic cap will raise the track but you probably can deal with that by removing rubber gasket (came with track) at the cap area. Other than that, water proof, water proof, water proof! Good luck and make a video if you do it. Good luck!
Exceptionally!!! "Well prepared designed described" Can you please let us know about the spear tier and ladder being mounted to the door? 🚐 With so much gratitude RAY.
Thank you Fred! Any chance you would be willing to share a complete list including amount and total length of materials ? I have the same van and would love to build the same design.
Awesome video Fred. My 2022 Sprinter is due to get here in June and the roof rack was going to be my first project. Yours is just perfect! Who makes the ladder?
This is such a great video tutorial. Thanks for the information, especially the 80/20 slot covers. Also, your Sprinter rear ladder is awesome. What model is that? Thank you. 🙂
Great job, thank you for sharing your video, you are going to get the roof rack companies (with their ridiculously high prices )out of business. 👍.I just started to build my cargo sprinter, If you don't mind telling, why do you have such a big air conditioner?
That’s the factory AC came passenger Sprinter. We bought it during the high of pandemic. This was the only one sat in the lot with $8K off MSRP. I am not going to be picky about it 😁. Besides we have no immediate plan to do RV conversation.
Wow, Fred. I had this same idea in mind and so glad I found your video. By chance, do you have the cut sheet measurements for the T-slot? I am going to order from that same website. I have the same 144 van as you.
Hi Fred. Great video. I am building a similar rack and using Autodesk Fusion. Where did you get your 3D 8020 parts to use in your design? Did you import them or built your own within 360? I am looking to streamline my design to save on costs and don't want to spend time modeling each part individually if I dont have to. Thank you.
Hi, I am not near my Fusion 360 at the moment. Yes you can import 80/20 drawings from Master Carr that is part of the plugin to Fusion. At least you can import basic shapes and extend to the right dimensions. Just search RUclips “import 80/20 to fusion 360” and you should find instructions on how to do that. Pretty straightforward. Hope this help! If not let me know and I can give more details when I can
This is a nice build. For the bracket to attach awning, do you use the same brackets come with the Thule awning and do they attach to the 15 series directly?
I used the two come with and I added another using 80/20 bracket (drilled to fit). Yes they all attached to the profiles directly as indicated in video
Thanks for posting this great video. I’m looking to build something similar for my van. Can you tell me if there’s a reason why you didn’t build out the deck more towards the rear so you can reach it directly from the ladder?
Thanks fir the awesome vid! Not much “real-estate” up there w the factory AC on the 144, and it looks like your ladder is in the back. Can you access the deck from that rear ladder and how? Tnx in advance!
Yes I wish I have the smaller version of the factory AC, so I would have more room. But for sitting and owning attachment purposes, it’s okay to me. And that’s another reason I don’t want to spend $3K+ for that added “real estate”. I have no problem using the rear ladder and step on the side rail to get to front. If you carry bulky or heavy items, yes installing a side ladder would be much better. I like the look but hesitate for potential added drag and wine noise (and cost). Alternative is to buy one of those Thule telescopic van ladder. Thanks for the comments!
In the drawing I didn’t draw the two brackets from the adapter kit. But when I walked thru the actual rack after put together in the video (on my lawn), you will see those two Thule brackets. You don’t have to use the kit. I was being lazy to find all the necessary hardwares 😀
Hello! I am so grateful for this resource. One question about the fastener that fits into the roof rail groove. Does the 80/20 fitting fit into that groove properly? thank you
As long as you buy the hardware for the same series as of the profile, they will fit perfectly. For example, if you use the 15 series extruded aluminum (1.5”x1.5”), all the 15 series hardware will fit into the slot.
No it won’t. You will need to purchase a set of “Rhino Rack T-nuts for Sprinter factory roof track” (listed in my video description) and stainless washers and bolts from your local hardware.
This is great, thanks so much for sharing your design and approach. I'm not quite sure why there are racks retailing for $5000 out there? The majority of racks are used for awnings, lights and solar. Perhaps there is another use case we are all missing in this?
Love your comment and good question! Compared to all the Overlander racks and equipment options, van racks are way behind on design yet way overpriced.
@@fredzhang5212 very true. I compare what’s available in the jeep aftermarket and it’s exponentially cheaper than the sprinter world. I’d argue jeeps are taking a lot more of a beating on offroad trails. At some point the industry needs to transition away from artisanal production to modern manufacturing methods. I’m still surprised nobody has started a factory in Mexico and sells 15% cheaper than the top brands. Crazy margin to be made at what the main brands sell pretty average components for.
Agree. All it takes is Rhino Rack and Yakima to extend their Pioneer and LockNload line to the van sector. Those are much more versatile and expendable than those current van racks made with tubular structure
Buy genuine 80/20 hardware I listed. No problem so far just like what you will get from Thule or Yakima stuffs. Don’t buy knockoffs from Amazon. Those rust from experience
Hi, Nice video. What series of size/series/platform was your 80/20? Going off of the comparison between your thumb and the rail it looked like it was bigger than an inch.
Thank you for the comments! The profile (that's how they call the extruded aluminum) I used is the 15 series which is exactly 1.5 in. When you see a profile cat# starts with 15xx, it's from the 15 series. I think 10 series (1 in) is too thin for strength or good look. The also have metric series. What ever you use, be aware that all the hardwares are series specific. You can find all sort of information from here: catalogs.8020.net/80-20-Inc-Catalog-23/152/
You can find the info in the video description under “Rhino-Rack T-nut for Sprinter factory roof track:” with a link. You just need to go to local hardware store to pick up some stainless washer and hex socket bolts (I forgot what thread size). It is tricky to fasten that bolt since there is so little room to operate. You either have to cut the hex key short, or drill a access hole thru the 80/20 (better). Maybe I will make a follow up video about that.
Hi Fred, I may have missed it in your video, but what is the size of the 80/20 profile did you use for your awesome rack? Thanks in advance for the answer.
@@fredzhang5212 Do the bolts come with the corner brackets, plates, connectors, etc.? If not, how many bolts and Tnut/bolt sets is required for the entire build?
What's the (estimate) weight of the rack not including the wooden platform? Do you have the fuel economy penalty (in mpg b4 and after) once you added the rack? It's a really clean design and built. Congratulations!
Thanks for the comment! The 80/20 I used has spec of 0.95lb/ft. I will say about 45 lb or less without the wood platform. As I stated in my video description, there is no detectable fuel economy penalty after I put on the rack (and awning). I made my usual trips from San Diego to LA. The MPG was the same 21+ before and after the installation. May be my factory AC creates more drag than anything else. I wonder if I have nothing on the roof, I may detect some differences. Anyway, should be minimum. Thanks again
Look for the Rhino rack T-nut link in video description. Besides that, I used stainless nuts and washers from Ace hardware. If you copy my low profile design with 1.5 in leg height, your will find that the space is tight for the Allen key when tight then nut to the square nut. You can either have your Allen key cut short, or drill an access holes on top. I did both and drilling access holes is easier and faster. You will know what I am talking about when you get there.
It’s a factory AC that tights to the whole climate control. So I not sure how much review I can do about it. Together it does keep comfortably cool in 100+F in our Yosemite trip.
Beautiful and looks very functional to. My Transit will have different roof attachment points but there's a lot here I can use in my design. Just one note, from my understanding, the 80-20 hardware should be replaced with stainless still fasteners as the standard bolts will rust.
Yes, for the Transit I would imagine the width might be different and needs adjustment there. Fore and aft of the feet can slide back and forth so that's easy. Regarding the hardware, the "90 degree inside corner connector - cat# 3364" doesn't matter. Its body is aluminum with a small steel pin. Regarding the T-nuts and bolts, if you get them from 80/20, they are blackened steel with black oxide coating. If you are familiar with Thule or Yakima, their hardwares are also the same blackened steel. They are quite weather resistant. The T-nut and bolts I purchased from 80/20, they have been out there for months now parked less than a mile from the Pacific Ocean with nightly salty marine layer. They look perfectly fine to me. So if you are fine with Thule/Yakima stuffs and how they weather, you can stick with authentic 80/20 standard blackened hardware; if you want a complete peace of mind, you can go with stainless. What you DON'T want to do is to buy non-80/20 stuffs from Amazon. I tried some 80/20 knock-off bolts from Amazon when I put in the wood rack. They looked the same blackening treated. But rust show up in just a few days. ACE hardware blackened steel hardware don't seem to be that great either. Be aware! Hope this help!
@@fredzhang5212 this helps a lot, I'm using Thule racks for over twenty years and never had a problem. Good point to get the hardware from 80/20, thanks again
Hi handsome, I enjoyed your channel and topic. I would like to ask you for a list of food you eat in your camper? Please , add 4 authentic foods. Thanks.
80/20 comes with clear aluminum or anodized finish. What I used here is anodized (except the one quarter round at leading edge I had to vinyl wrap it black since they don’t have anodized for that in stock at the time). Anodized finish profiles is about 1.5x the cost of clear finish.
Nice rack! I didn't see in the video where you talked about the track that you attached the rack to. The track that is bolted to the roof of the van. Could you please let me know what that is? Thanks!
Thanks for the comment! If your van already have a factory track, then you are good. If you don’t, then you have to install the track. Mine didn’t come with it so I had to buy the factory track from MB dealer and installed it myself. It’s not a small job since you have to remove the roof liner inside the van if it’s a passenger van like mine, but it’s doable. Cargo or crew van will be much easier. I should have done a video about it since it’s tricky with the roof liner, but worked through it instead. There are videos out there that are informative. I would definitely go with the MB factory track instead of the one made by Vantech. The factory one has better weather seal gaskets pre-installed and the bolts are pre-welded therefore easier to install. It’s less than $100 more than the Vantech one. Hope this helpful!
@@fredzhang5212 That's great info and very helpful. Thanks! I'm sure hoping there's a way I can do it without removing the liner. That would be a nightmare for me as I have overhead cabinets already bolted in, and lighting installed in the liner.
@@fredzhang5212 I'm going to looking into whether or not it might be possible using plus nuts with only outside access. Have you used plus nuts before?
I haven’t but in theory plus nuts should work if weather sealed properly. One more thing if I remember correctly. When you remove the plugs of the factory pre drilled track holes, half of that plug will fall inside. It may rattle somewhere and could be annoying. Better off drilling new holes? Good luck!
@@fredzhang5212 Interesting. I think I'll take my chances with the existing holes. With the insulation under the liner I don't think there's much risk of rattle. Also instead of using the proper rail/track I'm going to try using the 8020 half profile instead. It should work great and for 1/3 the cost. There's a youtube video of someone using a full profile, but with their technique I would need inside access. I will drill holes through the half profile so I can bolt into the plus nuts.


This is very well done. From a cost perspective, aesthetic perspective and usage perspective. This is one of the best thought out sprinter roof racks I've seen. You should be proud of this and I will be following your lead with my sprinter van. Thank you.
Wow! I’m impressed! Now I’m very much inspired by this. Thanks!
Great design and video explanation.
Regarding aluminum, there are specialty aluminum suppliers where you can purchase common shapes that are also anodized, typically clear anodized which is a silver type look.
Regarding attaching the redwood to the aluminum- would suggest using a 1/4-20 stainless through bolt. Flat head on top, with washers below, including a spacer washer to keep wood off aluminum. Otherwise, water will puddle there and dry, puddle and dry, over time degrade wood.
Also, suggest adding some countersinks to your toolbox, Weldon is a quality brand.
Thanks for the video!
Thanks for the suggestions! 👍
From one Fred to another Fred.....Awesome job!!!!
Thank you seriously! You put so much time and effort into making this a rack worth 3k!!!
You did an amazing job and I’m about to build mine now!!!
thamks for breaking it all down for me. it came out professional looking.
This is amazing! Finally a solution for my roof I can actually make myself and afford. Thank you so much!
What a great video! Thank you for your attention to detail and willingness to contribute to others!
What a awesome post. full of usefull information and inspiration. And I find your responses to questions very polite and helpful. Thank you Fred.
The best DYI van roof rack system I have watched on YT, nice layout and execution. I also like your AC system, can you share the information about you roof AC, thank you.
Thanks my friend! The AC is Mercedes Benz factory AC that comes with the passenger van configuration. It’s big so it takes up a lot of roof space. But very beneficial traveling in hot summers
@@fredzhang5212 Thank you so much.
Truly an awesome work, lots of useful information.
Great job! You explained the build very well. Anything you would have done differently now that it’s a few yrs old? Also what brand is your ladder? Cheers
This is awesome...Need more 80/20 ideas for the MB Sprinter
Thank you so much for the video, I have been thinking about building a rack for my 2015 144 low roof sprinter van . Great job!!
Brilliant design and well thought out, thanks for sharing!
Thank you!! I also want to make a roof rack of sorts. Only for my converted enclosed cargo carrier not a van. I need to replace the wooden frame I haphazardly built to mount my 4 solar panels on. The total length is 12'. Getting 2 lengths of 8020 thru the mail that length is impossible. However 4' lengths are much easier. I can get a pack of 10 with free shipping cheaper than 1 single long rail. Couldn't figure out how to connect them together though to make a long rail. Your video solved that. Once again thanks now I know what to do.
So glad to hear that!
What a f'in G! Great video, I am looking into vanlife and the costs are just so absolutely astronomical for crap like this. This looks FANTASTIC, even better than a lot of OEMS, and fits my bill for being infinitely customizable and reconfigurable. Great, great design and good job, my friend. This is going to save me some money.
You should post a paypal or something, I'd buy you a beer, this video will seriously save me $1500-2000
Thanks for the comment, thanks for the beer thoughts. Cheers!
Looks great! Nice work. I'm going to copy much of your design. Thank you bro
Pro tip. Ensure you never put aluminum in direct contact with steel. In this case, the roof of the van. When the two metals interact, an electric current is generated, which causes corrosion. Ensure you have an insulating layer in between.
Thanks. The factory roof track on which the rack is sitting on is Aluminum
What type of insulation I will have steel roof rack attached to aluminum one
@@Davidh741 There might be better options but inside my van I used 1/8' thick high density closed cell foam whenever I attached aluminum against steal. On your roof I think laying down a strip of butyl putty tape might be one of the better options.
Yes, you must isolate dissimilar metals. Paint is not an isolator. The most practical is using “1/8 thick hi impact styrene sheet” which can be easily fabricated, cut, holes drilled, etc. This can be purchased online (small 12x12 pieces, etc) at places like McMaster Carr.
Great video and you answered my concern about rusting on your update. Thank you for sharing your experience
Thank you! That helps me understand how one might do this to save money.
It's a beautiful product. And I learned a ton about working with extruded aluminum. Thank you!
Awesome! Thanks for share your design and ideas
Super cool. Nice... Im going to give it a try for my Ford Transit
Amazing! Love your attention to details..thanks for posting
Great idea thanks for sharing. Think I might be copying this idea for my own van, cheers👍👍
Thanks Fred - that is a good video exactly what I need - everything. Can you share the cut sheet/quantities you got of each? I am about to install OEM MB T-Track on my roof - MB 144WB 2018 2500 Cargo
I was looking to build something like this and I just saw your video thank you for all the explanation I’m going to go the same route. 👍
Thanks for the comment! Good luck and have fun!
I like what you have done which gave us other options and not rely on expensive roof rack that is similar in construction. Question, what aluminum grade is the one you used?
I am not sure what grade they are. You can inquire from 8020.net. Thanks for the comment!
Hi,Fred, this is amazing!
Great job. Definitely has me thinking about building my own.
Ok. I made my rack using these components… many things learned:
- It seemed on my van that the distance between the factory railing might be slightly different from the measurements here.
- The square nuts for the roof rails (20mm) were incorrect for mine. 25mm is much better.
- The legs are difficult to attach because of the challenge of trying to tighten bolts in such a small space.
One thing I’m not 100% clear on, is the optimal way to get the rack onto the roof… it seems in this video it’s done as one piece… but that’s not possible because of roof fans, a/c etc. So, knowing the actual steps to build and then attach, would be very helpful.
Thanks for sharing. Odd that the roof rails distance should be different. Hope you did measure 1st.
The square nuts, I bought from Rhino Rack. They are for the Sprinter rail and fit fine for mine. So your rails might be different after all.
For tightening the bolts to the rail, you can drill an access hole thru the 80/20 profile right on top. Then you will have easy access. I learned that later and shared it in one of the comments.
I built up the whole thing and have someone help me setting it on top. It wasn’t difficult if you have two people and two A ladders.
@@fredzhang5212yeah, i wonder if whomever outfitted my van put a different rail in. I didn’t measure first, but its working.
I’m not following on drilling an access hole… did you do it down through the actual 80/20 rail?
I saw a much easier approach from the unaka gear roof racks… where they used an L bracket on the inside as legs…. Vs the gusset. I wasn’t sure if you considered that approach or not.
Anyways, it was difficult work for me, but i got it to work and it looks pretty good. Now i need to find just one rhino rail… $260 for a set is not worth it:)
Amazing job Frank!!
Excellent Excellent Excellent!! btw, where is that ladder from?
Thanks! The ladder was from Aluminess. I have a video about that rack in my channel. Thanks
great work and thank you I'm going to build the same rack!
Thanks! I think you might have asked cat# info (I got it in my email but not showing up here). I did my best to added them in the video description. You can find them there. Make sure to double check in case 80/20 made changes. You may need to visit your local hardware store for some other nuts and bolts. There are different profiles so you don't have to pick the kind I use. If you don't need black color, bare aluminum profiles are something like 25-30% cheaper than the black anodized ones. You can save a couple hundred dollars that way. You can add up the lengths from my drawing in the video if you want to built exact. As DIY goes, I would encourage you to make changes as you see fit. Make sure triple measure to make sure your van is not different from mine. I buy custom length pre-cut. I cost extra $2 for the cut but well worth in my opinion. You just need to be sure of your measurement and design : ). Hope this helps!
Excellent video & beautifully designed rack, looks fantastic. A job very well done! SLiCK!
Fantastic job. So smart. Looks great. I am inspired!
Amazing work. I wish i was nearby for tips and trips.
Smart very smart man. Great build 💖
This is very well done. Do you have a save file or a parts list from Fusion?
Super well done! Thanks for sharing.
You did an amazing, creative job thinking out your rack in detail - wonderful job on your RUclips video explaining how you did it. Can I ask where you buy the awning brackets?
Thanks for the comment! I believe I got the Thule awning brackets from Amazon. Bracket info link see video description.
Very nice job on the build, and the thorough video was excellent and helpful! You mentioned in one of your replies to a comment that you had to install your roof track as your Sprinter did not come with one. I have the same issue. Did you use Riv-nuts to attach the track? Any difficulties in drilling or attaching the track?
Thanks! Regarding the roof tracks, does your van also a passenger van with head liner inside (can’t see sheet metal of roof from inside)?
@@fredzhang5212 we bought the van (on a 2010 Sprinter chassis) used. It was already completely built out commercially as a camper van, so the interior is completely finished out with headliners and cabinetry. No inside access to the roof
I researched quite a bit and couldn’t find a solution I can do without inside access. So I went thru the big trouble to remove the headliner just to install the track. My understanding is rivnut requires access from both sides too. But a bodyshop mechanic probably can find you a good solution. In that case don’t buy MB OEM factory track. Bolts were pre-welded to the OEM track for you to easily attach from the inside with nuts. You will get the Vantech tracks where bolts were not pre-attached. Hope you find a solution! Cheers!
Wait, sorry I was thinking about this wrong. I think you can use rivnut without inside access (as long as you weather seal it properly and don’t over-torque the bolts). bolts head will need to be countersinked in the track otherwise it will prevent T-nut’s sliding back and forth freely. My understanding is Sprinters already have predrilled holes for the tracks (mine does and so as many video out there). When not used, they are covered by round plastic caps and painted over. You should be able to see them easily. You can remove them easily with a heat gun. The problem to you is again no inside access. When the caps are removed, the piece inside holding the cap will break loose freely and there will be no way to remove them without inside access. So you might hear things rattling inside and won’t be able to do anything about it. If drill new holes, the plastic cap will raise the track but you probably can deal with that by removing rubber gasket (came with track) at the cap area. Other than that, water proof, water proof, water proof! Good luck and make a video if you do it. Good luck!
Hello Fred
Great Job! Did you also install the two side rails to the roof and then added in the 80/20 pieces?
If your van doesn’t come with the roof rack tracks, yes you will have to install them or have someone install them 1st.
Exceptionally!!! "Well prepared designed described" Can you please let us know about the spear tier and ladder being mounted to the door? 🚐 With so much gratitude RAY.
Thank you for the comment. The ladder see: ruclips.net/video/6UDVM56_CSw/видео.htmlsi=y8B_RA3mBfHpB1Jn
well I just ordered some extruded aluminium to follow your design! wish me luck!
Fantastic! Have fun!
@fredZhang what type of connector did you use to connect the rack to the roof rails of your van?
Excellent video! Very detailed and beautiful build. Thank you
Thank you Fred! Any chance you would be willing to share a complete list including amount and total length of materials ? I have the same van and would love to build the same design.
Awesome video Fred. My 2022 Sprinter is due to get here in June and the roof rack was going to be my first project. Yours is just perfect! Who makes the ladder?
Thanks! See my video about that ladder: ruclips.net/video/6UDVM56_CSw/видео.html
This is such a great video tutorial. Thanks for the information, especially the 80/20 slot covers. Also, your Sprinter rear ladder is awesome. What model is that? Thank you. 🙂
The rear ladder is from Aluminess. You can check it out in another of video about that ladder: ruclips.net/video/6UDVM56_CSw/видео.html
Great design dude!
Hi Fred, how did you fix the roof rack to the vehicle? Did I miss a video? BTW…beautiful job, thanks for sharing 👍
Thanks for the comment. It attached to the roof rail track
Great job, thank you for sharing your video, you are going to get the roof rack companies (with their ridiculously high prices )out of business. 👍.I just started to build my cargo sprinter, If you don't mind telling, why do you have such a big air conditioner?
That’s the factory AC came passenger Sprinter. We bought it during the high of pandemic. This was the only one sat in the lot with $8K off MSRP. I am not going to be picky about it 😁. Besides we have no immediate plan to do RV conversation.
Awesome video, thanks for sharing! Would you mind sharing your Fusion 360 file?
Nice modeling in Fusion360... Takes all the guesswork out of any design project.
Wow, Fred. I had this same idea in mind and so glad I found your video. By chance, do you have the cut sheet measurements for the T-slot? I am going to order from that same website. I have the same 144 van as you.
Thanks for the comment! I don’t have the cut sheet anymore. At least not one that I absolutely sure was final
Very smart , look's great. Thank's for the vid.
Thank you for the detailed video. Subscribed.
Hi Fred. Great video. I am building a similar rack and using Autodesk Fusion. Where did you get your 3D 8020 parts to use in your design? Did you import them or built your own within 360? I am looking to streamline my design to save on costs and don't want to spend time modeling each part individually if I dont have to.
Thank you.
Hi, I am not near my Fusion 360 at the moment. Yes you can import 80/20 drawings from Master Carr that is part of the plugin to Fusion. At least you can import basic shapes and extend to the right dimensions. Just search RUclips “import 80/20 to fusion 360” and you should find instructions on how to do that. Pretty straightforward. Hope this help! If not let me know and I can give more details when I can
Perfect. Thanks!@@fredzhang5212
This is a nice build. For the bracket to attach awning, do you use the same brackets come with the Thule awning and do they attach to the 15 series directly?
I used the two come with and I added another using 80/20 bracket (drilled to fit). Yes they all attached to the profiles directly as indicated in video
Great job my friend!!💪🏻💪🏻💪🏻
great video and great idea. Thanks for sharing.
That crooked ladder tho... haha
Great video and lots of good information. Thank you sir
Thanks for posting this great video. I’m looking to build something similar for my van. Can you tell me if there’s a reason why you didn’t build out the deck more towards the rear so you can reach it directly from the ladder?
I am limited by the location of the factory AC unit. If you don’t have that, then you will have a lot more options. Thanks
Thanks fir the awesome vid! Not much “real-estate” up there w the factory AC on the 144, and it looks like your ladder is in the back. Can you access the deck from that rear ladder and how? Tnx in advance!
Yes I wish I have the smaller version of the factory AC, so I would have more room. But for sitting and owning attachment purposes, it’s okay to me. And that’s another reason I don’t want to spend $3K+ for that added “real estate”. I have no problem using the rear ladder and step on the side rail to get to front. If you carry bulky or heavy items, yes installing a side ladder would be much better. I like the look but hesitate for potential added drag and wine noise (and cost). Alternative is to buy one of those Thule telescopic van ladder. Thanks for the comments!
Great looking rack Fred! Would you consider making a rack for a 22 Ford Transit?
Hey thanks! This meant to be DYI. Wish I could help you but just don’t have time. Good luck outfitting your Transit. They ARE good looking!
Amazing option, jobs a good one, well done!
Very nice build. Please elaborate on the AC unit! Thank you!
Let me know what you want to know about the AC. It's the factory one that came with my car. Thanks!
Hi Fred, Great work! You show a link to the Thule Awning Kit Adapter, but I do not see those on the install, were those used?
In the drawing I didn’t draw the two brackets from the adapter kit. But when I walked thru the actual rack after put together in the video (on my lawn), you will see those two Thule brackets. You don’t have to use the kit. I was being lazy to find all the necessary hardwares 😀
Good video. Interesting!
Great job man!
Very nice job, thank you for sharing!
Super helpful. Thanks man!
Excellent! Thank you for sharing!!!
Hello! I am so grateful for this resource. One question about the fastener that fits into the roof rail groove. Does the 80/20 fitting fit into that groove properly? thank you
As long as you buy the hardware for the same series as of the profile, they will fit perfectly. For example, if you use the 15 series extruded aluminum (1.5”x1.5”), all the 15 series hardware will fit into the slot.
will the 15 series T nut fit into the MB rail or do you need something else to attach the rack to roof rail?
No it won’t. You will need to purchase a set of “Rhino Rack T-nuts for Sprinter factory roof track” (listed in my video description) and stainless washers and bolts from your local hardware.
This is great, thanks so much for sharing your design and approach. I'm not quite sure why there are racks retailing for $5000 out there? The majority of racks are used for awnings, lights and solar. Perhaps there is another use case we are all missing in this?
Love your comment and good question! Compared to all the Overlander racks and equipment options, van racks are way behind on design yet way overpriced.
@@fredzhang5212 very true. I compare what’s available in the jeep aftermarket and it’s exponentially cheaper than the sprinter world. I’d argue jeeps are taking a lot more of a beating on offroad trails.
At some point the industry needs to transition away from artisanal production to modern manufacturing methods.
I’m still surprised nobody has started a factory in Mexico and sells 15% cheaper than the top brands. Crazy margin to be made at what the main brands sell pretty average components for.
Agree. All it takes is Rhino Rack and Yakima to extend their Pioneer and LockNload line to the van sector. Those are much more versatile and expendable than those current van racks made with tubular structure
thank you Fred!
Very nice! What about the hardware rusting?
Buy genuine 80/20 hardware I listed. No problem so far just like what you will get from Thule or Yakima stuffs. Don’t buy knockoffs from Amazon. Those rust from experience
Hi, Nice video. What series of size/series/platform was your 80/20? Going off of the comparison between your thumb and the rail it looked like it was bigger than an inch.
Thank you for the comments! The profile (that's how they call the extruded aluminum) I used is the 15 series which is exactly 1.5 in. When you see a profile cat# starts with 15xx, it's from the 15 series. I think 10 series (1 in) is too thin for strength or good look. The also have metric series. What ever you use, be aware that all the hardwares are series specific. You can find all sort of information from here: catalogs.8020.net/80-20-Inc-Catalog-23/152/
Nice job!
Ficou lindo demais . Muito obrigado por compartilhar 🙏🙌
Great Design, is this the 15 Series 1.5 x 1.5 ? Thank you!
Yes it is the 1.5” x 1.5”. See more information in Description
@@fredzhang5212 Thank you for your fast respond, I have a 170 sprinter just getting started.
Great Build! Question? What is the hardware required to attach the gussets to the factory roof track? I have a 2018 High Roof Sprinter.
You can find the info in the video description under “Rhino-Rack T-nut for Sprinter factory roof track:” with a link. You just need to go to local hardware store to pick up some stainless washer and hex socket bolts (I forgot what thread size). It is tricky to fasten that bolt since there is so little room to operate. You either have to cut the hex key short, or drill a access hole thru the 80/20 (better). Maybe I will make a follow up video about that.
Thanks for the info your video was top rate!
Hi Fred, I may have missed it in your video, but what is the size of the 80/20 profile did you use for your awesome rack?
Thanks in advance for the answer.
No worries. It’s the 15 series (so 1.5 in). You can find more information in video description. Thanks!
@@fredzhang5212 Thank you. I like that you have the rounded front crossbar, but how is the noise level traveling on the highways?
@@jaketran8247 no noticeable wind noise
@@fredzhang5212 Do the bolts come with the corner brackets, plates, connectors, etc.? If not, how many bolts and Tnut/bolt sets is required for the entire build?
@@jaketran8247 besides some bolts and t-nut can be bought as a set, all buy separately. Number of them depending on your design
What's the (estimate) weight of the rack not including the wooden platform? Do you have the fuel economy penalty (in mpg b4 and after) once you added the rack? It's a really clean design and built. Congratulations!
Thanks for the comment! The 80/20 I used has spec of 0.95lb/ft. I will say about 45 lb or less without the wood platform. As I stated in my video description, there is no detectable fuel economy penalty after I put on the rack (and awning). I made my usual trips from San Diego to LA. The MPG was the same 21+ before and after the installation. May be my factory AC creates more drag than anything else. I wonder if I have nothing on the roof, I may detect some differences. Anyway, should be minimum. Thanks again
Excellent! Well done
how much did you pay for the AC in the back of the picture?
It’s a factory AC came with the van.
Hello really like your video where did you source the hardware to mount to the oem rails on the roof? Thanks
Look for the Rhino rack T-nut link in video description. Besides that, I used stainless nuts and washers from Ace hardware. If you copy my low profile design with 1.5 in leg height, your will find that the space is tight for the Allen key when tight then nut to the square nut. You can either have your Allen key cut short, or drill an access holes on top. I did both and drilling access holes is easier and faster. You will know what I am talking about when you get there.
Looks good, can you review the ac unit sir?
It’s a factory AC that tights to the whole climate control. So I not sure how much review I can do about it. Together it does keep comfortably cool in 100+F in our Yosemite trip.
Beautiful and looks very functional to. My Transit will have different roof attachment points but there's a lot here I can use in my design. Just one note, from my understanding, the 80-20 hardware should be replaced with stainless still fasteners as the standard bolts will rust.
Yes, for the Transit I would imagine the width might be different and needs adjustment there. Fore and aft of the feet can slide back and forth so that's easy. Regarding the hardware, the "90 degree inside corner connector - cat# 3364" doesn't matter. Its body is aluminum with a small steel pin. Regarding the T-nuts and bolts, if you get them from 80/20, they are blackened steel with black oxide coating. If you are familiar with Thule or Yakima, their hardwares are also the same blackened steel. They are quite weather resistant. The T-nut and bolts I purchased from 80/20, they have been out there for months now parked less than a mile from the Pacific Ocean with nightly salty marine layer. They look perfectly fine to me. So if you are fine with Thule/Yakima stuffs and how they weather, you can stick with authentic 80/20 standard blackened hardware; if you want a complete peace of mind, you can go with stainless. What you DON'T want to do is to buy non-80/20 stuffs from Amazon. I tried some 80/20 knock-off bolts from Amazon when I put in the wood rack. They looked the same blackening treated. But rust show up in just a few days. ACE hardware blackened steel hardware don't seem to be that great either. Be aware! Hope this help!
@@fredzhang5212 this helps a lot, I'm using Thule racks for over twenty years and never had a problem. Good point to get the hardware from 80/20, thanks again
Hi handsome, I enjoyed your channel and topic. I would like to ask you for a list of food you eat in your camper? Please , add 4 authentic foods. Thanks.
Did you paint it or it came like this? What type of finish is it?
80/20 comes with clear aluminum or anodized finish. What I used here is anodized (except the one quarter round at leading edge I had to vinyl wrap it black since they don’t have anodized for that in stock at the time). Anodized finish profiles is about 1.5x the cost of clear finish.
Good job Brother!
Nice rack! I didn't see in the video where you talked about the track that you attached the rack to. The track that is bolted to the roof of the van. Could you please let me know what that is? Thanks!
Thanks for the comment! If your van already have a factory track, then you are good. If you don’t, then you have to install the track. Mine didn’t come with it so I had to buy the factory track from MB dealer and installed it myself. It’s not a small job since you have to remove the roof liner inside the van if it’s a passenger van like mine, but it’s doable. Cargo or crew van will be much easier. I should have done a video about it since it’s tricky with the roof liner, but worked through it instead. There are videos out there that are informative. I would definitely go with the MB factory track instead of the one made by Vantech. The factory one has better weather seal gaskets pre-installed and the bolts are pre-welded therefore easier to install. It’s less than $100 more than the Vantech one. Hope this helpful!
@@fredzhang5212 That's great info and very helpful. Thanks! I'm sure hoping there's a way I can do it without removing the liner. That would be a nightmare for me as I have overhead cabinets already bolted in, and lighting installed in the liner.
@@fredzhang5212 I'm going to looking into whether or not it might be possible using plus nuts with only outside access. Have you used plus nuts before?
I haven’t but in theory plus nuts should work if weather sealed properly. One more thing if I remember correctly. When you remove the plugs of the factory pre drilled track holes, half of that plug will fall inside. It may rattle somewhere and could be annoying. Better off drilling new holes? Good luck!
@@fredzhang5212 Interesting. I think I'll take my chances with the existing holes. With the insulation under the liner I don't think there's much risk of rattle. Also instead of using the proper rail/track I'm going to try using the 8020 half profile instead. It should work great and for 1/3 the cost. There's a youtube video of someone using a full profile, but with their technique I would need inside access. I will drill holes through the half profile so I can bolt into the plus nuts.
well done man 👍🏻
Great design. I can just nail solar panels over the wood.
Really cool
Well done 👍