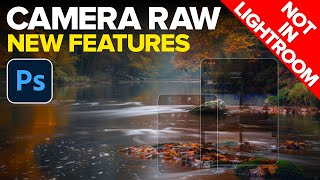
Special way to create glow effect in Capture One (A unique way that no one knows)
HTML-код
- Опубликовано: 18 окт 2024
- In this short video I show you a photo editing technique that you haven't heard before. With this technique you can create a natural looking glow effect in a contrasty scene like a woodland photo. I will also show a secret technique that fixes the overexposed highlights in Capture One. You can apply this glow effect in photoshop as well, but not in Lightroom.
Affiliate links:
amzn.to/3WD5sdR
or
amzn.to/3h3WINl
Order my 2023 calendar here:
hamedbank.com/s...
=================================================
My website: hamedbank.com/
Connect with me on Vero: @hamedbank
-- Sing up for my weekly blog --
hamedbank.com/...
Instagram account: / hamed.bank.photography
Facebook: / hamed.bank


Great way using tool in Capture One, easy to be acces! 10x for effort and sharing!
Glad it was helpful!
Thank you a lot, that video make my day !!
Wonderful. Now your comment made mine!
very good and informative ,thx
Glad it was helpful!
interesting, thank you
You are welcome! I am glad it was helpful
I think, using adjustment layer with Luma Range is easier. Just select highlight range, then rasterize the mask, then use feather or refine or both, then exposure, structure, clarity to liking etc.
Thanks for sharing your tips that is a good tip. Usually, there are many ways of doing things in editing. The point is not how to make the selection but to feather it several times with large to smaller amounts to achieve the exponential glow effect.
@@hbphotos yes, you can repeat that several times on separate layers with different ranges and feather settings, should work as well.
Thank you for the trick!
I‘ve been curious if i can achieve the same effect without having to export the picture separately to photoshop again
Thanks for the comment. I'm glad to hear it was helpful
cool :)
Thanks!
Great video; I was unaware of the mask feathering tool. Definitely going to use this one more. Did you end up making the video on recovering highlights in Capture One?
Great! 😀 thanks for the comment.
I have another video about Levels tool in C1. Please feel free to have a look for recovering highlights
but every time you clicked again on the sky, to create a new mask, the feathering you did before that is then LOST. so it makes no sense to do this 3 times, if you keep doing it in the same layer. only the last click and last feathering have an effect.
maybe you forgot to create new layers for each new click&feathering???
I have the same question!!!😮
When you feather the mask again, you grow the previous one, too. That is true. But it is not lost. I should have started with a larger feathering first and each time used a smaller value. Sorry if that caused any confusion.
Good and informative thoughts on the Orton effect.
Too bad you never switched on the exposure warning. I suspect the sky is burnt out +255.
Avoid hasty movements with the cursor.
Thanks a lot for watching the video and your comment. I really appreciate your advice!
About exposure, some clouds in the sky were already over exposed, to begin with. So I think it was a good idea to make the sky brighter to hide the clouds. But I could go lower the exposure of the sky. BTW, this was a glow effect and it has a different purpose compare to Orotn effect.
Yes, but if you have an overexposed sky, you don't have any image information that can't be saved by reducing the brightness or the highlights. Such an image is also not suitable for printing.
I also wonder how the edges of the leaves look at 200% zoom. Perhaps with artefacts or aberration.?
@@hbphotos
Aberrations mostly took care off with the software. This image wasn't meant for print. It was mostly for demostration perpose
Привет из России! Это здорово! Спасибо вам за то что поделились своей техникой! 🤝
Thank you! I am glad you found it useful
ƤRO𝓂O𝕤ᗰ 🙂
:)