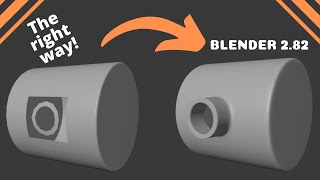
Create a vase in Blender insanely easily that can be 3dprinted in vase mode.

HTML-код
- Опубликовано: 16 окт 2021
- Having reached the unexpected milestone of 100 subscribers I present a quick video of how to make a vase in Blender really easily using modifiers. As a bonus I create a cylinder out of two vertices and a sphere out of only one vertex simply because it is cool.
For a video of even more vases see here • How to make even more ...  Хобби
Хобби


For anyone watching, if you want to fix the audio, pause the video and paste this in the browser console this will make the audio mono and fix the balance.
let context = new AudioContext();
let source = context.createMediaElementSource(document.querySelector('video'));
let splitter = context.createChannelSplitter();
let merger = context.createChannelMerger();
source.connect(splitter);
splitter.connect(merger, 0, 0);
splitter.connect(merger, 0, 1);
merger.connect(context.destination);
Can you say what is wrong with the audio? It sounds OK to me. I would prefer to not carry on making videos with bad audio.
@@notverygoodguy The audio balance is like 10-90, right channel is much louder with almost no sound coming from the left.
EDIT: I checked your latest video and the balance is fine there.
@@_-_-_-_-_-_-_- Thanks for getting back to me on this. I checked this audio set up of this video against my other ones and and haven't found the difference yet but I can hear it myself in the original. I will keep looking.
Thank you again. Much appreciated.
Wonderful explanation! Thank you for taking the time to show this! I learned a lot!
Thank you very much for the positive feedback. It is always encouraging to hear when people find these videos useful. Thank youy.
amazing sound effects!
Nice videos man, very clear instructions. And in a normal pace.
Thanks for the feedback. I am glad it was helpful
Hey! I really enjoyed every single part of this video, great job! You explain very well the steps that you are following during the tutorial, so it was easy to complete them. By the way, you have a great voice. Liked and subbed!
You are too kind :)
Thank you! You are a very good guy!
You are very kind :) Thanks!
So helpful thank you so much
Thanks for the feedback. I am very pleased it was useful for you.
Nice!Thanks dear.
You are so welcome!
Thank you for the video :)
Glad it was useful for you!
Awesome tutorial and really fun!
Thank you
Love this, made a vase with your wonderful tutorial
So pleased you made this :) Thanks for letting me know.
@@notverygoodguy I've even printed it in a lovely silk filament. One thing I noticed and was wondering if you had any advice on: The model seems to not be watertight. There's some holes on the top and bottom sides. Was there something I missed? Thank you!
@@notverygoodguy This happens when i try printing in spiral vase mode.
@@sephtronics Printing in vase mode is rarely watertight I'm afraid. There are often weak points as the filament gets laid down that water seems to find a way through. You can increase your chances of it actually being watertight by having the extruder temperature a little hotter and/or by using a bigger nozzle and layer height. I have had some things water tight but it's a bit hit and miss.
One thing you can do of course is to spray the inside of your vase with some clear coat of some kind, preferably a plant safe one.
Congrats on almost 500 subs!!
Thank you kindly :) I have been a bit lazy of late but the next video on hollowing a model WILL be finished soon. I hope.
Thanks, this was really a good video. This could be fun to try making a Rubin's vase with a photo reference.
Good idea. You might even get away with "trace an image as curve" with this idea. Most images of a Rubin's vase are two colours so I imagine that would work quite well.
i'm here at almost 4k subscribers...at the beginning of the video, you celebrated 100 subs, so congrats on 100 subs! :)
Thanks :)
Cool 😎
You're pretty good!
Thanks :)
Nice video, could you also make a more complicated one? I just subscribed because I want to make them :)
I guess so. I am a bit slow with videos but am editing one at the moment for cut and keying hollow models but I can look at more complex models. Having said that, you can make different shapes with this method and try using the wireframe modifier, That can give cool results!
Hey, very cool video!!!
Thank you. Glad you liked it :)
Veryyyyy gooood video , seriously - English it's not my main language but you show everything in good speed and made in 5 min vase. Please do more videos :)) maybe about creating easy body or animal ?
Thanks for the feedback! Having a little video break at the moment but will be adding more soon :)
Nice video It really helped me, but I have a question, is there a difference between using the single vert and merging the cube at center?
Well it used to be that you could only add a single vertex in edit mode so aside from the fact that you need to have the extra objects add on enabled, no there is no difference any more :)
I found some people on Discord wanting to make a Zelda show, so I decided to learn animation to help them. I first started off by making a shatter effect for a vase, and now I’m looking for the shape here.
Well I hope this helped. For easy shatter check out the explode modifier.
@@notverygoodguy I think I might have to restart the shape though since I accidentally messed up the shatter and couldn’t fix it, but I know how to recreate the shape now which is what matters
@@notverygoodguy Thanks for showing me how to make the shape!
@@desmondschneider5397 Glad it was helpful. Bear in mind you can easily edit the shape after you make it by just moving the vertices around.
💕👍
Thanks for your video! Tell me please, How is your method different from this time 5:07, from creating a Mesh UV Sphere?
I am not saying it is a good way to make a sphere and you would only rarely consider doing it but there are a couple of advantages. This method is done with only one vertex and with modifiers. This means it uses hardly any computer resources to generate a fully smooth sphere and that because of the modifiers it can be more easily scaled at any time later and doesn't need to have rotation and scale applied in booleans. It is more of an interesting approach to making scenes that are fully parametric. I would add, I have never used this approach in any scene of my own :)
@@notverygoodguy thanks for your reply!
Brother....your tutorial I download
This was great, but my Vase has a hole in the bottom center? was tha by default or did I accidently put that there? thanks
It shouldn't have the hole. Maybe you have moved the first vertex after creating it
super cool but can you make the audio mono? it's a little hard on just on ear
Thanks for the feedback. This is interesting because it was recorded in mono and converted to stereo afterwards. Could it be the balance between left and right channel that is the issue? For me it sounds OK but am very happy to find ways to improve.
I guess the solidify modifier should be set to a width that is about the extrusion width of your printer
I would think so yes.
You'd actually want to close the vase completely and have a solid mesh with no walls, then let your slicer take care of the extrusion width in the dedicated vase mode. 🙂
@@PeterHertel I guess that would be more sensible, yes :)
@@g0balot if you want to use the vase mode function, yes. But it just came to mind it does limit your max wall thickness to one extrusion width, so the solidify modifier size would give you a thicker more sturdy wall. Without the benefits of single line extrusion in vase mode of course.
Oky 1 question... i wanted to print it... but the model has little hole on bottom how do i fix it? In blender i can also see the "center hole"
Hi. This probably means your very first vertex wasn't in exactly the same place as the origin when you did the screw modifier. Well done for spotting the hole :) You can fix this in several ways. Either drag that bottom vertex on the y axis (or whatever axis you extruded your vertices on) until the hole is closed or set merge in the screw modifier and adjust the distance until the hole goes away, easiest might be to apply the modifiers and then in edit mode go, mesh->cleanup->fill holes or possibly merge by distance would work to.
Hope this helps, let me know if you have any more issues.
Before even watching this video I knew it was going to be vaas. Just knew it 😂
🤣
Great tutorials, but you could've used a path curve instead. Is there a reason why you opted for this method?
Yes. I wanted this to be as simple as possible and some beginners are afraid of curves :) I am planning a video on curves for beginners which will come out some time. No idea when except it won't be a wednesday.
@@notverygoodguy What do you have on Wednesdays?
@@basiladeeb I have an occasional series of videos called "what on earth Wednesday" where i cover topics that new Blender users have probably heard of but are likely to have no idea what they are e.g. curves. I make a point of never uploading one of these videos on a Wednesday.
Nice video!!! In case we want the extrudes, instead of make curves, to make like triangles how can I do it? Thanks in advance
I'm not sure what you want to achieve but you don't have to make the extrudes a curve. You can just make angles instead. Perhaps you could point me to a picture similar to what you want to make.
@@notverygoodguy can you send me a mail so I attach you the photos please?
@@panosloupos5682 Can I suggest you use WeTransfer and share the link. Things get lost in e-mail too easily
@@notverygoodguy everything good. I did it. Thank you for your advices✌️✌️
@@panosloupos5682 Great news!
Thanks for all support. I am looking the Apply buton on Edit Mode. I found solve the on your video. Good days.
Thank you for your comment. Glad this video was useful.
No practico blender hace meses, lo peor es que quiero estudiar animacion (no se mucho porque recien supe que queria hacer esto en vez de trabajar) y estoy haciendo esto en la madrugada.
Blender is pretty good at animation these days. Recommend Grant Abbitt tutorials for starting out.
@@notverygoodguy Thank you
You should change your name to Very Good Guy
You're too kind :)
You completely lost me in the beginning with the vertex
I'm sorry. What part of it is the problem, creating it or what it is?
not very good guy AKA anti hero
Hope it was helpful in some way.
lol you said YewCheub
ha ha :) I do. It's so much easier!