iPhone 8 Plus Screen Repair Guide - Fixez.com

HTML-код
- Опубликовано: 2 окт 2024
- High-Quality iPhone 8 Plus Screen Replacement: bit.ly/2EqPwmp
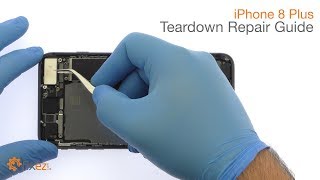
Watch the Official iPhone 8 Plus Screen Repair Guide. Following the step-by-step iPhone 8 Plus screen replacement instructions we have provided will help you safely fix a cracked digitizer or damaged display assembly. Visit Fixez.com for all of the DIY iPhone 8 Plus replacement screens, parts and tools you need to fix your phone quickly, and affordably.
If you need your iPhone 8 Plus repaired ASAP instead- we have you covered there too. Contact one of our skilled technicians at 866-233-6460 or support@fixez.com and they will fix your device for you. They are available Monday - Friday, 9am to 5pm PST.
Subscribe to our RUclips Channel for additional DIY smartphone and tablet teardown and repair videos! / @fixez
Like us on Facebook: / fixez.com
Follow us on Twitter: / fixezdotcom
iPhone 8 Plus Screen Repair Video Steps:
Step 1
• Power down your Apple iPhone 8 Plus phone.
Step 2
• Eject the Nano-SIM Card Tray.
Step 3 (iPhone 8 Plus Display Assembly)
• Remove the two bottom 3.4mm Pentalobe screws located next to the lightning connector.
• Apply some heat and then use the precision knife to create enough space to insert a triangle opening tool.
• With the opening tool slice through the adhesive and carefully decouple the iPhone 8 Plus display assembly from the rear case. Just like the iPhone 7 Plus, it opens to the side.
• The display assembly is still connected to the iPhone by cables along the middle-right side, so don’t try to remove it entirely just yet.
• Remove the following 4 Phillips screws securing the bracket that covers the battery, display, and home button cables. These screws are different sizes, so be sure to remember where they go.
• With the bracket out of the way pry the cables up from the logic board.
• Remove the following 2 Tri-Point screws that secure the bracket covering the upper component display cable.
• Disconnect the cable and free the iPhone 8 Plus display assembly from the phone.
Step 4 (iPhone 8 Plus Front-Facing Camera Cable Assembly)
• Remove the following 5 Phillips screws, followed by the metal clip they secure in place.
• Easily extract the stereo-enabling speaker.
• Use the spudger to help remove the tangled up iPhone 8 Plus Front-Facing Camera Cable Assembly. It includes the front-facing camera, microphone, proximity sensor and ambient light sensor.
Step 5 (iPhone 8 Plus Solid State Home Button)
• Remove the following 4 Tri-Point screws and then the metal bracket.
• Separating the solid-state iPhone 8 Plus home button is simple, with only light adhesive on the cable and no delicate gasket.
Step 6 (iPhone 8 Plus LCD Shield Plate)
• Remove the following Phillips screw, and then the 5 Tri-Point screws.
• With no adhesive on the iPhone 8 Plus LCD shield plate, and the cables nicely managed, simply lift it away from the display assembly.
* To reassemble your device, follow the steps in reverse order.


Excellent video! Just changed out my wife's screen on her iphone 8 plus. Saved my life!
Thank you for the comment and also please be sure to subscribe to our channel. Also take a moment to visit our webpage www.fixez.com
Super awesome! Love it. Thank you.
Excellent
I like you!
Greats video bro
Sorry to be offtopic but does any of you know a trick to log back into an instagram account..?
I stupidly forgot my login password. I would love any tips you can give me
@Aiden Kylo instablaster ;)