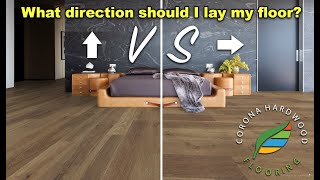
I SCREWED UP this LVP Installation | Had to Take it up and Re-Install it

HTML-код
- Опубликовано: 16 сен 2024
- I screwed up this LVP installation and need to take it up, fix the floor and then re install the same LVP. I get asked all the time, how can I fix some bad cuts, fix a dep I missed in the floor, I forgot to cut a vent and I missed a squeak.
The answer is simple - take it up, fix the problem and the re-install the plank.
I will share some good tips to help you salvage your floor.
When installing luxury vinyl plank flooring(including life proof flooring) you want your floor to look nice when your home renovation is done, right? Of course you do, so take the time to get your vinyl plank installation looking good.
Here are the links to tools I use. If you use these links I do get a commission and my family and I thank you very much for your support!
Entire Home Plank Installation Video - • SIMPLE to Use Step by ...
Tools and Supplies I recommend in this video and use everyday- www.sothatshow...
iRobot Roomba S9+ Bundle - amzn.to/3lxrZas
iRobot Braava Jet M6 - amzn.to/3agLamH
iRobot Handheld Vacuum H1 - (coming soon)
Bissell Crosswave - amzn.to/3ME3ep8
my website - www.sothatshow...
This is where you will find all the tools I mentioned in the video
my facebook page - / sothatshowyoudothat
While you are there hit the like button!
Laminate University - www.sothatshow...


Admitting to a mistake is a rarity these days, you'd never make it as a politician. Love your work.
Haha! Thanks for sharing
:)
You can tell hes not a Republican
Respect
@@SoThatsHowYouDoThat Hiya pal from UK. First time I've watched, enjoyed it,interesting.
I noticed the board was very pliable, is that a standard board in U.S?
The boards I had laid in my place recently where about 13 mm thick.
All the best.🍺👍
You seem like a good, honest dude. This is a quality that is definitely lacking in the contractor field these days. I would absolutely hire a guy like you!! Great video!
I appreciate that!
Those original hardwood floors look great to me..Id leave it alone
Being honest and being willing to do a little rework when needed, pays off 10x. An honest, quality installer like yourself will always be busy, even during hard times.
Can't believe they'd rather "screw up" that hardwood
I was upset over a mistake I found after making quite a bit of progress. Your advice at the end of your video motivated me to pull it all up and fix the problem. Set me back maybe 30-45 minutes, but I'm glad I did it. Thanks!
Great job! and good choice!
I feel your pain, Joe. After 35 years in many fields, the most important thing I have learned, is that ,as much as I want to please the customer and try to save them as much as possible, If they wont take my expert advise, I walk away. Nice save tho brother😎🙏✌
That is how I usually approach it also and that is solid advice for some of the other contractor's that watch this channel.
I've that you were honest and humble enough to admit your mistake, redo the flooring, and even make a video about it!
God Bless You! 😊
I’ve been watching your videos for some time now because I just started offering flooring install service and today on the job I’m working on right now, I had made this mistake of starting the layout in the wrong direction, when I got to the point where it became a problem, I tried to think of every way around not having to rip it out haha. I eventually said screw it and took it all out and redid it. Fair to say that made everything 1000x better and I’m stoked 🤙🏼
That is what makes a great installer!!
This is a must step that a lot of flooring guys seem to skip screws next to each nail then tapping each nail with a hammer to make sure it's down, it's amazing how much the subfloor can become loose over time.
As a fellow installer for almost 20 years I have to say I enjoy your videos. In my personal opinion I don't think you messed up but maybe should have told the home owner that the subfloor needed to be screwed down to avoid this situation. Sometimes giving the customer the cold hard facts might lose the job, but atleast you aren't working for free when you have to reinstall. I feel for ya man.
Thank you!
Thanks for the video. We finished our entire house a few months ago and just found out our foundation is bad and the foundation repair guys need us to remove the flooring before they begin. I've been looking for something to give me hope that I can make this happen without losing even more money in this process. This video gave me some hope! Thanks.
I've done a lot of uninstall/reinstalls over the years to remove damaged planks or fix low/high areas and have found that lettering the rows and numbering the boards using pieces of blue tape or masking upon which you write your numbers and letters , is a great way to keep all the planks in order.
Stack the rows in alphabetic order then reinstall in reverse sequence making sure to cull out damaged planks.
When you get to Z, start over with row AA for instance.
We did one a few weeks ago and ended up at GGG and 209 planks.
It is tedious but the end users appreciate the effort to minimize waste, breakage and the use of new material.
We installed laminate planking in the basement, family room laundry closets and two hallways, couldn’t have done it without listening to you again and again, thank you so much.
Class act. That's why when I chose to learn from someone I chose you bc I can tell quality is required in your installs .
Thank you!
I had to do this exact thing while doing my first DIY LVP flooring job. Saw a joint in a majorly visible spot in the living room separating and had to fix it as I was going to be selling the house shortly thereafter. What I did to keep track of the planks is treat them like an Excel spreadsheet and flip them over and write a letter and number (A1, B7 for example) on each to remember where they go. Took the guesswork out of the reinstall.
Joe, thank you for your wonderful, So That's How You Do That, videos. I've always been a DIY guy for almost every project I do for my family (mostly due to lack of funds) so installing a Manufactured Laminate Wood Floor fits right into my purview and your instruction is making it all possible. My favorite brother-in-law replaced his laminate floor (It was his wife, actually) so he gave me the old flooring panels, that are like new, and his floor-plan is larger than mine. God is good! May the Holy Trinity bless you and your family, richly and keep everyone safe and healthy.
Another great video. Thank you for taking the time to teach & share your knowledge with the world. I can’t tell you how many times you’ve helped me over the past couple of years. And, never underestimate the advantages of using titebond tongue and groove glue in a few key locations. Have an amazingly blessed rest of your day!
Thank you I appreciate you sharing and glad I could help
Holy crap Joe, I was impressed with the first install. I'm even more impressed that you could take it apart and have it all fit back together.
Thx man!
100% good advice. Rip it up, redo it, be proud of it. It will haunt you in your dreams. Not kidding. Customer IS going to notice it. Or someone's going to come to the house and point it out. Then you'll be standing there with egg on your face trying to explain how you left something crappy in their floor (and lying). I've been doing floors for 30 years. And I've made every mistake... hopefully. Not fixing a problem immediately is one of the HUGE mistakes. Even if it costs a lot of time or money or materials. People go to school and pay for classes. When we make a mistake, consider it paying for your class and a lesson learned. Great advice Joe. You're the best, God bless you!
Thank you I appreciate you sharing this
I hate to bring this up, but do not use sheetrock screws on anything other than drywall. They are weak, and will snap. Use flooring screws, which are no 9 gauge and usually 1 3/4" with a Torx head. Cheers, appreciate your honesty and integrity.
I had to take one apart and reinstall it once. I brought along 2 helpers and i lifted the planks 1 at a time, handed it off to a helper. He used a white paint marker on the back to number each plank and he handed them off to the next helper. He stacked them in another room and after the last plank was removed, numbered and stacked we reversed that process and i reinstalled them as they were handed to me in chronological order. The room was 22ft x 16ft and it only took us, from start to finish, 1 hour and 48 minutes. Not too shabby for 3 dudes that downed a case of beer before arriving at that house. It was for a friend by the way! Lol we dont drink before OR during work unless its at a friend's house :-)
Thanks again Joe! Based my 1200 square foot transitionless installation on your videos… came out GREAT! Being a believer, really appreciate the last video I saw where you prayed for your audience!! Outstanding testimony!
Glad to help
Great video. I have encountered cheap LVP where the tongue and grove break when taking them apart. Also, some would say it is a sin to cover up hardwood with plastic LVP. But sometimes you have to do what the customer wants.
Always appreciate your videos Joe. I'm getting ready to pull up the vinyl click-n-lock floor out of the great room in my new house and reinstall it in the bedrooms of the house so I can put tile in the great room.
Your videos always give me the courage to tackle a project. God bless you for sharing your knowledge
Anytime!! Thank you
You never seem to let me down good job as usual and keep the faith !!!!
Great job being honest and good video, but why would they not just sand the old floors down and stain them darker
Breaks my heart to cover a solid wood floor as I refinished floors for many years. But if that's what the client wants, so be it. thanks for the video.
In Sweden and other Nordic countries, I’ve heard people remove their floating floors and take the boards with them when they move. Sounds crazy to me. I’m enjoying the tips on your channel. Thanks.
Joe, you have helped me tremendously. For that I thank you. Even after I complete my project I will watch your videos and I certainly will recomend all. God bless you and your family.
I learned tile work from an old craftsman. Job one is no squeaks or "soft spots". Subfloor MUST be securely fastened. I've worked in half million dollar homes with squeaks in floor. Craftmanship and pride in work are no longer taught. Folks are taught speed work and multitasking. Good on you for being a good contractor.
I just stared making videos of my projects abs one of the things I don't want to do is hide my mistakes. I think it's so important that everyone sees that we make mistakes. It's how we handle it that matters. Great video and great lessons to be learned.
Thanks for sharing man
Screw 1 1/4 screws from the basement going up.
40 year flooring installer.. What I have learned and is hard to do.. Customers pushing you. And what ever floor store pushing you. The main thing if it is not right walk away.. Once you (the professional installer) decide to install a job knowing there is issues... It all on YOU THE PROFESSIONAL.. with that said many great sweet jobs that would have paid so great, you have to pass it up.. I been there many times customers trying save $$$ and person selling the flooring trying make money on job going great.. it put us installers in a hard spot trying to make money and please everyone , but redoing jobs don't pay anything 😂😂great videos you have👍, I been watching many of them and this first time make a comment .
Thanks for sharing man!
Being honest and humble..much respect to you
I eliminated the squeaks in our 55 year old hardwood floors using “Squeak No More” screws (the sheathing had not been glued and screwed). The special screws have a shank that breaks off below floor level.....otherwise the floor would have had to have been replaced.....lots of work, but saved about 15-20,000...
I just sent back drop and lock! This was expensive, Armstrong tabs kept breaking! Going for 12mm this time! Thanks
Honest work. Gotta be ultra honest with them beforehand and tell them it won’t be done if you aren’t allowed to screw it down. Personally this would be the only time I made this mistake because oof that’s a ton of labor you had to put back into it. Great video. Thank you
I pulled up our entire main floor interlocking flooring to replace a damaged section. As we pulled up each row, we wrote the row number and position in the back of each plank. Then we just put them back like a puzzle in order. Worked great.
Good tip
very interesting. I can understand the homeowner wanting you to come back. The screw work looks solid!! We just had smartcore vinyl plank installed over a wood subfloor (took up carpet) and it feels solid. As long as you explained what you were doing to the homeowner be proud of your work.
True.
Joe...You sounded a little exasperated about redoing that part of the job, but don’t !
You realize how many of us you’re helping by showing us real world stuff :)
Thanks your great 👍
frankie
Boston
Thanks
The guys out there that work in the trades are so much more valuable then the desk jockey's and computer cowboys.
Anytime!
We really appreciate your helpful videos and your love for Jesus ❤️
You are so welcome
Awesome tips. Just like to point out to the people that aren’t used to using sharp blades to cut the planks or anything really with a blade... never cut towards your body, always cut with the sharp edge of the blade away from you.
I just installed a floor using your methods. Way easier than the last one I did just 5 months ago. You help is very invaluable. Thanks, God Bless.
You're welcome and I appreciate you sharing this
@ 8:30 your advice is what I always did and also wondered why others did not. Best advice you can give. So many times I saw guys have to travel back to a job and set up tools sometimes mixing thin set and grout to replace a chipped tile they saw when they put it in (or grouted) and they just hoped the homeowner would never see. Here’s a clue, the HO will spend a lot of time there and will see it.
Exactly!!
I feel your pain. Did my my upstairs 900 sq ft. Used aqua guard. Went over hardwood floor but instead of using the required padding i used tar paper. Huge mistake. It squaked everywher. I installed alot of hardwood and used tar paper or rosin paper. And on top of it i used no saddles so it was one contuous floor. Learned a big lesson. 🤦♂️.
There are some old plank floors that are impossible to get to quite down as its the actual tongue rubbing. That looked like Cali Vinyl pro redefined pine. One of my most commonly used products as its 20 mil wear layer and able to purchase direct from manufacturer. Nice to see people take pride in their work these days
Do you have a video covering how to replace a single plank thats damaged? I gouged a plank in my entry (lifeproof). 🤦🏽♂️
Your videos have been a HUGE help on my flooring project! Thanks!
Not yet!
I've been doing flooring for over 30 years and it's nice to see someone who knows what they are doing and actually cares.
Thanks Don!
Great video. I ran into this tonight. Noticed id put two like boards together. Lucky it was only 3 rows in. About 17 planks deep. I hemmed and hawed and finally fixed it before continuing.i was glad i did in the end. It would have bothered me.lol
It is surprising to me how many people lay down a floor instead of just refinishing their hardwood. If you don't like the color, you can stain it a different color during the refinishing process. But that is just me, everyone is different and has different tastes, no right or wrong. I guess I am just in the minority. I love real wood floors.
Will never understand covering up hardwood floors with lvp
Well, I will never understand how people can use ketchup on a steak! Guess we will always be wondering....
Yeah, I'm having a hard time with that one too. Although, I did see some pretty big gaps in that hardwood floor. Maybe it was improperly installed to begin with.
I can understand hardwood in one room and another type of flooring in another and wanting the floors to match.
I like the good old peel n stick but in the newer Vinyl plank..Traffic Master Taupe oak color it's sold at Home Depot..looks great..and it's cheap and easy to install or rip out
Hardwood is beautiful and solid umderfoot but it's not for everyone. I've had 1st generation Pergo laminate on my floors for over 20 years and they still look great. The only reason I'm replacing them is because we're remodeling. I've considered replacing it with hardwood but our family is rough on floors and we want something more worry free.
Glad I found this. Looking to do LVP or laminate over a squeaky hardwood floor, now I have a good plan with the screws! Thanks bro.
Just rip out the wood and do the job properly.
Prep is the key to success. You can skimp or cheat a lot of places but never prep. 26 years in the bizz and repairs are rare as they cost time and money. Don’t like expensive learning 🍺
Totally agree!
I bet a resand would have been just about the same price, if not less than a brand new floor
I bet they just hated wood floors.....
We purchased a new house and the builder is installing vinyl plank rather than engineered hardwood I hope this is not a mistake. May be the way of the future.
I don't think mit is a mistake if the product is good.
A worthy experiment. Thanks for showing your mistakes.
You are welcome man!
How are you preserving the hard wood floor by putting screws everywhere, and isn't it recommended to use a non slip underlay.
We tried to preserve it and now we are not. No underlay was needed when it has one attached.
i would have left hardwood intact also , it would have been homeowners advantage , could have shimmed from crawl space if there was room under , and of course extra labor for more expense for homeowner , good job anyway cheers !
good video Joe I have learned over the years it all about preparation in any job be flooring painting ect
Right on
I am a computer guy and not very handy with home repairs. My wife and I bought our home brand new construction in 2004. So things are in need of being replaced. We have a revolving door of cats, as we rescue homeless kitties and help strays, so our carpets needed to be replaced. My wife talked me into doing our formal living room with luxury vinyl plank flooring. I've pulled up carpet and laid sticky tiles in a small room before so I figured this couldn't be any harder. We pulled the carpet and padding up to revel a few spots where the cats used it as a catbox. It was pretty gross, but we never went in this room so I never noticed it was that bad. But the flooring under the carpet needed to be sanded in a few spots to level it. also to remove some padding that wouldn't come up, I don't know what the builders did. Once we got all the carpet, padding, staples and leveled the floor we started with the planks. It was very easy to do, but figuring out how to start was hard, I didn't want it to be crooked or uneven. Cutting the heat vents was the hardest part.
Then my wife talked me into doing the dining room and the Family room. By the time I did the 3rd room I was an expert. The best advice is to make sure the sub-floor is clean, level and free of staples, nails and such. Then make sure you measure the room and figure out how many rows you need and how much you will have to trim off the bottom row. The planks are laid from top left to bottom right. The next best tip is to make sure there are no gaps in the seams. Get a special tool for tapping the planks together. My first floor had little gaps here and there, but the last room, every plank was tight. Also it is worth paying more for the nicer planks. They have padding on the back and are thicker and more comfortable to walk on. The floors look great and almost anyone can install it.
Thanks for this video
There are tons of videos out there on how to install a floor, but not very many on how to correct mistakes !!
Thank you!
i just did a full remodel in my bathroom full tiled shower vinyl flooring etc well it was my first time doing any of this kind of work and everything turned out wonderful except the grout job on the tile i didn’t do enough research on it and didn’t watch enough how to videos to get the understanding for it and i made my mix a little too wet and did the washes wrong too much water in the grout and now i have to dig it all out and do a full regrout due to air pockets and pinholes porosity etc sucks but live and learn
Hey brother Joe, you might want to add a screw gun with an extension rod. You can just walk around and put all them screws in really fast
Great video. I have to do this. I can’t believe they are covering up/destroy hardwood floors
You can do it!
Once I nailed a squeaky floor for a customer. Had it solid and quiet. Installed Armstrong laminate. The next day the idiot customer found one squeak. I wasn't there but my worker uninstalled the floor and renailed it again. I was madder than all getout on the inside. I told the idiot customer that Joan Jett and the Rolling Stones was responsible for me not hearing the squeak. I hated being in the floor biz and appreciate those who slave in other people's homes. I retired 15 years ago and still have nightmeres about that stuff. God speed to those who do floors for a living.
Thanks for sharing man!
Normally we Brad nail it and we use tar paper even if the floor has underlayment attached to it. A pretty floor like that we probably would have used it like a brown paper.
I have seen and used a similar product it is pretty much a floating floor so acts like a laminate floor.. so you need to allow expansion and don’t build kitchen units etc on top .. also consider what you are overlaying as products can sweat and expand ..
Um no it is much more expensive around here maybe if you refinished it yourself.
Too bad you had to put screws in that hardwood flooring. I love the look of the new flooring, but that original hardwood is a reminder of past craftsmanship that most homes don't have any more. Yes, it looks like "Grandma's house", but the new look is for today. You have a craftsmanship that most installers won't share with the DIY crowd. The store the product is purchased from probably won't have any answers like a pro like you! Thanks for the video!
Thanks Mike!!
Thanks for the video, insight, and tips...
I would like drawing animal marks different animals on the plank and on where it goes just because they're making you take it back up
Thank you for this video and advice!
i love your channel thank you
I really need to start over on the floor in my daughter’s bedroom. My issue is husband doesn’t want to move the furniture out of the room for me. And this hinders what I can do. He doesn’t want to help with laying the plank down so I’m all by myself on this
I’m afraid to scratch up the vinyl by moving the bed and dressers around too much.
the floor under looks better.
Please explain to me why ur covering real oak floors with fake crap?
rework sucks, but it could be the only right thing to do
My plank flooring wouldn’t go back together. Had to rip up for a plumbing job. It also wasn’t flimsy like this one.
At the beginning of this video you show silicone being applied next to a tub using tape to help make a clean look. Please provide me with a link to a video that shows this technique.
Thanks
Always better to fix an error now than later when the jobs over.
Great video! Question: We had Dura Quantum 7.0 installed and the specs say it is a Vallinge fold down system. Will this be easy or difficult to remove and put back together? Worried about compromising all the joints to save 3 joints. We have 2 joints that are in a dip and one joint I can feel a ridge under. I like the way your video embraces “everyone makes mistakes” while at the same time recognizing that this is a long term investment.
Good tips and a lesson learned thanks
You bet
Hi Joe, man am I in a bind! A year ago I installed LVP. Living room, kitchen, dining room and hallways had tile. So I floated LVP with attached padding over it. No issues here but Bedrooms had carpet and padding. After removal of carpet and padding there was roughly a 3/8 inch height difference between existing tile and original concrete subfloor. 😬.
I suggested to client from the beginning, self leveling compound to make up for the gap difference. Client disagreed and asked that I use plywood instead. I advised against it but proceeded with install. Plywood was installed using proper bonding adhesive.
Within 4 months I get a call about issues (plywood bubbled) because of expansion which I mentioned to client the risk of this happening. I removed and reinstalled correcting the affected areas of bubbling plywood. Before correcting affected areas I once again advised against plywood. Yet again client chose plywood.
Now once again I got that call😳 same problem is occurring. Client now wants me to tear out plywood and go with self leveling compound to correct issue.
Any suggestions? Please respond 🙏
Okay so just so I know that we're on the same page are you saying that this is a concrete floor a concrete slab I mean.
If you installed plywood over a concrete slab...
Using just “adhesive” would be your issue. I’m going to take a guess and say you installed 3/8 sheathing and the adhesive you used is PL400 applied from a large caulking gun?..
Plywood is not flat, it’s usually severely cupped in the center.
Also, plywood in direct contact with concrete will wick moisture from the concrete slab. This can lead to swelling at the joints, and also wood rot(if the slab has a high moisture content).
You would have needed to apply a roll on moisture barrier first. Also, recommend to use a combination of Ramset powder actuated nails and PL400 for installing, or drill and plug TAPCON screws + PL400 for the installation of plywood.
You should have never put plywood over a concrete floor always will have issues. Unless the customer was a opposed to a transitions at the doorways that would have been the best option and least expensive. By the time you would have laid the floor in that room and installed the mpr the height difference would have not been very noticeable or even that bog of a step up or down as you would think.
Well I couldn't afford to buy 18 boxes at once. Seeing that they were a stock item I figured I could get 9 now and the rest later. Wrong! They discontinued my item! Then they brought the item back but they changed the color of the exact item. So I now bought 18 boxes and will be doing it all over again. I will be using what I remove someplace else.
Joe, please know you rock my brain
Hope that is a good thing!
Lumber is ridiculous right now by me it’s 8 almost 9$ for 1 2x4
Terrible
So that’s how you don’t do that. Lol shit happens. I appreciate your videos keep up the good work!
I've been watching your videos because my husband and I are going to attempt installing floors for the first time. I'm a little scared because he wants to lay new laminate over old. After watching this video would you suggest we screw the old laminate down to the sub floor like you did here to avoid dips in the floor? Or should we use a level to make sure the old floor is even before we lay the new floor to avoid any issues we can't see. Thank you for all the tips!
I hate that crap. It’s like walking on plastic. Sand down and refinish the original oak floor. Probably a lot cheaper.
Screws on wood floor hard to watch. But I’m also tempted to put vinyl over wood. Because tenants.
Thank you I really enjoyed your videos I’m considering putting vinyl flooring in my home and a friend recommended for me to put Brad nails to hold the planks down I’ve watched a ton of videos and nobody does this, is this something you recommend
very helpful. thanks 🙏
Very good video here
Had to do tear one up about 12 years ago half way thru the installation was stair stepping didn't look right after redo was correct. Love your vids
Thanks for sharing
Why in the world. Would they cover a hard wood floor
Thank you!!!
Now do after you already nailed in the baseboards lol!
Thank you for the video. Which state are you in? I wish in mine! I need someone who knows what he is doing!