How To Open and Remove Sealant from Headlights | Permaseal | FlyRyde

HTML-код
- Опубликовано: 10 сен 2024
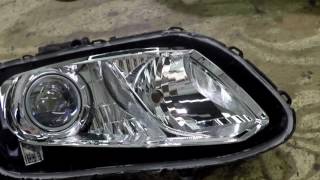
- How To Open and Remove Sealant from Dodge Charger Headlights with Permaseal.
www.lightingco...
Sign up for FREE access to new Headlight Open and reseal video course. Watch the 1+ Hour full video of this Dodge Charger Light build, as well as new sections covering different types of Permaseal, and multiple techniques to open lights like Heat Gun, Oven, Dremel, and Ultra Sonic Cutting.
Join the Community on Discord
/ discord
Tune in and follow the Stream Live DAILY at / flyrydechris
▀▄▀▄▀▄▀▄▀▄▀▄▀▄▀▄▀▄▀▄▀▄▀▄▀
What's up, I'm Chris! Stoked to have you on this video, and here's a bunch of things you can do next if you'd like to know more!
►If you're JUST GETTING STARTED... check out these videos:
Opening Headlights
• How To Customize your ...
Angel Eyes
• How to Install Angel E...
Demon Eyes
• How To Install Demon E...
Sequential LEDs
• How To Build Custom Se...
►DON'T Do these 5 Thinks:
• 5 Things You Should NO...
►How to help me GO FULL TIME!
• 2019 - I'm going ALL I...
►Want to work with me?
I can't take on much, but watch this video and read though my contract (which you're free to use for your customers too, btw):
flyryde.com/pa...
★FlyRyde Merch
teespring.com/...
★Discounts from Brands for FlyRyde Fam!
flyryde.com/pa...
● Amazon Links
- Amazon Prime 30-day free trial: amzn.to/2JhTYHR
Materials & Supplies:
-RetroRubber Headlight Sealant: amzn.to/2xs0SVm
-Chrome Stripping Degreaser: amzn.to/30f4mXN
-Heat Shrink Tubing: amzn.to/2Xn2bnR
-30 Pin Ribbon Cable: amzn.to/2LyoW10
-30 Pin Header: amzn.to/2xqnMfH
-Q Bond Headlight Repair: amzn.to/2Xg0Fil
-Weld-On Acrylic Glue: amzn.to/2Lzp8Nq
-Potting Epoxy: amzn.to/301bMNS
Tools:
-BEST Right Angle Impact Driver: amzn.to/2ROrvwT
-M12 Drill set: amzn.to/2ZZIVK2
-Heat Gun: amzn.to/2NtMAhL
-Soldering Iron (on the go): amzn.to/2Lwm4li
-Soldering Station: amzn.to/2LwxJR9
-Wire Strippers: amzn.to/2LyosIe
-Dremel: amzn.to/2Lwgi33
-Dremel Flex Shaft: amzn.to/2LtTmkS
-Dremel Plastic Cutting Blade: amzn.to/2XnOAbe
Parts:
-4 Channel Remote Control: amzn.to/2XhOrpx
www.amazon.com...
(I will receive an affiliate commission for orders made directly after visiting my Amazon Influencer Page)
ⓢⓤⓑⓢⓒⓡⓘⓑⓔ
www.youtube.co...
Call us: (909) 684-5044
Website: www.FlyRyde.com
▀▄▀▄▀▄▀▄▀▄▀▄▀▄▀▄▀▄▀▄▀▄▀▄▀
FOLLOW US ON SOCIAL MEDIA
IG: / flyryde
FB: / flyryde
Twitter: / flyryde


Go to Lowe's and pick up some flooring shims. Usually in the hardwood flooring supply dept. They are little plastic wedges that will keep parts of the housing separated as you go along. The shape will allow you to adjust how far open the cover is as you move along. 👍
E30 M3 hell yeah, I’ll do that!
Nicely done. Good balance of talk and demonstration of technique.
Blade's Toy Shop thanks bro, it felt like a live stream where I’m concentrating and hardly talking lol.
Yo thank you so much!! I’m getting ready to tackle my first headlight build on $1200 a piece headlights. This has surely helped me out. I’ll be watching all your videos now!
THANK YOU!!! I’m currently in the process of doing a set of 2013 ram projectors right now and I HATE this stuff, this video helped me a lot and definitely gave me better ideas on re-sealing after I paint them. Would totally love to see more videos like this.
Awesome did you sign up for the full video yet?
Yes I have!
ToxicHipHop306 did you get your ram lights done, love to see what you came up with, not many rams out there with custom light builds out there. I just finished mine a few weeks ago.
Triple_Threat_Mopars I’m not quite finished but I’ll let you know when I am!
That was really useful, way more than the quick videos that make this stuff look easy
Yah omg F that stuff! I recently did an 09 Jaguar XF and after only baking at 250° for 7-10 minutes I put those bastards back in at 20 minutes. And then it became...more manageable... still what a pain in the ass and I had to wear semi thick gloves and just pry at certain parts with a flat head. It even broke my plastic pry tools which I was pissed at. Not to mention one of the biggest headlights I've ever seen my Mom and my Dad both freaked when I came by asking to use their ovens 😂 Had to demonstrate that on top of a 1x4 it wouldn't rest on the oven and no parts inside will touch either. But I had like maybe half an inch on both sides from touching. Nightmare retrofit!!! Thanks for all you do you're the man and an inspiration
From what I've read, I'm gonna be dealing with permaseal on a 2013 jetta in the near future. I can't thank you enough for this video, I've been really nervous about starting this project.
William Sporleder honestly, I haven’t made the euro permaseal video yet. That might fall under the category of cutting 😣
@@flyryde crap, they make different levels of permaseal? I suppose that's probably why I've only found one guy throughout multiple forums that has attempted this. In that case, I can't wait for the cutting video so I can start piecing these together!
@@williamsporleder4321I have the same job on 2013 vw, did you succeed to undo it with the permaseal?
tip: For the new guys/weekend warrior, until you get he hang of it i would start from bottom of headlights fellas. Chances are you'll either expand the channels or some type of imperfection/damage. Errors will not appear when headlights are mounted to vehicle. good luck
I swear everyone else I’ve seen do these had a much easier time than I did. I 100% agree you should start on bottom where you can’t see it later if something gnarly happens.
Those look like E39 head lights in your icon photo, have you opened permasealed e39 head lights?
Didn’t realize the grand am was also permasealed until last night. Definitely took a long time and several oven bakes to get it open. My hands still hurt lol 😅
What pliers to you use at minute 5:50? Thanks
Makes all the other hatchet jobs look as ill-conceived as they are, great job of what looks a difficult gig, thanks.
Thank you this was awesome for me ....I have the same lights and needed to see this!
Kevin Kherkher awesome dude! Did you sign up for the full video course yet?
Hi. I try to follow your video for my Audi A6 C7. But i failed today. Main reason was i use heat gun, but sealant is not detaching...even back housing was melt, but sealant was not..i put WD40, Brake cleaner, Vinegar, sealant remover, but failed..
Can you please advise me how easily detach the lense?
Man, I love that shit. It really gets down and technical On showing you what to do and what not to do. Shit there was a couple of times i was rootin for you to conquer that light. Then all of a sudden bam, it was done. Great job.
Not too stoked to do more of these Chargers lol 😅
Thank you for sharing, will be doing some headlights for my atv and my truck soon, going to be on your website to get everything
Dirty South Off Road sweet! Glad to help 👊
I use a heat gun and small pry bar and only takes me about 10-15 minutes....next time I open one I'll make a how to video
Thanks for your good video, but also need you tell me what are tools are you using it?
Thank you for this vlog! Got the lamp open. After 20 mins I was thinking it wasn’t butyl sealed. Now I have to start the second headlight…. 🤣
Nice work and thank you for responding to so many comments with questions!
Thank you Mr Flyride.
I can't thank you enough!
Love your work and I need all the help that you give through your videos. I'm dissatisfied with current aftermarket headlight offerings and I know that with your instructions I can build much better looking headlights.
I want to mold new black inner panels for the lights. Suggestions?
After watching you I know that it can be done.
Jonny Ringo , Syracuse NY, btw.
It's more like a softish brittle plastic than rubber or sealant. Think this was the stuff holding my third tail light (brake light) together on my CTS that is known for leaking and causing problems with the electronics inside. It was Hor-e-blay! to get apart to replace with LED's and reseal to get it working again.
This was definitely valuable. It made me wonder if the Dodge Ram truck lights I guided a friend through for his first retrofit, would have been as easy as you made this look, or if it wouldn't have mattered. I say this because what I now know for sure was permaseal in his spare lights we used, his lights got so torn up in the channel (mostly his work), and the sealant seamed WAY crustier, even with high heat being applied with my heat gun.
GTpro yeah man, even the first light took me 3 times as long, because I didn’t have my temps and times right.
Some permaseal is NO WAY this easy. I’ve seen one video where the dude just simply peaks it all out in one chunk, as though that’s a realistic expectation, lmao 🤦♂️
Some is way harder than this for sure.
@@flyryde What cooking temps and times would you recommend for working with permaseal headlights?
GTpro 250°F for 13 mins is what he told someone else
GTpro 220-225 10 minutes intervals no more than 15 minutes, Mopar permaseals it’s been all I’ve done for all them. I just finished my own personal ram Rebel a few weeks ago.
FlyRyde they are all not the same in terms on cleaning the channels, like said that one sude picked it out in a chunk and that’s not what happened to the ones you did, it’s like each custom build that are all different none are the same they all unique, I’ve had easy ones with just one time in the oven and 💨 they open up quick n easy others takes me 30 minutes each to get them done.
Well i was trying to open headlight for ford focus and it has more stornger permaseal than this one and i coudnt open it with any special tools... only cut..
Great stuff! Please re-post the link to your Lighting Course, b/c the posted link it broke. Thanx!
Hey so I’m working with permaseal removal for the first time and my issue is it didn’t stick to the channel but to the lens edge. It does not want to come off so I’ve been scraping/shaving it away with a razor but I can’t seem to get it all. Will this cause an issue when resealing with butyl?
Bro doing god's work thank so much 🙏🏻
Couldn’t have asked for a better video! Awesome job. Have you done any 2019+ F-250 headlights? I’m fixing to tackle that and have heard they’re not easy.
I would definitely like to show you my technique of how to open these headlights. Should take about 1-2 minutes. Removing the permaseal afterwards is pretty easy as well now that I've gotten a good rhythm.
can you explain how you do it?
I’ve heard of some pretty cool ways to use pressurized air, but removing Permaseal quickly! That one I gotta see to believe 🧐
Is it easy to open a headlight thats sealed with the type of silicone used for bathtubs got a client's headlights i need to do
Bro after installing bi led projector lens we have to close headlight cover or not ? If we close it will burn out or not? There’s no space for passing cooling fans air
what’s that tool called when you were opening the headlights
Maybe I missed it, but what temp do you cook them at, and for how long.
In the beginning of the video, you mentioned something about an oven. If you put these headlight fixtures in the oven, at what temperature and how long? If not, heatgun it is.
Currenly working on a '11 BMW X5, E70. Watched almost all the videos on it, but none mentioned the clear lens is attached to the inner plastic shield, which I ended up breaking the cheap plastic tabs where the screws were attached. Superglue'd em back on. Now I've gotta figure out a way to clean off the rest of the black silicone from the housing in order to create a smoother surface for the new adhesive. Suggestions? Thanks
Literally blood sweat and tears. It’s the worst 😣
I have a bmw 428i grand coupe and I’m struggling atm. Is it just easier to cut them and buy new lense covers
What tool did you use to separate the lens?
I liked it and thought it was very useful info!! Thanks Chris!
Darren Ottman my man!!! I made this for you. I’m sending you a bunch of goodies and some swag next week 👌🙏
@@flyryde Awesome man!! I cant wait! It was a great video and will help me tons! I'm working on getting me a set of those gloves too so I don't end up ripping my thumb off either.
I want to modify my headlights for my 1999 Lincoln Towncar, they have a design that is similar to the mercury Grand Marquis and Mercury Marauder...Basically I want to retrofit projectors with switchback halo's and demon eyes, paint the outer chrome bezel flat black and possibly update the fake "projector" driving light with a real set I got from a Jetta...
Problem is, After looking at my old broken set to figure out how to open em...I don't know how to open these.
Ever done these lights before? and if so, how did you open them?
Has anyone ever replaced a headlight glass on a Scania Next Gen truck?
Got a 2020 f250 permaseal should I just cut and plastic weld ??
thanks for the tips
Hey Chris, can you make a video on how to make Quad Projector, I’m trying to make a quad projector for my Evo X and trying to get some ideas on how to achieve it.
My best advice for true quads, is to go with the halogen lights, and retro 4 easy to mount MH1 projectors. Doing a faux quad on the SSS lights is hard as hell, and it doesn’t even work. It also looks kinda stupid on the car in person lol.
Can you give some advice if we botch the channel at all or disfigure it a little
I could give you some in depth instructions if you really want to do it. I use bolt kits and a retrofit tool and hole saws to dead center the projectors. Dont use any of that putty epoxy unless you have to. The goal is dead center and to retain stock adjustment ability when I do retrofits by only mounting to the reflector bowls... NOT the housing or back of housing. Make the hole in the back of the housing bigger if you have to. You want that adjustability, its nice. There's lots of tricks and special parts and things that make the job a lot easier. LMK if you need any more advice
Hey buddy. Where can I find that plier? Thanks
changchung amzn.to/2M4PC8l 👍
FlyRyde I use the other kind similar to the retainer remover tool and it has work well in the past but yes Mopar permaseal sucks it’s the only thing that always makes everyone turn around and never mod their lights but like you called us Mopar man for doing these builds lol 😆 there ain’t that many Mopar man out there and that’s why ☝️ like you showed everyone. Do I love that seal nope never will, but I do love mopars 😉 and been opening these up quicker every time.
I watched it all thanks....will be so useful if I have some permasealed lights
Hey Chris,
Do you have any experience doing the 2011-2016 Ford Super Duty (F-250) housings? If so how do they compare to this and do you have any other tips or tricks with them?
I'm getting ready to do my retrofit pretty quick here.
Any advice of how to remove this projector ?? I was afraid to break it so I dint try to
Do you know if the headlights on a 2010 are permasealed?
I currently have 16 hours on a set of f10 headlights trying to remove the old seal from the housing...
What time and temp did you use to cook the permaseal? Bc I'm either not getting hot enough or long enough bc all I get is shreds and at max ⅛ inch pieces
I’m trying to figure out how to get permasealed. E39 head lights to come off .
I'm big MOPAR but some things make no sense. Like, why do I have to take off my whole front to remove the goddamn light assembly?
love the video man
Hi I need to open mine I ordered a heat gun to make it a little easier to open. Thanks
Hey man, i ve been trying to figure out how to open my e90 headlights. The previous owner sealed them with black silicone, its high temp resistant. How do i do that?
Silicone will be much easier to open than permaseal. Just get a something in between the lense and lip and run it along like a 90° pick or a utility knife. Use a screwdriver to pry a start point... Start on the BOTTOM of the headlights so you wont see it if theres a little vit of damage or imperfection.
Looks very hard but it was great seeing how you do it.
Wish I had seen this before opening mine! This stuff is a nightmare. Never again.
Jake Owens how long did it take you?
FlyRyde on and off about 5 hours start to finish.
Jake Owens ouch. I would of had them put back together by then lol 😆 but that’s only cuz I’ve done over 10+ of Mopar permaseals. They are not easy to work with if they are your first for sure.
Excellent video
😂😂😂😂😂you always do what you do best a good work
Moses Matagia thank you, I hope this video helps.
great details
I love your Video Bro!
I also do headlights for hobby though and i hate permaseal! Thanks for the video!
I've always used butter knives to open my headlights.
Junk TV I once saw my best friend slip with a plastic butter nice (making food), slice his thumb, and watched blood spray into the air, lol 🤦♂️🤣 I’m scarred for life
@@flyryde played that game.
Thanks for posting Chris!! I hate that stuff. Its like black plague. I always end up stabbing myself with whatever tool I'm trying to use to get the two halves to separate.. on my last headlight, i just cut the outside of the channel off, and then pried the lens away from the inner part of the channel/devil glue. Its effective, but intensive, as I had to epoxy the outer channel back in place afterwards..
Jonathan Sandiford you’re smart dude. That’s the method I recommend on anything harder than this kinda of permaseal. Corvette’s, Mustangs, Chargers, Challengers, etc can be pried and resealed like this, but most exotics and euro I’m not even remotely interested in prying.
FlyRyde 🤔 I’m interested in seeing you do a c7 headlights 😆 I’ve done a pair a few months back, they were fun 😒 NOT! lol 😆
did you applied amy heat on the headlight sealing ????
I went in when it was too hot and now that shit is everywhere. Any recommendations on what I should do now?
hi, Chris use wd 40 as I once wrote while chatting
:)
Light Service Radom I guess my biggest issue with that is when resealing, now there’s a layer, however thin, of grease that I have to make sure I get 100% out before resealing, if I want the butyl to be able to really grab onto the channel. How have you handled clean up?
w którym momencie używasz WD40?
Gotta question did you, so what did They use in 2001? Lol I’m trying to take apart gauge cluster glass and it seems like melted fucking plastic to a heat Gunn doesn’t seem like it does shirt👌
The video was absolutely valuable, but you need to find a better place to mount the camera. Maybe a head mount or chestie? Although you have great looking elbows and wrists, the camera kept focusing on them or they were in the way of the action. But thanks man, great content, keep it coming.
It is what it is bro. Glad you got some value out of it 👊
Hey Chris! Noticed your green tool there is part of a set of special headlight tools. Theres like 3 or 4 different sets of different type of headlight tools with the green handles. Some handles are shaped for more torque and pulling. Have you tried them all? Is the screwdriver shape the best in uour oppinion? Is it worth buying all the others?
Thanks man!
Keith Poley I used them to open up some Lamborghini Gallardo headlights. I honestly would just cut open any light that would otherwise require you to use that tool set. It’s very very easy to make one wrong move, and the leverage they have against the headlight lens is incredibly easy to cause a crack or break 😣
FlyRyde I agree and don’t use them and have not bought them other than a tool very similar to the Stanley Lock Ring Pliers you use on the video that’s the primary tool I use when I open headlights.
Man i just been cutting permaseal stuff open. Its not difficult and with some care you hardly notice. Especially tail lights... All them things gotta be cut.
Keith Poley I started doing the cutting method that diode dynamics and oracle shows on their videos a long time ago when I started, I didn’t like that method at all, was not a fan of how they look when putting them back together, only did a couple of them like that and then was able to get the oven method as a skill under my belt and been using that method ever since I successfully did the first set.
@@triple_threat_lightz its deffinately an art. Each headlight has a specific starting point. The hardest permaseals ive EVER had to open were for a 2005 BMW E65.... My god... Never again.
What will you use to Resell it
Can you change the seal one's you remove the old one?
Here you go: ruclips.net/video/uTuPq7izhPQ/видео.html
Butyl headlights are cake.
Heat them up to 230°F and hulk rip them apart 😂
Bad ass bro thanks for this
What about a 2014 charger ?
More videos please. Awesome
Useless video. How did you heat them and for how long? Video didn't show anything helpful.
Did you open without heating?
What year Charger was this ?? I opened up a 2020 in less than 5 min 🛸 I have a video on it I can show you Chris . Pretty sure there was no permaseal !!
Thanks for share again
changchung of course bro, thanks for watching
@@flyryde I share your video to a lot of Facebook's page retrofitting related
I would like more information on the Permaseal product. Do you know who makes it? What about an exact part number they are using? Your video really gives little information on heating. Like how hot. Should it be allowed to soak at the temperature? should the heat just be concentrated like when using the heat gun or more all around like i an oven?
Michael Meisman Permaseal Product? Not sure I follow my friend? Temps and times vary by manufacturer. Manufacturers vary by make and model. I could tell you 250F for 13 minutes like I did, but that may be more or less than your exact need.
@@flyryde OK so if I understand you here each headlamp manufacturer has their own "permaseal". Meaning that "permaseal" is not a name brand?? I did not hear in the video you say 13 minutes at 250F, sorry about that. Is 200 hundred a good area to start for initial heating or have you found 250 to be the starting point? Then using the heat gun to spot heat as needed when removing. Mnay years ago with MB, BMW, and Audi I would heat the lighting elements to 250then soak for 30 minutes and they would come apart like butter. But this was with glass lenses and the sealant was gray. Thank you very much for your time and information. I am just getting back into doing headlight remodeling after not doing it since about 2003.
Michael Meisman on Mopar permaseals its 220-225 10 minutes intervals no more than 15 minutes. There’s different kinds of permaseals levels from what I’ve read but that’s the temp numbers and times for all mopars lights.
How do you know what headlights got what
pj casas sounds like a great topic for a new video 🤔
FlyRyde google it lol 😂 jk
Lots of research on forums I do if it’s my first set on a specific vehicle, it’s what I do.
Oh boy
Keith Poley what? 🤔
@@triple_threat_lightz i swear the hardest part about this job is having to give everyone crash courses all the time.
Hey Chris, nicely done! How long do the lights need to be in the oven for?
1.5 hours
@@TRICKYBYRD 😂
Love your videos. Btw have you ever done q50 headlights? Looked on your playlist didnt find one.
bmtkid00 I have, and we filmed a bit of video about it years ago, but never really got to use it. I’m gonna do a crazy setup soon though 👍
@@flyryde awesome thanks. Keep up the good work👌
Can you make a video how to open permaseal fog lights
Let me guess - Spyder headlights? Doing my Ram trucks aftermarket lights.
Nope, just stocks on this video.
@@flyryde must be a new recipe - my 300c headlights came apart like a dream. Anyway, thanks for the help.
Good one this. Taa
For me it only tears every 1/4inch…
Hey bro I was wondering if you could customize my Nissan 370Z headlights for me if so please let me know asap
I do Z headlights! Got a vid up of some I just made a couple days ago.
Hey man, nice video, could you do video about BMW E60 headlights? Those are almost near to impossible. Here the sealing looks too easy to get rid of, unfortunately on E60 not so easy. I bought one headlight for testing and I had to throw it to the trash (I managed to get the headlight PVC cover off, but the permaseal was so damn hard to get rid off, that I completely fuc*ed the housing) :D
Keep up great work! Defiantly not your first time. BTW, how much is a lot? :)
Depends on how much you think your time and frustration is worth
You just got a sub. You may have heard something about how godawful HIR2 based headlights are, so i might try and work something out for my girlfriend, maybe some H1 bixenon projectors with a halogen for the meantime, as LED/HID is very illegal here and can get you in jail if you get in a crash at night and the other party tries to claim they were dazzled. H1 bi xenon with halogen is easily twice as bright with 3x the spread than HIR2, i don't get how a new car (Yaris Hybrid) came with that out of a factory in 2014, but it did from '14 to '20 i believe.
I liked it. If you have a permasealed housing, do you permaseal it again after the customization or do you go to butylene for the new seal? I need a plyers like what you have. I think it might save my hand strength or make it worse....
Havoc7991s DEFINITELY rubber butyl after you get all that crap out. The #1 reason for me, is that it’s ready to wash the car immediately after resealing and remounting the lights. No waiting for sealant to cure, PLUS it’s easy to heat them up and quick gain access again. I’ll have a follow up video to this soon showing exactly that.
FlyRyde 👏🏼 yup same here butyl is a lot faster. That’s what I do same thing with these permaseals lights 👍🏼
I dosed off after 5min.......LOL....then woke up with the lens already off.....LOL.....
idk but european cars has this permaseal strong as fk.. even after heating u rather destroy glass and back than open it. there r some chemicals to use but i wont try it.
I know it honestly sucks sometimes and is t worth the effort.
You're a star man.
Yeah it's boring
Yeah it is so Not Cool
Yeah it sucks
But thanks for showing us all what none of us have had the time to do