Full Color Engraving Stainless Steel With a Hobby Laser Cutter

HTML-код
- Опубликовано: 30 июл 2024
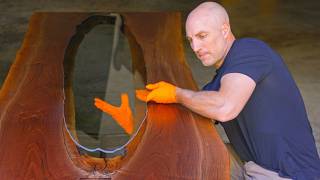
- This video documents some of my experiments of colour marking stainless steel using a 40w diode laser sent to me by Creality.
I think that I got some really unique and interesting results, looking forward to applying this to some of my other projects in the future.
If you are interested in purchasing the laser I used in this video you can do it through these links:
US store:
s.zbanx.com/r/BYuqW0LfOXPN
Use code discount code FALCON for $150 off.
(purchasing through this link will give me a small kickback)
UK store:
store.creality.com/uk/product...
Use discount code FN1106D for £100 off.
Please consider supporting me on Patreon for early access to videos and to help keep quality content like this coming: www.patreon.com/TheArtOfWeapo...
Check out my instagram for more updates: / theartofweapons
Timestamps:
00:00 Intro
01:23 Laser Cutter
02:32 Material tests
03:15 Geometric design
07:34 Gradient tests
10:03 Topographic contour design
14:16 Future work
15:10 More laser info  Хобби
Хобби


Hi everyone, I hope that you enjoyed the video :)
I think that I got some nice and unique results and am looking forward to applying this engraving style to some of my other projects in the future.
Let me know how you enjoyed this style of video as it is a bit different to my usual content.
If you are interested in purchasing the laser I used in this video you can do it through these links:
US store:
s.zbanx.com/r/BYuqW0LfOXPN
Use code discount code FALCON for $150 off.
(purchasing through this link will give me a small kickback)
UK store:
store.creality.com/uk/products/falcon2-40w-laser-engraver-cutter?aid=zbyt0001
Use discount code FN1106D for £100 off.
Off topic question - Do you happen to know what type of steel was used in carpenter's hammers decades ago as most new hammers use a lesser steel? As well as Bastard files? I am looking for a very hard steel that is not brittle, although the Bastard file steel is likely brittle. Over many decades I have noticed that the old hammer steel is very hard/strong and resists rusting to a good degree. Thanks
I've been trying to figure out green sand molding for metal casting & got a link to your slingshot casting video from almost 10y ago. It was so well done skilled up to this video and was not disappointed to find your subject material has advanced exponentially. Well done and keep up the fascinating content!
It may be a good idea to use a slab of metal (aluminium, copper or something else) beneath the sheet of metal to wick away the heat generated. The laser itself only interacts with the surface so it should not cause a problem and the metal wont be warped.
Issue is that laser only interacts with surface, if it heated the whole thickness evenly there would be no curling up.
So heatsink wont hwlp sadly.
(Ofc. if it would have heated the whole thickness the same way, there would be no oxude layer forming like we see to begin with)
Farout man I remember watching your homemade slingshot videos 10 years ago. Glad to see your still making content
What an interesting video again ! Love your curiosity and following the process, trials and errors
Great video and beautiful results! I'm currently creating some colour engraving files for my laser, so it's helpful to see your experiments. Your use of gradients is particularly interesting
Very informative and interesting as always. I think you've answered the warping question yourself: use thicker material (with more expense), more gradual heat application/passes (with more time), or even spread a large design over 4 smaller sheets then combine, either flush (though I guess no matter how well finished there will be a visible line) or wall mount in 4 separate frames with the voids between pieces and frames engineered into the orignal design.
Always glad to see another excellent video from you!
I was just in awe watching your experiments and amused it reminded me bit of very old tin types (early photographs prinyted on tin instead of paper) which my grandparents had. I look forward to seeing future results. Thanx for sharing.
Just a thought, if you welded another sheet with a threaded fitting welded in, on to the back of your warped art sheet.
Checked to make sure the welds have absolutely no voids or leaks.
Then connect a pressure washer to the fitting you might be able to hydroform a slight dome into the art piece.
It would still be warped, but in a more controled form.
If you placed the art side on the inside of the sandwich the finished art sheet would be concave, perhaps add an illusion of depth after it was separated from the backing sheet.
The only other thing would be to cool the back while using the laser.
Or float a layer of liquid nitrogen over the surface while using the laser.
You might want to stand back though.
Something to think about while mulling over an evening adult beverage with friends possible, cheers.
These experiments videos are great. Youre adding to our combined knowledge. If you were able to attach your workpiece to a large heatsink that might help with the warping, a large aluminum slab, myabe brown with some milled in fins. The exhaust fan would be pulling air around it making it more effective.
Thanks! I did have a few of the engravings on a 20mm aluminium plate and unfortunately that did little for the warpage.
Been watching u since u were a kid. Love these vids
Next project: holograms!
(Steven Mould has a video on special holograms that could be made with this laser engraver...)
As for the warping: how about trying to glue it to 20+mm thick steel using thermal glue (like the stuff they use to glue heatsinks to processors). There are such conductive glues that are able to withstand very high temperatures. Not sure about their price, though. But it would make sense since it would instantly transfer the heat into the massive heatsink.
Or maybe there's a way to heat treat without impacting the oxide layers by applying heat to the right places on the backside? (maybe add heat to the places where there is little or no marking on the front side) Or instead of cooling, preheat to a temperature just below the point of discoloration. That way the required added energy would be much less, thus introducing less stress. Also, having it heated will allow stresses to release during a slow cooling cycle.
(just trying to think outside the box here. I used to work with cutting and engraving lasers, but that was a loooong time ago. (1999 iirc) I remember that we cut unrolled objects, and when doing a cone, we had to cut the top and bottom first (so the "ring") and then cut the needed section in 2 separate runs because the metal would set as soon as the ring is cut. I know you can't release the tension of a solid plate by cutting it, but I'm trying to think of something that would work.)
All of these are great ideas, lots I've not thought of thanks! I like the pre-heating idea, I wonder if a 3d printer heated bed on max power would be enough.
@@taow A quick check tells me that a hot bed for PLA would indeed be in the perfect temperature range, because I think you'll be wanting to be around 190°C. (straw yellow appears above 200, but it can appear a little lower as well, so you'd have to rerun all your color calibration testing at various bed temperatures... aaaah, adding another variable squares the number of tests required - kind of)
Good call thinking of that!
I would assume that for a thin sheet of metal, it will deliver enough heat to maintain the temperature throughout the engraving.
Great explanation and awsome didactic material...! Thank you!
I enjoyed this video format... but I have always enjoyed your videos, regardless of format, so maybe I just enjoy your videos! 😜
Thank you.
Great video, love the idea of the Perlin noise field patterns on a laser. Maybe epoxy glue the thin stainless to a 18mm ply board/canvas before the engraving ?Really looking forward to what you do next in your videos!
Thanks for the tip!
Thanks for the videos! If not epoxy some sort of high temp adhesive,I am no expert, only a viewers thought:).@@taow
You can eliminate the random warping by rolling the sheet over a curved surface like a pipe that has a tight enough curvature to permanently bend the steel. Flip it over and repeat, but this time with just enough force to flatten it. It will take some practice, but you should be able to get good enough results that you can glue/clamp it down to a thin piece of wood to make it completely flat.
Thanks I'll give it a try!
This concept has the potential for some STUNNING artwork, but I guess you already figured that out. 🥴
How did I miss that you are uploading again my dude?! So stoked to see you never lost the love of creating!
More to come!
long time subscriber! Very awesome video!
annealing before and after lasing might help with warping 😊
Dear sir,
This is fucking amazing ❤
What you are doing reminds me of "Lightscribe", a now-defunct direct disc labelling technology that burnt text and graphics onto the surface of a CD or DVD using the disc drive laser and a special disc.
Nice one! Would love to see a cnc 3d mountain thats then lazer coloured. Unless lazer tech can only work on flat surfaces ofc
That is a great idea! This laser only works in 2.5D as it is a 2 axis machine, but with the module attached to my CNC router that would be possible (generating g-code might be difficult though).
Maybe try bolting the ss sheet down to the aluminum base plate, then cut off the holes after.
Great video, I remember back when you were doing GCSEs! Definitely going places :)
Amazing results! Maybe engraving a mirrored image on the back side will cancel out the bending.
Ohhhh, this is cool. Time to figure out how to upscale it and "paint" a DeLorean.
You could try to revert the warppage by engraving the same image ( or a mirored one?) on the back.
That method does seem to work in some way, I engraved on both sides of some of the sheets that I was experimenting on and although they didn't come out completely flat, they're much flatter than the single sided ones.
When I first saw the mountain images, I thought you were doing a fractal. I suspect you could bolt the completed mountain image to a flat piece of wood and have a result that can be put on the wall. Maybe those flaps you folded could be drilled and attached with pop rivets to a wood frame to keep it flat.
You can create colors on copper with heat also. I'm not sure if the effect is as permanent as it is with steel.
This video is way underrated
Thanks for sharing
What we do on big cnc lasers to prevent warping is spread the cuts far enough. Heat from single cut have then time to dissipate instead of being focused in one area. I have no idea if it will help on such thin sheet and in this specific application or if you SW can let you do this. Also there should be SW that can simulate heat distributions during cutting (or in you case marking) so that could also help. I just dont know if it can be acquired for free.
Edit: Also, a faster speed for marking the lines will of course reduce the transfer of heat to the sheet. Finding a good marking parameters without compromising on quality is definitely key here.
Cheers that is a great suggestion that I will look into, great to hear what is done in industry
YESSIR ANOTHER TAOW VIDEO
The warping isn't from heat, it's from removing material from a thin plate on one side. Think of curling a ribbon by sliding the edge of a scissor blade along it's length. A thicker plate should warp less. You probably know this from tests with no dark or black lines, less warping. If it was heat, it would warp the other way as metal expands when heated.
Damn I just found your channel again I followed your rambone sling shit tutorial to the tee and I know we gotta be the same age cause I sounded like you back then and I sound like you now 😂
That’s cool
I weld alot and to prevent warpage, we sometimes use a chill block to cool the work. Maybe a back side cooling block to keep the piece cool and wick away the heat buildup?
Worth a shot yeah, I tired with a block of aluminium below but I think I need a better heat connection between the work and the block
Try heating the steel sheet after you're done lasering it to release the stresses causing it to warp.
Awesome video, I didn't know these kinds of machines were available from Creality. BTW you misspelled "radiation".
Haha good spot no one else has noticed the spelling, that sign was generated with dall E 3 which is not great at spelling.
Fascinating work, it suggests all sorts of possibilities. Would it help if you attached the target steel plate to a large finned aluminium heatsink before irradiating? You might have to use some heat conducting paste between them to really see a benefit
Yeah I will give that a go thanks
Wonder if you could control the warping to create a shape somehow. Like only fix the piece in the center and create a ripple shape or smth of that nature
How did you generate your gradient test? I would love to do that on my stainless but cant find something to match that with a scale on the bottom...
Regarding the warping issue... The forces generated by surface distortion of a flat surface are huge, regardless of the cause (impact or heat.)
Clamping the material will never completely fix the problem; the forces are still going to be present after the clamping is removed.
I suggest you show what you have to a high-end auto restorer. Someone who deals with older classic cars would be best because those were more likely to have large expanses of near-flat sheet metal. What you have is well worth pursuing.
Cheers, I agree with the clamping and cooling will never fully fix the problem, those forces are very large and over a big sheet build up a lot
This is very useful, thank you for making such a detailed video. We're currently struggling with some simple 2-colour engraving with the same laser and figuring out a) settings to get the right colours and b) repeatability. For example, having found a decent green, then trying to apply that to a new sheet, the colour shifts substantially. Do you find that it is best to settle on an interval (say 0.05) and then just vary power and speed? I think you implied that you started to run at 40W to get the better beam spread. Did you defocus at all? I have so many questions about the details of this! Love your contour designs!
I wonder if you stuck the sheet in an oven for a while if that might help the metal to relax
Can you laser engrave underwater to prevent warpage? Maybe put some compressed air blowing on the sheet to keep it from warping, or peltier cooling pads underneath it.
Given the palette available using this technique, have you considered a rendering of Hokusai's _Great Wave off Kanagawa_ ?
...if warping is your issue, why not clamp it flat real flat.
Put it into an enclosure that lacks oxygen
(If you are cheapo then barrel with small hole and material more flammable than your metal works fine.)
Then heat it up just under melting point, to remove internal stress.
Since its not a structural part it will be in the "so long as it doesnt melt its fine" category - no need to worry about recrystallisation temperature, and grain structure reforming to a more rough version, which is nice.
Also, in sheets this thin - unlike what rest of comments seem to suggest - you are unlikely to be able to avoid warping.
The gradient in thermal expansion will be large enough that it causes plastic deformation due to "pulling strong enough". As a ballpark estimate, check what temps you form a given oxide color, look up thermal exapnsion coefficient to see what % it elongates, and check it against youngs modulus to see what stress you are dealing with. It will be above the yield strength of your material. The warp is basically the result of the remaining thermal expansion where the dimensional change is not enough to cause the material to yield anymore.
And even if you start using thicker slabs, the top layer will still retain a similar internall stress within it. Which can lead to a lot of "fun" if you try machining it without annealing (?) it beforehand.
(Pardon for shitty terminology, english isnt exactly my native language, or language in which i get my education)
What about having a cold copper heat exchanged slab or can you use CO2 cooling after the head passes.
This has an immediate application for me!
So, if you do multiple passes on the lines with a lower power and higher speed, can you achieve the same dark lines with less warping?
I've mostly seen this done utilizing a bunch of different layers. Were you able to do this well by using different levels of grayscale/fill? How easy does Lightburn make that?
Need to dump that heat. Maybe some heatsinks. or thin laptop coolers.
So cool.
I wonder if the warping could be fixed by doing a secondary print on the backside.
Maybe a mirrored version of the desing in the front ?
Thanks yeah that is a good suggestion that I will try, on the sheets where I did experiments on both sides I saw the warping even out a little
@@taow I just realised the warping from the front side would be a pain to set it flat for the back side. X )
In any case that sure is an amazing machine.
Further thought... because the curvature is concave, if you attach it to a piece of plywood, cut to fit inside the flanges, would screwing through the flanges into the edge of the ply be strong enough to hold it in shape?
Yeah I think that would work for keeping it roughly flat
vacuum hold down for a rev 2 perhaps?
Yeah worth looking into thanks
k I'm commenting whilst watching, but could you put aluminum heat sinks underneath?
Sadly not linked the test files for lightburn.
I wonder, if the nice frame you made on your last run could me arranged such that, if flipped over, you could repeat the run on the bottom side and destress the material to unwary it.
Unwarp
Certainly running the laser on the back side of a sheet seems to fatten it out somehow, on the experiments where I used both sides for different tests they are a lot flatter than the single sided tests. Thanks
Could you temper the warped sheets by heating them up to a high temp and let them gradually cool back to ambient? Might need to mount them flat first, then do the tempering.
Might do, worried that might change the colours though
Inert atmosphere is your friend.
Depending on university facilities, or how redneck you are willing to be you could use some elaborate oven system filled with inert gas, but the classic double oil barrel as used for "off gridders" to make charcoal at home would also suffice.
and color fades in sun after months, also ss goes rusty in the engraved area after a few months, have many customers complaints
CAN THIS BE DONE WITH A CO2 LASER?
Are the diodes individually replaceable?
I don't think so