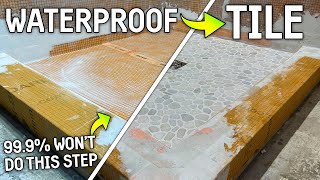
DIY Shower Tile Industry Secrets | Bathrooms 101

HTML-код
- Опубликовано: 22 мар 2019
- #diycrew #hrvdiy #renovision
This video will teach you proven methods for installing tile in your shower even if you have no experience. DIY friendly Instructions
Shower Niche Video Link: • How to Build a Shower ...
CONSIDER SUBSCRIBING!! / homerenovisiondiy
----
MERCH NOW AVAILABLE!!!: homerenovisiondiy.myshopify.com
----
WATCH SOME OF OUR POPULAR VIDEOS NEXT!!
► How to Tile Over Tile
• How To Tile Over Tile
►How to Paint Like a Pro
• DIY How to Paint like ...
►Our Latest Videos
• Jeff's Newest Videos
►Drywall Masterclass Playlist
• What You NEED to Know ...
SHOP WITH US:
►MY RENOVATION MUST-HAVES -
www.amazon.com/shop/homerenov...
► My Affiliates: homerenovisiondiy.com/our-aff...
HomeRenoVisionDIY may earn an affiliate commission if you purchase something through recommended links in this article. #ad #commissionsearned
BECOME A DIY MEMBER NOW!!!
► Get FULL access to me and my team for Q and A’s by exclusive email
► Receive merch discounts dropping SOON!!!
► Participate in monthly LIVE streams for live consulting and Member support!
CLICK HERE!!!
/ @homerenovisiondiy
For instant updates check out the links below and FOLLOW me on social media where you can stay up to date on new episodes and what other nonsense is going on in my life
----
FOLLOW US:
►MY WEBSITE: homerenovisiondiy.com/
► INSTAGRAM: homerenovis...
► FACEBOOK: / homerenovisiondiy
► PINTEREST: / homerenovision
► TWITTER: renodiy?lang=en
Produced by: Home Renovision DIY 2020
Video & Editing Services Provided by:
Subdivision Film LTD.
www.SubdivisionFilms.com
Disclaimer:
Videos produced by Home Renovision are provided for informational purposes only. All material provided within this website is for informational, educational, & entertainment purposes only. Some of these projects, materials, and techniques may not be appropriate for all ages or skill levels. The DIY instructions used here are used to simply breakdown projects to their simplest steps. Please use a clear mind and use all safety precautions while following the tutorials provided by this site. Home Renovision does not make any claims of the safety of the projects, techniques, or resources listed on this site and will not take responsibility of what you do with the information provided by this site. Viewers must be aware by doing projects on their homes they are doing it at their own risk and Home Renovision cannot be held liable if they cause any damage to their homes. With different codes around the world and constantly changing standards, regulations and rules, it is the sole responsibility of the viewer to educate themselves on their local requirements before undertaking any sort of project. That being said Home Renovision cannot claim liability with all applicable laws, rules, codes and regulations for a project. Be safe, have fun renovating and ALWAYS stay informed with your local building code.  Хобби
Хобби


So kind of you & others to put this info out for others. 70+ yr old woman fixing house to sell on limited budget. Helps more than you know. Gives me confidence. Many thanks.
You are awesome aunt m. Cheers to you and all you do. You are inspiring.
How to install a new tub without damaging the walls? Plz plz plz
I have only ever done one tile job - a kitchen backsplash and it turned out great. I did a lot of research first, and one really great tip I found and used was to start from the second row and work upwards after first installing plywood strips for the starting point. You use a laser level to install horizontal strips perfectly level and then you start installing (what will be the second row from the bottom when its all done) sitting on the temporary plywood strips so they aren't going anywhere - no sag possible. Once you reach the top (i let it all dry overnight) you remove the plywood strips and then finish by filling in the bottom row - you can use spacers to easily get them perfect.
I just have to say, your content in this video is so spot on. I’m an interior designer and I specialize in bathroom renovations and tile design. Your method for locating the niche and laying out the tile based on tile size on site is exactly how I design showers for my clients to get a well planned tile design every time. Now if every contractor or tile installer understood this, my job would be easier.
Can we see more videos of walk-in showers? Including the right way to install the pan liner?
This is the ultimate guide on how to layout the tile. The points about the center line, the bottom row and niche placement will surely set you on the right track to the beautiful tile install. I'd add that the flatter you make the wood under the backer boards, the easier all the following steps will be.
You always seem so happy, makes it enjoyable to watch .
Just finished my first tile job. It was a success. I found your channel after sadly, but I can’t stop watching it. Love all the tips. You’ve got a great TV personality that’s easy to watch and your Canadian to boot!
JUST what I needed Jeff...0 Thank you! After removing a 47 y.o. fiberglass shower, I'm getting ready to tile (Redgard done over Wonderboard) our stall shower (32x36) and already put your "How-To Niche" video to use and created my own in-wall Niche! Please keep up the great work, you were obviously born for this! Cheers from the lower 48. :-)
Excellent video with important information. Your son has a great sense of humour.
Thank you so much Jeff, I am a long time diy and lic electrician. You are my go to for all my new projects. Even if I know how to do the job I go to your training videos to get bonus learning tips. Keep up the great work!
I have to thank you so very much for all of the fantastic information you have shared in your videos. Over two years ago I started on a DIY journey, thinking at first of doing some needed shower repairs--only to realize along the way that it was going to take a full gut and renovation of the whole master bathroom. Your easygoing way of teaching, and sharing of tips gave me the confidence needed to persevere and create a bathroom that my extremely patient wife now calls gorgeous! Thank you!!!
Going to be taking on my own bathroom reno, and your videos are a great help. Thank you for your efforts, they are appreciated.
I really appreciate your time you put into your videos. And how you show what differnt tools you can use and how detailed you are
Very helpful. I am at the verge of beginning a tile job of a tub/shower niche along with the half lower wall of the bathroom. I was hesitant to start knowing I needed to keep the tiles from slipping down. Splitting the job on two days makes a lot of sense.
Im going to throw a pre-emptive like on this because I already know its gonna be gold.
Wow, Living Dangerous I see. Cheers Brian!
thank you so much for your incredible videos!! they are lifesavers in so many projects
Man you make that freehand line look easy, great job
Thankx im a contractor too.. i like to see that you show your project's you do , not like lots out there that tell you how but never o its been a long time since they've done it. i like seen and learning different tricks and apply the ones i like ..
Best home improvement channel on RUclips hands down. None of the other ones come close.
Good advice about setting the first row and letting it dry overnight. Great video Jeff.
when doing something for the first time, there is something to be said for completing a task , like the first row, and then walking away. It truly is so easy the next day.
Knowing where to start off is always key. Very informative video.
I think that was my favorite bit of advice. Take all the steps and time planning, get that first row in perfect, let sit, then tackle it the next day with 'ease' since the hardest stuff is all set. I look forward to redoing both my full bath and half bath in about 2 years.
Thanks Matt for pointing out that technique is never get! Great video!
Right on Jeff, good videos ,I always agree with your ideas and tips
This video is so helpful! Thank you you’re the best!
I just LOVE the dynamics between you and your son. Over the past few weeks I have learned so much from you. So much gratitude for the Home RenoVision team!
Jeff, Jeff, Jeff!! So ALL of your videos are Fantastically done & so full of knowledge but, 13:30 mark in this one is great. Tiling the first & level row, allowing it to dry & then coming back to continue off of a level course!!! Mad Knowledge there Bud, Mad Knowledge!!! Until da next one (and I'm a bit behind) hope all is well and Dirty Jersey out!!!
I'm totally OBSESSED with your instructional videos, Jeff, and this one didn't disappoint!
Glad to hear it. Cheers!
Hey, just wanted to say your channel is Awesome! Thanks! I've been binge watching since I found it while searching for info on something (I don't even recall what now).
I "grew up" watching This Old House, but I like your videos more.
Thanks again, and keep up the awesome work! -Atlanta GA
Thanks Demian, Welcome to the DIY CREW. Cheers to Atlanta!
Terrific channel.✅😇. Luv 🥰 It.
I'm "scrubbing" through this tile Reno video in an effort to find the magic number of "CENTER". Yes!
I found it watching you measure the left side of the bath wall..and BTW just a FYI to new viewers, listen to Jeff before you begin the project because he is on target regarding frustration and at times tears from feeling sheer defeat.
I am taking on the walls and the base floor of our walk in shower enclosure. Watching my brothers and many "handy" family members successfully install ceramic tile, Italian Carrara, Greek marble doesn't pass through to a sister as a genetic absolute or ability. This task, or rather, this artistry takes time to learn and master.
I bought a beautiful bevelled PEEL AND STICK GLASS TILE to cover the cultured marble shower surround thinking 3x6 size tile x 4 equaled the narrow 24 inch wide 3/4 to the ceiling was an absolute fit. 👎 I had almost 1/4 hanging from the edge. I bought Glass snippers to remedy the overage but having no experience using them, I only made it look worse.
Ugh. I'll update if successful. Thank you for the video. I'm Wiping my tears away and heading back to work.
Thank you very much, we appreciate that! Cheers!
It’s like your in my basement. Your last video on Drywall tips, was right on time. I’m almost finished with the first mud coat and your tips and tool recommendations worked as demonstrated. I even bought them from your amazon link.
Tile for the walk in shower is next. Excellent tutorial.
Cheers Eric, if you are looking for a good laser......
I payed around $150 for my Dewalt laser and thought it was expensive for what I was getting. I couldn’t have been more wrong. A good laser is an absolute necessity when doing tile, or any remodeling for that matter. Another great video!
I couldn't agree with you more. My laser has saved me hundreds if not thousands of hour on the job sites over the years.
Here Here...Cheers!
A level and marker will cost you $25 dollars if your working on a tight budget
What are u thinking we tile pros did before the laser go figure !
@@erichermann7873 I'm guessing it took a lot longer to get the jobs done or they were of less quality than if you had one.
This is such a great video. Thank you!
Boy oh boy I need you to come to London and remodel my bathroom. You have the patience of Jobe tto achieve great results.
the amount of wisedom thrown at me at about the 3:40 mark concerning viewing things level just completely blew my mind. It's so simple but i've never realized how to me something can look level and perfect due to eye position and somebody else having it different it looks crooked as their perception simply is different. now i wouldn't ever be so simple as to do things on eyesight, but it's still darn good and simple advice.
I get so excited when I see a new video ! Love it! Hope you aren't getting much snow there in Ottawa, my brother in law said he had to go do snow removal :P Winnipeg finally seeing some grass, hopefully the snow is done here.
snow last night gone today for the most part. spring is coming. Yeah!
Hey Jeff, great job once again and im getting ready to tackle my own DIY this weekend. Quick question, how come you only put spacers on top of the tiles and not on the vertical lines spacing them out?
Thank you! This video in particular has been very helpful to me. I have two bathrooms to do, one at the rough framing stage ready for tile, and the other not demolished yet. I've been worrying about the wall tile. We do have a laser level. iNVALUABLE. Showing how to lay out that first row of tile -- starting at the low side and that tubs/showerpans might not be level and how to compensate for them -- and the caution to wait for the next day have saved me a lot of trouble! Oh, and how to use the plastic separators properly. THANK YOU!!
Glad to be of help. I developed this strategy years ago when I used to pay plumbers to install the tub. they always claimed to be level and were always out. Glad to be of help. Cheers!
Your channel has been such a tremendous help in helping remodel my parents bathroom... Pretty much from gut to finishing... I watched your videos.... You should be charging for these informative videos. ;) thanks a million!
We are very happy with the way RUclips has been treating us as a partner. Looking forward to making the switch to full time on you tube soon. Cheers!
Great tips. I would use thinset on the wall too
Jeff I really dig this channel, you and Anna White are the leads in this DIY space. I have a video request, how to install a dryer exhaust port at a distance from the exterior wall. From my searching no one has done a video on this. I have a home that had an addiction put on it. Basically an entire room. It was done to I guess the lowest bidder.. the plumbing for the washer and dryer were not moved so it is at what used to be the side door which is now the middle of the house. The wall is an outside wall, but it’s inside. How can I 1. Add a vent to go through a structure wall or 2. Should I bite the bulletin and re plumb the entire house using a manifold system, shark bites, and plastic tubes to relocate the washer and dryer to an outside wall? Really dig your channel, it’s hard to get genuinely good DIY content with the kind of wisdom you put in your content. There is a lot of knowledge out there it’s wisdom that makes your content better.
Can you do a video when removing a shower tub combo and replacing with a walk in shower.
Great video. Thanks for the detailed instructions. As everything is level and you build up the wall with tile, how do you deal with the ceiling if that turns out to be uneven and not level too? Would you treat that final row of tile in a similar manner to the first row - grinding along to fit and then silicone the top? I can envision this looking ok for long or large tiles, but what about smaller or mosaic tiles? Won’t you notice that there’s more tile on one edge or the other?
you are such a great teacher...liked and subbed!!!!
Thank you!
Hi Jeff, amazing that the tiles lined up to the casing without having to be cut. If it didn't work out like that, there is another trick. You can cut the tile maybe 1/4" beyond the casing line for each row going up. Then rabbet out the casing from behind so the casing overlaps the tile. That way, the tile cuts are completely hidden and a nice thin caulk line will blend the transition...
very true. I usually just cut the tile since I am already set up for that at the moment. But good technique nonetheless. Cheers!
Can you explain more. What does rabbet out the casing mean?
Love this channel. Single parent mum from the U.K.
Thanks Honey Bear! We Love our friends in the U.K. Cheers!
I have yet to do tiling, but I will be in the near future. Excellent explanation on starting the first row properly, and I definitely have to buy a laser level--and probably watch this video a few more times. ;) Thanks so much!
Thank you very much. I have my favorite DIY laser in my tool section listed on my Amazon link if that helps. Cheers!
Home RenoVision DIY is it possible that the link is not working? I tried using it but it didn’t get me to the website
For my bathroom remodel, I've been studying the installation instructions for various acrylic and cast iron shower bases. They all have a tile flange and they all, without exception, tell you to install the base or tub so that the wall board and membrane are INSIDE the flange. They instruct you to build out the studs with furring strips and shims to contact the flange where necessary.
It appears that this tub was installed against the sheetrock instead of against the studs as typically seen.
Wao Jeff when I grow up I just want to be just like you good job brother 🎼🎶🎺👍🌅you the best yep 👍
awesome that we can all learn from each other in this life. Cheers to you my man. Looking forward top some Orlando hospitality one day! Cheers!
Jeff is the Messiah .
Awesome I tiled with my pops and was the cutter also in the beginning. Boy do times change.
we all get a little older and a little slower. Cheers!
Hi Jeff! I love the digi cartoon of you. It's brilliant!! Haha 😂😜
Thanks for the feedback. I will now stay young and slim forever! Cheers!
Thanks brother really appreciate the info
Lovin’ this bathroom project! I wish Jeff lived in LA. I need some tips on reno of mine!
Fire away with the questions, I am here to help. Cheers! And yes I wish I lived in L.A. as well. cheers!
Been watching all of your videos while renovating my upstairs bathroom and wish I had seen this before I installed my shower niches. Your advise for measuring out your tile to place the niche is something I did not account for. Now I'm dreading my tile job which is 3 x 5 subway tile. Any advise? Great channel btw. My basement is next for reno, your videos on basement reno have given me confidence to tackle the job. Thanks and keep up the great videos, they help more than you know.
if you are going to get splinters then I suggest taking the tile back and buying a larger size. it will always look better with larger tile if you have odd cuts. Or you can reinstall the niche. Cheers!
Great tutorial sir 👍 thank you.
Our pleasure entirely. Cheers!
Jeff, do you have any videos of walk in showers, pans liners, etc? I love your teaching style, Thanks you,
Thank you for this. Rather watch Home Renovision than GOT!
The only problem with this is that your starting with fairly accommodating conditions. Would be helpful to see the process and obstacles to overcome in the wrist case scenario.
My wife got me a laser level for Christmas, it has been a huge game changer in helping me renovate our home! Thank you for everything you do Jeff!
Great to hear Samuel, glad you like yours as much as I like mine. Cheers! Did you hear that ladies, an awesome gift and very affordable.
Love your videos. Anyways, I`d love to see a video on how to build a shower without a tub in it, just a regular built in shower on tiles.
Use a ledger board for the first row and you can tile the wall and at the end of the day come back to the first row. Saves a day waiting for tile to set.
I love your videos - the amount of knowledge and confidence you provide to others is unparalleled. I gots to know tho - how the HECK do your knees not explode when working in tubs?!? Mine hurt just watching you...
Jeff. Is that Home Depot MSI 4x16 Classique glazed ceramic Carrara wall tile?
Hi Jeff,
I love your DIY videos; much appreciated! I am tackling my first shower tiling DIY job.
My question is, where do I place my laser level to establish that first row of tile? I am using a shower pan not a tub, and my tiles are 4x7 in dimension.
Thanks in advance for your answer!
Tim
The Best DIY channel PERIOD!
Your videos are so helpful Jeff! I'm always taking notes while watching them. My son will say "where did you learn that from?" I say, "My Canadian friend Jeff on youtube" Lol I will be renovating my bathroom this spring. Do you have a video removing a tub and putting in a walk in shower with the shower floor tiled?
Not as of yet, sorry.
So relaxed and calm while doing your jobs. Is it because of all your experience or are you just a cool and calm type of person. I have neither going for me but im working on it🙂
Jeff, you are without a doubt the best home DIY guy on YT. Thank you for your dedication and efforts. I think it is time for a website upgrade! Need a design? :D
We are looking into that ina few months. We have so much on the go right now we can't even begin to look at it. Cheers!
Watching your videos makes me want to smash out my master bathroom and go crazy custom with it all. Trade you labor for a paint job Haha. Always awesome work you do
We are learning a lot from your videos. Just the right level of detail for our skills. We are interested in using acrylic panels inside our new construction shower. Frogg Wall, for instance. What is your advice?
Great easy to understand . Thank you
Another awesome video Jeff, thank you so much! I couldn't justify spending the money on the dewalt laser, Mastercraft's version came on sale for $50. I can't believe how many things I can use it for, let alone for when I start to tile my shower.
No worries Jason, mastercraft have great tools. I don't know what I would do without mine now.
I just bought that Mastercraft one on sale today as well -- I couldn't justify the $150 Dewalt either at this moment in time. I hope this Mastercraft one will be good for my needs.
Hey Jeff . do you give training for tiling ? Thanks
Hi Jeff. Thanks for ALL your videos...you've been a huge help to my reno. Question for you. I went to Home Hardware and they suggested Denshield Tile Backer instead of green board and Mapei waterproofing. What are your thoughts?Thanks, Jeff from Barrie
I'm loving your channel! Yes, what you described in your video was me (guilty as charged) with the "slivers". But I consider that my learning curve and thanks to you sir my next bathroom will look like a pro did it. I learn great tips from your videos and appreciate the effort you make to inform us.
Have you ever used the Schluter metal tile edging in your projects yet? Would love to see a video of one of your tile jobs using these items. I plan on using this on the outer corner edges for a much cleaner and professional look and could use some tips from you on this if possible please. Thanks for all you do Jeff!
using the schluter trims in my next shower. Cheers!
@@HomeRenoVisionDIY I'll be looking forward to it then! Rung "the bell 🛎" so I'll be sure not to miss it. 👍
Would you recomend just caulking cement board and tub flange like in this video or putting quickest on the tub flange and cement board.
Jeff where are the tiles from and are they expensive? Love your channel !
Do you use a membrane tape on the backer board seams? What kind? Thank you for such a gr3eat video!
Great info!
Great video Jeff. You do a wonderful job teaching someone how to 'think' about the job, visualizing an outcome and working backwards to the starting point. On a related 'thinking topic' Would love to see you build in some 'safety thinking' into the videos.
Seems as if the channel may be aimed at Homeowner DIYers and some of those folks may not be familiar with the concept of Job Hazard Analysis - that is: looking at the task at hand and asking the question -How can I get hurt? and What am I going to do about it?
Again visualizing the outcome first - all digits in perfect working order, no foreign objects in eyes, no grinder wheel tracks up hands and arms, no hearing loss or ringing in ears- in other words finishing the job in the same condition you started it in.
Cutting tile (or anything else for that matter) with a grinder with the guard removed might lead someone to believe that practice is a safe work practice... heck maybe even a mention of the use of a face shield, cut resistant gloves, long sleeve shirt and hearing protection, removal of jewelry that might be caught in rotating equipment and well as containing long hair for the same reason, while operating a grinder with a cutting wheel could be considered for inclusion.
A perfect bathroom tile job is truly a wonderful accomplishment, preforming that task and retaining your hearing, sight, and dexterity is the "cherry on top".
I am a fairly new subscriber to the channel but think you presentation is Outstanding.
safety is in the eye of the beholder. be as safe as you want to be. Cheers!
@@HomeRenoVisionDIY Cheers
Great video, excellent details! what height is good for a 12"x12" shower niche in a shower surround 82" tall? if there are gaps in the hardie board, do i fill the gaps with flexbond before red guard waterproof step? Thank you & awesome job!
You are very talented, sir. If you had a show on HGTV, I'd set DVR to never miss one....
Well we have a show here on RUclips,. every Tuesday and Saturday. Cheers!
@@HomeRenoVisionDIY touche!!!
I take it part is coming tomorrow? Man crazy this video popped up in my alerts and I’ve never seen the channel or subscribed but my phone must be spying on me. I’m in the exact stage and with the exact same tile. Same brand. So was trying to figure out that offset off level and poof you helped big time. Look forward to checking out other videos soon. Thanks! Ps nice taste in tile
Hi Bryan, we have another howm to video on Tuesday and then the project reveal is on Saturday evening. Cheers!
Hey Jeff where do you get the tripod for the dewalt laser level your using
Wondering if you have a video on tiling on a 45` angle or plan on one any time in the future ?
Nice job Jeff, is the video editing company a relative of yours? Either way, he/she does a great job.
His name is Max, we have been filming together for 9 years now. He is awesome and just bought a new camera. Probably the only RUclipsr using a 23 Thousand dollar camera. Can't wait to show you the vidoes in a few weeks of the new improved renovision. Cheers!
@@HomeRenoVisionDIY 23 thousand? Yep, Im in video proaction. My hammer cost $1,000.00
Hi Jeff- planning on doing my bathroom and the floor. Question is I'm doing a standing shower and or master bath is over a slab. What substrate is best for the bathroom floor being that it is directly over the slab? Thanks.
Why are your shows not on HGTV or DIY? I would watch them all! I am so glad I found this video. Should one put in the new bathroom floor first, and then the new tub and shower, or vice versa?
Hi Jeff, is directional troweling required? I also noticed you just back-buttered the tiles and not the wall as well, im using 3x12 tile and wasn't sure if I should backbutter and also all thinset to the wall for more secure hold?
Hi Steve, save the advanced tiling steps for tile over 12 x 12 in size. Cheers!
What would be great is if your “Favourite Tools” and “Recommended Tools” link to Amazon could allow a choice between Amazon.com and Amazon.ca. You make great easy to understand and clear videos. Thanks for your easy going manner.
Hi Gary, it always goes to .com and then it tells you if the product is available in Canada. we are still working out the bugs on our amazon worldwide link found on the webpage. Perhaps trying it and let us know how it works for you. Cheers! I would appreciate your help with that!
Do you have a budget-level alcove tub (200-300ish) that you recommend?
Well done... Thanks
Good knowledge!
I give your videos thumbs up when i start the video, because I know it’s going to be good. 👍
Thanks and Cheers for the effort. !
Home RenoVision DIY just doing my part 😀
Hey what did you do for your seams during waterproofing? Caulking? Or what do you recommend?
Nice video.. How long do we need to wait before resuming 2nd row of tile? Thanks.
Awesome video quick question. I'm also about to use the mapaie waterproofing membrane. Did you use modified or non modified mortar?
you can use either. Cheers!
Jeff, Please help? But first let me Thank you for the video. Wish I’d seen this before I built my own shower stall. I did a good job and the tile floor plan was the hardest, but it has lasted several years without problems! I do have a question I’d like your expertise with though. What do you recommend to clean grout and reseal. I’m getting the brown on the grout and can clean with bleach but want to clean really well THEN seal it well also! Can you Please help? I have the two “Miracle” brand “Pro Choice” cleaner and sealer from Lowe’s if that’s good enough?
at about 20;10 in the video, I was remembering my first DIY tub install and tile wall. I didn't use it at the time, because I didn't find out about this until after I was finished.
But at one of the box stores I seen a rubber seal that went agains the wall, and sat on the top of the edge of the tub. I dont recall how it attached, but it had a groove for the tile to set in. It was made out of a clear rubber type material. It was to help seal the bottom row of tile so water didn't seep up under the edge of the tile and the tub.
This was about 16 or 17 years ago, so I can't remember what store it was at or the name brand of the product. but it seemed like a great idea.. Whats your opinion?
Hello sir thank you for sharing your knowledge😊 what's the best cement to use for tiling on the cement board and what thickness of trowel is good, if you can give me some advice please sir thank you
Hiya need advice please. I wanted to tile an outside bathroom wall that was painted years ago but paint bubbling off due to raising damp. The wall is brick with coat of plaster... I think.
It has just a boarder of tile and I want to tile the whole wall.
Q. How to best prep wall for tiles? I'm concerned about the rising damp. Will the tiles fall off?? BTW. YT IS awesome. Great advice n great vid tech. Cheers
Did you mud or caulk after the layer of aqua defense?
wow great video so basically always start on the low side also how did you know to mark 3/16 and cut on the high side
LOL, watch the video! Cheers!