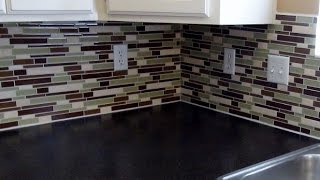
Install stone/glass/mosaic Backsplash - A Beginner's Guide Pt 3
HTML-код
- Опубликовано: 8 сен 2024
- In part three, we pick up with the fun part: Installation of the backsplash. I cover how to measure, cut, and place the backsplash as well as how to make sure you start and end the job correctly.
Part 4: • How to Grout, Sponge, ...
Thanks for pointing out your mistakes so we could avoid them 👍🏼👍🏼
Anytime! 👍👍
nice tutorial. We ordered our laminate countertop without the back splash riser so mosaic tile would extend all the way to counter. To our surprise the home center actually charged us more w/o the riser because like in movie Fargo. "They put the clear coat on in the factory" ha!
Fargo! Excellent film! The TV series is fantastic too. One of my favorites. Great reference! And yes, it’s funny because it’s true. It’s what you don’t pay for that costs you...somehow. Thanks for the comment!
Thanks for the heads up about the window side installation!!👍👍👍it's lot of work. Thanks for the great tips on your video.
You are very welcome! it's definitely a lot of work. More than I had anticipated, but that's par for the course on home projects. Best of luck!
Easy and clear tutorial. I love it. 👌👏👍
Much appreciated, thanks! Also, thanks for the comment 👍
So glad i saw your video. I will install the same tiles in a huge kitchen. I will ensure to start at the window (window is in the middle of the wall/kitchen).
Gel g right, I’d start at the window and work my way out to both ends. As I stated in the video, I would not straight cut the tile to fit flush with the window...that will look unnatural. Placing an uncut piece of tile then cutting small filler pieces to fill in the gaps is the way to go in my opinion. Best of luck on your project!
Good tips.
Glad it was helpful!
Great video thanks.
You’re welcome!
Bro it’s shorter because you didn’t put any spacers in between the top and bottom on the first section you did. Then you continued to move forward with that shortened length across the one side. The 2nd wall required no cuts but there are that spaces in between each tile that adds up and that’s why you got that unevenness.... always use spacers when putting two sheets together unless it’s a tile that was meant to be a single sheet and you so happen to just cut it to fit the dimensions...
Also start from middle outwards and upwards to avoid that type of mess up
Thanks!
"Perfectionism is crippling"
Story of my life,especially when you are going for perfect and the person before didn't 🤣🤣🤣🤣
Lol, I completely hear you there! Many times have I cursed the builders of my house! 👍
Yes...this is my first time doing this and trying to get it just right is driving me batty!!
@@ahartry I know I will never use the sticky tape again though. I believe that the process with mortar would have been easier to make adjustments, because they sticky backing left no room for error.
Quick question. Did you use a glass cutting blade in your wet saw? Or just the blade that came with it. Thanks so much I have the same tiles just a bit different color.
Wendy Somerville hey there! Yes, definitely use a glass cutting blade. Anything less will damage your glass tile. Best of luck on your project!
No links in the description for other parts!
Sorry :(
Do you have a link to the exact type of tile? I need to buy for my kitchen but can't find the exact design.
Hello. Unfortunately, no I do not. I can tell you I purchased this tile from Menards about 2 to 3 years ago, so it may no longer be available. It was made by Greenworks. Hope this helps! Best of luck.
I have a question sir. We are doing a marble back splash in our kitchen. We have a granite counter top without a granite border. Do we need a border trim to start from the bottom when installing the backsplash? Please help
Hmm, I don’t believe so, although I can’t say for sure. Usually, people just use grout on the bottom and from what I’ve seen, no boarder. Sorry I can’t be more precise
I was hoping you'd talk about how to measure how many squares mosaic tiles you will need for a project.
Kendal a tape measure is the best way to accomplish that. Measure the project size then get the dimensions of the tile you chose. Then, just good old fashioned cyphering.
Mosaics are typically 12"x12". Use a tape measure to find your square footage and buy that many pieces. If you cant figure out how to figure out the square footage and how much material you need, I wouldnt recommend attempting tile work
Hi.. thanks for the video..when I’m applying the Mosiac tile I’m running into the situation where I have to cut along the length. Is it advisable to cut along the length ? Or should I increase the spacing between tiles and grout it ..
Hello. I cut along the length to make the upper most tiles fit. It’s totally possible to do, just make sure you measure correctly and make as few cuts as possible. Personally, I wouldn’t create larger gaps to accommodate a perfect fit of the tile because if you do that once, you’d have to do it throughout the project. Best of luck!
You comment on having those little pieces against the window. LIke in any installation (eg, flooring), you need to account for the product width and plan accordingly...in this case, you would have been better off slicing an inch or so off the first tile so you ended up with a bigger piece at the window.
Yes, exactly. I tried to convey that in the video, but it was unclear. Good suggestion 👍
great what is product on wall your sticking the too
It’s called MussleBound. I got it at Menards. Thanks for the question 👍
Can you use a glass cutter to cut the tile
If you’re asking if you can cut the stone pieces with the glass cutting blade, yes you can. I do not think you could efficiently cut stone with a glass cutting tool. It would probably crack and break if attempted.
Not bad, but when you use that sticky backing instead of mortar you cannot make adjustments once you stick it on. Gravity isn't in play so your spacers don't mean much.
True, but it helps to consistently align the bottom row to keep things in order. 👍
What did you use to stick the tiles on the wall??
Muscle bound adhesive mat. Can find online or at home improvement stores.
@@FastFixRUclips will that fall out eventually??
How much do you charge for this kind of service?
I don’t do this professionally and I have no idea what it’s costs for someone to install. If I had to venture a guess, I’d say north of $300 on the low end.
How do you keep the plugs from being super recessed?
Excellent question. I cut spacers made from wood then drilled a hole in them for the mounting screws to pass through. There might be a better solution out there, but that’s what I did. You could probably use stone or glass scraps from the backsplash if you wanted. Just make sure you used a glass drill bit if you choose to use the glass.
I saw another video where you can buy little extensions to screw into the outlet area to bring the sockets forward and screw on the cover. Hope that makes sense. It's obvious I'm not in the home improvement business. 😆
@7:18 oops did not set that one straight
Yeah, it wondered up a bit, but not by much.
Apology NOT accepted on portrait view!
📲
This method was a bit confusing
Yes, I could’ve been more clear. Hope some of it helped?
@@FastFixRUclips definitely!! I didn't know you were gluing them , I found out later through the comments so now I get it . I think is clever!!! Thanks
I guess you did ok for a beginner, but the whole process is not really proper. You should be able to dry lay one wall at a tile and pre cut that single wall before you start spreading. Cut a sheet sort of in half (vertical) so one goes in the corner and the other side starts the next wall when your ready for the adjoining wall. Now you have your corner cut, which you lay on the floor and add sheets across the same length as you wall. You can measure across the backsplash to the other side and transfer that mark to your dry laid sheets. So now you literally have both sides cut (second side cut, again save for adjoining wall) you now can measure your outlets. Simply measure from your starting wall across to each side of outlets and transfer those marks to your dry lay. Measure from countertops to bottom and top of outlets and transfer to your dry laid sheets and with a speed square you now have your outlets marked. You mentioned to not be afraid to cut up your sheets , which is really the opposite of what really should be done. You actually should try and have whole sheets with cuts attached, even the outlets. If an outlet cut is center of a sheet, try to cut it right out of the center, so once your ready to install, it's much faster and much straighter. I precut each backsplash wall then install, then precut the next wall and install.
I’ll take that criticism. There are things I will do differently next time. Certainly some of the things you mentioned regarding the corner pieces, but overall I don’t think the process I used was improper, just not optimal. Thanks for the comment and tips!
Your right, shouldn't have said improper because most vids I see are done doing cuts more or less as you go, especially the outlets and stripping sheets down into smaller rows. I guess in the end it comes out the same, so optimal is correct. If you are going to use the corner sheet thing, just do some measurements on where to slice those first corner cuts because if you simply cut the first one in half, its possible that the other corner might work out where your just cutting off 1 inch of a sheet and you dont want that because it's hard starting the adjoining wall with little individual pieces, so in that case you need to cut the first sheet a couple inches less than a half sheet.
Yeah I like that idea. Planning a bit more prior to hanging the tile would be useful. Good deal man. Thanks!
Oh no!!! Uneven on the side wall!
Yes, it was good to see someone has done a worse job than me!
And Still looks very good!
Hey buddy why not make template with a white sheet of paper and attach it to the countertop with painters tape lay it over the box trace it on the paper and now you have a fixed point for cutting fold it down to countertop out of the way then put the full sheets of back splash on wall then unfold paper template and tape to back splash then cut the back splash with a diamond wheel dremel allot less measuring and work Be A Thinker don't make things so complicated, K I S S ( keep it simple stupid ) by the way you can do the same with the Mussel Bound with a razor knife and you will have a cut out template for the back splash..
fsbbrian For all who read this comment, I would suggest to know one to try this method of installation. One of the major problems with this idea being the use of a dremel tool to do the cutting. Tile saws exist for a reason. Using a dremel would be unfeasible to say the least. I’m very familiar with KISS and this idea is far from that mentality. I showed the correct way to install the tile for the best results. I don’t do half-assed.