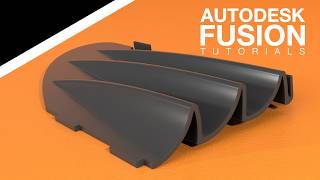
Core & Cavity Extraction using Fusion 360 - Stepped parting surface

HTML-код
- Опубликовано: 4 окт 2024
- Dear viewer,
In this video, step by step procedure of core and cavity splitting of a component is explained. It is explaining how to create the model of the given component, adding shrinkage value, create the parting surface and work piece and finally core and cavity splitting.
Open the link below to view the image of the component drawing.
drive.google.c...


![LEARN FUSION 360 FAST! A Beginner Tutorial [step by step instructions, no prior knowledge required]](/img/1.gif)
Why u didn't use split body instead of patched surface and why u didn't use split body and than combin & Cut. U could have avoided surface and boundary fill.
I am using a general procedure for all type of components. Thank you for comments.
@@scariaatakkamundakkal9157 anyways it was a good video, hope to see more
boundry fill sucks autodesk fix it please. why the hell green, green and more green!!!! You cant make more contrasting colors???
I don't have access to Autodesk now. Please post it in the official help portal of Autodesk