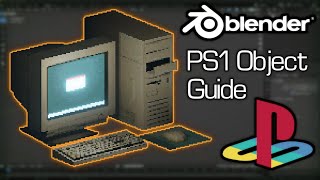
Blender Tutorial // How To Create A PS1 Style Asset // Texture Painting

HTML-код
- Опубликовано: 20 авг 2024
- This Tutorial shows the process of creating a low poly // low resolution asset in Blender and what steps are nessesarey to giving the desired retro effect.
My Instagram: / the_illustrationwork
My Redbubble: www.redbubble....
Music:
Tokyo Music Walker - Way Home is under a Creative Commons (CC-BY) license.
@tokyomusicwalker...
Music promoted by BreakingCopyright httpsbit.lyway-home-song
🔺
⭐ Easily copy and paste credit text from our website (perfect for mobile). Learn how to give credits correctly on other platforms
httpsbreakingcopyright.comcredits...
⛔ Remember that it is forbidden to register this song on any distribution platform (Spotify, iTunes, etc or any copyright detection system)
- - - - - - - - - - - - - - - - - - - - - - - - - - - - - - - - - - - - - -
🔊 Artists
@tokyomusicwalker4038 🧒 also known as Tokyo Music Walker, is a japanese music producer and beat maker. He's created multiple relaxing songs and his main genre is the Chill one. Without a doubt a very talented producer that we'll see more times on the channel.
httpssoundcloud.comuser-356546060
@tokyomusicwalker...
httpsopen.spotify.comartist7cktl...
- - - - - - - - - - - - - - - - - - - - - - - - - - - - - - - - - - - - - -
🔊 Follow us
@BreakingCopyright
httpsbreakingcopyright.com
httpssoundcloud.combreakingcopyright
httpsinstagram.combreaking.copyright
httpstwitter.combreakingcopy
- - - - - - - - - - - - - - - - - - - - - - - - - - - - - - - - - - - - - -
🔊 Contact us
⭐ httpsbreakingcopyright.comcontact
Please read the FAQ section below before contacting us.
❓ FAQ (Frequently Asked Questions)
⭐ httpsbreakingcopyright.comfaq


I have a few tips if anyone wants to make it more ps1 feeling:
- When creating the material replace BSDF with emission since the ps1 had very limited texturing options like roughness and such so that will help you replicate that
- Whilst creating the model really limit yourself to how many polygons you can use and how detailed you make your model. If its a character or something important then you can add some details but for things like random objects (for example the pc) really try to look at the object in very basic shapes. The pc can simply be 2 cubes and a cylinder forget about any bevels or indents to add more detail.
-The textures are where all the detailing comes from. The LARGEST textures on the ps1 were 256 x 256 pixels but thats only for characters and important stuff. For such small items id reccomend using 64 x 64. Altough the texture is small this is where you can add any detail so really get creative.
-Change the texture interpolation from linear to closest. linear makes the pixels blur together to achieve a more hd look which was not a thing on the ps1 (tho im pretty sure it was on the n64) but closest makes the pixels sharper. Also if you are painting your own textures inside of blender change the falloff to constant (the one that looks like a rectangle).
I am quite new to blender myself and im not really an expert when it comes to retro graphics so correct me if im wrong on any of these and give more tips since i am working on a retro styled videogame myself and would like some guidence :)
Very informative!
The texture painting is a interesting method to do this. Personally i have been doing a workflow like this: 1. Make collage of source images. 2. UV map to view angle. 3. Bake all textures to a separate UV mapping. 4. Re-size/pixelate/dither in gimp. 5. Reload asset with new texture file and UV map for use in projects. Now I'll have to try some texture painting for some other items.
That's a good way of doing it, I've only been doing blender for a year, maybe 2. This technique is just the way I found myself doing it and I've gotten into a good flow with it, it's fun too!
just discovered your channel and i love everything about it
I've been trying to figure out how people paint the textures straight onto the mesh. Great vid!
thx a bunch
6k views ?! This video has incredible editing 💀
Thank you !
loved the video!
Thank you so much!
Too many polygons, and the texture is too high resolution. Use only less then 30 quads and a texture that's 128x128.
Tho your looks pretty good, you've kinda overestimated the processing power of the Playstation, it could only render 10000 faces at a time and warped the texture cus it had to render it based on math
It's not exactly a 1 to 1 PlayStation Copy it's just a vague style choice/ influence, if I want a more accurate look I lower the pixel count in my textures
Do you know why it’s not recognizing it all and only allowing me to paint on one shape? Thank you I really appreciate it
ALWAYS REMEMBER THAT U HAVE TO NORMALIZE THE SCALEEEEEEEE
🎉🎉🎉🎉🎉❤❤❤❤❤
I'd say that's more Ps2
Bro, where to find these picture that free for commercial use?
Can't remember the site I got these specific textures from but a great site for free images is pexels. I link it in all my video descriptions
WHY IT DOES NOT PAINT THE STENCIL WHEN I CLICK WITH LEFT MOUSE? CAN I JUST TO KNOW?! I'VE SEEN UR VIDEO 7 TIMES AND ALWAYS THE SAME. I'M DOING A STUPID BOX AND CAN'T EVEN PAINT A TEXTURE.
I've recently had issues with the stencil not working, I opened a new blender project where it worked for whatever reason, had to import all my work progress into the new blender project
@@the_illustrationwork it happens to u too that it delete all the stentil textured on a part finished when u lile creare a new shape?
No I haven't had that
TO ME NOT EVEN PAINT THE STENCIL. I CLICK LEFT MOUSE AND NOT EVEN PAINT.
Maybe check that your objects face orientation is correct. Top right, click the 'overlay' dropdown (two circles overlapping) at the bottom tick 'face orientation' if the face you're trying to paint is red than you need to flip it. Select the face, in Edit mode go to 'mesh' > normals > flip