Thank you SO MUCH. This is literally better than the autodesk official tutorials. Subscribed, going to binge all of these lol everything makes more sense now
Super concise and to the point, exactly what someone needs when they have no time cause their assignment is due tomorrow! yet still enough time to leave a comment lol
Knowing to right click on the body in the browser tree to make it a component ended my two day struggle to make this ******* joint work lol. Thank you!
At 4:41 you say you can click and drag the components inside the simulation mode. How do you get into simulation mode? I've made an assembly and joined everything together with joints but can't move things around to check if my linkage is working. Everything just moves as one big clump.
in the top left corner of fusion 360 you can see a box that says design (presuming that you're in design), there's an arrow pointing down inside that box, click the box. it'll give you different modes to select from, that's where you'll find simulation, select it.
maybe a bit late after 3 years, but had the same problem and found out why: you need to fix one of your komponents, so that the other one can only move by rotating around the joint. you can fix an object by right-clicking it in your Browser. your second option in the dropdown menu should be something like "fixing" or "fix", click it. Now only the other object can move, but is restricted by the joint, so it will rotate around the joint.
@@winorxp8952 That's what I'm doing to get it working properly, but it doesn't seem like that's what the tutorial is doing. Not only are none of the components pinned, but he's also in Design mode instead of Simulation mode. What's he doing that's getting that to work?
Seems that "simulation" is not available on the free version. But the video appears to show the free version and moving the part freely with the mouse. How can we do this?
hi Justin, thanks for the tutorial I am designing a cabinet with a hinge so this was just what I needed Thankyou. PS hope you are ok? you haven't posted for a while?
Very helpful video, as usual. Can you help me with a problem? I designed a simple folding table with folding legs, but it's not working. The table was working fine, but then I add the legs, and the joints, and in order for the legs to work, I had to ground some element that now prevents the table from folding. Is this doable? Many thanks!
You have to double click on the blue flag to enable the movement. Likewise, you can also right click on the Joint on the left menu and select "drive joint" Hope this helps!
Before I start to learn this stuff, I wonder if what I need to do will work. I've designed a water level device to report the water level in a humidifier I've rebuilt. It is now controlled with an *Arduino Nano Every* board. I have a potentiometer with a small gear shaft on it. I made a short "arm" with a gear on one end (that rotates the potentiometer). The gear has a bearing in it and is attached to the wall of the tank. The gear on this arm meshes with the gear on the potentiometer. This arm is orientated in the horizontal position. At the other end of this arm is a long piece, that loosely hands from the end of the arm and on the other end of this piece is the float. Kind of looks like this: (ignore spaces please) LOL I'm trying to use emojis for this.... gear horizontal rod ⚙⚙➖➖➖➖➖ \ ❗ \ ❗ vertical rod \ ❗ 🏐 So as the water level changes the float moves the vertical rod up or down, causing the horizontal bar to move downwards or upwards, moving the gear, rotating the potentiometer. Where the problem is, since the vertical bar is loose (as it should be), the float actually pushes the rod outwards. The vertical rod doesn't remain vertical. I've seen float systems that use a stiff, thin guide wire that, in this design, would go under the gear, attached to the wall and then attacked somewhere on the vertical bar. The idea is that as the horiz. bar moves up or down, it keeps the vertical bar vertical and the float can't move it right or left. But I suck at mechanics, LOL, so I want to see if I can make this in Fusion, so that I can place the guide wire and have Fusion figure out the physics to show me how the movement will actually be. For those good with Fusion, can this be done?? I hope that I explained it clear enough.... sigh...
Thank you for this helpful tutorial. But unfortunately it didn’t work for me. I’m very new at fusion 360 and I have created a main component that is using several components files. I then added hinge to two of those components but these hinges are made within the main component and not in the individual file. So when I do the link you described in this tutorial, only my hinges are moving and not the component to witch the hinges are attached to. I probably did it all wrong but I can’t figure out how to move my hinge from the main component to the individual file.
same here. Seems that "simulation" is not available on the free version. But the video appears to show the free version and moving the part freely with the mouse. How can we do this? *edit* nevermind, "Drive Joint" makes it work!
Question: If I wanted to take this small piece of a hinge, and extend it to about 16" so that it runs along, say, a toolbox edge, how would I do that? I've tried to copy and paste parts but this seems to make everything super confusing with parts and bodies.
I had the same problem. I used the 'Create' , 'Pattern on Path' then selected the body and fiddled around with those parameters. I know there's got to be a better way but that's what I did.


![Eminem - Somebody Save Me (feat. Jelly Roll) [Official Music Video]](http://i.ytimg.com/vi/Vwa0HenQMi4/mqdefault.jpg)


Happy Monday everyone! Let me know what kinds of joints you'd like to learn to create in the comments below! :)
Have you stopped making content? Just joined the channel and seen your last video was 2 years ago, great content
I made a joint but i cant open and close it, but instead it moves the whole thing, not just the lid. can you help?
Thank you SO MUCH. This is literally better than the autodesk official tutorials. Subscribed, going to binge all of these lol everything makes more sense now
goated video, came from the blender tutorials and now I am using some fusion and freecad
Super concise and to the point, exactly what someone needs when they have no time cause their assignment is due tomorrow! yet still enough time to leave a comment lol
Knowing to right click on the body in the browser tree to make it a component ended my two day struggle to make this ******* joint work lol. Thank you!
At 4:41 you say you can click and drag the components inside the simulation mode. How do you get into simulation mode? I've made an assembly and joined everything together with joints but can't move things around to check if my linkage is working. Everything just moves as one big clump.
in the top left corner of fusion 360 you can see a box that says design (presuming that you're in design), there's an arrow pointing down inside that box, click the box. it'll give you different modes to select from, that's where you'll find simulation, select it.
@@bigb0ilevi699 that was no help at all, idiot
maybe a bit late after 3 years, but had the same problem and found out why: you need to fix one of your komponents, so that the other one can only move by rotating around the joint. you can fix an object by right-clicking it in your Browser. your second option in the dropdown menu should be something like "fixing" or "fix", click it. Now only the other object can move, but is restricted by the joint, so it will rotate around the joint.
@@winorxp8952 That's what I'm doing to get it working properly, but it doesn't seem like that's what the tutorial is doing. Not only are none of the components pinned, but he's also in Design mode instead of Simulation mode. What's he doing that's getting that to work?
Many thanks for sharing, very clear & simple tutorial!
Perfect tutorial
I love your easy to follow tutorials. Thanks a bunch. A old dog learning new tricks.
Happy to help!
Seems that "simulation" is not available on the free version. But the video appears to show the free version and moving the part freely with the mouse. How can we do this?
This is what I am noticing too
man i was like
wait.... that voice sound familiar
realized you're the blender cookie guy
well it's good to know that you're branching
another great concise tutorial video thanks!
Great content! Thank you for all the helpful walk through videos!
Well, that was easy! Thanks!
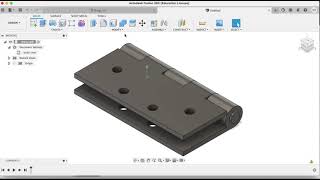
Do all 4 holes of the hinge have the same diameter ? And does the pin have the same diameter as the hole?
what about grounding one of the components though?
hi Justin, thanks for the tutorial I am designing a cabinet with a hinge so this was just what I needed Thankyou. PS hope you are ok? you haven't posted for a while?
Great video. Thank you!
thanks! clear and simple!
Very helpful video, as usual. Can you help me with a problem? I designed a simple folding table with folding legs, but it's not working. The table was working fine, but then I add the legs, and the joints, and in order for the legs to work, I had to ground some element that now prevents the table from folding. Is this doable? Many thanks!
thanks man, really helped me out
Thanks! Very helpful video!
that intro doe 👀
Now this is the good stuff.
Hello, why can't I click and drag my joint the way your moving yours 4:39
i can't either
Did you follow the rest of the instructions in the video?
me either how do u get simulation mode
You have to double click on the blue flag to enable the movement. Likewise, you can also right click on the Joint on the left menu and select "drive joint" Hope this helps!
@@EdwardMakes thank you so much!! Was trying to figure this out for so long
Spot on!
Before I start to learn this stuff, I wonder if what I need to do will work.
I've designed a water level device to report the water level in a humidifier I've rebuilt. It is now controlled with an *Arduino Nano Every* board.
I have a potentiometer with a small gear shaft on it.
I made a short "arm" with a gear on one end (that rotates the potentiometer). The gear has a bearing in it and is attached to the wall of the tank. The gear on this arm meshes with the gear on the potentiometer. This arm is orientated in the horizontal position.
At the other end of this arm is a long piece, that loosely hands from the end of the arm and on the other end of this piece is the float.
Kind of looks like this: (ignore spaces please) LOL I'm trying to use emojis for this....
gear horizontal rod
⚙⚙➖➖➖➖➖
\ ❗
\ ❗ vertical rod
\ ❗
🏐
So as the water level changes the float moves the vertical rod up or down, causing the horizontal bar to move downwards or upwards, moving the gear, rotating the potentiometer.
Where the problem is, since the vertical bar is loose (as it should be), the float actually pushes the rod outwards. The vertical rod doesn't remain vertical.
I've seen float systems that use a stiff, thin guide wire that, in this design, would go under the gear, attached to the wall and then attacked somewhere on the vertical bar. The idea is that as the horiz. bar moves up or down, it keeps the vertical bar vertical and the float can't move it right or left.
But I suck at mechanics, LOL, so I want to see if I can make this in Fusion, so that I can place the guide wire and have Fusion figure out the physics to show me how the movement will actually be.
For those good with Fusion, can this be done??
I hope that I explained it clear enough.... sigh...
Thanks!
great job
Awesome content . Thanks mate (y)
:)
Fantastic vid mate, each step clear and easy to follow. Very well explained tutorial. ya got yaself a new sub.
Thanks for the sub!
Thanks, one question, I have a revolute joint going clockwise but I want it to go other direction, how do I do this?
When you edit the joint, there should be an option for Flip
Thank you! College freshman here learning CAD just as a hobby. Appreciate the video.
Very welcome!
Thank you for this helpful tutorial. But unfortunately it didn’t work for me. I’m very new at fusion 360 and I have created a main component that is using several components files. I then added hinge to two of those components but these hinges are made within the main component and not in the individual file. So when I do the link you described in this tutorial, only my hinges are moving and not the component to witch the hinges are attached to.
I probably did it all wrong but I can’t figure out how to move my hinge from the main component to the individual file.
Simulation is not available in the free version. Be nice if they allowed you simulate one or two joints for free. :-(
THANK YOUUUUUUUUUUUUU
When I click to move the joint object the whole assembly moves.
nice video can we find hydraulic force in fusion 360
What if the loop for the hinge plate is not a closed circle ? like on a piano hinge.
I create the joint, animate it, set the limits, and simulates fine, but then can't move the joint by clicking on the part...
same here. Seems that "simulation" is not available on the free version. But the video appears to show the free version and moving the part freely with the mouse. How can we do this? *edit* nevermind, "Drive Joint" makes it work!
oooooooo tks very much
Question: If I wanted to take this small piece of a hinge, and extend it to about 16" so that it runs along, say, a toolbox edge, how would I do that? I've tried to copy and paste parts but this seems to make everything super confusing with parts and bodies.
I had the same problem. I used the 'Create' , 'Pattern on Path' then selected the body and fiddled around with those parameters. I know there's got to be a better way but that's what I did.
I can't get the part to spin, it's picking up the whole thing... PS everything is a component
I've created joints but for some reason I can't move it at all, it's a slide action btw.
Never mind, the result is down below in the comment section.
you didn't explain how to pin the component......
Thank you! I'm animating a car door and this was very helpful as I hadn't done joints before.