Это видео недоступно.
Сожалеем об этом.
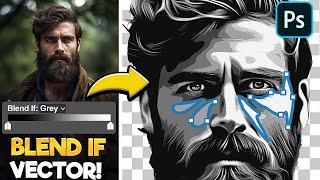
Photoshop Tutorial: FACE PAINT! How to Paint Graphics onto a Face.

HTML-код
- Опубликовано: 26 сен 2015
- Photoshop CC 2015 tutorial showing how to "paint" a graphic onto someone’s face, such as a flag or a sports team logo.
Photo provided by www.shutterstoc...
High-quality, royalty-free stock images
Image ID: 266682860
Royalty-Free Music provided by www.beatsuite.com
High quality, copyright-free music for RUclips.
Music track: "Race"
Subscribe to Blue Lightning TV!:
www.youtube.co...
Become a Channel Member:
/ @bltv_photoshop
Support Blue Lightning TV on Patreon for as little as $2/month!
/ bluelightningtv
You'll receive early access to watch my new tutorials ONE WEEK BEFORE the public can see them on RUclips. AND, you'll receive 10% off all of my merch sold at Redbubble, TeeSpring & Society6!
BLTV MERCH:
www.redbubble....
teespring.com/...
society6.com/bltv
Blue Lightning TV Channel:
/ bluelightningtv
My Website:
www.bluelightni...
Facebook:
goo.gl/fHLJsh
Tumblr:
/ bluelightningtv
Twitter:
/ bluelightningtv
Google+:
plus.google.co...
Pinterest:
/ bluelightningtv
LinkedIn:
www.linkedin.com/in/martygeller


Hello everyone! I hope you enjoyed this video! More than 85% of my viewers aren't subscribed, so if you like my videos, please SUBSCRIBE to my channel. It would really help out! Thank you very much! ~ Marty 💙
I am your channel subscriber and fans.
As a Latino I have to say, " Thanks and please be eternal." People like you make this world better.
Marty is the best teacher I've ever had. :)
I really enjoy watching your tutorials and following along. Even at work not following along I still find myself watching.
thank you internet, thank you youtube, and thank you blue lightning tv. the tutorial is very clear. i can learn step by step easily 😊
You are a master of tutorials! Thanks for an amazingly detailed lesson.
love this tutorial sir. you are the best photoshop tutorial teacher i have comprehended.... will love to watch more of your videos
when im trying to revel eyes using brush tool.. its getting painted in black colour. And in ps cc2017.. i have select and mask instead of refine edge.. in that when i select refine edge and select with brush,.. nothing happens and smart radius get deselected on its own plz reply and help soon.
reveal eyes worked... but plz explain.. select and mask. As im having it instead of refine edge.
ruclips.net/video/Rl1hEiKN4Lg/видео.html
FYI: If you want to use Refine Edge instead, go to Edit and Shift-click on "Select and Mask".
Thanks alot for this tutorial... !!! Had to change the blending mode for the foreground in my situation and minor adjustments, but it worked like a charm. This saved me, the only tutorial I found that is to the point and accurate.. ☺☺♥
One of the best teachers of photoshop for whom I have my best respect!
What a lovely tutorial! Recommend this one for beginners ❤️
thax man god bless your heart.
I love that you put down the photos its really helpful videos pls make more.
Photoshop is now fun and easy.
Fantastic tutorial. By far the best I have seen so far. THANK YOU VERY MUCH
Wow...Amazing outcome, Marty
And once again so clearly explained.
Top !!!
bltv your tuts are so clear and simple and of course awesome
I was searchin entire internet to find great tutorial how to do something like this. It is so brillant!
Excellent job Marty.
Every time I have a need Blue Lightning is there by my side
Thank you for that.
thank you for your step by step this is going to open up a lot of options for me!!
I have a way to work, but I like to watch the way you work, I admire the way Explanation
Marty, your tutorials are top notch.
Very Well Explained, best tutorial so far.
I am always very impressed and greatful for your tutorials and have started doing some with my High School students.
I was wondering if you could include a few more "why's" as to why you are doing certain things because it is hard to understand the process logic.
Thank you so much for your posts!!!!
Thank you so much for your tutorials. Your way of teaching is spot on. Step by step, concise and articulate. And designs that can be used in everyday life for recreation as well as professional. Awesome. Absolutely awesome.
Wow, thank you!
I didn't understand why did you made displacement psd file.. what is the purpose of it..please explain
i think it was my first tutorial that i underatand completely thnku .♡
Excellent tutorial, Marty. So clear and easy to follow. Thank you!
Real good job at keeping a good pace and explaining in the video
This is very amazing lesson and tutorial... Hey Blue Lightning TV, I very like your tutorial.. Thanks!!!
Thanks, keep update Blue Lightning TV.
Hi! I've been watching your video tutorials recently, because I wanted to enhance my skills and learn photoshop. And your tutorials are amazing and are easy to catch up. Thank you for making videos. You deserve way more subs! Keep up the good work! x
I really love this this way of painting
Amazing Tutorial as always . Well explained . Thank you.
I was here in 2016 now i am designer.
He is amazing 😉
Thank you, this has been a very helpful & instructive video :)
Always great tutorials. Thank you.
I like the detail in your work, great job!
Helped with my project, came out se well. Thanks!
Thank you so much. I love this channel and every day i create on project from your tutorial. Bundle of thanks
Thanks for this wonderful tutorial. Thanks for sharing.
Excellent tutorial! Worked exactly the same in my older version of PSP as well.
Wow Bro Great Video for Editing ,, Bahut Acche Se Aapne Explain Kiya Hai .. Useful video for Editor ,,
thank you for sharing
SIR you are great, nice speaking style, nice voice, nice video
Question! When I change from "normal" to "color burn" on the logo layer - it just turns black ... any suggestions?
Great video. Thanks so much!
just Amazing, thanks for sharing your knowledges.
Presentations are clear and I will use them as needed
The best photoshop tutorial i have ever seen.. Hats off😚🙆
Thanks, what a great tutorial.
Awesome guides, so clearly and I am Russian understood all of you said, I subscribed
Благодаря! Кстати, в моих учебниках переведены титры. Нажмите на значок «CC» внизу, справа от видео, а затем нажмите «Русский» для его перевода. Переводы не идеальны, но многое из них по-прежнему понятно. Пожалуйста, расскажите всем в России, кто хочет учиться или совершенствоваться в Photoshop, чтобы подписаться на Blue Lightning TV. :-)
Blue Lightning TV Photoshop Of course I will tell everyone of my friends, and you shouldn't write on Russian.
wow! great tutorial!! very well explained.
best tutorials of all time
this is my fav ch in youtube
Worked well for me, except at the end because my logo was not completely covering the face, it was showing black and white in those areas. I then couldn't figure out what bit to layer mask to reveal the colour :) if you could help me with that , i would be happy :)
I love your tutorial 💚💚
Please do another one with the flag? I had some troubles. Thank you.
These videos are great and help me a lot with my graphics in college. I was wondering if you ever going to do something in style of Chris Labrooy?
Hey Marty!
Could you make a tutorial for the panorama cube thing.
I can't explain it well,
I hope you understand what I mean.
Tnx!
wonderful manipulations there
Why does my subject have a grey face under the logo?
awesome tutorial, very helpful!
I love your tutorials! :D THUMBS UPP!!
Love this one (as I do love most of your tut's) but can it be that this doesn't work so well with black in the logo used ! After colour burn the black is gone ?
Btw I like the zoom !
Thnx so much for you efforts Marty .
amazing lesson
Love it. I had an idea for an October video... Creating a Jack-O-Lantern from a photo of a person's face applied to a pumpkin that looks lit up from the inside. I tried to use what I've learned so far but failed on my first attempt. Might try again. :P
thanks for awesome tutorial
Great video like always!
Photoshop.. Great video like always
when i brush the eyes it doesnt become colorful it remains black & white
-- adobe photoshop cs6 extended
im stuck at the same problem...can't erase the black n white mask around the eyes with brush tool...what am i doing wrong?
Bad Ass!!! I'm definitely going to try this!!!
Excellent tutorial
Nice lesson!
that's another great video ! thanks
Simply amazing!
I'll try today.
Alternatively one can also use clipping mask, instead of copying layer masks, because if you later decide to adjust the layer mask, you need to re-copy them again. :)
you are still #1 Marty!
thanks a lot for the tutorial
THanks man THAT was amazing...............................
This video is so helpful that it doesn't feel rightful to watch free of cost
Well, you're welcome to join my community of patrons or channel members who support my channel with a small donation every month. 👍 As a small token of appreciation, I give them access to watch my new Photoshop tutorials one week before the public can see them without any ads, too! 😊💙
Patreon: www.patreon.com/bePatron?u=2440633
Channel Membership: bit.ly/2J3fP8c
a very good comment.
thanks to u i am improve GOD BLESS U
its such a nice tutorial. Thanks man!!
I'm Mets fan too. Respect
great work man !......
Very nicely explained. Thank you Sir.
thank you very much for what u are doing, but it's take long time for me finish one work, please help me to understand it.. thanks
Excelente tutorial. Lo felicito ...
its works but not so much good..and why the pinch is pinching in corner side?
sir, plzz replay me on your previous dispersion,splatter effect video :(
I AM BACK IN THIS CHANNEL AFTER 3/4 YEARS.
Welcome back!
When I try open my displacement it says "Could not continue. Displacement maps must be 8bits/pixel". How can I fix this so that it works?
Edit: fixed it! for anyone else that has this issue just go to your logo/flag image, then go image>mode>8bit/channel
thanks for your video its helpibg me alot.
Ur explanation soooooo good bro tq
What tool have you used to cover all over the eyes? coz I've got a problem when I already brushing the eye with a tool, it's not working
Do you have the right foreground color? In a Layer mask white = visible, black = transparent
Go to 4:07 in the video and follow the steps. Make sure black is your foreground color and make sure your layer mask is active. When you brush black over the eyes, you;re actually brushing in black over the layer mask. This, in turn, reveals the eyes through the layer mask.
Thank You So Much
I got everything to work as you demonstrated except my very last image still has a black/white face. I can't see where I missed going back to a natural skin color. It seems like it happened for you at the color burn stage but I'm not sure. Why is my final image still in B/W?? Thanks!!
To clarify...just the image mask part of the face is still B/W
@@davidralph2666 exact same...not sure what went wrong
Fantastic!!
This was a great help, I used this method to create my own speed art of Pennywise the Clown on my channel.
When using PINCH it bulges the image and moves it up and turn is it a bit. Why?
I get black and white face paint as output. No colors are there in mask. What's the reason??
... Thank you very much for the artist