My apologies for the flickering light. I'm always trying to improve lighting and sound, trying a new setup for this video. Alas, it didn't work out so well. I will continue to try and improve things.
Note: As of November or earlier, there is no longer any need to solder a jumper wire between clk and gnd for the BIQU/BIGTREETECH TMC5160 V1.2. They have an internal 10k pulldown resistor to connect clk to gnd (you can verify with a multimeter). You do still need to clip or bend the clk pin to prevent the control board clock from interfering with the internal clock. Thank you for a great guide!
You sir, are an AMAZING contribution to the 3d printing community and I just wanted to have you hear it directly from me. My SKR v1.3 was delivered today and I'm in the middle of setting it up. I literally have a full set of 2208's in my Amazon cart right now and am going to switch them over to the 2209's based on this video alone. I didn't choose them then due to all of the possible issues I would have to deal with in my delta machine. You have given me the confidence to order the newer drivers with full confidence. In the end, my setup is going to be MUCH more capable than it would have been if I would've clicked "checkout" earlier this evening. I have you to thank for that. **Thank You**
It is sincerely a great contribution but from someone who's just bought a stock Ender 5 brand new to 3d printing it's intimidatingAF. What on earth have I got myself into. I heartily recommend BigTreeTech put this video into a kit so I can just buy it and plug it in :-) Soldering iron you say!? Good heavens.
Boards with removable drivers are the only way to go. Drivers can go smoke, and do. Having removable driver chips not only allows you an upgrade path, it can possibly eliminate replacing the board itself. Truly an excellent video. Nicely done.
Michael, great guide! BTW you are using BIGTREETECH TMC5160 V1.2 drivers here. BTT claims one of the key module features is that it internally pulls down the CLK pin to ground (and also has better aligned MOSFETs, 6-layer PCB for better heat dissipation, ...). In case you need to pull down the CLK pin on an older version, you can also use a trick - if you melt the CLK pin's solder on top and apply pressure on the pin from the bottom, you can push it all the way up through the board so it looks like one of the SPI pins. Now you can solder a short wire to the GND pin, like you suggest, but on the other end you can have a single pin female Dupont connector that you can attach to the modified CLK pin when you want to ground it, or disconnect the cable when you don't want it grounded. With the SKR Pro 1.1 + TMC5160 V1.1 kit that I received, they delivered the SPI loom anyway as part of the TMC modules - so I could just snip off some wires with a single pin female Dupont for the grounding job. Obviously in case I need to push back the CLK pin at a later point, I just need to heat up the pin again and push it through the PCB to its original location. On my SKR Pro 1.1 in my CR10 Mini I have extreme difficulties calibrating the stepper drivers to make the motors not overheat, not have skipped steps and have sensorless homing working.
Excellent video. I powered my board via USB to get the initial setup going, the problem I ran into is that m122 doesn't work, or doesn't return the right results, if you're not powering it via the 12/24v port. Banged my head on the desk for a while reading old forum posts and things before I found the solution. Everything else was great! Thanks again!
What a great series this has been. And as you keep adding too it as more drivers pop up these will the go too place for stepper driver upgrades. Thank you for sharing.
Nice video , i have a mks gen l and tmc 2208 instaled on my ender 3 from your videos , it works perfect , tanks for your videos , i have the 0.76 and 0.9 for e vref and it works great , all day it was on , but the stepper motor and the heated shink were cold , the motors works perfect , they have power . Only my e E steps per mm didn't were god , now i have set them and the cura flow to 60% and the print looks great !
@@weirdoku the steps per mm are almost calibrated , maybe 1/2 mm error , but if i set flow to 100% i get horyble prints, overextrusion , not sticking to the bed , that becouse it extrude too much filament , the bed is perfect calibrated with a piece of paper that is 0.2 mm , that is my first layer height , soo it soulth be only that problem, it extrude too much filament , soo i go down until i get it fine, and now it is arount 60% and the e stets 93, and i printed the extrusion test ok
Would love to see an SKR 1.4 / 1.4 Turbo and TMC 2209 video from you now that those are out. I and a lot of others out there are struggling it seems with getting them to work.
I Got my SKR mini v2.0 motherboard a few month ago and I realised it it was working very loud I tried editing TMC driver settings but that did not work then I see my video and edited my software settings to tmc2209 as you showed and it is now very quite thank you very much. great video
I enjoy your detailed video's. I use them as good reference. I am using this video to help me configure TMC2209 on ReArm board with Ramps 1.4 driver card. Thanks
Hey, were you successful with mounting the TMC2209 on the ramps 1.4? I haven't found any guide, tutorial or anything that says that they are compatible, how did you do it?
On my Ender 3 I changed from TMC2208 to (1) TMC2209. The 2208 were dying in my case (2/5). I guess because of temperature. In stealchop these drivers can get really hot. I bought 4 TMC2209 from Watterott and installed only one on the Y axis. And I installed a Fan in the top lid of my ender 3 back-case. So far no driver died. In spreadcycle my 2208 are causing a whining noise in the motors, when they not move. I guess it is because of the holding current. The 2209 feature CoolStep where they can tune the current with the currentsensors for stallguard. These drivers don't whine with the same settings in spreadcylce. The TMC2209 are really worth the extra. Thanks for this video and how to setup the sensorless homing. I haven't given it a shot because there were a lot of comments on github/marlinfw that this is tricky to setup.
BIG, BIG Thanks! My Ender 3 Board messed up and without your guides i would have spend weeks to get the printer to work again. Keep on with this great work!
The chart in the video shows a value of 20 amps for the Bigtreetech tmc5160. The linked webpage has a maximum current of 5.5A and a maximum (peak) RMS current of 3.0 Amps (~average). Maybe the mosfets have a rating of 20 Amps, but according to the specifications, the module does not. Also the mating connectors used typically have around a 2 Amp rating. So what you plug the modules into may be the limiting factor. I would love to have a 20Amp rated driver, but that is highly unlikely in this form factor.
What exactly would you use a 20 amp driver for? Like a positioning module for some super heavy platform? I was window-shopping a NEMA34 CNC kit and even those big monsters only needed about 7-8 amps.
I also was confused by this high rating. They definitely have better mosfets which run cooler. But 20A seems a bit way to high. On the watterott shop page it says the 5160 can run without a heatsink. At least on the low currents on a printer this should work. But from my experience with my tmc2208 I would always place a headsink
@@GordonGEICO I am not surprised about using a 20 amp part. The maximum current rating of the part is only one factor when it comes to part selection. The 20 amp part will have a low resistance when switched on and that is probably the greater reason for it's selection. The amount of heatsink cooling capacity for these modules is very low. The 20 amp rating on the part may be a dc rating. Turn the part on and hold that current. With stepper use the part is switched on and off rapidly. That causes additional heat compared to switching a pure dc current. Thinking about the designs I have done (I design electronics for a living) and the maximum current rating for semiconductors I have used would typically be three times the current the circuit was expected to switch. And this is about what the TMC5160 seems to be. 20A/5.5A ~3.5 times (maximum rating) But the temperature for the complete module would limit the continuous (RMS) rating.
@@tinayoga8844 actually I believe the 5160 driver itself (maybe with the external mosfets in the circuit) could handle the 20a current it's rated for, when force cooled properly... But installed on this tiny circuit board with a tiny heatsink that doesn't even touch the actual chip (only the mosfets!) as well as having such tiny traces, the cooling capacity and hence forth current rating is greatly reduced. The chip is basically over specced for its application, but that is why it is deemed safe to use without any extra heatsink with low current devices (I'm putting a heatsink on mine anyway, and I'm considering some form of additional physical connection from the heat sink to the heat spreader on the board for the actual chip to be cooled).
The froggie I am is so grateful for your guides, because of your work and time you put to your RUclips channel i've been able to do so much things to my printers. From this video i've been able to configure and install SKR1.3 motherboard with TMC5160's on my Alfawise U20 (=Longer3D LK1, a CR10 clone) Oh and because of you i bought an ender 3 a month ago and in few days that printer was already printing amazingly without modding much. Keep up the good work !! Wish i'd still be in australia i'd offer you some beers. I might visit your patreon page ^^
For those of us who have a good tune in 1.1.9 there's WinMerge. It makes it easier to compare the settings between 1.1.9 and 2.0 that translate across the versions.
Hey Michael, Finally got the MKS 1.3 installed on the #Borg, and my 2209 (v1.2) drivers should arrive in a couple of days. I would have had a much tougher time if it hadn't been for your videos. Thank you.
I'm using an Ender 3 + SKR 1.3 + TMC2209 in UART mode. I keep getting "Unknown command" when I try an M122. I'm *not* on USB power, but am using 24v. M119 worked so I know communications are good. Great videos, they've enabled me to try things I never would have on my own!
Also, this may be related and help anyone answer. I'm using Big-TreeTech TMC2209 v1.2 drivers, and the SKR 1.3. Is there anything I need to solder, bend, or cut on these drivers to enable UART???
Hi, I tried this with MKS TMC2209 V2.0 driver with MKS GEN L 1.0 board(for Tevo Tarantula) and this works super silent. I only updated X and Y axis as I think Z and E do not make much noise while printing. The only change which I did for MKS TMC2209 is I saw on one other video like they solder R8 and UART pin together. Rest all I followed your steps and it works simply well. Though I need to disabled this "MONITOR_DRIVER_STATUS", as with latest release of marlin they are generating an error if this macro is being used with software serial. But in short, many thanks for this video, it really helped me on following end to end steps from software and hardware perspective.
Hello there, I just got the TMC2209 v2.0 for my Gen L v1.0 as well. Do you happen to still have the video you mention about soldering R8 and UART together? Just want to make sure I don't do anything wrong. Thanks!
@@nehrox2567 Just saw your comment. Here is the video in case anyone needs this in future. ruclips.net/video/7ShcFKXrVHo/видео.html&lc=Ugx9N2oAOx7GBFb0Lqx4AaABAg.9J_pLsJKYF89K0Vqrgz2ME
Is there a mistake at ~6:20? It looks like you calculate the RMS current and the VREF, then you input the VREF result into settings for current under each driver.
I think it’s a mistake. The comments in marlin call for RMS current directly. The value he’s putting in is much closer to peak current ((rms * 2.5)/1.77) than I’m comfortable with.
Thank you so much for these videos!! This is my first foray into 3d printing so modding them is new as well. I don't know if this would be the proper place to ask a question but I'm going to give it a shot... I've updated to the SKR E3 DIP V1.0 with the TMC5160's. Thanks to you it pretty much went flawlessly thanks to this video. The only gremlin I've run into is that the Z Stepper is not very quiet at all. All other axis steppers are SILENT! I've double checked the code to be sure I did enable Stealthchop and it was. So for the heck of it I commented it out and reflashed the card but pretty much the same noise. Tried the Google and have not been able to find anything similar to this issue documented anywhere. Thanks in advance for any help you can provide!!
2208 and 2209 sound the same and are damn near silent. You will hear the fans instead of the drivers AND, best of all, the pattern you can see in the light (no Salmon skin though that is gone too) if you hold the object just right is gone with them.
@@MrFox_Adventures no issues with the board for now, testing sensorless homing and probing in the coming days. I attached heatsink to all the mosfets and cpu, both on top and bottom so that cooling is good with fans as I need to print for couple of days. You can check hackebike project here on youtube/facebook
I love your guides to 3d printing! Your configuration tool is an absolute gem! I recently upgraded my sapphire pro to 2209ers. (from 2208). When using them in UART thy skip steps like crazy :-(. Motor current is on the high end (850)
It does. The difference isn't staggering or even relevant for most use cases, but it's there. I have both types of drivers, each running on their own SKR 1.3.
3dmodularsystems.com/fr/drivers-moteurs/661-tmc2209-driver-moteur-hyper-silencieux.html Calibration du courant: formule de calcule du courant dans les moteurs: i=Vref Vref = Imot
The timing is perfect! I just came to your channel to check the stepper direction settings as I'm setting up my SKR 1.3 with 2209's and I see this instead!
Im looking to upgrade my stepper drivers, so I have been watching many videos comparing them. One thing that is not mentioned much on anyone's videos is regarding the differences between UART, IC2, or SPI interface modes. Is there any benefit using a stepper driver that supports SPI over drivers that are strictly UART. Anyone know how these various interface modes effect 3d printing?
There seems to be absolutely no need to bend out or remove the pins (MS, RST and SLP) on an MKS Gen L at least not on my 1.0 unit, once you remove the MS jumpers. MS are only connected to 5V if jumpered - disconnected otherwise; and RST and SLP aren't connected anywhere at all. (correction - SLP and RST are connected to each other; just make sure SLP is unconnected within the step stick) There is also no need to use two pins per serial port, just pick pins suitable to RX, and alias the TX pin to the same in the configuration. Inline resistor should be used just in case. 4 wires instead of 8. I'd even have an urge to just hardwire it on the back of the PCB to the corresponding RST pins. Besides pins 63, 64, 65 and 66 on AUX2 also pin 11 from the servo connector is usable for RX, making it possible to use all 5 axis with firmware control.
Great stuff mate I used the config file you provided in one of your other videos changed the steppers from A4988's to 2209's. One thing of note was that Atom would not successfully compile the file until I placed the files in the PlatformIO projects folder. It wasn't happy with it in a folder of my own choosing. It couldn't find the files even though they were there. Copy and paste and success. Not sure why but maybe this will help some one else who may be stuck on compiling
I have the TMC 2209 drivers for the Manta M8P boards. I am having issues with the Manta Series which has lead me to the Duet 3 HC6 board which has TCM5160 drivers. The SLI can control micro stepping: micro steps: 128 rotation distance: 40 full steps per rotation: 200 This will greatly improve the printer resolution. They also run cooler.
Love your tutorials. Make possible for average Joe to fine tune 3d printers in their current state. Hope you can get your hands on Anycubic Predator, with that brilliant extruder placement. I'm trying to upgrade mine with Bond BMG + e3d v6 + SKR PRO 1.1 TCM5160+ esp01s
Michael, this comment is regarding your slicer tuning video. I'm posting it here in case you don't read comments from old videos. Your retraction test gcode has an error. The 2mm retractions don't start until Z = 12mm, not 7mm as stated in the video. So the first 10mm are at 0mm retraction and at 10mm the 2mm retractions begin and then increase by 2mm every 5mm. Thought you and all others should know this.
Great video! But i would like to add one comment on bench testing a new board/firmware. I just picked up a SKR E3 DIP and 5160 drivers. I followed your instructions. But i couldn't get the M122 test to work. Wasted a lot of time. I was only using USB power to the board. Turns out E3DIP/5160 needs 24V input connected to return proper M122 test response. Maybe its obvious to advanced users, but it wasn't to a noob like me. Cost me a lot of time going around in circles, thinking drivers were bad or i missed something in the firmware.
Hey Michael, another great video that I have been eagerly waiting for. I'm planning to install the SKR 1.3 with 2209 drivers on the Borg. Not sure when yet as I have recently started a new job. Anyway, since the Borg has dual Z motors, can you do a video on setting up Marlin 2.0 for that? I understand that the E1 driver port will be used for the second Z driver and motor?
I'm also curious about dual Z, is it better to use 2 steppers or just a splitter for both motors from one? (SKR Pro have 2 z connectors connected to one stepper)
I know this is a old video but it was new when I took a break from printing I'm getting my printer going again and I'm upgrading to use the new stepper drivers available now. The mks gen L has a new version that handles UART without jumpers and mks has a 2209 Bob too I get the gist but and it seems 8 but control is going to the wayside but maybe you could revisit this
Setting the voltage that will cause usage over those values, up to 1.414x higher in the version of Marlin I'm on, 1074.64 and 1272.6 respectively. This can and most likely will fry peoples' stepper motors over time.
Thanks for another nice tutorial. Just to quickly double check something as I am setting my v1.4 with 2209s on Ender 4. When using 2209s in UART mode do we still need to make any adjustments on the driver using the potentiometer (as we do in standalone mode) prior to setting the current in firmware? Or do we skip that step altogether? Since you don't mention anything about it I don't suppose we have to adjust anything on the driver but wanted to double check in case there is some base value that needs to be set beforehand. Thanks a lot!
Just to answer my own question here in case someone else is also interested. There is no need to adjust anything hardware wise as everything is set in firmware.
@@czajuniapawulonik3148 Thank you for your answer, i was wondering the same. And it's unclear in the video. It must be explained in 1 of the videos of the 37652 video of Teaching tech, but after spending 2 days trying to find the solution on the video, i decided to go through the comment, and i found yours! Thanks for this help.
Love the channel. I was wondering if you could do a tutorial with the skr 1.3 and using sensorless homing for the zmax to align the x gantry with the printer like the prussia printers do?
Why the 2.0 version from Banggood need to be soldered between pins? Is not Uart Ready for use in a skr 1.3? Im trying to find out what version to purchase (1.1 from bigtreech or 2.0 Fysetec). regards @teaching tech !!!
All was well, but i had to disable the hybrid line otherwise it would make this racket as if skipping steps during auto homing. TMC2209 and MKS GEN L v1.0. Marlin 2.1.x on a Tevo Tornado and stock motors.
After setting up my Ender 3 Pro with she skr mini E3 v1.2 and flashing the latest firmware from bigtreetech I have extruder skipping problems. I noticed you recommend vref values to X,Y,Z at 760 and E to 900. Bigtreetech config file currently has them at X,Y,Z at 580 and E at 650? Please advise what settings to use to fix this problem and what the safe and max settings are. The extruder is a creality 42-40. Thanks
it is quite weird what he does! he inputs the Voltage in the X_Current and current is AMPS so i think the x_current is supposed to be the previously calculated RMS current in milliamps which will be "x, y, z: 596 and E: 706 as for the Vref you will have to set that value manually on the drivers them selves (tmc2209)
OK so I watched the skr 1.4 (stock and turbo) and was a great setup install config. However you only briefly went into the 2209 setup because you directed us here to the full 2209 setup. But there is a huge difference which makes this tutorial null and void...this is the skr 1.3. And yes at first it seems like they're the same and that would be right...but the 2209's are apparently completely different and really need their own in depth setup for the skr 1.4 models. The jumpers on 1.3 and 1.4 are completely different. Normally it wouldn't matter with most drivers...unless you have the 2209's. The jumpers are all over the place on the 1.3 and although the 2 boards are very similar, they're still a little different. And those little differences seem to be big issues. The 1.3 work great but give you "tmc connection error". So there's clearly something different needed. There's a bunch of setups out there. But not 1 showing all components and configuration for an ender 3 with. Theres alot with 1 or 2 parts but not the whole thing. Skr 1.4 turbo, 2209 (sensorless homing) And tft35 3.5 e3 v3.0 display. All for just ender3. Theres a ton of people out there with this same problem. They get the new stuff but cant seem to get it all running. And the support is infamous for not supporting. So if theres an issue or questions...Goodluck. you're odds of getting support help are slim to none. But somebody really needs to make a full config with setup for the ender3. These tmc connection errors are getting real old
Another great Video. Now that you have all these different stepsticks how about doing a torque test. A prony brake would work or whatever you’d think would be easier.
I followed your guide for tmc2209, but i am using klipper (It needs only one wire for Uart communication). Anyway i have cut the 2 pins but i still have issues with the communication. It says unable to read stepper register
While browsing AliExpress for the TMC2209 drivers I saw that there is both a v1.1 and v2.0. I am not able to find a clear comparison of the two. Is there any value in getting the v2.0? Your amazing and I am always learning from videos. Thank you so much.
Ok, I'm a noobie trying to learn, but Micheal mentioned the v1.1. From what I see v2.0 is missing two pins whereas v1.1 has them. Other then that , that's as much as I know.
@@Turbo7968 Thanks for your reply. I have sets of each on order. When they arrive i will try to find out more about the differences. I am not sure of the purpose of extra pins but will continue to see what I can learn.
Excellent videos. Thank you. Would you please do a video on how to setup dual Z steppers on a Turbo 1.4 using TMC2209 drivers. I've been trying to get mine working for days. The Z motors are not synchronized and they make a loud hum for a few seconds after manually moving the using the TFT35-E3 V3.0. Again, the videos you've done so far have been a great help.
For the skr gen l i found out its better the fysect 3.0 version of the 2209, i has the tx and rx pin so you dont need a resistance because its already built inside
I don't quite follow the logic behind the VREF calculation @ 6m15s - you calculate a voltage but then enter it into Marlin as mA? Can someone explain where the numbers in this equation come from?
The SKR e3 v2 board w/ 2209s -- the firmware from BTT is set to like 570. I found this insufficient for consistent performance on Z. Many hours thrown away trying to chase that down. Set per your video and looking promising.
I want to THANK YOU for all the hard work you do for all of us. Now I have a major problem my problem is I can't get it to scale to the right height.All the sudden it starts scaling lower than what it is. I didn't change anything I tried cura 4.1,4.0, 3 .6 version. I calibrated my estep's now it prints a lot little better now but I still getting the scaling problem still small! My setup is ender 3 with skr 1.3 w/ 2208 v3 . Can you please help me.
not clear of what a tms 2209 can do on Max Amp doc say : The integrated power MOSFETs handle motor currents up to 2A RMS but later only 1.2 : The maximum settable motor current is 1.77A RMS (0.11Ohm sense resistors), but the SilentStepSticks can only be used up to 1.2A RMS. Irms = (Vref * 1.77A) / 2.5V = Vref * 0.71 Vref = (Irms * 2.5V) / 1.77A = Irms * 1.41 = Imax Vref -> Voltage on Vref pin Irms -> RMS (Root Mean Square) current per phase (Irms = Imax / 1.41) Imax -> Maximum current per phase (Imax = Irms * 1.41) I have 2 motors on Z axis driver so 0,450A per motor ( max 1,7a ) is to less for my setup i set vref max to 1.2v who is 0.9A rms actually can i set a Vref 1.7V two handle my 2 motors correctly wihout killing the tms 2209 ?
hi! thanks for the video, I did everything according to the instructions, but I get an error when flashing: MONITOR_DRIVER_STATUS causes performance issues when used with SoftwareSerial-connected drivers. Disable MONITOR_DRIVER_STATUS or use hardware serial to continue. what could have gone wrong?
Is it same on MKS gen L V2? The board seems to be a bit different. It already has jumpers for uart mode but for the sensorless homing there are some jumpers looks like those on SKR v1.3. I could not find any information for those jumpers but they have same name. Thanks for the tutorial anyway, it help out a lot!
Hey Teaching Tech, great video helped me alot setting up my SKR1.4 with TMC2209 Just one thing you did set your Motor current in Marlin to 0.76 which is your calculated Vref shouldn it set to be 0.596 to match your max A_rms?
The 5160 seems a little overpowered for a 3D printer. Maybe better suited to a CNC, that has to move more mass? While I'd like to see more details on the 2209, I'd also love to see a setup video for the BIQU SKR Pro v1.1 (it's hookups for the 220x drives is a little different from the SKR 3.1)
Suggestion: since you're doing a bunch of videos where you configure marlin differently for each driver, why don't you fork and leave the modifications somewhere instead of downloading a zip? That way, the less technologically inclined can download a zip from your fork with the changes in there
Great video Michael. Would love to see you do Linear advance and Junction deviation with the 2209s (preferably on the SKR1.3, but then i am being selfish:) )
I followed your video using a SKR1.3 board with TMC2209 driver. My settings are all the same but i just get a bad response from the printer on all stepper drivers when running the M122 command. Do you have any advice on why i do not get a response from the stepper drivers?
I bought an SKR v1.3 after watching your video and was amazed to find 2-3V of ripple! on the 5V switching power supply even though the 24V input had only 120mV of ripple going in. They do seem to have put some thought into the filter network on the 3.3V supply (not that it helps much with right around 1V of ripple), but there's no such network on the 5V supply. Just curious if this is typical, or if my board is just defective--have you tried putting an oscilloscope on yours?
Michael do you know first what driver the S42C chip unit uses and can it do sensorless homing? I am using 2 one on each axis X and Y. I am thinking probably not but this is an upgrade to the S42B version. I just got the BTT Octopus Pro board. I know it is overkill.
For some reason, the printer was all working, but when I put the board back in the case, the Y axis no longer works. The 2209 is okay, I swapped sockets to check, and the stepper motor is okay, so I think the board now has a problem. Is it possible to remap the unused E1 socket and use it as the Y axis instead?
Great video, but the TMC2209 is not really an upgrade for those who use a BIQU TMC2208 v3 with UART right, apart from the sensorless homing, is not that big of a deal.
I have5 of the TMC2209s (X Y Z E0 E1) and I maybe mistakenly clipped the one leg of each does that prevent the sensorless homing and UART control. Not sure if I really need it I am working on a delta printer and having a difficult time with the Marlin 2.0, SKR 1.4 turbo, TFT3.5, TMC2209, and BLTouch plenty of info on creality and cartesians but not so much for deltas
You mentioned a previous video on setting up the 2209 in standalone mode, but I can't find it - can you provide a link? I'm looking to upgrade the TMC2100's on my MKS Gen L (stock Sidewinder X1 board) with 2209's as simply as possible. Thanks.
Hi Michael, great video as usual. I followed all your steps to install SKR V1.3 with TMC 2209 drivers on my Ender 5. Unfortunately for me all my motors are now way too louder than they were with the Ender 5 silent board. Am I missing something here. I'd really appreciate your help on this.
I just saw 2209 on on spool3d's store site the other day, i could barely find any info on how to use 2209 or set them up. Not more than 48 hrs, BAM, Teaching Tech swoops in to save the day
Quieter, remove surface artefacts like zebra stripes, and these smart ones let you control a lot more via software. For example, no need to manually set vref, change at will via gcode.
Being quiter and removing skin artifacts are mostly the results of fundamental differences in chip design: - TMC uses feedback loops to adapt the actual output so it compensate for the self induction. A4988 and other drivers do not have this. You might kill some of the self-induction by diodes (TL-Smoothers) but a feedback loop is much more effective and the movement is more precise. - On a 8-bit board the cpu can not do more than 1/16 or maybe 1/32 (on a slow axis) microstepping due to it's speed. The TMC can interpolate and make a 1/256 microstepping to make smoother movement even on 8-bit boards. - with serial or spi, depending on the tmc you choose, you can set modes not available via cfg-pins. For example Prusa changed e-Axis TMC to native 1/32 microstepping without interpolation as an extruder is a slow moving axis and needing more torque (1/256 interpolation has less torque and led to inconsitent extrusion). So SPI or serial controlling is not just to set current via firmware instead of potentiometer, show status of the driver and enabeling crash detection, but also improving print quality by optimiced settings. Of course with a socked-driver you alternativly can choose different drivers for the axis - for x and y TMC as they are fast moving axis and interpolation do a good job, on z it nearly does not matter what driver you use (but TMC are a good choice if using z-hops) while on e-axis you should prefer a driver with native 1/32 microstepping - so no standalone TMC (you need spi or serial for using TMC in this mode) but there are other drivers you can set to 1/32 by jumpers. So using 4 TMC in standalone mode is not the best solution - so the Creality's"silent board" is no good idea. One disadvantage of this drivers for sockets is the heat-management. The chips are meant to spread the heat through the pcb. If you take a look on an EinsyBoard or a Duet: The PCB is designed to get rid of the heat without heatsink and (depending of the case you design) without fan.
you let us see where Uarto For X/Y/Z/EO where are E1 located ? X=X , Y=Y Z=Z1 E0=Z2 E1=E0 here on mks gen_L v1.0 for dual Z driven. i can not set the E1 for uart?


My apologies for the flickering light. I'm always trying to improve lighting and sound, trying a new setup for this video. Alas, it didn't work out so well. I will continue to try and improve things.
I'm more concern that you look like a muppet behind the desk on the intro :P
Haha I can't argue with that.
I just connected a brand new monitor and this was the first video I played on it.. Was worried until I scrolled down.. lol
Content is King my friend. The content always makes up for the little things. Don't sweat it!
You ever planning on upgrading to a 4K setup?
Note: As of November or earlier, there is no longer any need to solder a jumper wire between clk and gnd for the BIQU/BIGTREETECH TMC5160 V1.2. They have an internal 10k pulldown resistor to connect clk to gnd (you can verify with a multimeter). You do still need to clip or bend the clk pin to prevent the control board clock from interfering with the internal clock. Thank you for a great guide!
You sir, are an AMAZING contribution to the 3d printing community and I just wanted to have you hear it directly from me. My SKR v1.3 was delivered today and I'm in the middle of setting it up. I literally have a full set of 2208's in my Amazon cart right now and am going to switch them over to the 2209's based on this video alone. I didn't choose them then due to all of the possible issues I would have to deal with in my delta machine. You have given me the confidence to order the newer drivers with full confidence. In the end, my setup is going to be MUCH more capable than it would have been if I would've clicked "checkout" earlier this evening. I have you to thank for that. **Thank You**
It is sincerely a great contribution but from someone who's just bought a stock Ender 5 brand new to 3d printing it's intimidatingAF. What on earth have I got myself into. I heartily recommend BigTreeTech put this video into a kit so I can just buy it and plug it in :-) Soldering iron you say!? Good heavens.
Boards with removable drivers are the only way to go. Drivers can go smoke, and do. Having removable driver chips not only allows you an upgrade path, it can possibly eliminate replacing the board itself. Truly an excellent video. Nicely done.
Michael, great guide! BTW you are using BIGTREETECH TMC5160 V1.2 drivers here. BTT claims one of the key module features is that it internally pulls down the CLK pin to ground (and also has better aligned MOSFETs, 6-layer PCB for better heat dissipation, ...).
In case you need to pull down the CLK pin on an older version, you can also use a trick - if you melt the CLK pin's solder on top and apply pressure on the pin from the bottom, you can push it all the way up through the board so it looks like one of the SPI pins. Now you can solder a short wire to the GND pin, like you suggest, but on the other end you can have a single pin female Dupont connector that you can attach to the modified CLK pin when you want to ground it, or disconnect the cable when you don't want it grounded.
With the SKR Pro 1.1 + TMC5160 V1.1 kit that I received, they delivered the SPI loom anyway as part of the TMC modules - so I could just snip off some wires with a single pin female Dupont for the grounding job. Obviously in case I need to push back the CLK pin at a later point, I just need to heat up the pin again and push it through the PCB to its original location.
On my SKR Pro 1.1 in my CR10 Mini I have extreme difficulties calibrating the stepper drivers to make the motors not overheat, not have skipped steps and have sensorless homing working.
Excellent video. I powered my board via USB to get the initial setup going, the problem I ran into is that m122 doesn't work, or doesn't return the right results, if you're not powering it via the 12/24v port. Banged my head on the desk for a while reading old forum posts and things before I found the solution. Everything else was great! Thanks again!
What a great series this has been. And as you keep adding too it as more drivers pop up these will the go too place for stepper driver upgrades. Thank you for sharing.
Thanks a lot - I was installing 5160 to SKR 1.3 board and your "easy to setup" guide really guided me in right direction!
Nice video , i have a mks gen l and tmc 2208 instaled on my ender 3 from your videos , it works perfect , tanks for your videos , i have the 0.76 and 0.9 for e vref and it works great , all day it was on , but the stepper motor and the heated shink were cold , the motors works perfect , they have power .
Only my e E steps per mm didn't were god , now i have set them and the cura flow to 60% and the print looks great !
@@weirdoku the steps per mm are almost calibrated , maybe 1/2 mm error , but if i set flow to 100% i get horyble prints, overextrusion , not sticking to the bed , that becouse it extrude too much filament , the bed is perfect calibrated with a piece of paper that is 0.2 mm , that is my first layer height , soo it soulth be only that problem, it extrude too much filament , soo i go down until i get it fine, and now it is arount 60% and the e stets 93, and i printed the extrusion test ok
Would love to see an SKR 1.4 / 1.4 Turbo and TMC 2209 video from you now that those are out. I and a lot of others out there are struggling it seems with getting them to work.
Your channel is my first "go-to" channel on 3D printing tech. Very thorough & clear presentation. Awesome awesome work.
Perfect timing my 2209's and skr board are currently in the air. Thanks for the great content
Another great learning experience. Love the channel and what you bring to the 3D printer community.
I'm reprap fan since... well when Mendel90 was a new construction. I can say that until now I have not seen many yt channels as helpful as yours is.
I Got my SKR mini v2.0 motherboard a few month ago and I realised it it was working very loud I tried editing TMC driver settings but that did not work then I see my video and edited my software settings to tmc2209 as you showed and it is now very quite thank you very much. great video
I enjoy your detailed video's. I use them as good reference. I am using this video to help me configure TMC2209 on ReArm board with Ramps 1.4 driver card. Thanks
Hey, were you successful with mounting the TMC2209 on the ramps 1.4? I haven't found any guide, tutorial or anything that says that they are compatible, how did you do it?
On my Ender 3 I changed from TMC2208 to (1) TMC2209. The 2208 were dying in my case (2/5). I guess because of temperature. In stealchop these drivers can get really hot.
I bought 4 TMC2209 from Watterott and installed only one on the Y axis. And I installed a Fan in the top lid of my ender 3 back-case. So far no driver died.
In spreadcycle my 2208 are causing a whining noise in the motors, when they not move. I guess it is because of the holding current. The 2209 feature CoolStep where they can tune the current with the currentsensors for stallguard. These drivers don't whine with the same settings in spreadcylce.
The TMC2209 are really worth the extra. Thanks for this video and how to setup the sensorless homing. I haven't given it a shot because there were a lot of comments on github/marlinfw that this is tricky to setup.
The amount of detail and effort going into this video is really amazing!
BIG, BIG Thanks! My Ender 3 Board messed up and without your guides i would have spend weeks to get the printer to work again. Keep on with this great work!
Very useful
Learned how to uncomment from this video!! NOWHERE online was I able to find an article telling me how to uncomment something !
The chart in the video shows a value of 20 amps for the Bigtreetech tmc5160. The linked webpage has a maximum current of 5.5A and a maximum (peak) RMS current of 3.0 Amps (~average). Maybe the mosfets have a rating of 20 Amps, but according to the specifications, the module does not.
Also the mating connectors used typically have around a 2 Amp rating. So what you plug the modules into may be the limiting factor. I would love to have a 20Amp rated driver, but that is highly unlikely in this form factor.
What exactly would you use a 20 amp driver for? Like a positioning module for some super heavy platform? I was window-shopping a NEMA34 CNC kit and even those big monsters only needed about 7-8 amps.
I also was confused by this high rating. They definitely have better mosfets which run cooler. But 20A seems a bit way to high. On the watterott shop page it says the 5160 can run without a heatsink. At least on the low currents on a printer this should work. But from my experience with my tmc2208 I would always place a headsink
@@GordonGEICO I am not surprised about using a 20 amp part. The maximum current rating of the part is only one factor when it comes to part selection. The 20 amp part will have a low resistance when switched on and that is probably the greater reason for it's selection. The amount of heatsink cooling capacity for these modules is very low.
The 20 amp rating on the part may be a dc rating. Turn the part on and hold that current. With stepper use the part is switched on and off rapidly. That causes additional heat compared to switching a pure dc current.
Thinking about the designs I have done (I design electronics for a living) and the maximum current rating for semiconductors I have used would typically be three times the current the circuit was expected to switch. And this is about what the TMC5160 seems to be. 20A/5.5A ~3.5 times (maximum rating) But the temperature for the complete module would limit the continuous (RMS) rating.
@@tinayoga8844 actually I believe the 5160 driver itself (maybe with the external mosfets in the circuit) could handle the 20a current it's rated for, when force cooled properly... But installed on this tiny circuit board with a tiny heatsink that doesn't even touch the actual chip (only the mosfets!) as well as having such tiny traces, the cooling capacity and hence forth current rating is greatly reduced. The chip is basically over specced for its application, but that is why it is deemed safe to use without any extra heatsink with low current devices (I'm putting a heatsink on mine anyway, and I'm considering some form of additional physical connection from the heat sink to the heat spreader on the board for the actual chip to be cooled).
@@78audioguy Well, the actual chip is not regulating the current, the mosfet is... so it makes perfect sense to place the heatsink on those.
Nice easy to follow guide.
Great vid as always! Definitely picking up SKR 1.3 and TMC2209 :)
The froggie I am is so grateful for your guides, because of your work and time you put to your RUclips channel i've been able to do so much things to my printers. From this video i've been able to configure and install SKR1.3 motherboard with TMC5160's on my Alfawise U20 (=Longer3D LK1, a CR10 clone)
Oh and because of you i bought an ender 3 a month ago and in few days that printer was already printing amazingly without modding much.
Keep up the good work !! Wish i'd still be in australia i'd offer you some beers. I might visit your patreon page ^^
For those of us who have a good tune in 1.1.9 there's WinMerge. It makes it easier to compare the settings between 1.1.9 and 2.0 that translate across the versions.
Or if you don't need UART you can use them with 1.1.9 and TMC 2208 Standalone setting.
Hey Michael, Finally got the MKS 1.3 installed on the #Borg, and my 2209 (v1.2) drivers should arrive in a couple of days. I would have had a much tougher time if it hadn't been for your videos. Thank you.
I'm using an Ender 3 + SKR 1.3 + TMC2209 in UART mode. I keep getting "Unknown command" when I try an M122. I'm *not* on USB power, but am using 24v. M119 worked so I know communications are good. Great videos, they've enabled me to try things I never would have on my own!
Also, this may be related and help anyone answer. I'm using Big-TreeTech TMC2209 v1.2 drivers, and the SKR 1.3. Is there anything I need to solder, bend, or cut on these drivers to enable UART???
Hi, I tried this with MKS TMC2209 V2.0 driver with MKS GEN L 1.0 board(for Tevo Tarantula) and this works super silent. I only updated X and Y axis as I think Z and E do not make much noise while printing. The only change which I did for MKS TMC2209 is I saw on one other video like they solder R8 and UART pin together. Rest all I followed your steps and it works simply well. Though I need to disabled this "MONITOR_DRIVER_STATUS", as with latest release of marlin they are generating an error if this macro is being used with software serial.
But in short, many thanks for this video, it really helped me on following end to end steps from software and hardware perspective.
Hello there, I just got the TMC2209 v2.0 for my Gen L v1.0 as well. Do you happen to still have the video you mention about soldering R8 and UART together? Just want to make sure I don't do anything wrong. Thanks!
@@nehrox2567 Just saw your comment. Here is the video in case anyone needs this in future. ruclips.net/video/7ShcFKXrVHo/видео.html&lc=Ugx9N2oAOx7GBFb0Lqx4AaABAg.9J_pLsJKYF89K0Vqrgz2ME
Is there a mistake at ~6:20? It looks like you calculate the RMS current and the VREF, then you input the VREF result into settings for current under each driver.
Can anyone help clarify on this? Why do we insert voltage numbers for XYZ_CURRENT in Marlin?
I think it’s a mistake. The comments in marlin call for RMS current directly. The value he’s putting in is much closer to peak current ((rms * 2.5)/1.77) than I’m comfortable with.
i will erase my comment i wrote the same
Thank you so much for these videos!! This is my first foray into 3d printing so modding them is new as well. I don't know if this would be the proper place to ask a question but I'm going to give it a shot... I've updated to the SKR E3 DIP V1.0 with the TMC5160's. Thanks to you it pretty much went flawlessly thanks to this video. The only gremlin I've run into is that the Z Stepper is not very quiet at all. All other axis steppers are SILENT! I've double checked the code to be sure I did enable Stealthchop and it was. So for the heck of it I commented it out and reflashed the card but pretty much the same noise. Tried the Google and have not been able to find anything similar to this issue documented anywhere. Thanks in advance for any help you can provide!!
Joey Endriukaitis is it possible to contact you privately? I would like to ask you something since we have the same motherboard. thank you
Works nicely on a Tevo Tarantula Pro with TCM2209v1.2 and MKS Gen L1.0. Just had to invert X and Y home direction
I'm always pleased for your great work, perfect. Thanks!
Well done. Thank you for posting this information. This is very useful for setting up my new board.
Thank you for this video. Are you planning to make a video about skr mini e3 soon?
Could you make an explanation of the encoder that is possible to use on the TMC 5160? Would this make it a closed loop stepper?
I would love to hear the sound of that drivers, please make a video of sound comparison between this drivers.
2208 and 2209 sound the same and are damn near silent. You will hear the fans instead of the drivers AND, best of all, the pattern you can see in the light (no Salmon skin though that is gone too) if you hold the object just right is gone with them.
Great work once again Michael, thanks
would like to see a video for the SKR Pro v1.1 and also the SENSORLESS_PROBING. btw, great video!
How do you like the pro and all of that circuitry so close together (crammed together) like it is?
@@thebeststooge doing some tests in the coming days, but it does not look too bad.
Any luck now that it has been a bit?
@@MrFox_Adventures no issues with the board for now, testing sensorless homing and probing in the coming days. I attached heatsink to all the mosfets and cpu, both on top and bottom so that cooling is good with fans as I need to print for couple of days. You can check hackebike project here on youtube/facebook
still trying to make 2209 sensorless homing to work on skr pro!
I love your guides to 3d printing! Your configuration tool is an absolute gem!
I recently upgraded my sapphire pro to 2209ers. (from 2208). When using them in UART thy skip steps like crazy :-(. Motor current is on the high end (850)
2209 handling up to 2A tells me it will run cooler than the other older ones at our 300ma-1.2a current 3d printers, right?
Yes it should.
It does. The difference isn't staggering or even relevant for most use cases, but it's there. I have both types of drivers, each running on their own SKR 1.3.
@Nuno Pereira Would this mean I could remove the fan that my current A4988 has to have?
@@thebeststooge I would leave it.
I'm not sure how to work out correct vref settings for the 2209. Is it the same formula for the 2208. Love your detailed video's.
3dmodularsystems.com/fr/drivers-moteurs/661-tmc2209-driver-moteur-hyper-silencieux.html
Calibration du courant:
formule de calcule du courant dans les moteurs:
i=Vref
Vref = Imot
The timing is perfect! I just came to your channel to check the stepper direction settings as I'm setting up my SKR 1.3 with 2209's and I see this instead!
Im looking to upgrade my stepper drivers, so I have been watching many videos comparing them. One thing that is not mentioned much on anyone's videos is regarding the differences between UART, IC2, or SPI interface modes. Is there any benefit using a stepper driver that supports SPI over drivers that are strictly UART. Anyone know how these various interface modes effect 3d printing?
There seems to be absolutely no need to bend out or remove the pins (MS, RST and SLP) on an MKS Gen L at least not on my 1.0 unit, once you remove the MS jumpers. MS are only connected to 5V if jumpered - disconnected otherwise; and RST and SLP aren't connected anywhere at all.
(correction - SLP and RST are connected to each other; just make sure SLP is unconnected within the step stick)
There is also no need to use two pins per serial port, just pick pins suitable to RX, and alias the TX pin to the same in the configuration. Inline resistor should be used just in case. 4 wires instead of 8. I'd even have an urge to just hardwire it on the back of the PCB to the corresponding RST pins.
Besides pins 63, 64, 65 and 66 on AUX2 also pin 11 from the servo connector is usable for RX, making it possible to use all 5 axis with firmware control.
Great stuff mate I used the config file you provided in one of your other videos changed the steppers from A4988's to 2209's. One thing of note was that Atom would not successfully compile the file until I placed the files in the PlatformIO projects folder. It wasn't happy with it in a folder of my own choosing. It couldn't find the files even though they were there. Copy and paste and success. Not sure why but maybe this will help some one else who may be stuck on compiling
Great content again. Keep up the nerdly content. It is much appreciated
Love the series! Nice content like usual, just bought the 2208 so maybe in the future i will take the 2209
I have the TMC 2209 drivers for the Manta M8P boards. I am having issues with the Manta Series which has lead me to the Duet 3 HC6 board which has TCM5160 drivers. The SLI can control micro stepping:
micro steps: 128
rotation distance: 40
full steps per rotation: 200
This will greatly improve the printer resolution. They also run cooler.
Love your tutorials. Make possible for average Joe to fine tune 3d printers in their current state. Hope you can get your hands on Anycubic Predator, with that brilliant extruder placement. I'm trying to upgrade mine with Bond BMG + e3d v6 + SKR PRO 1.1 TCM5160+ esp01s
Michael, this comment is regarding your slicer tuning video. I'm posting it here in case you don't read comments from old videos. Your retraction test gcode has an error. The 2mm retractions don't start until Z = 12mm, not 7mm as stated in the video. So the first 10mm are at 0mm retraction and at 10mm the 2mm retractions begin and then increase by 2mm every 5mm. Thought you and all others should know this.
Glad to help!
A year later, are these steppers still be best available?
Great video! But i would like to add one comment on bench testing a new board/firmware. I just picked up a SKR E3 DIP and 5160 drivers. I followed your instructions. But i couldn't get the M122 test to work. Wasted a lot of time. I was only using USB power to the board. Turns out E3DIP/5160 needs 24V input connected to return proper M122 test response. Maybe its obvious to advanced users, but it wasn't to a noob like me. Cost me a lot of time going around in circles, thinking drivers were bad or i missed something in the firmware.
Hey Michael, another great video that I have been eagerly waiting for. I'm planning to install the SKR 1.3 with 2209 drivers on the Borg. Not sure when yet as I have recently started a new job.
Anyway, since the Borg has dual Z motors, can you do a video on setting up Marlin 2.0 for that? I understand that the E1 driver port will be used for the second Z driver and motor?
I'm also curious about dual Z, is it better to use 2 steppers or just a splitter for both motors from one? (SKR Pro have 2 z connectors connected to one stepper)
I know this is a old video but it was new when I took a break from printing I'm getting my printer going again and I'm upgrading to use the new stepper drivers available now. The mks gen L has a new version that handles UART without jumpers and mks has a 2209 Bob too I get the gist but and it seems 8 but control is going to the wayside but maybe you could revisit this
Setting the voltage that will cause usage over those values, up to 1.414x higher in the version of Marlin I'm on, 1074.64 and 1272.6 respectively. This can and most likely will fry peoples' stepper motors over time.
Thanks for another nice tutorial. Just to quickly double check something as I am setting my v1.4 with 2209s on Ender 4. When using 2209s in UART mode do we still need to make any adjustments on the driver using the potentiometer (as we do in standalone mode) prior to setting the current in firmware? Or do we skip that step altogether? Since you don't mention anything about it I don't suppose we have to adjust anything on the driver but wanted to double check in case there is some base value that needs to be set beforehand. Thanks a lot!
Just to answer my own question here in case someone else is also interested. There is no need to adjust anything hardware wise as everything is set in firmware.
@@czajuniapawulonik3148 Thank you for your answer, i was wondering the same. And it's unclear in the video. It must be explained in 1 of the videos of the 37652 video of Teaching tech, but after spending 2 days trying to find the solution on the video, i decided to go through the comment, and i found yours!
Thanks for this help.
@@joanS12 Pleasure. Glad I could help.
Finally..you are the best! Thanks
Love the channel. I was wondering if you could do a tutorial with the skr 1.3 and using sensorless homing for the zmax to align the x gantry with the printer like the prussia printers do?
Maybe try Z_STEPPER_AUTO_ALIGN in Marlin? I've got my dual z kit coming in the post and I plan to try that
Why the 2.0 version from Banggood need to be soldered between pins? Is not Uart Ready for use in a skr 1.3? Im trying to find out what version to purchase (1.1 from bigtreech or 2.0 Fysetec). regards @teaching tech !!!
Version 3 from BTT/BIQU is UART ready.
Hi Michael, your tutorials are so concise and easy, thank you for your hard work
If the 2208 and 2209 don't support SPI, and Marlin does not support UART, then how are you using them?
All was well, but i had to disable the hybrid line otherwise it would make this racket as if skipping steps during auto homing. TMC2209 and MKS GEN L v1.0. Marlin 2.1.x on a Tevo Tornado and stock motors.
After setting up my Ender 3 Pro with she skr mini E3 v1.2 and flashing the latest firmware from bigtreetech I have extruder skipping problems. I noticed you recommend vref values to X,Y,Z at 760 and E to 900. Bigtreetech config file currently has them at X,Y,Z at 580 and E at 650? Please advise what settings to use to fix this problem and what the safe and max settings are. The extruder is a creality 42-40. Thanks
it is quite weird what he does! he inputs the Voltage in the X_Current and current is AMPS so i think the x_current is supposed to be the previously calculated RMS current in milliamps which will be "x, y, z: 596 and E: 706
as for the Vref you will have to set that value manually on the drivers them selves (tmc2209)
OK so I watched the skr 1.4 (stock and turbo) and was a great setup install config. However you only briefly went into the 2209 setup because you directed us here to the full 2209 setup. But there is a huge difference which makes this tutorial null and void...this is the skr 1.3. And yes at first it seems like they're the same and that would be right...but the 2209's are apparently completely different and really need their own in depth setup for the skr 1.4 models. The jumpers on 1.3 and 1.4 are completely different. Normally it wouldn't matter with most drivers...unless you have the 2209's. The jumpers are all over the place on the 1.3 and although the 2 boards are very similar, they're still a little different. And those little differences seem to be big issues. The 1.3 work great but give you "tmc connection error". So there's clearly something different needed. There's a bunch of setups out there. But not 1 showing all components and configuration for an ender 3 with. Theres alot with 1 or 2 parts but not the whole thing. Skr 1.4 turbo, 2209 (sensorless homing) And tft35 3.5 e3 v3.0 display. All for just ender3. Theres a ton of people out there with this same problem. They get the new stuff but cant seem to get it all running. And the support is infamous for not supporting. So if theres an issue or questions...Goodluck. you're odds of getting support help are slim to none. But somebody really needs to make a full config with setup for the ender3. These tmc connection errors are getting real old
Another great Video. Now that you have all these different stepsticks how about doing a torque test. A prony brake would work or whatever you’d think would be easier.
I followed your guide for tmc2209, but i am using klipper (It needs only one wire for Uart communication).
Anyway i have cut the 2 pins but i still have issues with the communication. It says unable to read stepper register
While browsing AliExpress for the TMC2209 drivers I saw that there is both a v1.1 and v2.0. I am not able to find a clear comparison of the two. Is there any value in getting the v2.0?
Your amazing and I am always learning from videos.
Thank you so much.
Ok, I'm a noobie trying to learn, but Micheal mentioned the v1.1. From what I see v2.0 is missing two pins whereas v1.1 has them. Other then that , that's as much as I know.
@@Turbo7968
Thanks for your reply. I have sets of each on order. When they arrive i will try to find out more about the differences. I am not sure of the purpose of extra pins but will continue to see what I can learn.
Could you make a video how to calibrate junction deviation? :)
awesome content .. thank you for sharing
Excellent videos. Thank you. Would you please do a video on how to setup dual Z steppers on a Turbo 1.4 using TMC2209 drivers. I've been trying to get mine working for days. The Z motors are not synchronized and they make a loud hum for a few seconds after manually moving the using the TFT35-E3 V3.0. Again, the videos you've done so far have been a great help.
For the skr gen l i found out its better the fysect 3.0 version of the 2209, i has the tx and rx pin so you dont need a resistance because its already built inside
I don't quite follow the logic behind the VREF calculation @ 6m15s - you calculate a voltage but then enter it into Marlin as mA? Can someone explain where the numbers in this equation come from?
The SKR e3 v2 board w/ 2209s -- the firmware from BTT is set to like 570. I found this insufficient for consistent performance on Z. Many hours thrown away trying to chase that down. Set per your video and looking promising.
I want to THANK YOU for all the hard work you do for all of us. Now I have a major problem my problem is I can't get it to scale to the right height.All the sudden it starts scaling lower than what it is. I didn't change anything I tried cura 4.1,4.0, 3 .6 version. I calibrated my estep's now it prints a lot little better now but I still getting the scaling problem still small! My setup is ender 3 with skr 1.3 w/ 2208 v3 . Can you please help me.
A full video how to change ender 6 motherboard with a duet 3 6hc or skr1.4turbo with tmc2209 or both would be nice
thank you is working you are a real hero
I'm looking at trying the MKS SGen L with the 2209s. Do you know if this board follows the SKR 1.3 or if it is a mix between the two?
Thanks, your video is very helpful
not clear of what a tms 2209 can do on Max Amp
doc say :
The integrated power MOSFETs handle motor currents up to 2A RMS
but later only 1.2 :
The maximum settable motor current is 1.77A RMS (0.11Ohm sense resistors), but the SilentStepSticks can only be used up to 1.2A RMS.
Irms = (Vref * 1.77A) / 2.5V = Vref * 0.71
Vref = (Irms * 2.5V) / 1.77A = Irms * 1.41 = Imax
Vref -> Voltage on Vref pin
Irms -> RMS (Root Mean Square) current per phase (Irms = Imax / 1.41)
Imax -> Maximum current per phase (Imax = Irms * 1.41)
I have 2 motors on Z axis driver so 0,450A per motor ( max 1,7a ) is to less for my setup i set vref max to 1.2v who is 0.9A rms actually
can i set a Vref 1.7V two handle my 2 motors correctly wihout killing the tms 2209 ?
hi! thanks for the video, I did everything according to the instructions, but I get an error when flashing: MONITOR_DRIVER_STATUS causes performance issues when used with SoftwareSerial-connected drivers. Disable MONITOR_DRIVER_STATUS or use hardware serial to continue. what could have gone wrong?
Is it same on MKS gen L V2? The board seems to be a bit different. It already has jumpers for uart mode but for the sensorless homing there are some jumpers looks like those on SKR v1.3. I could not find any information for those jumpers but they have same name. Thanks for the tutorial anyway, it help out a lot!
Hey Teaching Tech,
great video helped me alot setting up my SKR1.4 with TMC2209
Just one thing you did set your Motor current in Marlin to 0.76 which is your calculated Vref
shouldn it set to be 0.596 to match your max A_rms?
The 5160 seems a little overpowered for a 3D printer. Maybe better suited to a CNC, that has to move more mass?
While I'd like to see more details on the 2209, I'd also love to see a setup video for the BIQU SKR Pro v1.1 (it's hookups for the 220x drives is a little different from the SKR 3.1)
Suggestion: since you're doing a bunch of videos where you configure marlin differently for each driver, why don't you fork and leave the modifications somewhere instead of downloading a zip? That way, the less technologically inclined can download a zip from your fork with the changes in there
the fact that your asking this is a very good reason you don't want that. Learn.
@@ster9765 I'm not asking for me :)
Great video Michael. Would love to see you do Linear advance and Junction deviation with the 2209s (preferably on the SKR1.3, but then i am being selfish:) )
Hello Michael ,
May I ask if for the ‘Bigtreetech v1.2 , all the jumper should be taken out too? To put the ‘TMC2009? Many thanks !! Cheers !!
I followed your video using a SKR1.3 board with TMC2209 driver. My settings are all the same but i just get a bad response from the printer on all stepper drivers when running the M122 command. Do you have any advice on why i do not get a response from the stepper drivers?
I have the same problem, did you sort it out?
I bought an SKR v1.3 after watching your video and was amazed to find 2-3V of ripple! on the 5V switching power supply even though the 24V input had only 120mV of ripple going in. They do seem to have put some thought into the filter network on the 3.3V supply (not that it helps much with right around 1V of ripple), but there's no such network on the 5V supply. Just curious if this is typical, or if my board is just defective--have you tried putting an oscilloscope on yours?
Michael do you know first what driver the S42C chip unit uses and can it do sensorless homing? I am using 2 one on each axis X and Y. I am thinking probably not but this is an upgrade to the S42B version. I just got the BTT Octopus Pro board. I know it is overkill.
For some reason, the printer was all working, but when I put the board back in the case, the Y axis no longer works. The 2209 is okay, I swapped sockets to check, and the stepper motor is okay, so I think the board now has a problem. Is it possible to remap the unused E1 socket and use it as the Y axis instead?
Absolutely. Just visit the pins file for your board and copy and paste to switch.
@@TeachingTech Thanks, that got me working. No I just have to work out why my prints are not in the centre of the bed :)
Great video, but the TMC2209 is not really an upgrade for those who use a BIQU TMC2208 v3 with UART right, apart from the sensorless homing, is not that big of a deal.
I have both. The 2209 do run a bit cooler than the 2208. Apart from that, they're both great (I don't use sensorless homing).
I have5 of the TMC2209s (X Y Z E0 E1) and I maybe mistakenly clipped the one leg of each does that prevent the sensorless homing and UART control. Not sure if I really need it I am working on a delta printer and having a difficult time with the Marlin 2.0, SKR 1.4 turbo, TFT3.5, TMC2209, and BLTouch plenty of info on creality and cartesians but not so much for deltas
Thank you!!! 💪💪💪💪
You mentioned a previous video on setting up the 2209 in standalone mode, but I can't find it - can you provide a link? I'm looking to upgrade the TMC2100's on my MKS Gen L (stock Sidewinder X1 board) with 2209's as simply as possible. Thanks.
Hi Michael, great video as usual. I followed all your steps to install SKR V1.3 with TMC 2209 drivers on my Ender 5. Unfortunately for me all my motors are now way too louder than they were with the Ender 5 silent board. Am I missing something here. I'd really appreciate your help on this.
I just saw 2209 on on spool3d's store site the other day, i could barely find any info on how to use 2209 or set them up. Not more than 48 hrs, BAM, Teaching Tech swoops in to save the day
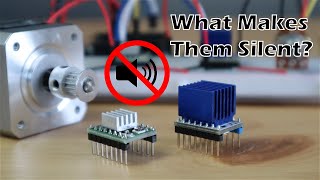
So uuuh, do stepper motor drivers only make things quieter? Or are there other things?
Quieter, remove surface artefacts like zebra stripes, and these smart ones let you control a lot more via software. For example, no need to manually set vref, change at will via gcode.
@@TeachingTech thank you!!
Being quiter and removing skin artifacts are mostly the results of fundamental differences in chip design:
- TMC uses feedback loops to adapt the actual output so it compensate for the self induction. A4988 and other drivers do not have this. You might kill some of the self-induction by diodes (TL-Smoothers) but a feedback loop is much more effective and the movement is more precise.
- On a 8-bit board the cpu can not do more than 1/16 or maybe 1/32 (on a slow axis) microstepping due to it's speed. The TMC can interpolate and make a 1/256 microstepping to make smoother movement even on 8-bit boards.
- with serial or spi, depending on the tmc you choose, you can set modes not available via cfg-pins. For example Prusa changed e-Axis TMC to native 1/32 microstepping without interpolation as an extruder is a slow moving axis and needing more torque (1/256 interpolation has less torque and led to inconsitent extrusion).
So SPI or serial controlling is not just to set current via firmware instead of potentiometer, show status of the driver and enabeling crash detection, but also improving print quality by optimiced settings.
Of course with a socked-driver you alternativly can choose different drivers for the axis - for x and y TMC as they are fast moving axis and interpolation do a good job, on z it nearly does not matter what driver you use (but TMC are a good choice if using z-hops) while on e-axis you should prefer a driver with native 1/32 microstepping - so no standalone TMC (you need spi or serial for using TMC in this mode) but there are other drivers you can set to 1/32 by jumpers.
So using 4 TMC in standalone mode is not the best solution - so the Creality's"silent board" is no good idea.
One disadvantage of this drivers for sockets is the heat-management. The chips are meant to spread the heat through the pcb. If you take a look on an EinsyBoard or a Duet: The PCB is designed to get rid of the heat without heatsink and (depending of the case you design) without fan.
you let us see where Uarto For X/Y/Z/EO where are E1 located ?
X=X , Y=Y Z=Z1 E0=Z2 E1=E0 here on mks gen_L v1.0 for dual Z driven.
i can not set the E1 for uart?