In addition, if you add a contrast adjustment of any kind, be it curves, levels, or the brightness/contrast layer, and you find that your image has become more saturated, which can sometimes happen with contrast adjustments, you can set the layer blend mode to "Luminosity" and it will only affect the brightness and not the vibrancy/saturation. Alternately, if you're using curves or levels to add color with the Red, Green, or Blue channels, and find that you're losing contrast, you can set the blend mode to "Color" and it'll only affect the colors and not the contrast. Great tutorial as always, Ed. Always enjoy your stuff!
Hi Ed very helpful video, I learned a lot. I have a question about eyedroppers. The way I understand it you pick for example a black eyedropper and click on something black in the image that's going to set what your black actually looks like. The same is true for white and grey eyedropper so I understand that, BUT when I click on black eyedropper and click on black part of my image, it displays an additional curve of a different color in my curve window. The same is true when I click the white eyedropper on the white in the image and the grey eyedropper on grey in the image. So now I got 3 additional curves. Is it supposed to be like that? What are those additional curves? Hope you can help me out, Thanks so much, Marianne:)
what you are selecting in the photoshop tone curve is a tonal range. so you are selecting what black is yes. and now photoshop gives you options to edit everything within that range. the same with the highlights and the mid tones. This means you can independently sect and edits highlights mid tones and black using the tone cute. this allows you to make ver specific edits very easily.
It may seem nuts but because Ps is such a gigantic library of tools a few videos on Mood might be a way to Dewey Decimal it out a bit. What you did with the raising the reds and lowering the blues in the shadows really brought out an airy romantic almost 1950s Italian film look.


In addition, if you add a contrast adjustment of any kind, be it curves, levels, or the brightness/contrast layer, and you find that your image has become more saturated, which can sometimes happen with contrast adjustments, you can set the layer blend mode to "Luminosity" and it will only affect the brightness and not the vibrancy/saturation. Alternately, if you're using curves or levels to add color with the Red, Green, or Blue channels, and find that you're losing contrast, you can set the blend mode to "Color" and it'll only affect the colors and not the contrast.
Great tutorial as always, Ed. Always enjoy your stuff!
Probably the best tutorial on curves that I've ever seen. Thank you so much!
I love following your tutorials absoulotly brilliant and very well explained
I was actually looking for a tutorial on the TONE curve, not just curves. mainly how the parametric sliders affect the image.
Good tut Ed, crystal clear, good information.
Thanks for sharing
Nice shot by the way
Loved it!!!
Thanks for the tutorial.
Great video, thanks
A little clarification, but when you use the "set black point," is that essentially taking the point you click on the screen and making it 100% black?
Thank you! Very informative and I always looks forward to your videos.
Awesome. Super happy you enjoy my photoshop tutorials. The photoshop curves adjustment layer is awesome.
Nice video! I like it
thank you!
Hi Ed very helpful video, I learned a lot. I have a question about eyedroppers. The way I understand it you pick for example a black eyedropper and click on something black in the image that's going to set what your black actually looks like. The same is true for white and grey eyedropper so I understand that, BUT when I click on black eyedropper and click on black part of my image, it displays an additional curve of a different color in my curve window. The same is true when I click the white eyedropper on the white in the image and the grey eyedropper on grey in the image. So now I got 3 additional curves. Is it supposed to be like that? What are those additional curves? Hope you can help me out, Thanks so much, Marianne:)
what you are selecting in the photoshop tone curve is a tonal range. so you are selecting what black is yes. and now photoshop gives you options to edit everything within that range. the same with the highlights and the mid tones. This means you can independently sect and edits highlights mid tones and black using the tone cute. this allows you to make ver specific edits very easily.
Thank you very much for replying, it's clear now:)
Thank you very much for replying, it's clear now:)
It may seem nuts but because Ps is such a gigantic library of tools a few videos on Mood might be a way to Dewey Decimal it out a bit. What you did with the raising the reds and lowering the blues in the shadows really brought out an airy romantic almost 1950s Italian film look.
How did you add the points? How many points can you set?
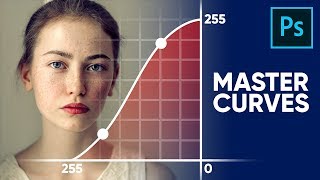
can i download this color grid somewhere ?
hahah very funny teacher gr8 job
Can't this be done in Lightroom?
yes, under tone curves but I think it's more powerful in photoshop
you are a very funny guy
like for ED
In Light Photoshop😂 ....