Home Automation using ESP32 Blynk 2.0 with IR remote control relay temperature sensor | IoT 2021

HTML-код
- Опубликовано: 21 июл 2024
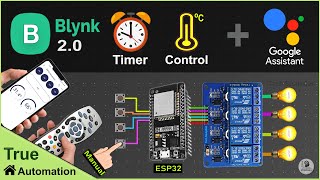
- In this IoT project, I have shown how to make home automation using ESP32 Blynk 2.0 with IR remote control relay, temperature sensor, LDR to control 8 appliances with real-time feedback. You can also control appliances without internet from IR remote and manual switches.
$2 for 1-4 Layer PCBs, Get SMT Coupons: jlcpcb.com/RHS
Download PCB Gerber file for the ESP32 IoT based home automation project
drive.google.com/uc?export=do...
For this ESP32 project, I have used the FREE plan of the Blynk IoT platform.
Visit the following website to get electronics components, modules at a very reasonable price
utsource.net?source=RUclips
During the Blynk tutorial video, I have covered the following topics:
00:49 ESP32 control relay with the New Blynk IoT app.
01:51 Controlling Blynk ESP32 with no Wi-Fi.
02:42 Required Components for this Blynk ESP32 IoT project.
03:02 Circuit of the ESP32 Home Automation projects.
04:56 How to set up NEW Blynk 2.0 template for ESP32.
08:10 Set up Blynk cloud Web Dashboard for ESP32.
09:42 How to set up the mobile dashboard in NEW Blynk IoT App.
11:56 Program ESP32 with Arduino IDE.
15:02 Connect ESP32 with Blynk IoT cloud.
16:00 Connect appliances with relay module circuit.
16:04 Controlling appliances from Blynk App, IR remote, and switches.
Required Components for this ESP32 home automation system
1. ESP32 DEV KIT V1
2. 8-channel 5V SPDT Relay Module
3. TSOP1838 IR receiver (with metallic casing)
4. Switches
5. DHT11 temperature sensor
6. LDR
Amazon India Affiliate links:
ESP32 DEV KIT V1: amzn.to/331pohb
8-channel 5V Relay Module: amzn.to/3mTWyVZ
DHT11 sensor: amzn.to/3s6e91p
LDR: amzn.to/3izmcAu
Amazon United States Affiliate links:
ESP32 DEV KIT V1 : amzn.to/3mBjCch
8-channel 5V Relay Module : amzn.to/3p50UeH
Required Components for the Smart Relay Module PCB:
1. Relays 5v (SPDT) (8 no)
2. BC547 Transistors (8 no)
3. PC817 Optocuplors (8 no)
4. 510-ohm 0.25-watt Resistor (8 no)
5. 1k 0.25-watt Resistors (10 no)
6. LED 5-mm (10 no)
7. 1N4007 Diodes (8 no)
8. Push Buttons (8 no)
9. Terminal Connectors
10. 5V DC supply
------Important points for this ESP32 project:------
1. IR receiver sensor must have a metallic casing. Otherwise, you may face issues while trying to get the Hex code.
2. After compiling the code, you have to press and hold the BOOT button of ESP32 until the code starts uploading.
3. Install the correct version of the ESP32 board and libraries as mentioned in the code.
4. You can use any IR remote for this ESP32 project.
5. Use a stable 5V 5A DC power supply for this smart home project.
6. Please take proper safety precautions while working with high voltage.
-----------Related Previous Video Links:------------
Steps to program ESP32 with Arduino IDE
• Programming NodeMCU ES...
Get IR Remote Hex Code for the ESP32 control relay
• Smart Home with Amazon...
----------Codes----------
Download Code for this Blynk ESP32 IR Remote control relays from the following article
iotcircuithub.com/home-automa...
During the Blynk home automation tutorial video, I have explained all the steps to make this IoT-based smart home system, how to program the ESP32 with the new Blynk Edgent library.
In this ESP32 project, you can control the relays without internet from the IR remote and manual switches. ESP32 will automatically reconnect with the Blynk server when the internet comes back.
You can use any IR remote to control the relays, just get the HEX codes of unused IR remote buttons, and control the appliances with those buttons.
This smart relay module can be used for different internet of things projects which I will cover in upcoming videos.
#homeautomation #esp32 #blynk
-------------------------------------------------------
Thanks For Watching...
✅ SUBSCRIBE ✅LIKE ✅SHARE ✅ COMMENTS
Find out more such IoT projects: iotcircuithub.com/
Facebook: / techstudycell
Instagram: / techstudycell
Telegram: t.me/techstudycell/
Twitter: / techstudycell
-------------------------------------------------------
Other useful ESP32 home automation projects:
Latest ESP32 projects playlist:
• ESP32 Projects
Latest NodeMCU projects playlist:
• NodeMCU Projects
Smart Home using Arduino IoT Cloud ESP32 Alexa control relay with IR remote
• Arduino IoT Cloud ESP3...  Наука
Наука


You're great bro...pure youtube pe kisi ka video itna information wala nhi hota hai
Right
Thanks for the feedback
Dude this is pretty good stuff, you need more subs!
Parabéns por este belo projeto meu jovem, muito top, vou comprar está placa que vc montou, ficou show para o projeto!
E muito boa sua aula, dinâmica e muito profissional! Obrigado mais uma vez!
Forte abraço!
Thanks for sharing. Are you planning to update the board? Like adding air apaces between the outputs of the relays, change the relays with N/O-N/C contacts, adding a voltage reg for higher inputs (12V) and adding the new ESP32 board? If so, pls let us know.
Great work thank you for that, Just request could you please add heater in system which can be controlled by the DHT temperature changes instead of the
Très bien , continuez de faire des bonnes vidéo
Hey man great project, after about an hour of issues uploading the code to my esp I’m happy to say it’s working. Pretty good stuff, I haven’t used the new blynk up until now- so far so good, maybe I’ll add a microphone for voice commands or some sort of voice command.
I'm having same issue
Your projects are too good sirr........no words for you....your great sir....
This guy from Tech StudyCell makes goods videos and presentation but never attends queries even on paid basis on his youtube channel or emails
Thank you so much 😀
It is very hard to attend all the queries. Still I try my best
Great project keep going dude... 👍👍👍👍👏👏
Thank you so much 😀
@@TechStudyCell can you please give me the circuit daigram of this pcb layout
Very good video I know about manual switch connection because I connect switch and on then relay on off regularly
Thank you for providing useful information
Welcome
Best video for home automation projects
Thanks..
Great video but I have a question?
How to attach display for temperature show??
i am from Viet Nam and me very like your project
Very informative video... Thank you for sharing this 👍👍👍👍👍
Welcome
Hello, great project congratulations, could you explain to us how it makes this project have a display to know DHT status with other information?
Excelente buen proyecto y buena explicacion!...muchas gracias por brindarnos tus conocimientos...leyendo un poco acerca del aprovisionamiento wifi que aporta la nueva app Blynk 2.0 como harias para agregar un boton a tu pcb que haga un reset a las credenciales wifi y te permita conectarte a otra red ¿nos enseñarias a hacer esto? desde ya muchas gracias!.
Super video, thanks for sharing your knowledge to us
You are welcome
is there a distance required between you and the system for the work of these?or you can control the system wherever you are with the internet?with the remote control,wich distance required?
Tasmota or blynk? which is better for creating a good smart home for a while, or maybe you have other recommended ones
Nice project
Thanks
@Tech StudyCell sir what do I need to change in sketch to use touch switch using tp223 instead of push button?
Great job this project add RF remote
ok. noted
awesome!!!!! can you please provide the working drawing circuite for PCB?
thank you for this project, how to introduce the coordinates of my wifi in the code?please need your answer
Отличное видео. Супер.
Very important video thank you
Welcome
very nice application
Thanks
Sir, what is the maximum working range.
very good project
Thanks
bro yaar greate
bro ap arduino programming pr b koi series bna den please,,, we will be very thankful
You make great and nice projects. Kudos.
I uploaded this code to my board, created template and datastreams. But when I want to connect the board to wifi network using OTA, it gives me this error of CONNECTION INTERRUPTED!!! I tried both switch and button codes but both are doing the same error. Please how do I fix this? Thanks
Hello sir, your projects are excellent and I made 2 projects for home automation using ESP8266 for 2 rooms. It has been working successfully for more than a month. Now I am trying to make a project using ESP32 with 8 relays using Blynk and IR Remote. After getting HEX code for IR remote, I tried to update it in the main code. But since it is a .h header file I can't open and modify it. If I open it and modify the file it is saved as a .txt file. Can you please help me how to solve this?
Thanks in advance.
Renganathan
add bluetooth too as esp 32 has buletooth, like switch - bluetooth - wifi - remote
Please, can you add Bluetooth function to this project? it would be awesome to have it also with Bluetooth. thanks.
In your recent project WIFI PLUS BLUETOOTH AND MANUAL CONTROL, your code makes the relay states to update automatically to the way you left it whenever they board restarts and connect to wifi. But it's not in this one. Can you add it please?
Hi sir nice project, can we make IR remote also, If possible please include that video also.
Nice project 👌👌
Thanks
Sir i am making this project like blynk 2.0(wifi)+BT+manual with DOIT ESP32 DEVKIT V1 board but due to higher size of code i select board ESP DEV with Huge file option in partition for uploading the code, code is successfully uploaded working all perfect except board is not connected with wifi so i cant control via blynk so please give me any suggestion? i change the board?
Is it possible to replace that relay with a pwm controller?
Very good information video 🇮🇳🇮🇳🇮🇳
Thanks
Hi sir great project, keep it up. pls make esp32 cam IOT project, LAN to WAN
Will try
Super. But pls split panparak on next video...
U really great but the problem is u don't answer some of as
Please which part of the code makes it work without internet because the other video it doesn't work without internet
Please watch complete video, I have added two functions in BlynkEdgent.h file. Those functions will work with and without internet
Sir.. it showing error compiling for esp32 dev module. What mistake i did ? I hv esp 32 wroom
Can you please make a video for this project where you can use two esp32 board of these & connect to the same blynk app. I tried to see your other video on how to add two device on one blynk on mobile but i keep failing... Hope i can see a solution 😊
excuse me , is there any auto home video that has 16x2 lcd??
Sir, error "old version of blynk library is in use, please replace it with the new one".
Please help
Ok nice one but what's about all of and all on using remote function
its really great work , i have small query do this project remember its last state, if power gets off, but wifi is available , how will it react if power came back . Same situation with wifi too. please explain
I have also same query
if you uncomment the BLYNK_CONNECTED() function, then it can fetch the last state from blynk server.
please provide the complete diagram for pcb
Hello sir ypu project is excellent. i am getting problam in this project ( after disconnect wifi all relays going to off ) can u suggest me to resole problam
Nice video 😊😊🎉🎉🎉🎉
Thanks
bro i am facing a issue while doing the hexcode.while opening the serial monitor its automatically shows continous inverted ??????????........ like this with & without connecting esp 32 pls...reply asap
Please make a video to make this project with esp8266 and and 4 channel relay module. Good video.
Please refer to this video ruclips.net/video/H-gkysrJjAc/видео.html
what is the use of LDR sensor ???
sir i make this project for 4 relay only but once i switched ON all relay either by blynk or manual then after my esp32 is disconnected from wifi and there is no control by blynk or manual unless you restart the board, i tried with different pin also but still problem is continue...any solution?
can you please make it for node MCU ?
Hi, excellent video, I have a question for this project, I can use esp8266?, Obviously changed somethings things but could works?
Yes. You have to use Blynk.Edgent library for esp8266
@@TechStudyCell thanks 😃 I try make it.!!!
Osm bhai
how to control fan speed Internet and manual
Please say
Can you tell us how to control curtains using these devices please reply
Hehe hehe....... Lazy bastard....
Hi sir great project, can i use 5v 2amp power supply for this project?
Yes. But If you face any issues please use 5V 5A stable DC supply
is it possible to connect a 16 channel relay ?/
Please make a video for fan regulator control by blynk app....
Fantastic. Congrats.
Is it possible to integrate this code to control using alexa or google assistant? That could be perfect if yes.
You can purchase Blynk paid plan to integrate Google Assistant and Alexa
What would the code and buttons look like for momentary buttons? on pause off? Thanks.
uploaded the code for button in article. link is in description
Hii bro how can I use this code using node mcu and 4 channel relay
Sir my esp32 blue led is blinking but not create wifi hotsport why???
Beautiful project I set up the blynk 8 currency relay appears in the wifi network but impossible to connect me! An idea? Thank you in advance
What is the issue?
Hey why not to use capacitive touch pins on esp32
Will use in future video...
Add to project IR transmitter -> trun on TV, please
Hi, I used the button code. But I found out that all relays turns off whenever I switch off wifi hotspot. Even if I use remote control or buttons to switch on relays, they will all shutdown immediately wifi is off. But all relays stays as they are when wifi is on. What can I do please?
can you share the schamatic and pcb file please?
Can we add last memorize function using esp 32 intarnal chip it will very helpful
If you uncomment the Blynk_connect() function in the code, then it can fetch the previous States from Blynk server
sir is there a way to supply power to my relay board through my esp8266? as i'm using a usb charger to power my nodemcu board
Connect Both NodeMCU VCC to Relay module VCC, and gnd to gnd. Although you will get no issues, But this is not recommended
Instead of IR control can we use esp32 bluetooth?When i am trying to do that i am getting memory error.
You will get memory error for blutooth+ WiFi.
It is possible to do home automation using the ESP32 Blynk with a temperature sensor, a gas leak sensor, and a fire sensor, an infrared remote control relay via WiFi, without internet or Bluetooth.
sir. eik video push button aur blynk par banaye plz..8 relay wala..aur wifi code upload karne ke bad mobile se dale.aur wifi reset button option be ho
Great Sir.....
Can you add auto option
Will add in future
how to modify blynkedgent ?
Bhai please fan regulator include kar ke v bnao
Is it work over the internet ? , Or only in a same router range ??!
Over internet
Sir plz go for it with nodemcu 8266....plz
Can same code be used in esp8266
Sir without WiFi work this project yes and no
Error compiling for board DOIT ESP32 DEVKIT V1. piles halp me
Hey there.
What do I need to change in the sketch to use push buttons instead of switches ?
You can download the code for pushbutton from the article. link in description
@@TechStudyCell thank you so much my friend.
Have a great day 👍
@@TechStudyCell sir what do I need to change in sketch to use touch switch using tp223 instead of push button?
puede agregar el alexa a este codigo asi esta bien completo por favor quedaria exelente
please make on nodemcu esp8266
Please help me i have some problems in this project please help me
Pls add eeprom function
Can ypu make video in which you use arduino iot cloud as they have free alexa support in them
Already made video with Arduino IoT Cloud and Alexa. Please check previous videos
Please sir I didn't get the web description on how to get the code
Visit the article, link in description
please make a video on esp32 home automation wifi+ bluetooth+ manual switches ON THE NEW BLYNK 2.0 PLEASE
Hello sir .
I followed exactly according to this video but ,relays turn off after disconnecting with wifii plz help me
Blynk has changes some logic... Please refer to following video. ruclips.net/video/LbQ6mCVGBeg/видео.html
please make video / code on Nodemcu8266 of same project with analog LDR sensor and Humidity sensor
What is the code for push button.. your site says only switches..
Will share the code for pushbutton by next week
How can I delete my previous wifi? Thanks.
thank you for this great knowledge ... but where can I set the credentials SSID and password ?
Through OTA. Please watch complete video
How size is push buttons in Pcd ?
download the code for pushbutton from article.