Photoshop: How to Transform Photos into DITHER Images

HTML-код
- Опубликовано: 1 июн 2024
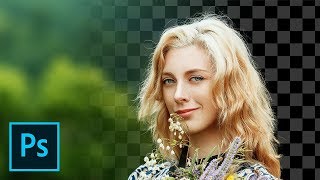
- Photoshop CC 2024 tutorial showing how to transform photos quickly and easily into super-sharp, dithered images.
www.shutterstock.com/photos
Royalty-free stock photos provided by Shutterstock
ID #: 109835783 by Yana Zastolskaya
ID #: 2438228923 by Rayyanj1998
Music track: Another Form of Life
Artist: Dmitriy Lukyanov
License this track or other great quality royalty-free music from www.shockwave-sound.com/a/e7e...
All my Patrons and Channel Members receive VIP Early Access Passes to watch my new Photoshop tutorials one week before the public can see them! 😊💙
Join my Community of Patrons on Patreon!: www.patreon.com/bePatron?u=24...
Become a Channel Member!: bit.ly/2J3fP8c
To become a Channel Member on IOS & other "unsupported devices": bit.ly/2OoJnwO
Support Blue Lightning TV on Patreon for as little as $2/month!
www.patreon.com/bePatron?u=24...
#photoshop #dither #photoediting
Subscribe to Blue Lightning TV!: bit.ly/2WkFbkj
BLTV MERCH:
Redbubble.com: rdbl.co/35HhA4y
TeeSpring: teespring.com/stores/blue-lig...
Society6: society6.com/bltv/designs
bluelightningtv.wixsite.com/bltv
RUclips Channel: / bluelightningtv
Website: bluelightningtv.com/
Facebook: / bluelightningtv
Facebook “Subscriber Page”: bit.ly/2WmWIbw
Instagram: / bluelightningtv
Tumblr: / bluelightningtv
Twitter: / bluelightningtv
Pinterest: / bluelightningtv
LinkedIn: / martygeller


Очень интересно и полезно. Спасибо огромное, Марти!
Well done sir well done 👏👏👏👏
I love these lessons 🌿💐💐
Fantastic sir
Thank you ❤❤💐
You’re doing the best, sir. As always, you describe it in the best way. I hope you will do a tutorial on vintage design.
www.youtube.com/@BLTV_Photoshop/search?query=vintage
Another excellent tutorial and result.
this is so cool! ayight, i'm off to ps! 💨
I'm back and have joined. My prior credit card got hacked. Your channel is the best out there, Marty.
I like the post-processing at a higher resolution at the end. Say, it appears that when you change the color, the thumbnail color shows the before and after. Is there a way to restore back to the original color?
Best,
Ken
Bellingham, WA
Thanks, Ken! Yes, to revert the color back to the original, double-click the thumbnail of the updated color which will open back the original color in the Color Picker. Just click OK to apply the original color.
Thank you for sharing🙏🏻
I would never have known how to do this
sometimes you just have to know what you are doing👍🏻.
Nooooooo the Gif Mafia got Marty!!!
😂
Thank you for making and posting. How did your exhibition go?
My art show went well, thanks. Spoke with many interesting people. 👍🎨
Wow 😳 Thanks For Shearing ❤
This is awesome 👌, can this be used in selecting the number of colors we need in the design so we can burn to make screen printing frames. Can it also be used for embroidery digitizing? Thank you 🙏
You can choose from 2 to 256 colors. Regarding screen-printing frames and embroidery stitching, I don't know enough about their processes.
@@BLTV_Photoshop thank you so much 💓
Hi how's your digital photos sell & plz tell about your health. Love from India
I'm pleased to say my art prints of my work have sold and are selling. 💙 My health is doing well. 🙏 Thank you for asking, my friend.
I thought it was
Dirty images lol
You don't need to save the file as a gif, you can simply reduce the image color depth and use indexed colors. All the features described here is available to you plus you can save and load color palettes to keep things consistent.