Why Does This Happen? Siftable Castings vs Clumpy Castings??

HTML-код
- Опубликовано: 5 сен 2024
- Hello!
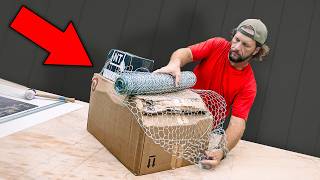
Why are the Castings different in these two worm bins? One tote’s castings are just the right level of moisture for sifting right away. I did nothing special to make these castings this way - and that’s the question! Why are they perfect right from the get-go??
The castings in the second worm tote are too moist and are clumpy. They won’t sift. I also didn’t do anything special to this worm tote.
I’d like to figure out what’s happening so I can manage my bins so more, if not all, my worm bins give me beautiful ready to sift castings automatically! Wouldn’t you like that too??
Let’s put our minds together and work this out 👍🪱😍
Thanks!
Yours in the dirt,
Jayne


You are the worm queen! I’m still working on the basics… had my worms for a year? Or more and still not sure how to gather castings? Or reproduce the worms? Or anything… till I found you a couple of days ago, you’re the most knowledgeable and replicatable and do-able information out there!
Wow! What a great compliment 🥰. Thank you! What you’re saying you’re getting out of my content is exactly what I was aiming for! Yea me! 🤣🤣
Please feel free to ask all your questions. I do read and answer all comments 👍. And the Castings Crew is great for jumping in and adding lot of information and experience too 😍🪱
I get a wet clumpy mess in bins I've left too long before harvesting, because they get over-processed and the very high percentage of castings is very hydrophillic. Especially in something like my plastic stacking systems that don't breathe well. The most lovely crumbly, siftable castings come from a tote that gets lots of woody material, very good aeration, and is easy to turn the contents over to balance out moisture - I do a slow horizontal migration in that one. I suspect the size of Black Beauty might be a factor here, with it being harder for air to penetrate the middle of the larger volume and for water to evaporate from it too. If it already has a tendency to run damper because of the bigger volume, that can make the processing speed faster. Thank you for sharing your vermicomposting adventures, and all the best.
Hi Frank! Welcome! You’ve hit on all the points we’ve been considering as factors for the difference between the castings in these 2 big worm totes. As well as some of the same results I’m getting in my regular bins.
This has been a huge help to me to figure out what’s going on with my castings - and what changes I can make to improve the outcomes. I hope it’s helping other worm wranglers too!
I really appreciate you adding in your experiences which has added to the support for the reasons why we get the results we do!
I’m so thankful for the community coming together to help me out! And again, help each other too ❤️👍🪱
I see more moisture in my VermiHut worm tower which can lead to more clumpiness as compared to my other three bins that get more airflow. One of the things I've noticed since my absence due to my soldier surgery is, combined with being a little drier, letting the worms attack the castings longer so they are completely worked through gives me that super tiny perfect castings. But I think you are correct when you describe it as a moisture difference...perhaps more bedding in the castings at the start will help that second bin??!!? Excellent video Jayne & cameraman!!🪱🪱🪱
Hey Patrick! How is your soldier shoulder surgery healing? Well I hope!
You know, the extra bedding mix in at the beginning could be a key difference. I had totally forgotten that one of the differences between the 2 large tote was that with the 45 gallon tote I had mixed new bedding into the whole bin when adding the worms. With black beauty I separated the new bedding from the worm bin dump side to help migration. That might have ‘backfired’ and led to the muddier castings result in black beauty. The worms did not migrate out as fast as I anticipated so stayed and re- processed a lot of the castings multiple times leading to sticky clumpy castings. The reduced air flow due to the cardboard cover didn’t help either 🙄😬.
I mixed in a lot of dry cow manure but I don’t think it’ll be enough to totally rectify the situation.
This has been a good learning experience for me (positive spin on errors made 😆) and everyone’s input and ideas have helped so much!!
Thank you so much for adding to the conversation 🤗🪱🤩
One time a couple years ago, I had an outdoor grow bag bin get super saturated from a heavy rain, knowing it would dry on its own, I did not worry much. Must have been at least a week or two later when I went to harvest that bin, the castings were pretty clumpy. The problem was, that bin was more than ready to harvest, I was letting the worms forage for any remaining food before I dumped them into my downward migration system. The other bins that also got drenched were OK because they were not even close to be harvested. I am betting the cardboard restricted the air enough so the finished castings clumped together.
Stay Well!!!
Hey Brian! I do think the cardboard had an impact for sure. Both totes were loaded with already active regular worm bins from inside and I tried to have each added bin not be more than half castings but I can’t swear to that. I was pretty desperate to get the bins loaded into these larger totes.
I can totally see why your situation developed. Once the castings are very wet they don’t give up that moisture easily. That why we love them for the garden! Another commenter made the same point. I did respond that I did add sifted cow manure to black beauty’s castings to maybe help dry them down. We will see how that works out!
Thank you so much for sharing your experience 🥰. All this information is valuable to at least start moving in the right direction as much as possible 👍🪱
I think what's affecting the moisture is that your regular 45 gal bin doesn't hold as much, there's less burrito on top, and there's more evaporation because the soil is closer to the top of the bin. Black Beauty is much larger, holding more moisture and much deeper. When air passes across the top, it's not going to dry and evaporate as much. I think the cardboard is also contributing to holding moisture in.
That makes a lot of sense to me. How do you think that plays into getting the same kind of different castings results in my regular bins they are indoors and much more consistent with depth and worm density, etc? 🪱🪱
Hi Jayne,
After watching your whole video, My educated answer is...
beats the heck outta me! Maybe having no extra cardboard and a smaller surface vs Black Beauty being so big.
Take care and have a great weekend
❤Peggy❤
Hahaha! Well, it currently beats the heck out of me too! I’ve already received some great thoughts and input from commenters! The Castings Crew rocks!❤️❤️🪱
I lived in Japan for 10 years and every time I purchased castings, they were very dense, and the store keep the castings in the refrigerator. I asked the Japanese why in the refrigerator and the response was if the castings dry out the bacterial will die, and you will not get the full benefit of the worm's gut.
That’s cool! I agree 100% that if the castings get bone dry the beneficial bacteria from the worm’s gut will die off and much of the benefit of castings will be gone. I’ve stored lots of castings in feed bags for relatively short periods of time, being careful to use them before they dry out. I am testing using refrigeration for other purposes for worm wrangling! 🪱🪱
Hi Jayne. Funny thing that you mention this, and so perhaps it's nothing if all your bins contain the same species of worms, or at least similar ratios. However, mine don't. It's true that I live in an exceptionally humid area, and close to the water table, so as you know, casting pull in moisture from the air. It's a plus, until we're wanting to harvest, so suddenly I end up with castings like in your black beauty. Couple of different observations from my systems on this: my tower has the clumpier, more moist castings, yet my totes have lids on top too. The tower contains a mix of species, but my totes do not. The worms in my tower also migrate out into separate breeding zones, and this is where it gets fascinating for me, because my European Night Crawlers go down in the sump and like it really soggy down there, but the Red Wigglers go to the empty summer tray, and they like it moist, but drier castings to breed in than the ENCs. My long term winter stored castings didn't really dry out too much, but they were from the tower. Yet I was able to harvest crumbly soft casting straight from my Red Wiggler grow out bin a few weeks ago with no issues. This is, of course, only my observation, but I will be keeping a closer eye on it all from here on. Suzanne
Hi Suzanne! Thanks for all your observations 👍. First off I only have esenia worms. Mostly, probably red wigglers. The worm density of each bin per gallon of bedding…🤷♂️. No idea at all! But my guess is it’s at least toward the high side. I actually added 2 more regular bins into black beauty yesterday. I also mixed in dry sifted cow manure into the black beauty muddy castings side to help dry it down as well as feed the worms that are still very obviously happy on that side 😬. My thinking is that the worms will eat the manure and also be active and maybe, just maybe, help the castings turn into finer individual poop pieces vs drying down into larger pebble like clumps. The larger pebble like clumps happen in some of my indoor bins when the worms have left the drying down side of the bin ‘too soon’. Or at least I think the clumps are due to this. 🤷♂️. This is exactly what I’m trying to get a better handle on.
I’m excited to see responses already to my questions and will be giving them all a good think! 😊. Thanks so much for taking the time to share your experiences and thoughts!! 🪱🪱🥰
My ENC bin is clumpy and wetter than my wiggler bin. I put cardboard strips in to help absorb moisture for a couple of days. After removing the strips I mixed in some dry cardboard shred. 2 weeks later it’s better. When I fluff I break up the clumps but it’s still clumpier than the wigglers.
I had plastic bubble mailers on both bins. I changed to pieces of cardboard on the ENC to help the humidity. Wigglers still have mailers and it doesn’t get clumpy.
I harvested some a month ago that look as nice as your pretty castings. Neither bin looks that good now. I figured I was feeding too much wet stuff but idk.
I don’t do big feedings. I add small amounts every 1-4 days. I’ve adjusted my shopping so I don’t throw away as much as I did previously.
@@scrapzwtf That’s interesting that your ENC bins are naturally different from the red wiggler bins in regards to castings consistency. All my bins have the same worms so to speak. These 2 big bins haven’t had any wet food at all. They were most to begin with as the regular bins that that went into the big totes had castings as well as the worms and unprocessed bedding. Some of the bins were moister than others. But from there I didn’t add any moisture or wet food at all. I may add some larger pieces of cardboard to help dry out black beauty’s castings if the cow manure isn’t enough.
Thanks for sharing your experiences. It gives me more to think about 🪱🪱
@@RockinWorms
The ENC bin is looking much better. It took more than 2 weeks for that to happen. Every 2-3 days I fluffed and broke up the clumps. I added a little food but nothing overly wet.
@@scrapzwtf Thanks Suzanne for the update 😍. I’m glad it’s looking better. I realized in conversations that perhaps a key difference between these 2 large worm bins was something I forgot I did initially 🙄😡. With the pretty castings 45 gallon tote I had mixed bedding all through out the tote after/during adding the regular worm bins. So that helped equalize the moisture. And distributed worms throughout. With black beauty I separated the new bedding from the added regular bins, thinking the worms would quickly migrate out to the new bedding side. Nope. I think too many stayed and just reprocessed the castings they came in with 😬. Bad worms! 😆.
I’m stuck in this lack of time loop so getting back to black beauty is once again becoming an issue. I’m making changes and it is helping but it’s not an instant solution.
I think what I’m going to do is mix it a LOT of bedding into black beauty and see how that helps. The cow manure I already did isn’t going to be enough I fear.
Thank you so much for your observations and help with my issues! 🤗🪱
I have the same problem. I think moisture is absorbed from the air and that may be part of the cause. Also, worm activity may have an effect on the bin moisture. I use two thirds horse manure and one third mushroom substrate for bedding and feed a grain mix as a supplement feed. Also, I add the castings and bedding from my breeding bins to make my tubs. These are wetter to start with and make the situation harder to manage. I am converting to an 8’x3.25’ flow thru bin to help with this problem and others.
Hi Dusty! That’s basically my situation in a nutshell. I don’t add breeder bin used bedding to other bins right away but it can end up in other bins as the wisp grow up and I need to refresh their bedding or I move worms around to balance worm bin populations. Your bedding mix and grain feed sounds very similar to my breeder bin set ups. Inspired food scraps to grow out bins though. Sometimes that makes the bin very damp especially in the food zone. Sometimes the castings will dry beautifully and other times not so much 😬.
I’m curious as to why you think a cft will help with the wet castings as a cft depends on wet compaction to keep the bin contents in place …? 🤷♂️🪱
Factors that may impact level of dryness. 1. Added cover, as you mentioned, will retain moisture, no ony the cardboard but also thickness of your "burrito". 2. Outdoor vs indoor, outdoor usually has more wind and an environment that will add drying forces. 3. Type of food, high water content vs dry worm chow. Outdoor + less cover + worm chow were all components of the bin with dryer castings.
Hello! Thank you for your thought on this 😍. I totally agree that the cardboard cover in black beauty had an effect so I did remove it. Both bins only were fed pre-compost and worms chow. Neither received any food scraps so that couldn’t have been a factor. In my indoor bins that certainly could play a roll as some bins get one food and different bins get something else - all on the luck of the draw on what I have in hand coming feeding time. 🙄. Both these bins are outside and at least nominally exposed to the same weather factors. The smaller tote is close to the house wall which could either shelter it more from drying winds or perhaps expose it to more drying heat as the wall gives off heat during the cooler night…? Hmm I didn’t think of that until now! Thank you for sparking that thought!
I’m sure the burrito topping is not consistent across the totes. I do need to strike a balance of the thickness seems to be an issue. The dry shred keeps almost all (not all - I found some bugs in Big Boy yesterday 😡) the creepy crawlies from taking up residence in the worm totes. And that is important to me.
Hmm more things to consider! Thank you so much for adding to the discussion and factors I need to consider ❤️🪱
@MonzGary Exactly my words :D, this is why people use breeding bins, you want them to be damper than the bins made for harvest.
Also, if your bin is still damp after all the mentions above, you might wanna add an heat mat underneath the BB (Black Beauty), but make sure you remove the carboard if you use the mat otherwise you might end up cooking your worms :X
@@MelancholyRhyme Since I started using my basic bedding (precompost and sifted cow manure) I get a lot of castings out of breeder bins. That’s not the usual ‘commercially accepted’ result with breeder bins. You get cocoons but not castings. The basic bedding broke that wall! But then the fundamental push-pull of moisture is still in play. More moisture, more cocoons. But impossible to sift. I have on several occasions been at the crossing where I’ve gotten respectable cocoons and been able to sift out 2/3 of the castings/bedding after a breeder cycle. Wait. Sorry. I got off topic there! 🤣. I’ll leave it in case someone finds it informative anyway 😎.
I really don’t want to go the heat mat route. Especially as it moves into summer. We are already getting a few 85F days. Cooking my worms is already a concern of mine with them on the patio 😬. Out of curiosity, how does the cardboard contribute to cooking the worms?🪱
@@RockinWorms Hi, it's not necessary the cardboard's fault! preventing ventilation of the bin by covering the surface with cardboard (or anything else) can raise temperature of the bin, same with cooking, when you put the lid up, the temperature raises :D
What i have been doing in hot summer temperatures is sticking poles for example, around the bin , this way the worms have a shade but also enough space for fresh air to enter the bin, also 85F and above i put ice cubes on top of the bedding to somewhat cool the bin, works like a charm.
Sorry if i didn't explain my self well, English is not my native language :D i live in Israel and summers here are crazy.
@@MelancholyRhyme These patio worm totes will have shade all day as they’re under a patio roof. I may have to use ice bottles to cool down the surface but I’m really hoping to avoid that by having the bedding deep enough to provide insulation. 🤞🙏.
This is a new location for me to have worms so it’s going to be an adventure!
I’m happy to have you part of the group! 🪱🪱🤩
It could be the vagaries of weather and timing that you assembled the bins, Jayne, especially since you noticed this both indoors and out. Maybe changing air humidity affects vermicompost differently depending on the level of completion.
~ Sandra
Hi Sandra! I made the bins up at basically the same time - within 24 hours. Someone else mentioned the moisture retention ability of the castings depending on how completed they are. If this is a factor - and it seems logical that it would be - then anything that affects surrounding bin humidity would play a part. That ties into other thought on airflow, bin placements, the burrito topping thickness, etc.
Sigh…. I was hoping for an easy answer 🤣🤣
Thanks for your input 🥰🪱
I wonder if its simply having then in a larger tote. I know with my plants that I have in different sized pots, the smaller pots dry out way faster than the larger ones. Id be thrilled to have either one of those totes full of castings, beautiful job there!
I think you are pointing out a factor. Volume could be a differential in how the castings hang on to moisture. It doesn’t explain the same phenomenon happening with the indoor bins as while not identical the volume is much more uniform.
I love my big water troughs! So handy for so many jobs! Marketplace baby! 🤣❤️🪱
It's hard to adjust the humidity very precisely, when you have bins outside.
I know worms like it damp, so there needs to be enough humidity in the bin for them to thrive. But what if you prep the bin for harvesting a few days before or a week (depending on the air humidity), cover it with a dry cardboard sheet and a screen mesh to keep bugs away. Let it dry enough to be easier to sift, then, when you put the worms in the bin again, give them a good spritz or damp new bedding and they'll be happy!
Maybe it works out.
Hey Diana! Any luck finding a decent priced shredder? I have my fingers crossed for you 🤞
I guess that the question - how exactly to get the castings in an outside tote to dry down enough. It’s been on the dry side for a few days but we did get rain rather recently. Won’t the cardboard hold the dampness in? As does the shred on top? That’s what several people are suggesting is happening. I did take the cardboard off black beauty as well as mix in some cow manure so we will see what that does over the next few days. 🤷♂️. I’ve got no problem with the idea of drying half of BB down quite a lot. I do that with my indoor bins all the time - with some great results and some not so great (the clumpy stuff turning into dry crack mud and not breaking into small castings particles). The other side of BB would remain very worm friendly 🪱🪱
@@RockinWorms Hehee... didn't find a shredder yet, but when I'll see one available, I'll buy it right away. 😃
Yes, I guess if you dry half of the bin at one time, then the worms will be able to migrate to the other side (the Dark Side, hihi).
The last time when I wanted to dry the bin a little bit (because I saw some springtails), I've used the cardboard/mesh screen method and it worked, the bin dried out pretty evenly. I know I've seen it on youtube a while ago, on someone's channel, cannot remember who, but they were doing this to dry the castings and it was working for them. I think you can also let the bin without cardboard and just cover it with mesh screen, but I don't know if the wormies like so much light. I think you can try a few options and see what works, then share it with us! 😋
Have a great weekend!
Habitually late to your video again. Second the comment that the castings in Black Beauty might be more processed, and that's why they are clumpier. I've noticed in my bins that (all other variables kept pretty much the same) that the castings will become sort of gluey and ball up if I let them go a little too long. I was recently able to rectify this in a couple of my bins by scrapping the harvest entirely then just working in a lot of new bedding and letting them go at it again. They're at harvest again now and migrating, and the castings are back to a normal, siftable level. I wouldn't rule out the possibility of air circulation being the culprit - I imagine that contributes. But so far, the gluey, clumpy stuff in my bins is pretty much always attributable to harvest was pushed back longer than it needed to be. I didn't have any luck in those incidences drying them differently to avoid the balling, but if you find anything differently I'd love an update on the topic!
From the scientific end (which I am barely versed in) I imagine it might have to do with the aggregates produced by worms - which aids in binding soil particles. Maybe too much of a good thing?
I’m leaning that way too. Over processed adds to any clumpy issues already developing. The past few days I’ve been sifting entire bins that I normally would have set up for horizontal migration and done a half and half ping ping type of movement and sifting. I don’t get thru as many bins at a time but the bins I do handle are set up properly for the next several weeks and I’m not pushing off or perpetuating an issue. And it’s better for the worms in those bins too as they get fresh bedding and food quicker.
That said I do think the other factors we’ve all been discussing do play a role and can better or worsen the bin dynamics. I’m working on playing with those factors to move more in to the ‘better’ category 😎.
Time is always the factor 😖. I’ve recently been able to start to manage my population growth a bit better and that will eventually allow me to not be so consumed with bin care demands.
I agree with your science idea. Worms excrete a substance that helps the soils. When they have to re-consume their castings the sticky stuff gets more and more. Like you said, too much of a good thing. 🪱🪱
@@RockinWorms If you find a way, please let us know! My life has become chaotic and I imagine sticky castings may be a more frequent occurrence going forward, so I'd love to find alternatives to address it! (I'm also working on consolidating my bins in the future, so maybe, maybe not!)
@@evelynknight5627 The whole thing is a more of a challenge when the bins start to add up 😳🙄.
I love my pre-compost. It’s fantastic worm food and bedding. But they go thru it so fast! I’m back at where I was last fall with needing to slow the bins down. So I’m sifting out a bunch and refreshing the whole bin, using some more-compost, quite a bit of sifted cow manure and lasting adding in some dry raw cardboard shred. My thought and hope it the dry raw cardboard will absorb more bin moisture and help distribute it more evenly, provide slow food for the worms , any maybe result in a more even drying down/out of castings. 🤷♂️.
I’ll certainly let everyone know how it works. Or doesn’t! 😆. I’ve also removed the newspaper covering and plastic top on some bins and added a layer of raw shred on top instead. To facilitate more even air flow…🤷♂️.
I’m battling! 🤣🤣🤣
Hi Jayne, thought you'd cracked it with the cardboard being on one but not the other, and then you mentioned the same thing happening with the bins inside. Is there something that you add to some bins, like the manure, and not to others, that could be more water retentive? Have fun, Mark : )
I think the answer is going to be more nuanced than I first thought it would be 😳. I do different castings consistency (is that a good word for this phenomenon?? 😆) in the indoor bins too. It’s rather random on what a specific bin gets. I do add sifted cow manure to really wet bins that I’m not wanting to sift right away - to both dry it down and to feed the worms and to keep them moving thru the bin so keep the wet castings from staying clumped as they dry (🤞). I think I’m going to have to set up specific test bins to figure this out. I don’t know that I can do that right now as I’m more focused on my big cocoon order and just keeping up with worm care. What I’m really hoping for is someone to say ‘oh, all you have to do is xyz and bingo! Great castings every time!’ 🤣🤣. A girl can hope! 🤣🪱
I’m continuing to bput more and more info on my bin labels with every feed so I can start to at least gather more data on what’s effecting the bins the most as far as nice lovely castings vs muddy or clumpy castings.
I do think - and have said this before - that even where a bin sits on a shelf makes a noticeable difference in what the castings are like come harvest time. I kinda forgot that dynamic! You’ve reminded me of that. Hmm. There’s only so much I can do to address that. Hmmm. I do consciously rotate some bins to new locations. Maybe I need to do more of that. Hmmm. More factors to think about!
Another comment already made also made me think of the location of these patio totes and how that can be effecting the castings consistency.
These 2 specific bins fit the same type of feedings. But proportions to bedding to worm density was not something I even thought about. Hmmm. Good golly! How deep does the worm hole go?? 🤣🤣🤣. But you know, I find this very interesting! Thanks for being part of the conversation ❤️🥰
It might have to do with how much heat is absorbed by the different material or thickness of the bin.. Even color might affect the amount of heat. Depending the amount of light that comes through.
Hey Esmy! The bins are in complete shadow under the patio roof. But the tote wall thickness may affect overall insulation properties and that could affect drying rate. Hmmm. Something to think about - how to manage that. Interesting! 🪱🪱😎
The difference between the castings has to do with the bacterial load of your substrate. I prefer the mud like texture, and I keep my casting in cold storage to keep the bacteria alive. My plants love the mud like castings.
Hello! Are you saying that it’s the bacteria that makes one bin’s castings muddy and the other one’s drier? The worms are the same and the bedding came out of the same pre-compost batch. I don’t know how the base bacteria would get to different in just several weeks…?
There’s no way I can keep my castings cold. I don’t have the space and it’s hot as hades here in the summer.
I do use wetter castings directly on my plants if that’s what I have on hand. I water the castings in after applying so it doesn’t really matter if they’re wet to begin with 🤩.
@@RockinWorms If I take shredded cardboard and soak it for 24 hours and then remove the water from the cardboard to field capacity, then add mushroom mycelium to eat and grown on the cardboard for a month or more. (The worms love mycelium more than anything and the results is clay like castings. I need to send you photos of the vegetables that I grow with the worm casing.
(Note: I mix the thick casting with super fine vermiculite and super fine perlite, (I use a coffee grinder) until it reaches a very fine and loose mixture that is perfect environment for growing anything.
I know this works because I've never had an insect attack any of the items I grow.
If I only let the mycelium consume the cardboard for a few days before adding the worms the mixture is very dry and fine. The more the bacterial and the type of bacterial the worms consume will affect your casting. The best pro biotics that you purchase for yourself will need to be keep cold so that the bacterial will not overpopulate and kill off the strain and this the same for worm casting that is alive with bacterial. I have a saying that I don't water my plants, I'm watering my bacterial which feeds the roots.
That is why one of your bins is different because you set up the perfect environment for the bacterial to grow for the worms to consume. Worms only eat the bacterial in the soil. Mushroom mycelium is the best of the best.
@@RockinWorms I use my casings to make a special slurry for the plants which takes two to three days process and time is critical so that the bacteria don't overpopulate and kill themself off. Close monitoring is required. If I store the finished product, it's in the cold section of your refrigerator.
@@AviatorDave Well that sounds mysterious! Can you share what you’re doing? Lots of us use our castings for plants. 😎
@@RockinWorms I use a food grade 5 gallon bucket filled with city water. I use an air stone to remove the chlorine from the water and also to provide oxygen to the bacteria while they grow.
First I prepare the dry mixture. I take a lady's pantyhose and feel a small section of the hose with the worm castings and rabbit feces. After adding the dry mixture to the pantyhose and tying it off, it will fit in the palm of my hand. A small portion will go a long way.
I use a fish tank aquarium heater to heat the water in the five-gallon bucket to 85°F.
Second Part: Is preparing the liquid mixture. Mix hot water with one tbsp molasses in a pint-sized jar. After the water and molasses is well combined and the water temperature has dropped down to ambient temperature. Add one tablespoon of sea kelp liquid along with one tsp. of fish emulsion. Mix well.
Third Part: Add the dry and the liquid mixture to the five-gallon bucket.
Finale Part: Wait for the overflow of bubbles from the top of the bucket which indicates the process is complete.
You can use this concoction any way you prefer. My choice is to foliar feed the leaves with the liquid, and you can actually see the leaves start praying a few minutes after the mixture is applied.
Timing is critical at the stage of seeing the bubbles because the bacterial is at it's maximum load and in a few hours the bacterial will start to die.
Note: To prolong the life of my water sprayer I stop the air pump for a few minutes to allow the solids to settle to the bottom.
I love your channel!😊
Thanks!! 🥰
I think Black Beauty's castings have been processed by the worms more.
That could certainly be the case. I don’t know how many worms are in there, let alone as compared to bedding. The worms did seem to take longer to move into the new bedding than the worms in the 45 gallon tote. That would mean they did work the bedding/castings over more. I do find that when the castings are more processed they are stickier/clumpy/muddy. Maybe it’s as simple as that??? 🪱🤞
I don't even sift my castings. When i harvest my bins about every six months, I use the pile system, i guess you would call it . i get a piece of plywood with plastic clamped on it and create six or seven long piles like a ridge line or slanted roof and just scrape them off till i hit worms and eventually i get down to just worms. i can do a bin in about an hour or so. then my wife uses it in her garden and i make worm poop tea. Taste pretty good ice cold. LOL just joking about drinking it.
Haha! Worm tea is good with cookies!
You’re using the light migration method to harvest your castings. It works well. It’s not a favorite of mine but it’s the right method in many situations. I find that it’s hard to get wisps to move down in any type of muddy castings. That makes harvesting very hard for me. How do you handle that? 🪱🪱
Could it be the cardboard on top holding in more moisture?
I think that’s definitely part of it. I’ve removed it. But I think there’s more to it. 🤷♂️🪱
I think it comes down to the moisture in the bins to start with mine I’ll make a bit dryer at the start if I like them for casting but for breeding side I’ll have them wetter but it’s harder to sifting wet castings also. Your castings are looking great (black gold)🇳🇿❤️🪱
Hey. I didn’t worry too much about the beginning bin conditions that were dumped into the totes. I was kinda desperate to just get the consolidations done asap 😳😎. I did take out what castings I could before the dumping but it was what it was 😆. I simply have to deal with the hand I know have. But yes, I would very much like to determine how to better proactively manage the bins to get more consistent siftable castings without having to do dry downs. That’s my goal! 🪱🪱
Think the ones in black beauty, they seem more processed…. I have a bin I found today that’s gone a bit like this, but a lot less- one of my baby bins- 100s of babies in there and they needed moisture, and some fresh bedding but when I mixed it in, it went into like clay … and definitely not tiny pebbles like individual casting are. It’s like a big tray of play dough atm…. With worms all in it lol I hope they will be ok, they have beefing and food and everything they need but just give that them moving through it will sort it out, as my only other option is to put it but by bit into my tiny softer so I don’t loose the worms, and add water to them to ‘wash’ the castings into a bucket…. So I separate the worms. And then can bubble the castings.
But I wanna give them a couple of days to see how they go with what I’ve done. As have added more fresh precompost and some just dry cardboard to try to mitigate the moisture issue
Like play dough! That’s a great description 👍. I did the same tactic you did but with some sifted cow manure. I do think it’s a good idea to try to get the kiddie as lessened so the worms, especially babies, can move more freely in search of food. I look forward to hearing how your bin progresses and if it gets better 🤞🤩
@@RockinWorms I’ve also put my dehumidifier on in the room and taken the newspaper off the top, too hope it drys out as much as possible.
I wish I had tho it to use dry coir instead of cardboard.
I have just looked as I went past to take Lilly in the garden… and the cardboard is wetter then when I put it in. But the casting dough is still mucky…. Lol
Just hoping it does something, will leave it till tomorrow and then maybe take a handful out and add some coir and see how it goes. And then maybe 🤔 that will help and then I can sort the rest I hope. I will let you know in 24/36 hours as to where we are at and hopefully everyone will be a step closer to what we want. Xxxx
Take care auntie Jayne…
@@cherylhowker1792 Yeah I don’t like adding cardboard shred to a bin I’m trying to dry down. It never goes the way I want it to 😡. Large pieces of cardboard could help or using the find method could help. I don’t want to try the find on the patio (bugs) but you can use that on your indoor bins. It works really well and within a few days. Give it a try! 🪱
@@RockinWorms how you do that??? What’s that way to do things.
Sorry don’t know what you mean x
@@cherylhowker1792 No worries! I’ve got you! Here’s a video I did on it. It’s super easy if you have some cardboard laying around 👍:
Dancing with the Devil - Part 2 - Why This Happened
ruclips.net/video/B-ldtG2-E3c/видео.html
Give it a watch and let me know if you decide to try it 🤗🪱
I see a major difference if I use shredded cardboard, (grainy casting) or if I employ used mushroom blocks it's a very dense casting.
That’s interesting too! I’ve not ever used mushroom substrate. I basically use the pre-compost and the cow manure. I do know from other worm wrangler’s experiences that different foods do give different colored castings but I hadn’t heard about it effecting consistency per se. 🪱😎
@@RockinWorms The Japanese religion is the worship of nature, Shinto. You can see this in the Japanese Gardens and the cleanest of the nations. Beautiful place to live and visit. I'm a USA citizen with my main home in Northern part of Tokyo. I'm in the states visiting and trying to speak English again. Big difference between the two countries.
@@AviatorDave I bet! What a cultural transition! How long will you be stateside? Do you have worms in Japan? You said you bought castings…? 🪱
@@RockinWorms Land is so costly in Japan that most homes have a super small footprint and it's cheaper to purchase. I came to the states to play golf and the Japanese government closed the country because of coronavirus so I'm stuck here until I can return back to Japan without getting the jab. I'll be here for a few more months in Augusta, Ga. I'm an insect farmer, raising Black Soldier Flies (BSF), Mealworms, Red Wigglers and my main hobby is growing lion's mane mushrooms and playing with plants of all types. I also have a small flock of quail that love BSF.
@@AviatorDave Visit Japan says that vaccination requirements were lifted in October 2023 for tourists. It sounds like you may be in a different category though. Regardless, do you insect and mushroom farm in Japan? Or is that only here in the states? 🪱
I never sift.
There’s quite a few worm wranglers that don’t sift. I usually sift to keep the cocoons from all going out to the garden or having to bait out the castings later on. Also sometimes the worms just don’t move out of the castings as quickly as I want them too. And there are times when the castings take forever to dry down - I’ll light migrate the worms (if it’s not a wisp bin) and take the clumpy castings out that way. Either way it takes time to separate the worms from the castings or the castings from the worms. 🪱
Pull the ones out of black beauty and let them dry out in an empty bin for a few days... A late post i know
@@pandabear15214 Hi Angela! ots never too late to share ideas 😍
I had given that some thought at the time but wanted to see if I could find a way within the trough itself. Then fate had different plans for me 😩.
I’ve actually made good progress toward more consistently siftable castings on my grow out bins. A higher density of worms coupled with not letting the bin get too old seems to be working quite well to keep the castings from getting wet and clumpy 👍🤩🪱
My theory, and nothing more than just an idea, it may be difference in cardboard? Some have more glues that maybe the worms are avoiding and clumping it up, like you see stuff they do not eat. Maybe thats causing more clumping. I have seen this in my tower systems where is all cardboard bedding. But not so much in bins I have added coir or sawdust....
Hi Ann! I’m thinking no because the bedding is pre-compost and while each batch will be unique I don’t think it’ll vary that much - or at least there’s such a variety going into the pre-compost mix that it probably balances out. In smaller systems like towers I can see what you’re saying happening for sure. And as I just bought a used tower system on Monday (!!) you bring up something I may have to deal with! Thanks for your input 😍🪱
When I start a new worm bin, I never touch it until I place an empty coffee container in the bin with small holes and food, (mushroom Mycelium) to collect all the worms for movement to their new home. I but a coco coir mate on top of the bin substrate and I check it for dampens every week or so. If it feels a little dry, I spray water on the top of the mate and wait for another week to check again.
Japanese say that an unhappy worm will not eat the beneficial bacterial but eat the antibiotic bacteria.
Ok so you bait out all the worms in a bin using a coffee can with food in it, then move the can of worms to a new bin. This baiting out can take a week or longer. I’ve done a similar thing but used horizontal migration to get all the worms in one place, then scooped them into out into a different bin. 👍.
I’m not going to argue with anyone’s cultural norms. My understanding is that worms will eat what fits into their mouth. Period. 🪱🪱🤩
@@RockinWorms Normally I can harvest all the worms within 48 hours because the worms cannot resist the mycelium. I've accomplished the horizontal migration, and my little friends get upset with me anytime they are exposed to the UV light. So I try to keep them in harmony with nature by using the coffee can principle.
I agree with you that our little friends will consume anything that you put in front of them. I will use growing vegetables as an example that if I take man-made chemical fertilizers, I will end up with all the bacteria in the soil being exterminated and a tomato would taste like it was store bought. I want to provide my worms with the best bacteria possible so that the end product is a sweet tasting tomato and no insect invasion.
@@AviatorDave There are multiple ways to get to the same end. You e found what works best for you and your worms and that’s what counts. I appreciate you sharing your methods so others can decide to try them if they wish 👍😎
The difference in produce grown with worm castings - you use frass as well? - is simply amazing. Both taste and yield and insect free-ness. A neighbor struggles with tomato hornworms and I don’t get even one! Castings and frass for the win! 🪱🪱🤩
@@RockinWorms I use the mealworm frass in the soil preparation. I agree there are unlimited ways to accomplish the task. It's nice chatting with you and I have watched all of your tutorials and I have learned. Thanks a Million.
@@AviatorDave Thank you for visiting! I hope to hear from you in the future and you’ll continue to share your experiences and methods 👍🪱
Great video.I'm just starting to sift for the first time.And mine are dry and I don't know you said you took a professional warm course and you posted a link on one of your videos and I can't find it if you could post that again.That would be great.Thank you so much
Hi Suzanne! No, I didn’t take a worm class. I probably should! I know Samantha at MeMe’s Worms took a class. You could bounce over to her channel and ask who she took it from.
BTW did you call CalRanch about the sifters?? 🪱
@@RockinWorms they don't have them
Thanks
I called about the sifters. They don't sell them anymore.t@RockinWorms