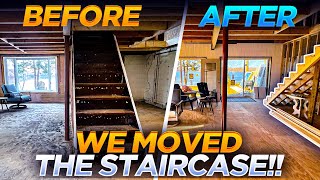
Changing the existing floor structure to move the staircase

HTML-код
- Опубликовано: 25 ноя 2023
- In this video we will be going through how to remove a floor to allow for a new staircase to be fitted in a different position. This is a four part series ending in the fitting off the new stairs.


Toolstation stock 91mm hangers, think there made by speedy
1 of my pet hates the hangers being over sized I always pack with 9mm ply either between the double or on the outside so it lines through when boarding. Then bead of resin in the top of the slot. Great work as always
Awesome work Richie
i do love how you always belt and brace all of your jobs .....as you know it makes sense nice job as always cant wait to see the end result
So, that's not coming apart anytime soon 😊 yes coffeetime... Appy with that? APPPPYYY
Malcs in Perth WA ♥️
Great stuff again Rich. Looking forward to the progress. Cheers 🍻
Superb work! Can't beat a bit of joist work!
Attention to detail "Brilliant"
I get so much relevant advice from the videos every week that I use on our projects.
Appreciate the time you guys keep taking to put the detail in the video’s, really is helpful 👏🏻
It’s our pleasure and we really do enjoy doing it for you all. When we get comments like yours it makes it even more worth while so Thank you 👍🏻
i knew you would fire the rest of the hangers on 👌👌
Don’t know why I bother questioning myself sometimes 😂👍🏻
Brilliant,I wish I had your skills.
With a surname like Wood what else could I have done 😁. I have had and still have good teachers as well in my Grandad and Dad. 👍🏻
Love your content mate. I’m just a keen DIYer (most complex thing I’ve done is build my garden office) but love watching more complex building jobs. One observation if I may - I noticed you didn’t use washers on the coach bolts. when I doubled up the rafters on my garden room I also used coach bolts but found without big washers the heads were pulling through the timber! Probably just me overtightening the darn things….
I’m using C24 tantalised so doesn’t compress that much so I have no concerns about that and it’s got to be tight hasn’t it 😁👍🏻
solid job
Quality
Most interesting Video. Is this the refurb house with the front falling off? Have not seen any updates to that project for a while.
Bloody RUclips not showing me notifications of ya new videos lol. Sorry I didn’t abandon ya lads
👍🏻🎅🎄
Excellent
Hey Rich, do you ever hear anything from 'Damp dog' or Jack from the old 'D1' days? Regards
Phil.
Hi Phil. I saw Jack a few weeks ago at Stig’s retirement doo and there were a lot of old faces there. Hope your well mate. 👍🏻
Maybe those double hangars are oversized because you sometimes have to sandwich a piece of steel plate in between two joists for load bearing purposes? Just a guess really.
It’s a good guess 👍🏻
Called a flitch plate
Solid and sturdy job you've done there Rich, can't see that floor going anywhere soon. The point you made about the minimum 2m headroom I thought that applied to all stairs wherever they are in the house ? By the way what has happened to the big job and Mick for that matter, have you given him his cards or are you keeping that job under wraps till next year ?
I wasn’t 100% sure on the headroom so better to be safe than sorry. I did mean to ask to Stairbox but I forgot. I may confirm it on the next video if I remember. 👍🏻
Love the detailed explanations, thanks
But could i make a plea not to swing the camera around so much, makes me dizzy 😊
Sorry Mozzer. I’ll try my best with the camera and hope it hasn’t ruined your viewing too much. 👍🏻
great job rich. what do you think of that adjustable angle nail bar. i have been tempted a few times but never pulled the trigger.
you should get a wider diamond blade for jobs like that. i have a 6 and an 8 . great for those metal lead clips. you know its fully clear then. the sds method is a pain to get that last stuburn bit out
Hi Alan. I wouldn’t hesitate with your purchase of the nail bar it’s excellent and very versatile because of the adjusting head. I’ve got a couple of different blades but wanted a tight fit and to be honest the bricks were that soft on this occasion the drilling out method worked out great for me. Thanks for commenting on the video mate and your continuing support it’s very much appreciated. 👍🏻
Great work again as usual Rich. Did the floor level up to the joists once you relieved the acrow’s ?
Yes mate it did and I didn’t need to mess about packing and putting compo under the double joist on top of the wall either just a couple of small packers glued in for my own piece of mind. 👍🏻
@@mrabuilders6723 👍👍
Annoying packing out hangers, but Speedy Fixings do offer their Built-in Masonry Hangers in 91mm & 100mm widths & various depths, also Simpson do them.
And Timco also list a 90mm width.
I’ll give them a look cheers 👍🏻
Looks solid. What laser where u using is it any good
Hi David it’s a huepar 360 I think is the model. I’ve had it for 18 months now and it’s never let me down. 👍🏻
I think the hangers out there always seem to comply with rough sawn sizes, so 2" is 2", 4" is 4" etc.. But timbers are rough sawn to those sizes and then planed down slightly, hence why they don't fit exactly.
Can’t disagree with that but for many years now we find easy edge sections at our stockists which are regulated to the same size so a 2” timber will now be either 44mm or 47mm. I haven’t used rough sawn timber for over 10 years at a guess especially for joists and rafters etc. Thanks for taking the time to comment. 👍🏻
@@mrabuilders6723 Can still get rough sawn timber from the builders merchants, but in limited sizes. I have a sneaky feeling it's also green treated. Good job so far, looking forward in seeing the staircase move, or are you making a new one?
I’m not making it unfortunately I haven’t got the time or the premises for that anymore. I’m getting it made by stairbox. 👍🏻
@@mrabuilders6723 Easiest option nowadays.
And cheaper
Nice job Andy, as usual!! Did you forget the compo under the new trimmers..?? and some adhesive between the old end..?? Reckon I'd wait for the slate to pack those timers, better than compo. All the best, keep em coming pls !
By the time I’d levelled the trimmers in there was hardly a gap. It looked more before I started messing with the acro props to level it in. I did put several packers and plenty adhesive under them and between the old and new. At least I know you were listening to what I was saying and not just watching what I was doting thanks for that 😁👍🏻
I might be getting the wrong of it here but I thought it was Rich that done this video? Who’s Andy ?
@s3an175 I was being polite but yes your right I’m Rich. 😁👍🏻
My bad sorry Craig... and Ritchie...
Think I'd of chopped the double trimmer into the 9" solid wall by one skin depth then wrapped the end of the trimmers in DPC
This is a solid 9” wall and it’s not good practice to pocket joists into it in my opinion. It introduces the opportunity to pull more damp into the inner face. Also if you wrap it in DPC and moisture gets into the void where the joist sits it can then get trapped in between the DPC and the timber causing the joist to rot. Thanks for taking the time to comment Anthony and thanks for watching.
@@mrabuilders6723 Agree,old fashion pockets nowadays, hangers the better option & less work..
What happened with the big job is it on stop for some reason
There will be an update soon 👍🏻
Nice front door, you don't get that with new houses.
What’s happened with the big job fellas
An update will be coming soon. 👍🏻
Can I have your roofer's number please?
If you would like to contact us via our email I’ll pass on all the details to you no problem. 👍🏻
the load of whole floor is supported by couple of screws, wonder why british houses are shyte
I wonder why people don’t watch the whole video and pay attention to what’s being done. It’s a build in joist hanger it does what it’s meant to do the concrete screws were extra. Hope your having a lovely day wherever you are in the world