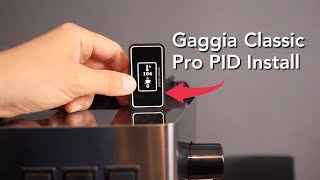
How to install Top Cover Boost Box (PID,dimmer,pressure gauge) on a Gaggia Classic Pro Evo tutorial

HTML-код
- Опубликовано: 6 окт 2024
- This is my own experience on how to install the Coffee Sensor Full Top Cover Boost Box package (Gaggia Classic Pro or Evo full boost upgrade combo), that includes the PiD controller, the dimmer kit and the pressure gauge with the adapter attached to the solenoid valve.
I really think this is the most complete (and yes, long) tutorial available on the internet that is composed of all steps, tips and tricks on how to install all three upgrades at the same time.
This tutorial is not for those user or guys that would want to do a good job but do not have the patience to do so.
All the steps, tips and tricks are here and explained the best possible way.
I am a seller but at the same time, a coffee machine user that wants and feels the need to share the knowledge and experience with all users.
This way, the coffee community grows and when stuck, will have a reliable place to ask for help and receive a quick and good answer to possible problems.
All my Gaggia parts can be found here: coffee-sensor....
My Boost box: coffee-sensor....
Separate parts can be found here:
Pid controller: coffee-sensor....
Dimmer: coffee-sensor....
Pressure gauge: coffee-sensor....
Pressure gauge adapter: coffee-sensor....
Read the disclaimer before attempting any of my personal mods presented on Coffee Sensor channel.
Use a certified technician to do this job or any other job that i made, created or sell as a complete kit and always make sure no electrical wire or electrical connection touches the case, water or any other metal part of the machine or any other wires from inside.
Water and electrics are a dangerous combination and should be handled accordingly.
Always work safely and with a cold unplugged machine !


![KSI - Thick Of It (feat. Trippie Redd) [Official Music Video]](http://i.ytimg.com/vi/At8v_Yc044Y/mqdefault.jpg)


Great instructional video 👍
Thanks 👍