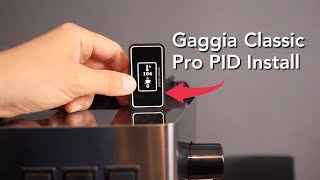
How to install a PID on a Gaggia Classic Pro - DIY, cheap and good looking!

HTML-код
- Опубликовано: 8 сен 2024
- In this video I'll install a PID unit on my Gaggia Classic Pro. As you'll see, it isn't that complicated and really takes the humble Classic to a higher level!
00:24 - Introduction
02:10 - A list of parts
05:58 - What NOT to do first
06:50 - Disassembling the machine
09:27 - Installing the temperature sensor
10:55 - Making connections
15:10 - Installing the solid state relay
18:44 - Tidying up the cables
20:01 - Connecting the PID
22:45 - Cost summary
24:15 - Autotuning
24:51 - Was it worth it?
In contrast to the most popular solutions in the market, my PID will sit at the back of the machine and be no bigger than the unit itself. It will also be completely reversible and much cheaper than ready made solutions!
This clip can also be treated as a how-to instructional video for anyone wishing to go the DIY way. Please note that I'm only using the PID to control the brew temperature. Steaming will remain controlled by the Gaggia's stock thermostat. It just overrides the PID and heats up the boiler to the factory preset steaming temperature.
Links to parts [None are affiliate links]
bit.ly/3gL9c95 - XMT 7100 PID unit
bit.ly/3xgAHhc - PT100 precision temperature sensor
bit.ly/3wnZD6l - Fotek solid state relay 25Amp
amzn.to/3xamPFg - cable sleeve (different widths available)
amzn.to/2RSAge0 - magnetic tape (example link, different widths available)
www.thingivers... - 3D printed case file (print this locally)
bit.ly/3pPphP0 - the unattractive aluminium enclosure if you wish to go that route
You will also need:
1. About 60cm of SiHF 2x0,5mm2 cable connecting the PID do the SSR
2. About 60cm of 1mm2 (17AWG) cable to deliver power from the Gaggia to the PID
3. About 60cm of FLRY 1.5mm2 cable to connect the SSR to the Gaggia
4. Ring crimp connectors that fit the SSR need to be for M3 bolt, here's an example: amzn.to/3xcWBCq
5. Two piggyback connectors and two spade connectors will also be needed, it's probably a good idea to buy a set, like this: amzn.to/3qOx9Rq or find a shop where you can buy those per piece.
The video that turned me into a home espresso fanatic, by the ever brilliant James Hoffmann:
• The Best Cheap Espress...
If you don't want to go the PID way just yet, here's an excellent video how to get the most out of your Gaggia Classic Pro on The Majestic Bean Channel:
• How To Get The Best Re...
Wonderful video by Damian Witoński on how to mod your XMT7100 to control two SSRs and therefore also the steaming temperature:
• PID XMT7100 dual SSR m...
Music credits:
"Montauk Point" Kevin MacLeod (incompetech.com)
Licensed under Creative Commons: By Attribution 4.0 License
creativecommons...
"Perspectives" Kevin MacLeod (incompetech.com)
Licensed under Creative Commons: By Attribution 4.0 License
creativecommons...


Thanks everyone for watching and such a positive response!
There's a couple of points I need to clarify that I missed in the video:
1. Autotuning: XMT7100 PID will keep your brewing temperature within 2-3 degrees from the set value after autotuning, but you need to start autotuning once the machine is fully heated up (give it 15 minutes of idling). You can reduce this variation even further with custom settings, I just didn't see the point as it's good enough for me. Thanks to Murat Öztürk for pointing this out!
The most commonly used parameters for PID on a Gaggia Classic are the following:
P: 4, I: 60, D:15, Souf: 0.2, ot: 2, PSB: -008
The settings found by autotuning in my case were:
P: 4.1, I: 66, D: 18, Souf: 0.2, ot: 2
2. I've added a section about cables in the video description, this was a popular demand in the comments.
3. I've skipped modding the PID for steam temp, because it involves soldering and I wanted to keep this tutorial as simple as possible. With the temperature visible on the PID display I can comfortably work with the stock thermostat. I turn the steam button on, wait for the PID to show about 140 degrees, then purge the wand and start steaming at about 145-150 degrees. The "steam ready" light won't turn on during steaming, indicating that the heaters are working during the process, which is what we want. The stock thermostat kicks in at about 155 degrees in my case, but there might be some sample variation with different Gaggias.
Hi Robert, I just finished installing the PID as per your video tutorial and is working good, but I have noticed that the (AL) light on the right-hand side of the screen which I assume it's an alarm never comes on, is it necessary for it to be on, or am I alright like that.
It comes on once your reach the alarm temperature, so you can theoretically use it as a thermostat. That's how you use XMT7100 for steaming, but you still need to modify the PID to control two SSRs.
You're fine, don't worry about this LED :)
Thanks a lot, Robert, So I won't bother with it as I am only using the PID for brewing and then purging at 140 after I hit the steam button then steaming at 145-150 as you mentioned in another comment, and it's going pretty good for me, just another question that might sound a little stupid, but would you happen to know if by default the PID reading is in Centigrade, thanks again for your help.
Yes, the default is Celsius. If you need Fahrenheit, then press SET, input the password 0089 and press SET again, scroll down do CorF and change the value. Approve choices by pressing SET again, scroll to "End" to finish.
Then I should be alright, I'm used to Celsius, the only reason I asked is that although I got the PID set at 103 the water coming out of the group head is reading 85 according to the thermometer I'm using, the one that clips on for frothing milk, should I increase the values on the PID, or is that perfectly normal, thanks a lot.
Amazing video. I really appreciate that you specified the parts and even the source. That is the greatest obstacle for me - getting the stuff. Once I have the stuff I can follow good instructions, which you have definitely provided. I read all the comments to understand better and I have to comment that you have certainly helped many, many people save about $150. We appreciate you, your time, and effort. 🙏🙏🙏❤❤❤
I just finished mine mod (gaggia new classic). Everything perfect. Thank you for this howto. I bought some little different version of XMT7100 - different default values and little more options. This was pain at the start as it was still heating (never stop) or never heating.
And one note at the end. You dont need to put boiler out (with all fittings on bottom). Just unscrew it , unplug top cables and rotate to be able to get to the temp control senzor from bottom.
I decided to take it out for clarity. If I didn't it wouldn't be very clear in the video. The procedure might come in handy in case anyone needs to change the oring in the boiler.
Hi, can you say how you handled your PID? I seem to have the same issue, it keeps heating and have different looking setting from the start - shows value around 90-100 slowly growing (but no decimals like in celsius)
Thank you for your video. I was able to follow closely and complete my PID DIY installation. I didn't thought I can achieve it but I did! Coffee tastes so much better now! Cheers
Thank you for your kind words! Congratulations on your mod!
Best instructional video seen in ages! Clear and concise from the start to the end, with all needed parts and tools, and also tips & tricks! Many thanks, now I'm waiting for the parts from Aliexpress 😂
Thank you so much!
Thank you so much for this video. I couldn't justify to myself spending $220 for the PID mod but you have put the option back on the table. This will be happening to my Classic Pro in Seattle very soon. Once again thank you.
Thank You!! I completed everything today: cut opv spring, lamp dimmer switch on right side in front of steam knob, installed manometer on front right, moved Gaggia logo left, setup xmt7100 for 2 relays, pulled a perfect shot, and I now know the pressure is at 8.5 bar. You helped a lot!
Wow, you've really given this humble machine a boost! I bet it can punch way over its weight now :)
@@robertkujawa3504 Here’s how it pours, what do you thin?… SAY ESS-SSPRESSO! Perfect Espresso/Cortado on Upgraded Gaggia Classic Pro GCP ruclips.net/video/val-K-Z_YCM/видео.html
Amazing! Probably the only video on RUclips that talks about the full assemble with the list of components. I have the same kit which I installed 2 months ago (I bought it as a bundle). Temp surfing was a horrible thing... But now, most of my shots are bitter haha. Still trying to wrap my head around the temperature variable in process.
Very nice and well adjusted instructional. The tempo of explanation makes it easy to follow without getting bored.
I was also hooked by the James Hoffmann Video and bought a used Gaggia with the intention of modding it - with your video, I feel confident to start.
Best of luck with your Gaggia! :)
I used this guide to mod my gaggia, it worked very well. Thanks for the clear instructions!
I have a newer gaggia, I put my SSR tilted sideways on the left side of the ventilation grid, so above the other electrical stuff . This way it doesn't block the water funnel but can still be bolted to the vent-grid, which is good for some extra cooling.
I also used Damian Witonski's guide to make the pid-alarm regulate the steam. But I contrary to his guide used the same SSR for the steam and brewing. I made the pid alarm output route through the steam switch into the ssr, so parrallel with the pid brew output, this works because steam is higher temp than brew, so it just 'overwrites' the brew pid signal when the steam switch is turned on.
That's an excellent tip! I didn't think about using the same SSR, but you're right, the temp ranges don't overlap, so there's no reason it won't work! Thanks for this great input!
Hi @evert S. do you happen to have a wiring diagram for the single SSR solution? That would be a great help. Thanks.
Hi Evert, I've also got the newer Gaggia (with eco timer) and can't find a wiring diagram. Do you have any drawings you could share for how you did this? Thanks.
@@cazsplinter8900
Hey, I drew some of the wiring,
on top of the US gaggia classic 2018 wiring diagram to show how I wired it up.
The EU version should be the same for the steam part of the circuit. But the power wires are different. I used this guide (ruclips.net/video/WNs3uSLA4Ts/видео.html)
To remove the eco timer on my EU gaggia, So thats why there are some more loose wires in the picture.
Also, please note that if you use 1 SSR, the steam-ready light will never turn on.
instead the brew ready light will, and you can see the temp. on the PID so it's not a problem I think.
imgur.com/a/YniAkSU
@@evertschone1 Hi, how is the Mod holding up with just 1x SSR? Can you help with selecting the correct pins when wiring up to the Steam switch? I have the 2012 Gaggia Classic 230V model - the steam switch in the middle. Unfortunately youtube won't let me post a link.
Great video. Thanks for sharing.
Use a lighter to melt the sleeving at its two ends. Careful to put off the fire very quickly if the sleeving gets alight. You can do this in the sink if you aren't comfortable with this process.
Thank you for the good tutorial Robert.
I did the install myself two weeks ago and it has worked flawlessly ever since.
The boiler PID mod is easy. Did it over the weekend and my pulls now are much better and consistent. Thanks for making this video.
I hope you can do another one on how add the second SSR for steam. For those of us who are more ambitious, stuck at home and are not afraid of modifying/soldering the PID controller, it will be a great project.
I'll eventually muster the courage to do that, not yet ready! I'm getting consistently great results with the current setup, so the incentive to modify it for steam is weak. If I do this, I will probably use the existing SSR (single relay) to control the steam as well.
I don't even own a Gaggia but this video was worth it
Hi Robert! followed your instructions start to finish and it worked great. This has saved a lot of money and time.
From the Netherlands the cost were about 66 euro's(excluding some of the connectors and all tools). It took about 3 months for all parts to arrive(maybe due to covid and delays, but I wasn't in a rush). Once all was there I spend roughly 2-2.5 hours to do the mod.
Hi Robert thanks for the video. Didn’t want to spend too much on a machine so I got a classic, but a pid set is 220€ now so I followed your list and orderes the parts from aliexpress, here in May, hope everything goes well (I have the new 2023 machine)
I done this upgrade on my gaggia and honestly was one of the best things I ever done. All you need is time and some tools, another very important tip is to change the steam arm to single hole for insane results.
hey Rob! thanks again a ton for the detailed video... i successfully completed the mod on GCP, both for Brew and Steam...
More than the need, doing it, was the motivation toward fulfilling experience one gets, i bumped through endless number of times i watched Your Posts including this one, the joy of which (task completion) is endless... From Bean-To-Cup...-...PID'd :)
Thank you very much! I just finished installing mine.... and it's 12:40am. A bit late for a coffee. Damn :)
First of all, thank you for the great video and the effort you have put into this. Regarding the control parameters of the PID, these are generally too conservative due to the autotune process and therefore the intrashot differences are very large. I have found the following setup to be optimized: P=1.6; I=10; D=3 runs stable and fast for me.
Thank you for posting this. I had been thinking about adding a PID to my Gaggia Classic for a while, and the details you gave helped me get started (in particular, the links to parts known to work, and the tip about silicon cables, which I'd have overlooked otherwise).
It worked out fine, and my machine is so much easier to use now! I think it's a pity that a PID isn't a more common feature of single boiler machines.
One comment: after reading somewhere that cabling across Gaggia units wasn't always the same, I took some time to trace every cable in mine and make a wiring diagram, and then I decided to power the PID from connectors on the front panel, and not pull any cable from the mains connectors in the back.
My reasoning is that it might be slightly better for safety, because the entire circuit remains between the power switch and the thermal fuse:
First, if the fuse blows, the PID doesn't remain powered.
Second, when the power switch is off, most of the circuit is only connected to the neutral, as opposed to the phase (assuming proper wiring in the wall socket, which incidentally isn't the case for me).
Can you share your wiring diagram?
I would also be interested in this.
Wiring diagram if possible to share would help me as well! Good idea!
Finally after several months with this PID: thank you so much for your EXCELLENT tutorial! Your video pushed me to do it after months of guessing. Getting all the parts was easy with your description. The PID works flawlessly and made all the difference. Best wishes from Germany! 👋🏻👋🏻👋🏻
Thanks mate. I recently got an old model and installed a diy kit using a written guide. Went perfectly untill i decided last week to invest in a brand new machine. Tried to convert the controller over to that and had some issues with the wiring. Getting 170 volts when the machine was not running. The new one has that auto timer board on it so it just wires differently then the old one does.
Just peeking where you tapped the power solved my isseu. I was tapping the brown wire coming out of the plug instead of the blue one. Now the PID actually turns on and off with the machine. Saving me another mod i was almost going to buy.
I wish this video came out a week sooner before I bought a pre-made PID package for the classic. Anyways I hope some people get some good use out of it.
Where did you buy it at
@@cheezenation9182 Mr shades. I've loved it.
Thank you so much!!! I have never done anything like this before, but your video was so straightforward and clear that even I was able to mod my Gaggia without any issues. Couldn’t have done it without your video!
Great video, clear camera angles and naration, great choice of music, just enough.
I want to do the same thing to my GCP but go one step further by doing my pid with a controller or a RPi. This will help me a lot, thanks !
Thank you so much! I'm very happy that the video will be useful to you, that's it's purpose! :)
Stephane, I want to do the same! Did you see that one post on the Reddit where he placed the RPi in front of the drip tray? Looked amazing. Please let me know how it goes, I will definitely need some help trying to do the same.
Here's a tip, when installing the wire sleeve. Use a lighter and melt the ends together to stop them from fraying.
I know this trick now, I wish I knew it back then :)
Excellent vid and instructions!
With regards to the sleeve, once all wires are in, put a dab of high temp hot glue and slip a strip of decent heat shrink over it, this will keep the sleave in good condition until you use a heat gun to loosen it up again
Thanks a lot for sharing this. Following your instructions I just installed a PID on my 1999 Gaggia Classic and it works perfectly. :)
Amazing video! Very detailed and easily understandable, with great camera angles. I happened to buy a used ascaso dream (thermocoil) for a very affordable price that i had to buy it as my first espresso machine. I have enjoyed the taste of the shots, but there is room for improvement. For now i am satisfied with other accessory improvements, but I am really curious about installing a PID into it. I found out that couple of people have actually done this mod for this machine, but there ain't any detailed information or guides for this. I wonder how much would the installing differ from this great example of yours.
Hi :)
I started the same way, after J.Hoffman video. Got the Gaggia Classic for 100$ (was described as faulty). Owner never cleaned shower screen and used with pressurized baskets only.. 🤪
After 3 min clean it was good and running ))
Having same consistency issue (one day shot is wow, other morning is noooo...)
Installed the PID, easily removable way.
Yeah, got better. But then I installed the temp sensor on the group - and found that hot boiler doesn't mean hot group.. it is taking up to 20 min (without steam help).
Consistency improved, but still not the best.
Not mentioning the 9 bar adjustment, brass plate, IMS shower, bottomless ptf..
Checked the temp drop during the shot and it was.. a lot. Around 3'C. (Just google temp stability of Lelit Anna, Ranch.Silvia.. there is no such drop start 92-end 91.8)
So.. I went further. Got pre-heating copper tube wrapped around the boiler and... pump dimmer to adjust the pressure on the fly )
After all of this - result was good. But the workflow.... complex! Look to the temp gauges, pressure gauges, time, volume.
Too much for the 30 g of the hot DRINK ))))
Removed all the stuff and sold for 260$ (without any mods, just good working condition).
Found a used Expobar Office machine, 300$, almost got it, but changed mind and got Flair Pro 2 + Bellman CX 25 + kettle.
Happy for now.. for now.. almost.. )))
Ha! Seems like Mr Hoffmann was right about one additional thing: this really is a hobby and a rabbit hole. I've been enjoying the journey, but it might be just too much for someone who just needs their espresso fix.
Thanks for sharing!
Wow i thought the flair looks way more complicated to use …. I don’t understand how you can have that big a temperature drop from the boiler to the brew head..… the brew head is basically bolted to the boiler… also couldn’t you just use a temperature offset ?
@@chopsonyou2007 The temperature drop is because a small boiler is filling with a cold water and at the end of the shot, the mixture of hot and cold water is going to the pack. The drop of temp is what I measured, may not be 100% accurate.
thanks for the video! Connected, everything works. Espresso has become better! Informative and clear video!
Really great video with all details needed :) Thanks a lot!!
Nice job Robert! Wonderful video a great addition to the community, really helpful. I hope you enjoy your new and improved Gaggia!!
Thank you! I'm glad I could contribute to the Gaggia users family
Thanks for this video. This was very helpful and by far the best pid mod video on RUclips
this is a great and thorough video, very nice to see a cheaper option to the PID kits. I'd love to see a gagguiuno video as well done as this!
I've done it thanks to You! But have to admit that aliexpress case is terible. It took me few days to order a 3D printed one and now it looks great! So tips for anyone for not going the half way and do it properly with printed case.
Thankyou very much for taking the time for making this video
You might want to add thermal paste also to the backside of the SSR to help cool it with the metal backside of the machine :)
Great.. I'm waiting for my XMT7100, SSR relays and Thermocouple🙂
thanks a lot for the video, it was helpful to improve my gaggia. Greetings from Chile. Muchas gracias por el video, fue util para mejorar mi gaggia. Saludos desde Chile.
I'm planning to implement this mod later. In my local market M6 thermocouples are so common. Even I might have one somewhere at hope. Hope I can find an M4 locally, but what I noticed M6 is the standard for most of the industries or above.
Thanks a lot for this video and instructions!
Hi Robert, thank you. I followed your guide to add a PID to my Gaggia and it works like a charm! Also, the 3D-printed case is awesome, i am so happy that i did not buy the alloy one!
Very good job. Very well made video. Thank you.
very good tutorial! I have the 2023 version with the monobloc. could be also used for my gaggia in this case?
Great video. I hope to do this to my 2002 Gaggia in the future!
Great video and really really tks I hope this video remains is just what I was looking for. Tku good man
Awesome video. Thanks so much for putting this up here!
Great job! The next thing you ought to consider is to add an electronic module (SCR electric motor speed control) to control the vibratory pump output to regulate group head pressure as a profiling device.
Does this make sense without an in-line pressure gauge?
Another thank you for a great video. Nice to see the wires at least sleeved too. Maybe an inline fuse protecting the small wires supplying power to the PID, just in case?
I'm kind of fancying this mod, plus a remote pressure gauge, a dimmer module, and maybe an auber shot timer, all stacked in a specially designed 3D printed box for the left hand side. Eye opener about not really needing the steam alarm control and leaving the stat in as a fail safe
Great work Robert, looking to do this myself soon 👌🏻
Thanks and good luck!
Thanks for a great tutorial video Robert 👍
Thhis is brilliant, I hate the look of a PID on the side of the machine as well.
Great instructions Robert. Excuse the noob question but I am new to this. Is tapping wires same for the 120v machines (US model)? I have the brown wire on the brew bottom at the same location as yours, but at the socket, I have a white wire at the bottom instead of blue. That being said, the power button has gray and white wires on top instead of blue/orange in your model. FYI my model is Nov. 2020 with the wider funnel.
Great video, I’ve finally installed my pid to my 04 classic.
Strangely enough my auto tune seems to take forever. The blinking AT light never goes of.
It does keeps the machine at 103
any differences in parts or instructions from the classic pro compared to the classic? i have an 07 :)
Anyone else yell at their screen when the screw bit was left in the boiler? 😂😂😂
Man, thank you so much for this video!!!
Thank you Robert!
Hi Robert, just wondering if the parts you linked will work with a 120V machine as well. I've messed around with taking things apart and putting them back together before but not really much in the electrical space
Yes, they will accept a range of voltages, 120V included.
Great tutorial. The only thing I do not understand is - the temp sensor PT100 that you screwed in the boiler and put thermal paste - isn't this paste in contact with the water? Why do you need thermal paste, or the hole does not go in the boiler and is just in the wall of the boiler?
The hole doesn't go all the way through to the boiler inside. It ends in the boiler wall. The PT100 sensor reacts very rapidly to temperature changes, so in order to take advantage of that and reduce latency, I used the thermal paste.
Great video, thanks!
Excellent video!
I successfully completed my PID controller install. In the end, after watching all of the videos, I just had to guess. No one had filmed the install on an early Gaggia. Mine is from 2002.
Part of the problem here is that Gaggia was entirely inconsistent with the colors of their wires. I had a hell of a time following what the tutorials were doing. In particular on this video, @11:00 he says brown wire. Where? Who knows. Mine does not have a brown wire on the brew switch, which is not in the middle, but on the right. From bottom to top, mine has two gray, then white, and then red. So...which wire? It would be much more helpful if the tutorials said what the wire does what so that we can look at our particular machine, all of which will be different.
The piggy-backs I installed when from the neg/blue wire on the power wire on the back wall of the Gaggia and the steam switch in the middle using the double/white wires at the top of the switch. I used heavy (14) gauge wire throughout. I did not have to remove the boiler in order to install the temperature sensor, thankfully. It was a bit fiddly, but with a little patience, not difficult. Also, I was able to attach the extruded box and the relay with 3M double stick tape. The back wall of the Gaggia is cool enough for the tape not to overheat. I cut a 2.5cm x 2.5cm hole in the side of the extruded box into which I was able to fit all of the wires. The result is very clean with no wires visible from the back and everything is reversible. The next step, a dimmer circuit to the pump, will not be reversible, however, as the knob and shaft will be drilled through the side of he Gaggia on the right behind the steam valve knob.
Oh yeah, it works great and is absolutely worth it. A vast improvement over what I had before. I set the PID for 101ºC, which for my medium dark roast gave a much, much better tasting shot than 103º.
True about the wire colors. I recommend having a multimeter on hand, to verify the voltages before you flick the switch.
I happy your mod works!
I was reading down the comments for similar GC owner to share their PID install following Robert's clear instruction . I've the same dilemma about wiring color code. Robert tap on brown color to piggy back for live wire, in our case it's Red (Live) color, I also noted on the schematic diagram that the red colored wire is then connected to the steam switch, is it ok to tap on this red wire for Live connection? Alternately someone state that it's okay just to tap on the back of GC or GCP rear switch for power.
Thanks for taking this newbie inquiry.
Great video - thank you! How important is using a thicker cable for the PID power connection? I have an 18 AWG silicone insulated cable at hand, but was wondering if this may be too thin. Thanks
I’ve done the mod. It wasn’t too hard thanks to good instructions. But now, how to use that PID? You set it on 103C, but can you save two different temperatures like say one for brewing, 103 or something (cause it colder inside the boiler, right), and one for steaming , say 140C. Then how can you easily switch between the two without having to change temperature manually with the buttons?
It doesn't work like that, I'm afraid. The PID controls only the brew temperature in this case, the steaming temperature is still controlled by the stock thermostat. It is possible to modify the PID to control the steaming temperature using the alarm function, but it is beyond the scope of this video. At some point I will prepare a follow-up video with the advanced mod like that.
@@robertkujawa3504 Rob! m just putting the video on replay going to bed from last 4 nights and kindda it's got soaked in my brain... Have the mod Parts on the way for recently procured Gaggia C/P. (Note that we're not getting the XMT7100 here (India), so have ordered a dual set-point Selec PID).
Was wondering if You're doing the video for both the Brew and Steam Thermostats...
know what, i drew myself sketches of how it should be, and should work...
But there're enthusiasts waiting for the video including myself...
Again, great work and so simple narration... Love ya Mannn!!
Thank you for this amazing tutorial, I have only one question, which way did you connect the Ground and VCC to the PID, or perhaps it doesn't matter because its DC? Thanks anyways
Hi There, great video. I noticed in the comments questions and answers about different parts that are not listed in your summary - is this correct? Do you have a link to the full listing and description of parts that will be needed? Thanks again for the video! Amazing effort and I think the first of its kind on youtube!
Yeah, I intend to update the video description with everything I missed in my commentary. Stay tuned, it's coming shortly!
@@robertkujawa3504 Thanks for updating the description since I last looked. I'm going to give this a shot. :)
Hello Robert, can you make a video about the other customizations the you made for your machine? Maybe you can add links with the bottomless filter etc...
Thanks!
Will do once my new kitchen is ready :) thanks!
Great video!
Thanks to you i was able to do this install about an year ago, however as of recently my XMT7100 PID just stopped powering on. Light on the Gaggia power button turns on, no heat, and i can't tell if the PID or Relay are getting any power. Any troubleshooting steps you recommend? I checked all the cables and connections, they seem fine. I have a multimeter if it'd be useful, but I'm not familiar with how to use it (it's an AstroAI Multimeter 2000), thank you so much for your help.
Thank you so much for this "how to".
I did this PID mod with single SSR ( Brew temp only ). I have question, is it safe to use the steam switch? Does the steam temperature has its maximum to stop heating? Because we cannot control the max steam temperature on the PID with single SSR. What happen if i swtich on the steam but did not use the steam? Will the boiler gets broken? Or it will just stop heating the boiler at certain temperature?
thank you
thanks for the great content. im trying to figure out if its worth doing the gagguino or this. might do the gagguino just because hunting down all these cables is hard for a noob like me. anyone here have any links where they bought theirs recently?
Hi there. So the first thing I noticed when looking at the parts is that the relay you bought is 24 volt. The PID controller you bought is 12 volt.
Hey Justin, the SSR can accept input voltages in the range of 3-32V, so it's fine and it's been working like this for 1.5 year. No issues.
@@robertkujawa3504 ohhhhh!!!! Ok thank you so much!!!! I'm going to adapt this install on a different machine I have! Thanks so much for putting all this info out here :)
You need to melt the ends of the sleeve with a lighter to keep it from fraying.
Now I know, thanks! :D
This is very helpful and gives me confidence to attempt PID mod.. it’s a shame Gaggia do not integrate a similar solution even if it meant producing a variant model for aficionados, they could then call this model the “Pro” version!
Great tutorial, I've been searching for an explanation like this for quite a while, finally, I found it I have ordered all parts you recommend from Ali express but not sure what size of the silicon insulated cable to order, can you please tell me what AWG or MM you used
For connecting the PID do the SSR I used SiHF 2x0,5mm2 cable and for delivering power from the Gaggia to the PID I used 1mm2 cable (17AWG).
For connecting the SSR to the Gaggia I used FLRY 1.5mm2 cable.
Thanks a lot, I'll get ongoing looking for them
Hi Robert, just a question about PID settings. The settings found by autotune (P:4.8, I: 78, d: 19) produce an intrashot stability of around 5c. I was wondering if you had any luck with trying custom settings? I have seen people achieving an intrashot stability of 2-3C, so I know it can be improved.
Edit: After some trailing different settings I found online, the best result is still with a setting found by autotuning (P:4.1, I:21, d:005). Intrashot stability is now around 4c with a 30s runtime. The small boiler on the Gaggia is a limiting factor.
Hi Mathew. I'm having the same issue of intrashit stability. What is your Gaggia model and boiler capacity? I will try the settings you pointed here!
Great video and really helpful, just one question - do you need to first set the parameters/temperature in the PID before Autotuning? Thanks!
No need for that, you can start with the stock ones, set the temp, let it heat up well and then auto tune.
@@robertkujawa3504 Thanks Robert, i will give it a try.
Are you still running your setup with SSR 25DA or changed it to 40DA?
great video
Really nice video, thanks a lot, I'll try to do this with my Gaggia. I have a question about the FLRY cable, I'm not sure what it is, looking on internet I found some FLRY cables but they are always with a letter next to the FLRY, for example FLRY-A, FLRY-B, etc. Can you give me more info about the cable that you used?
You're looking for the FLRY-B variant, although either should work just fine, as long as the diameter is there.
Thanks for your answer, but I don't understand if the FLRY cable has something special or should work any 1.5 mm2 cable with a good resistance to high temperatures. For example, can I use the same silicone type cable for all the connections? Obviously using the right sizes (0.5, 1.0 and 1.5 mm2)
@@erodaven Keep in mind that those silicone cables are much thicker than others and if you're using the same 3D print file I used, the hole in the back will probably be too small. They're also more expensive :)
Other than that, you'll be okay using them for everything.
Hi! Great video! Thank you for sharing the whole process and all the Infos for the parts, much appreciated 👍
I ordered the same parts, and I'm excited to set it up! Could you help me with two things that aren't clear to me from the video:
- When you attached the power source to XMT 7100 unit on to terminals 1 and 2 (21:30), in which order did you connect the L (coming from the front switch) and N (coming from the back wall) wires?
- And is there any benefit, or what is a difference, in using an SSR-25DA instead of SSR-40DA? I'm asking because the ready-to-order PID Kits include SSR-40DA, and my knowledge of electronics is nonexistent to understand the difference 😁
Thanks a lot!
Hi Igor! I'm glad you like the video! As for answers:
1. The order doesn't matter, this is alternating current :)
2. I don't really know why they select such high rating for premade kits. The heater element on the boiler draws 15amps, so 25 should be plenty. Perhaps they do this for longevity (more headroom), but even with 25amps you're comfortably at 60% rated output. Unless I'm missing something, I'm not an electronics expert :D
@@robertkujawa3504 Great! A big thank you again!
@@robertkujawa3504 I stumbled across some reports of so called fake Fotek SSRs that would not perform to it's current rating. In one example, the SSR-25DA had a 12A Triac inside, or 50% less than the rated load. This might have something to do with why the kits all seem to be using 40A SSRs. The Gaggia should only draw around ≈ 6A (230V models), so you should still be okay if the 25A SSR only had a 12A triac.
@@robertkujawa3504 First of all, great video. I had the same question with respect to SSR-25DA vs SSR-40DA. I saw this note on the Mr Shades site but I have no idea what it means:
"These products are typically current rated lower than the name suggests - so it is advised to limit this SSR to switching 25A maximum. (a typical Gaggia espresso machine is rated at approximately 6A). "
Anyhow, it is pretty equivalent cost to get the SSR-40DA; would you recommend that?
HI, thanks for the video. Can you please specify the width of sleeve you used, and provide links to the following cables or alternative keywords to use (had no luck searching):
1. About 60cm of SiHF 2x0,5mm2 cable connecting the PID do the SSR
2. About 60cm of 1mm2 (17AWG) cable to deliver power from the Gaggia to the PID
3. About 60cm of FLRY 1.5mm2 cable to connect the SSR to the Gaggia
THANKS!
Disregard, I was overthinking things. I realized I have a bunch of wire and can insulate it where needed if I have to. Ordered everything I need for $45! Much better than the $200-$300 I almost spent for a ready made kit. Thanks for the guide.
If anyone still needs this:
The sleeve width is 15/25mm that's for unexpanded/maximum expanded width.
To find apropriate cables look for:
1. Look for two strand silicone cable of the given thickness. Silicone cables are rated to temperatures reaching +200*C, so they can be comfortably routed right next to the boiler. They are also very flexible.
2. Same as above but thicker and sinlge-strand. If you type in the thickness and "silicone cable" in your marketplace of choice, you'll see them popping up.
3. FLRY-B cable is a PCV coated multiple strand copper cable used in car engine compartments. Look for heat resistant cables of the given thickness, able to withstand up to 105*C.
Greetings!
Thank you for your excellent video! I installed mine a little differently to my liking but made all connections as you did! I don't see any reason to deviate from your wiring as it seems the most efficient way (Just replacing the thermoswitch with the controller and thermocouple).
How ever when I flip my steam switch now it just keeps heating and heating. I am not sure why. It kept going past 170 before I shut it down.
I don't see why the steam thermoswitch shouldn't still regulate the temp to 145. Perhaps you have input on this?
Thank you again! I've been enjoying tinkering with my Gaggia.
hi Weese! i was attempting to do the sketches/schematics last night and just bumped this query on situation of yours that got me thinking how can i repeat it... One (but not likely that You haven't hit it already) is when i've not set the High Value of PID to say, 140, default value is 600 deg. c for PT100.
Second, if my Steam Thermostat remains closed (can be any reason of several e.g. faulty thermostat, wires/terminals on the outside get shorted in Thermostat route to Steam Switch, Grounded Steam Thermostat accidently) etc. In latter case the situation will over-ride the discharged SSR, i.e. even when it's open after Set Temperature is reached, the circuit via Steam Switch and its thermostat will appear to close it.
Check wiring routes with close attention once, and boiler body for earthing leakage.
Great video! I saw in a another tutorial thermal paste was applied to the metal surface of the SSR relay. Is this not required?
My SSR is working well below it's rated specification, that's why I took my chances without the paste - just didn't want to make a big mess. It's been fine for a month now, time will tell if this was a mistake. By all means, go ahead and add some paste if you want to be on the safe side. It certainly won't hurt.
Hi robert! Looking forward to doing to this to my gaggia, although i cannot find these wires anywhere or what they would officially be called in my local home hardware SiHF 2x0,5mm2, FLRY 1.5mm2. I am canadian if that makes a difference
Just observe the diameters and temperature resistance. These are 2x0.5mm2 and 1.5mm2 in diameter. I went with fancy silicone wires, but you can pick those dedicated for automotive engine bay wiring. They will be able to withstand high temperatures around the boiler.
Ufff, seems i'm ready for a new project ))))
thank you, this video is very interesting, bravo. What is the material of the boiler of this Gaggia? Copper? (I doubt) Aluminum? (ouch) Stainless steel ? (too expensive ...).
Yes, the boiler is made from aluminium. This is great for heat transfer, but you have to be careful when descaling with citric acid.
There was a short batch of Gaggias (2015-2018) with a stainless steel boiler, but these are best avoided, as they don't feature a 3-way solenoid valve.
Hello Robert, nice video, and you almost convinced me to do the mod. I have 1 more question before I do it : you mentionnend your machine is running on 220v. Will the connections and harware be the same for 110v?
The PID unit I linked to can work with a wide range of voltages, 110V included. As for the connections, please refer to the wiring diagram available at Whole Latte Love. I have no access to a 110V machine, so can't give you a 100% sure answer.
Hi Mr Robert, Good job and thanks for sharing the installation process of PID kit for Gaggia Classic Pro
First of all I have to say sorry I have 3 questions as I very new to this kind of coffee machine, please help and guide me and Thanks in Advance
I bought this model: GAGGIA MILANO CLASSIC RI9480/13 (2019 Model - SIN035UR) and to arrange all modification parts and wires from Ali-express and other parts from different places it took me almost 2 months in the mean while I have watched your videos many times to understand myself and I have prepare a notes and bought necessary parts and kept ready in hand to install PID
I would like to Replace or Mod the Rocker switch from Monostable to Bistable to take advantage of using wifi switch to keep my coffee machine ready to use during busy day , even after changing the switch the wiring will PID installation will remain same as {How to install a PID on a Gaggia Classic Pro - DIY, cheap and good looking!} explained in the video or if there are any change please mention
I would like to install 2nd SSR to the Steam function as well, do I have to use 25AMP DA or 40 AMP DA? Please help in this process for wiring and connections ( video would be more helpful for me and I appreciate if you could spare time for this one as well ) or at least a diagram and parts list
I have XMT7100 1/32 DIN model I will Modify the PID to use for 2nd SSR as as you suggested “ Mr. Damian Witonski ” video to modification
Please make a video for the PID temperature settings for both the Brew and Steam
Thanking You
Tej with Love from INDIA
Hey Mr Robert i have found the PID temp settings in the comments section and understood you have skipped steam PID temp , can you help for wiring changes if i want to change rocker switch bistable
Hi, first of all, I would like to thank you for the really informative and useful video.
Do you know what material was used for 3D printed case?
Is any temperature-related requirements?
Hi Juras, thanks for the kind words! As for the material, I honestly don't know, so I relied on the printer's expertise. I described the use to him and I think he chose a food-safe and temperature-resistant material, but there's really no need for this. The PID remains outside the machine, so is always cool and doesn't come in contact with the coffee.
PLA is cheap and would offer enough resistance to sit outside the machine. It starts to soften @ around 60°c.
Thanks for the video it was very helpful! I have 1 question and 2 suggestions:
Q: Do you know what the SU value is in the 0001 menu? I saw another video it was called extraction temperature with it set to 105. Is that just the default temp the PID is aiming to reach?
Suggestions: Instead of removing the entire steam wand I just used a pair of needle nose pliers pull the quick release pin that can be seen in your video at the 7:51 mark at the steam wand hole. I also found that I did not need to disconnect the hose or solenoid to complete the thermocouple install.
The default value for SU [set value] is 80 degrees Celsius, at least on the unit I ordered and linked to in this video. It's the temperature displayed on the PID screen, so very easy to check and adjust.
Good tips regarding the disassembly, might be useful to others. The reason I dismantled more than I needed was for the clarity of presentation. This way I could remove the boiler and show the steps in detail. It's also good to know a full disassembly procedure in case your 3-way solenoid valve ever gets clogged.
Great video! I will try to do it the same way :) Without Your I would be lost! Then maybe I will try to add 'Dimmer mod' as well. Have you thought about this?
Yes, a dimmer mod would be high on my "to do" list, but I'm still figuring out the most aesthetic way to do it.
Does the brown wire on the brew switch connects directly to the power outlet? When the machine is off, does the PID stay on, turn off? I have newer model and trying to figure out the connection before I start. Thanks
Hi! I followed this as closely to what was in screen and it seems to work... Pid turns on and starts tuning the temp. But it trips the breaker of the house as soon as I hit the brew switch (I have the dimmer mod installed). Anyone has a guess as to what's happening?
Hi. What material did you use for 3D printing? Speaking to suppliers locally I can choose between PETG, PLA, ABS or Nylon. Any recommendation? I assume some have different strength and thermal properties so perhaps one is better than others given the case of the machine does heat up? Thanks for your help (and the AWESOME video).
Hey Douglas, I relied on the guy providing the printing service and he recommended PLA.
@@robertkujawa3504 I did the same! The guy I used recommended black PETG. I'm sure either is fine as where the PID sits won't get very hot / near melting temp. Thanks again for your great video.
@@williamdouglastoy PETG is more expensive, presumably he charges more. For this application PLA is fine. I 3d printed mine myself.
noticed you hooked up wire from the power source to the brew button, shouldn't power source be hooked up to power switch on the machine?
Hi, thanks for this great tutorial! I have a question though:
For the PID power source is it ok to tap with the piggy back on the power switch instead of the brew switch? I’ve read another tutorial and they tap on the power switch, thanks
You should be fine, the bottom white wire should carry 220V, but it's always good practice to verify this with a multimeter.
What difference should make that change in the connection?
Which wires do you plug into 1 and 2 on the PID? Do you connect the wire from the brew switch to 2 since that is ground?
Thanks for the video. This works for Gaggia Classic 2015 EU version?
Yes, it should work just fine
@@robertkujawa3504 Thanks for the quick answer. Did you work out how to PID Steam? I am tired of triying to do latte art anda before having It ready, the Steam light goes off
There's no need for the PID steam control. Once my kitchen remodel is done, I'll record a video showing how I use the temperature reading to get lots of steam pressure and volume. For now, here are the steps (temp offset 8*C)
1. flick the steam button and watch the temp on the PID display
2. once it hits 140*C purge the wand
3. once it hits 150*C start steaming
4. introduce a single burp of air right at the start and then keep spinning the milk as long as it takes for it to become too hot to touch
5. wipe the wand, release remaining pressure, fill the boiler back up
Using this procedure, I never see the steam light come on and get enough steam for two pitchers!
@@robertkujawa3504 Wow, thanks for your clarfying answer. Waiting for that video without doubt. I have dissambled the machine, and as I said, mine is Gaggia 2015 EU. The button part is different, and the connectors are 4.8 width, so, is it possible to power the PID directly from the energy connector at the back? You just took the neutral from this site. I hope the PT100 fits the boiler btw