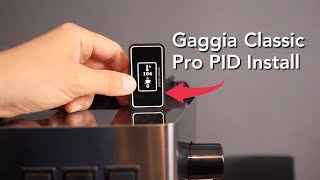
How to install a PID on a Gaggia Classic 2019 Pro tutorial including 9 bar spring replacement bonus

HTML-код
- Опубликовано: 6 окт 2024
- This is my personal experience regarding the installation of a full BREW +STEAM SSR's and PID controller kit, on a Gaggia Classic Pro 2019 model.
I'm using my Top Cover Box in order to install and have a great look of the PID controller on top of my Gaggia Classic Pro 2019.
PID kit available here: coffee-sensor....
Top cover box: coffee-sensor....
More custom Gaggia Classic parts and accessories: coffee-sensor....
9 bar spring: coffee-sensor....
A few tips and very important safety measures:
After the hardware installation, remember you need to tune the controller in order for it to work perfect on your own coffee machine.
Written tutorial about the set up of the controller is available for my customers.
Remember after hardware installation to put everything to safety and to use electrical tape (or heat insulation) and our plastic power cord protection, in order to isolate your work from high heat and water.
Zip ties can help you contain and put the wires to safety and not have loosen wires inside the machine.
Make sure no wire touches directly the metal case or boiler body.
Make sure BEFORE using the controller and SSR's that your machine does NOT have any water leak present or that could permanently damage the PID and your machine also.
Check all wires, bolts and connections BEFORE using the kit.
DISCLAIMER
The installation of any individual part or entire kit that we sell should only be done ONLY by qualified technicians, with proper electrical and mechanical knowledge.
Coffee machines work with electricity (that can cause shock or death) and water under high pressure and temperature (that can also cause death or high risk injury).
We shall hence not be liable for any damage made to yourself, your machine, any personal injury or other losses caused by improper or incorrect use of our parts or kits.
This installation tutorial represents only a personal experience of the user involved and should not be used as guidance in anyway.
Seek professional advice and help in installing any mods or parts / kits that we sell on your coffee machine.
In case you understand the above mentioned and start an installation process, you agree to accept all liability associated with the modification of your espresso machine and totally agree to hold us in no way responsible or liable for any loss, damage or injury that can occur.
You also agree to indemnify us and / or our resellers against all possible claims, damages, costs or expenses, including legal fees, arising out of any installation, use, misuse or failure of any of our parts or kits.
In case you disagree with the above mentioned, stop installing or using any of our parts or entire kits and do not attempt to install or use them in anyway.
According to EU law, you can always return the parts or entire kits you bought from our company, to be granted a full refund.


Very nicely done.
You need to be a technician to do the job well-done.
It looks great the pid installed on the Gaggia Classic.
Great instruction video!
1) What pressure gauge can you recommend for the top enclosure?
2) Why do I programme the PID without one cable connected? Can I change a value in the programming later without disconnecting the cable again?
It's a safety measure, in case the controller is wrongly tuned or something is connected wrong. Yes you can later on program the controller without removing any wires, if the first set up was good and machine runs smoothly. I will have in around 2 weeks the gauge and adapter for the solenoid.
Greatt Video. Many thanks.
Great tutorial ! Can we follow it with the new Gaggia Evo ?
Yes you can! I already uploaded a video with the installation on Evo also.
Considering doing this myself and have a couple of questions if you don't mind.
1. Why don't you replace the thermostat for the steam? Is the original one sufficient?
2. What is the point of tthe jumper cable you install at the end (admittedly, this might be limited electronics knowledge from myself)?
3. Does the controller let you set a brew and steam temp? How do you switch between the two?
4. Why do we need a DA and AA relay? I would've thought we'd need 2 of the same, but again, lacking electrical knowhow.
Thanks!
I did replace theoriginal brew thermostat. Watch at minute 2:50. It was replaced with the PT100 temperature sensor that has the white cable. Since you have 2 SSR's, one controls the steam temps and the other one, the brew temps. There are two different models, one is DA and one is AA. You have separate settings in the PID controller for each. They are located in two different menu places, so you can always set one or another without any problem.
@@coffeesensor6612 I think he didn't understand when you changed the thermostat but didn't remove from the boiler so he may confuse because of that. But thanks for making everything simple. I was so overwhelmed with all other videos and yoır video made me confident enough to do it in one hour.
@@ahmetzyc At minute 2:48 the brew thermostat IS REMOVED. Thanks for your kind words and we keep in touch ! God bless, Tudor P.
@@coffeesensor6612 he asks for steam though.
@@ahmetzyc indeed did not remove the steam thermostat. Just the brew one.
Will you be making a video on setting up PID?
Settings are offered as a read document to our customers, after the purchase. Thank you and God bless, Tudor.
Nicely done! Are you going to have a follow-on video showing how to add the pressure gauge?
I am now working on the pressure gauge and dimmer mod and the single hole steam tip is already done and on it's way. So the Gaggia Classic Pro is definitely one of my loved projects that will be developed at a maximum level.
@@coffeesensor6612 Thank you for this tutorial, may I ask why single hole steam tip?
@@showmak improve vortex and thus, frothing. There is a reason why most premium machines offer usually single hole tips. Of course there are users that prefer two or three, depends also on each style.
Well done. How many amps on the line fuse protection? In case for replacement?
Great video @coffeesensor6612! It is very nicely explained. Can you let me know if this is an out of the box XMT7100, or it has been modified in some way? Adn why there is a need to a small grey jumper cable between PID terminal 1 and PID terminal 4?
The XMT is standard controller, no mods made to it.
what is wiring AWG gauge used for connection 16 AWG or lower ? and the in line fuse wire connected to PID what is the fuse capacity?
I bought this but a few things included in the kit was never used in the video, the wire and resistors in the same bag as the rubber grommets. Did I miss something ?
I seem to have everything in order, the pid is set up after a minor mishap which blew the thermal fuse. But now the temperature reads correctly and the boiler heats up. But I seem to have lost power to the pump (or it died on me during the install)
Pump should not have any problems. I believe you installed the dimmer also?
@@coffeesensor6612 I did not, don't actually remember what I did wrong initially but it works fine now.
Very well done.
Thanks !
Great video! Any update on the pressure gauge?
In production
@@coffeesensor6612 waiting for it
Do you not need to connect the PID to earth?
Only the alu box if you use that one, to the machine chassis. The PID controller itself no.
I mean the one at 15:26
Does it matter which brew ssr goes in to the R Brew and L Brew thermostat cables?
Follow this exact tutorial of you want good results and no electrical problems.
@@coffeesensor6612 I did follow everything and everything works perfect. But I have a question since I have done all of the stuff for the brand new machine I never used it before. After using steam I get kind of a sound of steam even though I am done using the steam. Is it normal because temperature is very high ? Because I never used the machine before I cannot compare it to without pid. Steam temperature is set to 137
@@ahmetzyc send me a video on my website with what you mean by sound of steam. thanks !
Hi there, do you know what settings you use to offset the brew temperature? For example the PID reads 50 but by the time it gets to the brewhead it will be cooler due to travel time etc...
Psb setting inside the PID controller should be set at -08.0 (WITH MINUS), that if you are using Celsius degrees or -14.4 for Fahrenheit. That means that what you will see on the PID controller display is not the boiler PT100 sensor detected temperature but rather the brew temperature. So offset is set to MINUS 8. So that is why I set up the PID controller at 94 and not 102 for example. So short, offset can be around 8 degrees max 10 degrees C.
My temp sensor has two whites and one red, can it still be used?
yes you just put the red where he put the white and the 2 whites where the reds went
You can try yes. The white to position 6 and 7, and the red to 8.
the realy nice looking machine turns into the terminator. i do not like the looks.
Cannot comment on taste. It's personal. Cheers.