Expansive bits are back! | Restoring, sharpening, and using vintage adjustable auger bits

HTML-код
- Опубликовано: 25 мар 2023
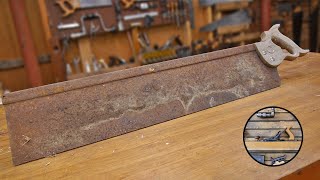
- Expansive auger bits feature a adjustable cutter that allows them to bore custom sized holes using a brace. In this video, I restore a 120-year-old James Swan No. 7 expansive bit, demonstrate how to sharpen and how to bore large holes cleanly, and highlight the differences among commonly found models. Starting with Clark's patent in the mid 1800s, expansive bits became popular for woodworking and other trades as an addition to the standard set of fixed diameter augers. Like many hand tools, expansive bits reached their peak in the early decades of the 1900s, with improvements like Wright's patent. A well-made expansive bit at this time cost a bit more than a Stanley No. 4 bench plane. Top manufacturers included Connecticut Valley Mfg Co (Convalco), Russell Jennings, James Swan, Peck Stow and Wilcox, Irwin, CE Jennings, Sargent, and Millers Falls. The art of using and maintaining them was gradually lost with the advent of power tools. With good practice vintage expansive bits are a lot of fun to use and well worth rediscovering.


Thank you Sir.🎉
Very informative. Thanks.
Thanks for watching!
I have three expansive auger bits that I've picked up with bunches of auger bits at garage and estate sales. They're rusty and dull and this is the first thing - video or print - that I've come across that shows how to restore these to working condition. I've successfully cleaned and sharpened fixed diameter auger bits, but this showed me some things I didn't know about restoring expansive bits.
Thank you!
I noticed the lack of information out there as well. Hopefully this helps more people discover how great these bits are. Best of luck with your restorations!
I found a set of these years ago and refurbished them. It's so refreshing to see another that actually cares about the tools they use. Love 😘💋 your channel sugar bear 🐻!!!!!
Thanks! Glad you're enjoying the channel :)
@@thehandtoolworks Also I've now found a giant chisel or I believe they're called a ship's lap or plane anyway it's about three inches wide by about ten inches of actual chisel part and then taper's nice and slow into the hollow place for the handle. Probably about an eleven inch taper that doesn't get skinny before the hollow and then fan's out for what I'm thinking is a two inch diameter hole formed for the handle!!! It looks as though I could possibly or probably simply stuff a shovel handle into it and use it for an open planer!!! There's hardly any rust on it so I'm thinking I'll polish it to maby a point zero one finish so it will shine like a mirror!!! And with a naked wooden shovel handle I'll be able to stain it in a light wood finish!!! And since I won't have to do much to the back of the shovel handle to make a nice ball end I'm thinking 🤔 I'll have myself a nice open plaining flat!!! That I can use with pressure from my hip!!! I'm a retired engine builder and CNC lathe machinist and I've learned how to make an edge so Sharp the edge can't be seen even with a two hundred power comparitor!!! So I won't have to exert much pressure to shave wood off of whatever I wish!!! Lucky find huh????
@@thehandtoolworks He's where I got the idea in his video titled (making a huge two handed chisel from scraps) I think I'll go check again and make sure I got that right 👍!!!
Hi Kim, That is a great find! Antique shipwright's/timber framing slicks are really collectible. I'd be interested to hear if you find a maker's mark.
I have never seen such adjustable drills. Thanks for showing and the perfect restoration/conservation. I like that you don't polish away the history of these tools.
greetings from Germany
Tino
Solche einstellbaren Bohrer habe ich noch nie gesehen. Danke für das Zeigen und die perfekte Restaurierung / Konservierung. Ich mag es, dass Du die Historie dieser Werkzeuge nicht wegpolierst.
Grüße aus Deutschland
Tino
Many thanks Tino! Und es hat mir sehr gefallen ein bisschen Deutsch hier in den Kommentaren zu lesen :)
@@thehandtoolworks 😉
the refurbished auger bit can be made rust-resistant by coating it with a thin film of oil and then leaving it in a moderate oven (as with "seasoning" an iron skillet). The oil converts to a tough resin, transparent with an amber tinge. this is removed from the cutting edges by a fine file just before the next use. This video is a fine example of a simple clear and complete demonstration of the subject.
Great video - really clear and helpful! I wish I’d watched this before I tried sharpening my own expansion bit
Thanks @darkdave25, hope you got it working well!
Your enthusiasm and passion are contagious. You can see that you genuinely love what you do.👍👍👍
Thanks PerfectRestore!
fabulous! Good work!
Thanks a lot!
So much cleaner to use than todays hole sets. I have my great grandfathers brace and about 6 bits. I'm going to see if I can find one of those 50's style expandable bits.
Awesome, good luck!
Love you videos. I have a request. Would you do a video of your shop especially your tool wall. Is seems so simplistic yet elegant.
Thank you.
Thanks! Yes, I'll be featuring the tool wall and more of the collection in upcoming videos.
The timing! I just took a pair of these out of my late father's drawer to put in EvapOrust. One has Germany on the tang? and the other has TRYON*. This sharpening process will help immensely! Just ordered an auger bit file thanks to your other two-part video.
Glad you found the video :) You might want to try steel wool, wire wheel, or some very fine sandpaper just to remove the brown surface rust but leave any dark patina underneath which is protective. Evaporust tends to strip the patina leaving the steel more prone to rusting. Best of luck!
Thank you for this video - very interresting!
Some time ago I was lucky enough to win an auction of several drills on ebay, including such an adjustable drill in the original wooden box from the 1930s. It was a German manufacturer ("Anker-Werke"), but the drill isn't half as good as the ones you showed. It has significantly larger tolerances in the adjustments, the screw and the thread have already suffered significantly. As is so often the case with German tools from this period, they are modest replicas of English and American models. I then put the drill aside quite quickly, now, after your video I know that I have to look for. The screw adjustment mechanism the Iwin drill shows is convincing!
(BTW: I'm still satisfied with my auction win, there were three very good Forstner drill bits from the same time.)
All the best: Georg
Thanks Georg. Gimlet bits are one exception I can think of. Until at least the early 1900s, German makers supplied the US with the finest gimlet bits. I have a collection of antique German gimlet bits from makers like Robert Hönne-Knovel, JM Hoff & Lange, and Hilger & Söhne. These inspired me to make clamping auger handle video actually :) Good luck getting your expansive bit back to work!
@@thehandtoolworks Hi!
Thanks for the answer! I know Hilger & Söhne, but not the other two. I still have some gimlet bits from my grandfather, I'll have to check the brands.
After your video I got the adjustable drill out again. The thread in the drill actually still looks fine, it is the thread of the screws that is quite damaged. I'll try a new screw.
Man I love this stuff. Learned a lot then on those kind of drills. Think I’ll start looking for that type of drill when I got to antique shops. I have two braces but both need parts. Anyway great video friend.
Thank you
Great learning experience
Glad you enjoyed it!
Great video, thank you for sharing.
Thanks Nick! Glad you liked it!
@@thehandtoolworks Indeed I liked it, thank you.
@@thehandtoolworks I just purchased some old bits myself, they need some attention and thank to people in the known, I might be able rejuvenate them even a bit.
Great, thank you so much for this videos! I'm learning a lot.
Maybe you recommend some books with similar knowledge?
Cheers from Poland 🍻
Glad you're finding the videos useful. The old catalogs and manuals from vintage toolmakers often have a lot of interesting information, eg: archive.org/details/StanleyToolGuide1952/mode/2up archive.org/details/MillersFallsCatalogNo391925/page/n21/mode/2up
Here's a books on hand tool woodworking from 1915: archive.org/details/handworkinwood00noye_0/mode/2up
@@thehandtoolworks
Excellent, thx for an answer.
Cheers 🍻
Perfecto,maestro,gracias🙏🙏🙏👍👌
Gracias @luismigueldominguez5487 !
Parabéns ficou perfeito, eu ganhei uma proca dessa , pretendo restaurar!
Obrigado! Boa sorte!
What a joy to view. Why did you use a scraper to initially remove rust rather than the soft wire wheel? Why use 3in1 oil on the sandpaper? I appreciate learning from you.
Hi @LitoGeorge, I used a scraper here to remove strongly adhered rust and get the tool ready for sanding with very fine sandpaper. The soft wire wheel would have left too much surface rust behind if I went straight to it (and would have kicked a lot more rust into the air in the shop). I use oil to lubricate and prevent the sand paper from clogging.
@@thehandtoolworks thank you for your answers. To further understand: I thought the wire wheel would abrade whatever rust might be on the piece until bare metal. In fact, I wondered if time at the wire wheel would even abrade the metal on the piece. Not so then? Regarding the sandpaper and oil, would putting oil on sandpaper after it gets clogged, allow the swarf to rise and make the sandpaper last longer? Recently I bought a 30ft roll of 1.5" wide 120grit aluminium oxide belt sander "belt" (cloth backed) and I find it doesnt last very long at all - it gets degraded very quickly in fact. I am curious if applying the oil and trying to rework the piece in hindsight will work. Tx
@LitoGeorge, I use a soft wire wheel with very thin/flexible bristles at low speed, so unlike a stiff/aggressive wire wheel, it can't abrade the metal. Using oil (or even water or windex) might help unclog your sandpaper (if the problem is that the particles of grit are degrading or falling off quickly, then it will not help). Sanding erasers also work well at unclogging sanding belts: a.co/d/98TXf3c
Which bit is better the new design with wide throat or the old one?
Hi @dragomirdichev2423, the older style bits are my favorite to use. For common hardwoods (eg furniture making), the older style is usually better. For softwoods (eg construction) where less refinement is needed, the wide throat design works faster and the coarser thread is preferred. The wide throat and coarse thread are also good for greenwood work.
You produce high quality videos sir! I have a question concerning these bits. Why do you put a backing board against your work piece for the final push through?
Thanks @les3449! The backer board is needed to give the lead screw something to bite into so that it can continue to pull the bit all the way through the hole and to keep the bit centered in the hole for the entire operation. If you tried to force the bit through without a backer, you wouldn't be able to release a nice clean circle of wood at the end leaving a smooth inner bore. Instead, toward the end of the cut, the bit would bust through the hole when the circle is only partially released, leaving behind a very jagged inner bore where the wood breaks off.
@@thehandtoolworksI see. Thanks for the explanation!
May I ask why you didn’t just take it to the wire wheel first?
Hi @jonesey1981, I use scraping and light sanding to remove the well adhered rust then finish with a soft wire wheel. This does a good job of removing surface rust and polishing the steel a bit while preserving the patina, which is the look I'm after.