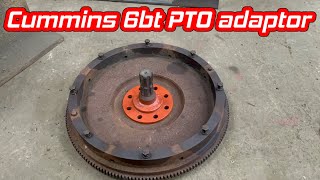
Re-drilling a wheel rim that’s been run loose.

HTML-код
- Опубликовано: 14 окт 2024
- In this video I repair a wheel rim that’s been damaged due to running with loose wheel nuts.
All the bolt holes were egg shaped but the customer couldn’t find a replacement rim the correct size.
I welded the old holes up, cut out a centre from another old rim to use as a template, transfer punched the hole centres onto the rim, centre drilled each hole and then drilled out to 22mm.
Thanks for watching!


Almost retired engineer here, (40 years in the industry this year) and it's great to see the younger generation with such skill and ingenuity to repair things, especially in this throw-away age. It's great to see these essential skills continuing to survive.
There is no throw away when working for farmers lol
One of the most honest and realistic channels on RUclips. Proper engineering 👌
Thank you!
Share this guy's work he's brilliant
No he's not l! You must shovel poop for a living to think so!! He makes a nice long video like C E E but makes a big project out of it..!!! USA will be called upon to bail out jolly old Great Britain once again in the future!!!
Love your "down to earth" approach to everything , spot on.
Thanks!
Ever since the dawn of the invention of the wheel people have neglected to check the tightness of the wheel nuts especially on heavy or load bearing machines. Good solid fix. Good video and great editing.
Way to go, I would had gone the same way. Little tip, when your centring your drill in radial drill. Spin it in reverse over centre punched or centre drilled mark, come down on z axis then engage clamps. It always finds centre, then spin forward to drill hole out. Keep pumping em out fella, you do great stuff.
Snowball produces the goods again...as usual! 👍
Maybe a basic repair but it keeps another machine going the bloke couldn't find parts for. I was watching the latest CEE video when your video popped up. Two chalk and cheese jobs but both serve a purpose. That's my engineering overload for the night.
Great vid. I do love this channel, as most of these sorts of channels have all the expensive equipment, in this case you can achieve the same results with minimal basic equipment. It’s great. Thank you.
You have great patience, alot of fellas would tell the customer buy new ones 😂
one of the best channels on YT real work real problem real solutions, with zero sweet talks ❤❤❤❤❤👌
Thank you!
Lovely bit of old school repair work. I don't why you don't have 300 k subs but I do know that people who know like your work. Keep it up mate, it is a joy to watch.
1- Weld up and grind flat. Find center and use DRO to set up bolt hole circle, and cut to size with boring head (Best to use carbide for hard spots. )
2- Same as above with rotary table.
3- Same as above with calculated BHC and center punch.
The LAST thing I would do is change the center. (Reminds me of the old double center short track rims of the 70s. )
Good,honest work,no bs.
Please more videos like this. With tips for people how to repair things. Big thumbs up.
Your welding cable is like pakistrani truck.
I like the small jobs showing your skills and the thought process behind the project. Thanks
Nice job snowy. Very important to countersink the stud holes accurately. Because it's only the nut to wheel taper. Being an exact match that stop your wheel nuts coming loose. Not a lot of people know this when they try to fit different wheels to their car. Had to explain this to my friend who was going to alter some wheels for his son. So wheel and nut are machine cut matching set. I know this because I was a passenger in a car that had bodged front wheel nuts cut with an angle grinder. Wheel collapses and nearly fell off. Thanks ruth and mark.
Yes bit different when you’re traveling at speed. Luckily this is a back wheel for an old slow moving yard forklift so won’t be going over 10mph.
this is a new one for me, never thought that could be done but that's just pure genius.
Ey Eup , down to earth without a shop stuffed with mew fancy flashy gimmicks , most enjoyable education cheers
Glad you enjoyed it. Thanks for watching.
Very clever that transfer punch bush you made !
Its the kind of work and ingenuity i love, pity the work is so dirty, like my old job in the building trade that i dont miss any more. Another good one bud
great work pal,nice restoration.
Good job, so many different ways to accomplish a given task
Thanks for bringing us along mate. Appreciate it.
Thanks for watching.
Oh wow, you instantly officially became my fav channel.
An ARCHDALE RADIAL ARM DRILL???
Kidding me?
Amazing!
Greg
Thanks!
Yes, she’s a big old girl!
Great job,
Awesome video, thank you Oliver. Great work
Well done!
nice tidy job 👍
Nice job, had a wheel come loose on my ford 655c but luckily my daughter noticed it and we tightened it up before any real damage done.
Love your work 👍 It still baffles me though why people abuse their equipment this much and then expect a craftsman (i.e. you) to make it all better 🥴
Depends how much equipment you have to look after. Old Yard vehicles tend to get overlooked. Engineers get paid the same to service new kit as repairing old neglected its irrelevant. Wheel nuts can catch you out, had a spell of that myself so bought some of those plastic markers. Fit those and guess what nothing worked loose 🤷🏻♂️. How often do you check YOUR vehicles sleek nuts ?
Depends on the season too. if the planting is late or the harvest is going on, you just keep going until the wheels fall off, literally. Repair costs are almost always cheaper than lost production.
Nice work 👍
Go west young man,big wheels keep on turning
Hi I really enjoy watching you at work really interesting. Thanks.
Thanks for watching!
Nice fix. Thanks for sharing.
I've done this repair a few times. Too bad you had to build the template, I have one setting around. lol For the next maker - there's a hex nut that fits the hole and will act as a guide bushing.
Depending on the machine's stud (probably 3/4" 19mm) and nut type it may not be necessary to drill the holes so large, leaves more "meat" at the edge.
From here it looks like a "Budd" center. If so, the holes and nuts are actually a ball taper (not sure if that's correct terminology) rather than a common simple conical taper. But, they'll "seat in" well enough after a tightening or two, especially for a slow off-road application.
Brilliant How To. Cheers!
Very interesting, I would advise that you keep the pattern and get yourself others. I've known farm workers who kept doing that to their bosses wheels.
I once worked for an agricultural engineering firm and saw it happen many times.
love the videos and your clever approach to solving problems. Keep them coming as it great to pick up different ideas.
Thanks, will do!
Thank you for the video, your work is excellent.
Very good project and probably the only way to get the spacing and bevels (chamfers) correct too... Thumbs Up!
Thanks!
Nice bit of handiwork.
Thanks 👍
God bless you. Great work
Nice repair done well👍 The wheel looks very old and no doubt hard (perhaps impossible) to find a suitable replacement. Suspect the customer would be very happy.😁
Oliver, We used a flat copper bar to plug holes.
That just reminds me of the dentist last week 😂😂
Good video
Great video well done
Well don very enjoyable keep the videos coming
you could drill the new holes between the old ones
Use the countersink in the radial arm drill on the old holes first. Saves a boat load of grinding.
I usually have a copper pipe coupling around in a 2" size to split and hammer out as a backer. If i am doing multiple holes i fold it so it stays in place over the edge . Why keep them 2 or 3 in stock. I can flatten them out to make washers.
Do they dissipate the heat alright? I’ve tried using thin copper before but it wasn’t getting rid of the heat quickly enough and just melted through it.
@@snowballengineering the bigger fittings are thicker than the tubing. Do they dissipate enough heat to not blow thru not always. I thought about squishing them almost flat and blowing compressed air thru them to keep them cool. I just made more .
@@snowballengineeringyou not got a copper headed mallet, ideal
As you made the guide for the punch why didn't you just drill a pilot hole saves time setting up and trying to start on your centre punch mark with your pillar drill. Great videos keep up the good work😊😊😊😊😊😊😊😊😊😊
Good job lad.
Great video!
I appreciate your skill in welding, but why not just drill new holes in between the original holes?
Nice work brother 👌🤘🤘🤘🤘
Great video man
You do great work, do you ever use hard surfacing rod for high wear areas
I accidentally did this to my friend's pickup once on I-95 near Savannah GA. He told me to keep an eye on the lug nuts but I didn't listen. I solved the problem by buying him a junkyard rim.
My question is which would be stronger, the welded portion or the “parent” metal?
nice one !
Nice work! Good as new :)
Thumbs up from me 👍
Put a piece of tight fitting wood find center ,set divider to bolt circle radius.,scr8be bolt circle then swing arc from bolts hole to bolt hol6e th
Really interesting videos. You seem to know a lot for someone who appears quite young. How old are you if you don’t mind me asking?
Thanks! I’m not that young, I’m 30. Been in the engineering game for about 12 years now. 4 of them years on my own.
@@snowballengineering As I’m 54 , your young………..,Your doing a good job. As a mechanic myself, it’s interesting to see how things are repaired. Good luck with the channel
nice
Good video
☹🇬🇧
🙂
👍😎👍
How about a piece of firebrick instead of copper???
Good repair. Some would have just redrilled without welding up the old holes to save time and money but that would be far too hillbilly for most.
Bit of time it took to weld up the holes is worth it to not look like a hillbilly 🤣
What if you make a holder that holds ie a 8 mm drill instead of a center punch?
Yes, that would have worked. Thanks for the suggestion!
@@snowballengineering how is the line boaring project going???
Weld the holes up and re drill the pcd in the gap...
That’s what I did.
@@snowballengineering Must admit I got called to help my neighbour so just typed when you were welding them up. Could you not do the pcd on the mill? Good fix as always. did this last week so you are not alone with rough jobs..
ruclips.net/video/hpcn7MQdz-Q/видео.html
Couldn’t fit the rim in the mill as it doesn’t have enough gap between the bed and quill. That’s one thing I won’t tackle is vehicles 🫣 if it’s thinner than 3mm I’m not keen 🤣
@@snowballengineering Lol, trying to up load a short vid of how i did some rims last week!!
@@snowballengineering There you go, 11/22's
ruclips.net/video/JXb1CGl51b4/видео.html
My bad on the first reply.
😊Man yuo have to by a micrphone 😢
Wouldn't it have been easier just to drill 6 new holes 30 degrees around from the old ones?
That’s what I did. But the old holes still need filling in otherwise it looks horrendous.
Farmers and selective hearing.
What?😂😂
When I was 15 my first job in a factory at an engravers we made all sorts including brass washers for ships plumbing which were punched out 3 inch discs that left a raggy edge the kid showing me how to use the belt sander said do one side chuck it in the box get the next one , being a clever clogs I decided to the other side straight away not realising brass gets incredibly hot when worked no gloves by the way I grabbed it and instantly flung the it was red hot , I had to do 1000 washers with burnt fingers , Just a little story from the early 70's LOL .
Things soon get hot fast on the belt sander! 😆