Instrument Panel Light bulb Replacement

HTML-код
- Опубликовано: 10 фев 2025
- Did our video help you? If so, consider buying us a beer: bit.ly/3feE6tJ
This is a tutorial of how to replace a burnt out instrument panel light bulb on your 3rd Generation Toyota 4runner. Note: This repair video starts with the instrument panel already detached from the dash so I'm showing you the steps in reverse how I got everything apart to get at the burnt out bulb. The bulb in question was the gear selector light for "D" (Drive) What's interesting and I've never noticed before is the drive selector light dims when you turn on the headlights which I assume is to keep the glare down while you're driving.
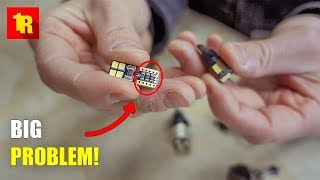
*PARTS*
Instrument Panel Bulb #83120-60020
amzn.to/2pvjVhb
*TOOLS*
If you're looking for other tools not used in this video, check out Timmy's Master Tool List.
www.amazon.com...
*Needle Nose Pliers
amzn.to/2pQ6yIa
*JIS Screwdriver (Better for screws on a Japanese vehicle)
amzn.to/31nlP0f
*Chapman Ratchet Screwdriver Set
amzn.to/2XAKY7v
*1/4" and 3/8" Flex Head Ratchet Set
amzn.to/2ql8nNA
*3/8" Drive 6 Point Metric Standard Socket Set
amzn.to/32WIh0M
*3/8” Drive Regular Extension Set
amzn.to/2OehCao
**As Ebay Partner Network members, we earn commissions from qualifying purchases.
**As Amazon Associates we earn from qualifying purchases.